
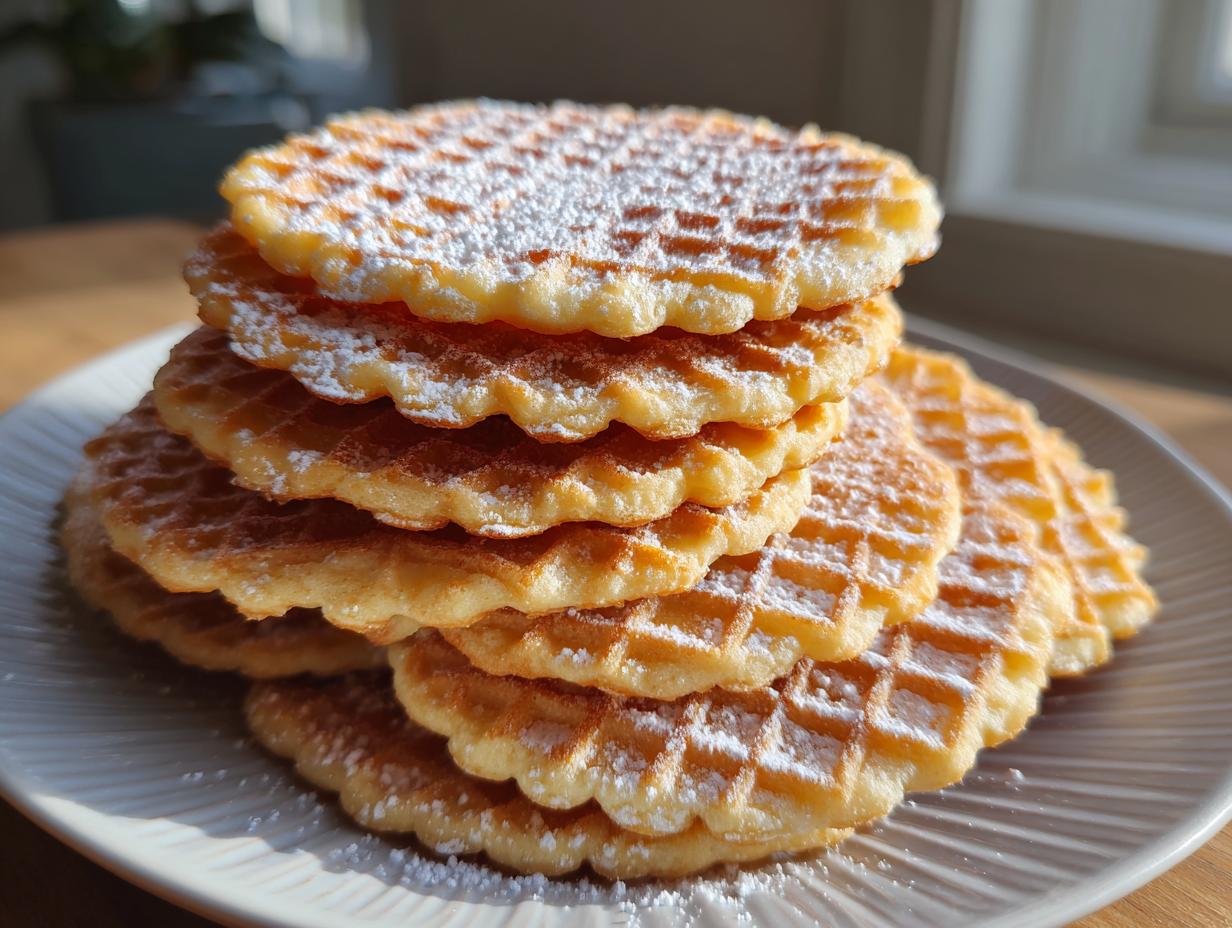
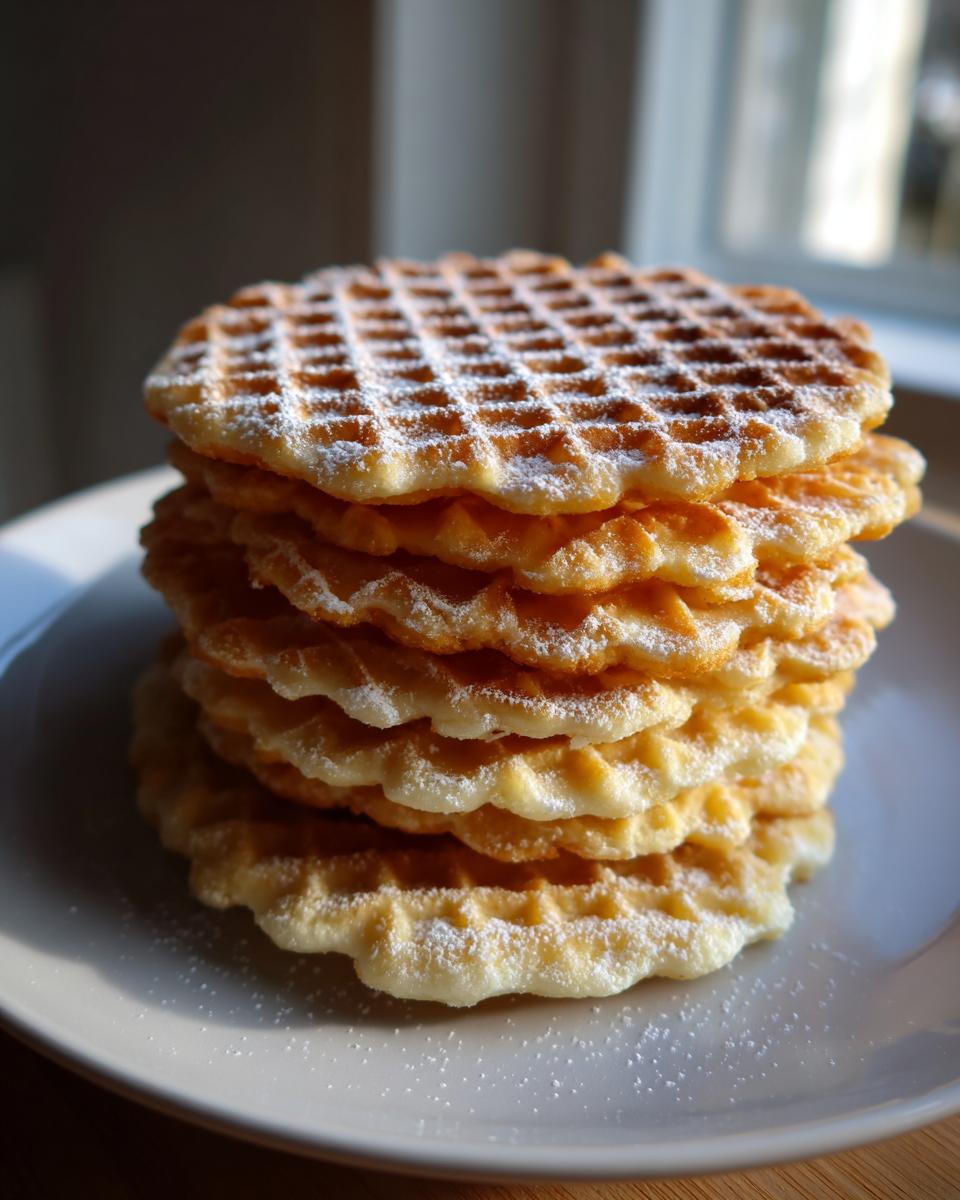
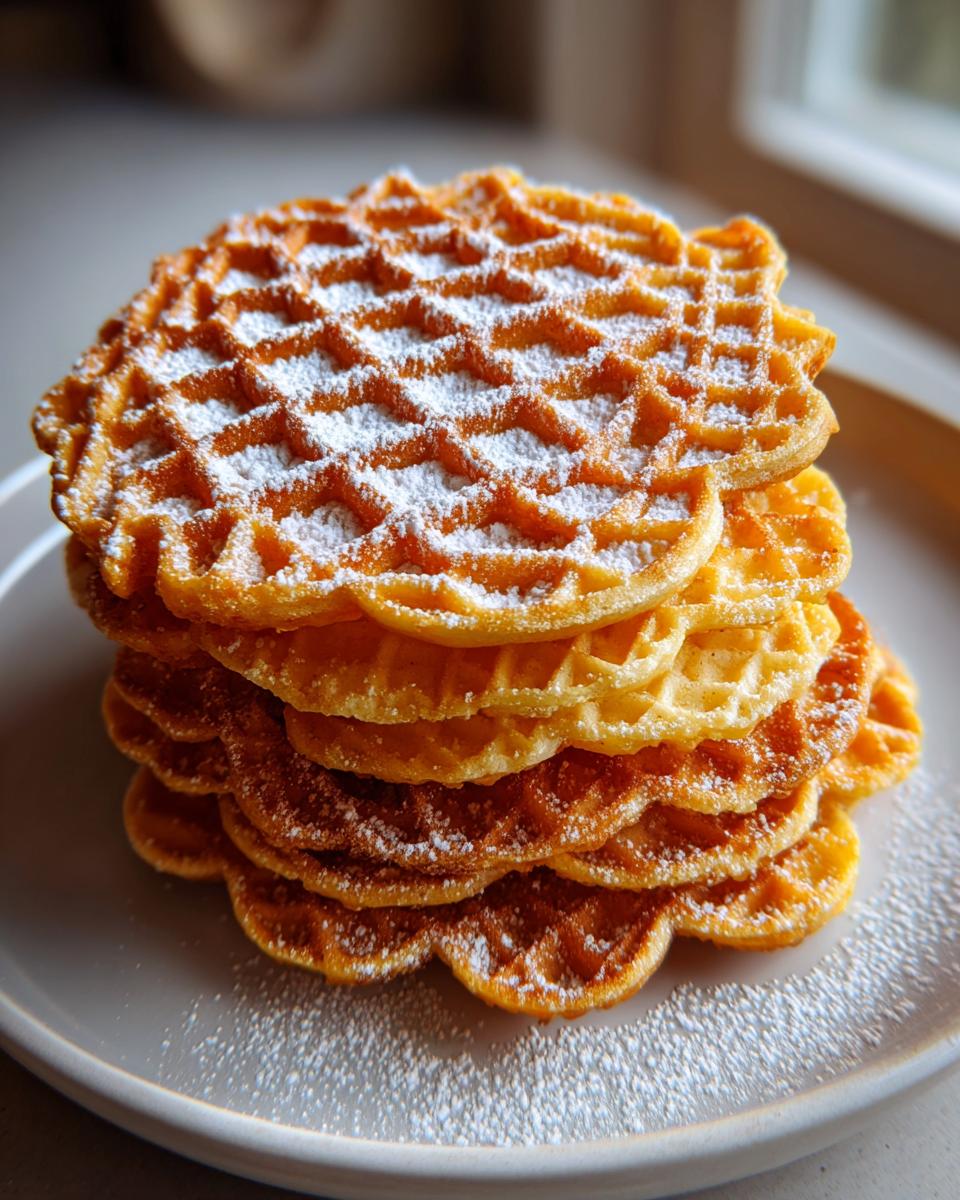
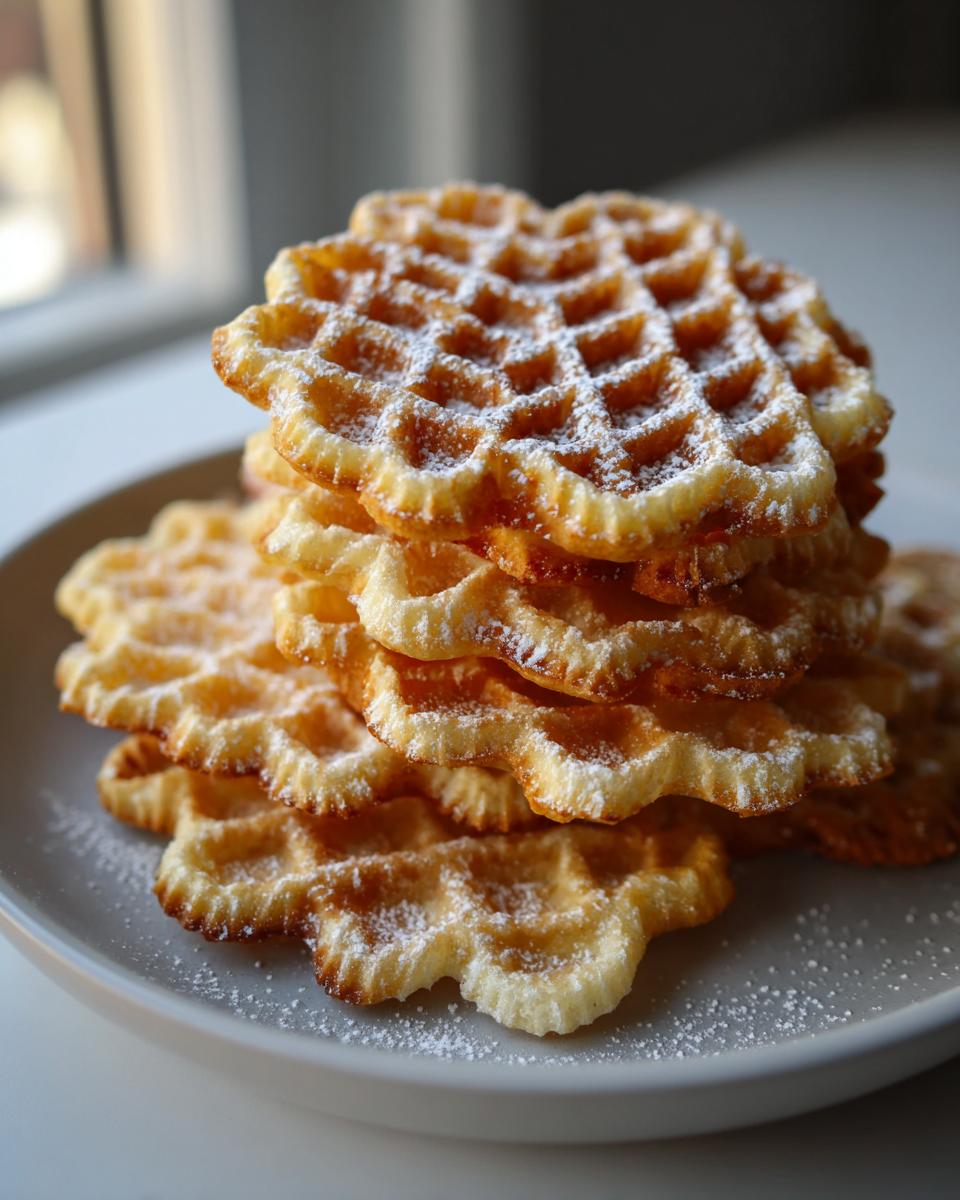
Oh, friends, if you have never experienced the delicate, lacy magic of a real, homemade Italian waffle cookie, you are in for such a treat! There is something so elegant and nostalgic about those patterned wafer cookies, and making them yourself is easier than you think. Today, we are diving deep into the absolute classic: the pizzelle cookies that sing with both warm vanilla and that perfect, subtle kiss of anise. I’ve tested this reliable base recipe dozens of times across different irons here at Kings Cook to ensure every single batch comes out thin, buttery, and delightfully crispy. Trust me, once you master this standard combination, your holiday cookie baking will never be the same!
- Why This Classic Vanilla and Anise Pizzelle Cookies Recipe Works (E-E-A-T)
- Ingredients for Perfect Pizzelle Cookies
- Essential Equipment for Making Pizzelle Cookies
- Step-by-Step Homemade Pizzelle Instructions
- Flavor Variations for Your Pizzelle Cookies
- Tips for Success with Crispy Pizzelle Cookies
- Storing Your Homemade Pizzelle Cookies
- Serving Suggestions for These Italian Waffle Cookies
- Frequently Asked Questions About Pizzelle Cookies
Why This Classic Vanilla and Anise Pizzelle Cookies Recipe Works (E-E-A-T)
I know there are so many flavor possibilities out there, but if you want that true taste of tradition, you need to start with the vanilla and anise combo. This is the heart of any Authentic Italian Cookie Recipe, and honestly, it’s my favorite! I spent ages making sure the balance was perfect—not too much anise that it tastes like black licorice, but just enough to give it that beautiful, warm, slightly exotic finish. These Italian Waffle Cookies are amazing because they use melted butter, which helps them stay thin instead of turning cakey.
I tested this batter consistency until I was blue in the face! If it’s too thick, your pizzelle might not spread thinly enough, and you’ll end up with a slightly chewy cookie instead of that delicate snap you’re dreaming of. When it’s right, it should look a bit like thick cake batter—smooth, but definitely not watery. Trust me, seeing these come out golden and crisp after all that testing is the best feeling!
Achieving the Perfect Texture in Your Pizzelle Cookies
Crispness is everything when it comes to these Delicate Thin Cookies. The moment that pizzelle comes off the hot iron, you must work fast! If you let it sit on the rack for even 30 seconds, it can start to absorb its own steam and lose that perfect snap. My secret here, especially if your iron runs a little cool, is to keep the heat up high. You want to cook it until you can barely see any steam escaping. That’s your cue that the moisture is gone, and you’re left with pure, buttery crunch.
Ingredients for Perfect Pizzelle Cookies
This recipe uses a wonderfully simple ingredient list. You probably have most of this stuff right in your pantry already! Remember I keep things easy here at Kings Cook, so no fancy imported flours needed here. This recipe makes a fantastic yield of about 3 dozen Crispy Dessert Recipe wafers, perfect for setting out at a party!
- 1 cup all-purpose flour
- 1 teaspoon baking powder
- 1/4 teaspoon salt
- 3 large eggs (make sure these are room temperature if you can!)
- 3/4 cup granulated sugar
- 1/2 cup unsalted butter, melted and cooled (This is important—hot butter will scramble the eggs!)
- 1 teaspoon pure vanilla extract
- 1/2 teaspoon anise extract (or more, if you really love that traditional flavor!)
Essential Equipment for Making Pizzelle Cookies
Okay, let’s talk tools! You can’t make these amazing treats without the right device. This isn’t like making drop cookies where any old baking sheet will do. To get those classic patterned designs and that ultra-thin structure, you absolutely need a pizzelle iron. These operate just like a waffle iron, but they press the batter incredibly thin. If you’ve been eyeing one for a while, this is your sign to pull the trigger!
If you’re looking to upgrade, I actually wrote all about my favorite Belgian Waffles Recipe equipment, and a lot of the same principles apply to the heavy-duty irons needed for these cookies. For making Homemade Pizzelle Instructions easy, you’ll want one that heats up quickly and holds a consistent temperature.
Beyond the iron, you’ll just need standard kitchen gear—mixing bowls, a whisk, and a good thin spatula for lifting those hot, delicate wafers off the iron. Seriously, don’t try to use a regular flipper; you’ll just end up breaking them!
Tips for Using Your Pizzelle Maker
Before you even start mixing the batter, get that iron seriously hot! Preheat it for a good 10 minutes before the first use. For that very first batch, which I like to call the “test batch,” you absolutely must oil the plates. Even if your iron says it’s non-stick, heating up dry iron can sometimes cause sticking when the batter hits the heat. Mix up a tiny bit of vegetable oil or use some non-stick spray very lightly, and wipe it down once it’s smoking hot. That first cookie usually doesn’t come out pretty, but it seasons the iron perfectly for the rest of your Festive Patterned Cookies!
Step-by-Step Homemade Pizzelle Instructions
Alright, this is where the magic happens! Grab your mixing bowls, because we’re going to follow a method that builds flavor and ensures these turn out perfectly thin. Before you even grab the whisk, make absolutely sure your pizzelle iron is preheated—we talked about that in the last section, but it bears repeating: hot iron equals crisp cookie! I also highly recommend letting your finished batter rest in the fridge for about 30 minutes; I find it really helps set up the structure needed for these Easy Wafer Cookies. Having the right foundation is just like making sure your batter is perfectly smooth before you start cooking your French Toast Recipe!
Mixing the Pizzelle Cookies Batter
First things first, get your dry ingredients—that’s flour, baking powder, and salt—whisked together thoroughly in a medium bowl. Set that aside. Now, in your biggest bowl, we need to get some air in there! Use your mixer on medium-high speed to beat those three eggs with the sugar. You’re looking for it to change color to a pale, pale yellow and get a bit fluffy, which takes about three minutes. Don’t skimp on this part; it’s super important for texture!
Next, pour in your cooled melted butter, vanilla, and anise extract. Mix just until they combine. Then, and this is critical, add the dry mixture to the wet ingredients gradually. Mix this on low speed only until you see almost no streaks of flour left. Seriously, stop mixing the second it comes together. Overmixing is the enemy here! If you do that, you risk developing too much gluten, and your beautiful pizzelle cookies will turn tough instead of melting in your mouth.
Cooking and Shaping Your Pizzelle Cookies
Time to cook! Use just enough batter—usually about a tablespoon or a small ladle—to cover about two-thirds of the plates. Close the iron right away and press down gently but firmly. Steam will erupt loudly; that’s normal! You need to cook them until the steam seriously slows down and the cookie is a beautiful golden brown, which usually takes between 30 and 60 seconds. Check out this guide for more Homemade Pizzelle Instructions!
The moment you lift the iron lid, you have about five seconds to rescue your cookie before it hardens into a flat, brittle disc! Use a thin spatula to lift the hot, pliable wafer and immediately transfer it to your cooling rack. If you want to make cannoli shells or little cones—a great way to serve up ice cream—you need to use tongs or your fingers (carefully!) to quickly roll or shape the cookie while it’s still piping hot. Once they cool completely on the rack, they transform into those wonderfully Delicate Thin Cookies you’re aiming for. Don’t forget to dust them with powdered sugar after they are fully cool!
Flavor Variations for Your Pizzelle Cookies
While the classic vanilla and anise is what I always start with—it’s the best way to honor these Traditional Italian Sweets—once you nail the basic dough, you are totally free to play around! That’s the fun part of mastering the batter for pizzelle cookies. If you’re looking for other tasty options without reinventing the wheel, I have a few simple swaps you can try based on my testing.
It truly is so simple to pivot your flavor profile just by swapping out that one extract, or adding a dry ingredient. Check out these easy upgrades!
Making Almond Pizzelle Variation
If you’re making these for someone who isn’t a fan of anise—or maybe you just want something a little sweeter and nuttier—you want to try the almond variation. It’s a lifesaver when you’re building a big cookie platter! All you do is cut out the anise extract entirely. Then, simply swap in 1 teaspoon of good quality almond extract instead. That’s it! Instant change, and suddenly you have a beautiful cookie that pairs perfectly with coffee. You can find tons of ideas for these easy pizzelle cookie recipes online.
Chocolate Pizzelle Ideas
Now, chocolate pizzelle! This is a rich, dark twist that feels super decadent, making them perfect for an elegant dessert or as Christmas Pizzelle Treats. For the best result here, you need to slightly compensate for the dry cocoa powder so the cookie stays delicate. Take your 1 cup of flour and reduce it by 2 tablespoons. Those 2 tablespoons you removed? Replace them with 2 tablespoons of plain unsweetened cocoa powder added right into your dry mix. Give it a good whisk, and you’re ready to go! These are always a hit.
Tips for Success with Crispy Pizzelle Cookies
We’ve made the batter, we’ve cooked them up, but now we need to secure the crispness! Because these are such delicate, thin cookies, getting that perfect shatter requires paying attention to a few details. I’ve gathered up all the little secrets I learned during my extensive testing phases right here, so your batch of pizzelle cookies comes out flawlessly crisp every single time. This is truly where the reliability of my recipe comes in!
These tips focus on preventing soft, bendy pizzelles, which, let’s face it, we don’t want unless we’re intentionally shaping them into cannoli shells. If you want them flat and crunchy for stacking or gifting, pay attention!
Here are the tried-and-true methods that kept my cookies perfect:
- Rest the Batter: This might sound fussy, but letting the batter chill in the fridge for those 30 minutes makes a huge difference in spread and final crispness. It stiffens the fat just a bit, which helps control how thin they flatten out.
- Don’t Be Afraid of Heat: If they come out looking pale or feeling a little floppy once they hit the cooling rack, they haven’t cooked long enough. Put them right back on the hot iron! I always cook them for an extra 10 to 15 seconds past when the steam stops escaping. That extra minute of dryness is what makes them snap.
- Serve with Coffee: If you’re making these for the first time and you’re worried about texture, remember these are ultimate Coffee Pairing Cookies! Even if they aren’t 100% brittle right out of the gate, serve them next to a hot cup of coffee or espresso. The pairing is perfect, and sometimes a slightly softer initial texture firms up beautifully after an hour or two next to a warm mug.
If you’re looking for more amazing baking secrets to lock in texture, you might want to check out my recipe for fudge brownies—controlling moisture is key in every good recipe!
Also, remember that humidity is the absolute enemy of a crispy pizzelle. If you’re baking on a rainy day, you might need to cook them an extra 20 seconds longer than usual. You can read more advanced tips on texture from others who love making these Crispy Dessert Recipe treats!
Storing Your Homemade Pizzelle Cookies
Okay, this is where I see people make mistakes after putting in all that hard work making beautiful Italian Waffle Cookies! You have successfully cooled them on the rack, they are perfectly crisp, and now you can’t just toss them in a regular plastic bag and forget about them. These cookies are very prone to picking up any ambient moisture in the air, and humidity is the number one killer of a good pizzelle texture. We want them to be light and shattery, not soft and bendy!
The rule here is non-negotiable: you must store them in an airtight container. And I mean *airtight*. I love using big tins or glass jars with tight-sealing lids for this. I let them cool completely—and I mean completely, give them at least an hour once they look done—before I even think about putting them away. Because this recipe is relatively simple and doesn’t have a lot of added fat stabilizers in the dough (besides the butter), they generally look and taste great for about a week, maybe ten days, if they stay sealed tight.
If you happen to have leftover dough or cooked them in a huge batch, I’ve even had success freezing the plain, un-dusted cookies. Just place a square of parchment paper between layers so they don’t stick together, seal them in a zip-top bag, and pull them out about an hour before you plan to serve them. They are fantastic for making ahead for big holiday bakes!
If you ever get nervous about keeping baked goods fresh, you might want to check out my tips on handling dough when I make my gooey cinnamon rolls—it’s all about controlling that moisture!
Serving Suggestions for These Italian Waffle Cookies
We’ve finally reached the best part: eating them! While these beautiful, patterned pizzelle cookies are absolutely perfect dusted with just a little powdered sugar and eaten plain, they are so versatile. Think about all those other wonderful secondary uses! They aren’t just for finishing up your big holiday platter, although they look gorgeous as Christmas Pizzelle Treats.
I love keeping a batch ready just for a mid-morning snack. They are the world’s best Coffee Pairing Cookies. Seriously, the subtle anise and vanilla cut through the bitterness of a strong espresso or a milky latte better than any store-bought biscuit I’ve ever tried.
But don’t stop there! Remember, if you shaped them while they were hot and pliable, you have built-in little edible bowls. These are wonderful filled with fresh ricotta and a drizzle of honey for a true Italian dessert moment. Or, if you want to be extra fancy, you can dip the edges of the cooled, flat cookies halfway into melted chocolate—dark chocolate is my go-to! It adds a lovely, slightly bitter contrast to the sweet wafer.
If you want another great idea for that perfect coffee break pairing, you definitely need to try my recipe for apple cinnamon muffins; those flavors complement the pizzelle so nicely. And if you ever feel like experimenting with spices for the holidays, check out these neat Gingerbread Pizzelle ideas for a warm, wintery spin!
Frequently Asked Questions About Pizzelle Cookies
I know you’ve got questions, and that’s fantastic! When you’re committing to making Traditional Italian Sweets like these, you want to get them right the very first time. I’ve answered the top things folks ask me here at Kings Cook. Don’t hesitate to browse my About Page if you want to know more about how I test my recipes!
Can I make pizzelle cookies without a pizzelle maker?
This is a tough one, and I have to be honest with you: generally, no, you really can’t. The reason these are called Italian Waffle Cookies is because they rely entirely on that specialized iron. That iron doesn’t just cook them; it presses the batter into that very specific, thin, patterned mold. If you tried to use a regular cookie sheet, the batter would just spread out like a thin, irregular cracker and you wouldn’t get that signature texture on your pizzelle cookies. Stick to the iron for that delicate, lacy look!
How do I store pizzelle cookies to keep them crisp?
I stress this because it’s so important: humidity is your absolute sworn enemy when it comes to crispness! If you skip this step, your perfect cookies will turn soft in a day. You must store your cooled pizzelle cookies in a completely airtight container. I prefer metal tins because they offer great protection. Avoid putting them in the fridge, as the moisture in the fridge will definitely soften them up. Keep them at room temperature in a sealed jar, and they’ll stay crisp for over a week!
What is the difference between vanilla and anise flavored cookies?
That’s such a good question, as it gets to the heart of our recipe! Vanilla is sweet, familiar, and mild—it’s a lovely, comforting background flavor that lets the buttery notes shine. Anise, on the other hand, gives the cookie that distinctly Italian, slightly warm, almost licorice-like scent and flavor that makes them unforgettable. Our Vanilla Pizzelle Recipe incorporates both so you get the best of both worlds: familiarity from the vanilla and that classic punch from the anise. If you watch this quick video from Mary Ann Esposito, you can see the emphasis they place on that distinct aroma: It shows the traditional method!
PrintClassic Vanilla and Anise Pizzelle Cookies: Your Guide to Crispy Italian Waffle Cookies

Learn to make authentic, thin, and crispy pizzelle cookies at home. This reliable recipe combines classic vanilla and anise flavors, perfect for any festive occasion or coffee pairing.
- Prep Time: 15 min
- Cook Time: 20 min
- Total Time: 35 min
- Yield: About 3 dozen 1x
- Category: Dessert
- Method: Waffling
- Cuisine: Italian
- Diet: Vegetarian
Ingredients
- 1 cup all-purpose flour
- 1 teaspoon baking powder
- 1/4 teaspoon salt
- 3 large eggs
- 3/4 cup granulated sugar
- 1/2 cup unsalted butter, melted and cooled
- 1 teaspoon pure vanilla extract
- 1/2 teaspoon anise extract (or more, to taste)
Instructions
- Prepare your pizzelle maker according to the manufacturer’s directions and preheat it fully. Lightly brush the iron plates with non-stick spray or oil if needed.
- In a medium bowl, whisk together the flour, baking powder, and salt. Set this dry mixture aside.
- In a separate large bowl, beat the eggs and sugar together with an electric mixer until the mixture is pale yellow and slightly thickened, about 3 minutes.
- Beat in the cooled melted butter, vanilla extract, and anise extract until just combined.
- Gradually add the dry ingredients to the wet ingredients, mixing on low speed until a smooth, thick batter forms. Do not overmix.
- Using a small measuring spoon or ladle, drop the batter onto the center of the hot pizzelle iron. Use only enough batter to cover about two-thirds of the surface; the batter will spread thinly.
- Close the iron quickly and press down gently. Cook for 30 to 60 seconds, or until the steam stops escaping and the pizzelle is golden brown. Cooking time depends on your iron’s heat.
- Carefully remove the hot, delicate pizzelle with a thin spatula. Immediately place it on a wire cooling rack. If you wish to shape them (into cannoli shells or cones), do so while they are still hot and pliable.
- Allow the pizzelle to cool completely on the rack to achieve maximum crispness. Repeat with the remaining batter.
- Dust cooled pizzelles with powdered sugar before serving, or store them in an airtight container.
Notes
- For a crispier cookie, let the batter rest in the refrigerator for 30 minutes before cooking.
- To make Almond Pizzelle Variation, substitute the anise extract with 1 teaspoon of almond extract.
- For Chocolate Pizzelle Ideas, reduce the flour by 2 tablespoons and add 2 tablespoons of unsweetened cocoa powder to the dry ingredients.
- If your pizzelles are not crisping up, cook them for an additional 10 to 15 seconds on the iron.
Nutrition
- Serving Size: 1 cookie
- Calories: 85
- Sugar: 5
- Sodium: 35
- Fat: 4
- Saturated Fat: 2
- Unsaturated Fat: 2
- Trans Fat: 0
- Carbohydrates: 11
- Fiber: 0
- Protein: 2
- Cholesterol: 30