

Okay, stop what you are doing right now and listen to me: those flimsy, dry, sad excuses for bread you find in the plastic bags at the grocery store? We are never, ever going back there. I promise you, making incredible, soft pita bread from scratch is not some complicated magic trick!
I’m Kate, and here at Kings Cook, my whole deal is making sure you feel confident tossing out the store-bought stuff. This homemade pita bread recipe is one of those absolute gems I’ve tested over and over again until the rising and puffing were flawless every single time. We’re talking fluffy flatbread that balloons up to create those glorious, airy pockets you crave—perfectly suited for stuffing or dipping. Whether you finish these off in the oven or right on your stovetop skillet, you’re going to be so proud of this pita bread from scratch.
- Why This Homemade Pita Bread Recipe Delivers Soft, Fluffy Flatbread
- Essential Ingredients for Perfect Pita Bread from Scratch
- Step-by-Step Instructions: How to Make Pita Bread Pockets
- Tips for Success When Making Soft Pita Bread
- Serving Suggestions for Your Fresh Pita Bread
- Storage and Reheating for the Best Pita Bread Experience
- Frequently Asked Questions About Pita Bread
- Nutritional Estimates for Homemade Pita Bread
- Share Your Fluffy Pita Bread Creations
Why This Homemade Pita Bread Recipe Delivers Soft, Fluffy Flatbread
Honestly, the difference between store-bought and baking your own pita bread is night and day. Those sad, flat discs you buy? They lose all their springiness immediately. My goal with this recipe was to create a true soft pita bread that stays pliable even after it cools down. I’ve made batches over and over, monitoring the proofing times and the dough consistency until I knew, without a doubt, that this method guarantees tender, fluffy flatbread every time.
It’s incredibly rewarding knowing you made something this delicious yourself, especially when it’s ready for dipping into my favorite creamy hummus recipe or wrapping around some freshly grilled chicken. Trust me, you’ll never go back to the dry stuff after you nail that perfect puff using this tested formula, which is similar to the approach found in guides on making fluffy homemade pita pockets.
Achieving the Signature Pita Bread Pocket
The magic of the pocket—that’s the star of the show, right? It all comes down to one thing: extreme heat. When that relatively thin dough hits a screaming hot surface, whether it’s a baking stone or a cast iron skillet, the water inside instantly turns to steam. This steam has nowhere to go but up, which forces the dough to inflate like a balloon!
This is how we get those perfect crevices for stuffing your favorite gyros or falafel. If you follow the heat instruction precisely, you won’t end up with a sad, flat tortilla—you’ll get the genuine, pillowy pita bread pocket. Truly, it’s a fantastic beginner baking win!
Essential Ingredients for Perfect Pita Bread from Scratch
See? I told you this was simple! You probably have most of this stuff sitting in your pantry right now. We aren’t messing around with weird stabilizers or hard-to-find flour blends here. This recipe is truly about getting that wonderful, yeasty flatbread flavor using just a handful of basic components. The quality of the yeast matters a lot for that beautiful rise, though!
Here’s exactly what you need for 8 lovely pitas:
- 1 teaspoon active dry yeast
- 1 teaspoon granulated sugar
- 1 cup warm water (and it absolutely needs to be between 105–115°F, not lukewarm, not too hot! Hot water kills that wonderful yeast!
- 2 1/2 cups all-purpose flour, plus more for dusting
- 1 teaspoon salt
- 2 tablespoons olive oil
Ingredient Notes and Substitutions for Your Pita Bread
Because we skip the egg and dairy, this recipe is naturally vegan pita bread friendly, which is just a happy coincidence! You don’t need to swap anything out for that, which makes things even easier.
Now, a quick note on the flour. While all-purpose works best for that classic stretch and puff, you can absolutely experiment with swapping half of the flour for whole wheat flour if you want a slightly heartier, richer loaf. Just watch your dough texture during kneading; you might need an extra splash of water if you go too heavy on the whole wheat. But stick to this basic formula for your first time!
Step-by-Step Instructions: How to Make Pita Bread Pockets
Okay, here is the part where we turn that shaggy mess into glorious, golden, puffy warm pita bread. Don’t worry if you’ve never made a yeasted dough before; this process is actually so straightforward, and it’s the defining moment for achieving those amazing pockets. We need patience here for the yeast to do its best work. If you’re looking for another fun bread project once you master this, my focaccia recipe is fantastic!
Mixing and Kneading the Pita Bread Dough
First things first—make sure that yeast mixture you made is nice and foamy. That means the yeast is alive and ready to go! Into the bowl with the flour and salt—whisk those dry ingredients together just to make sure the salt is distributed. Now, pour in your activated yeast water and the olive oil gently.
Mix it up with a wooden spoon or in the stand mixer until it looks like a real mess—a shaggy mass of dough grabbing onto itself. That’s exactly what you want! Now turn it out onto a lightly floured surface. This is where the real fun starts. You need to knead this for a solid 5 to 7 minutes. Don’t be tempted to add cups of extra flour! Keep working it until the dough feels smooth under your hands, almost springy, and it holds its shape without sticking everywhere. That smooth, elastic texture is key to ensuring the dough can trap steam later.
The Rise: Developing Flavor in Your Pita Bread
Once you’ve got your perfect ball of dough, find a clean bowl, give it a quick swirl with olive oil to stop sticking, and pop the dough in there. Turn it over so it gets lightly coated. Cover that bowl tightly—I use plastic wrap, or just a nice damp kitchen towel if I’m feeling folksy—and put it somewhere warm.
This first rise is where the magic happens for this yeasty flatbread. Leave it alone for about an hour to an hour and a half. You’re looking for it to double in size. Don’t rush this part; letting the yeast develop builds all that wonderful flavor and the structure needed for puffing. Keep the kitchen warm, though, especially if you’re trying this out during the colder months!
When it’s ready, gently punch the air out—don’t beat it up, just release the accumulated gas. Then, divide that beautiful dough into 8 equal sections. Roll each one into a taut little ball, cover them up again with that damp towel, and let these little guys rest for 15 short minutes. This rest time relaxes the gluten so they roll out easily. This entire process of using quality ingredients and giving the dough time is why this homemade pita bread is so much better than anything you can buy.
Shaping and Cooking for Warm Pita Bread
Time to shape! On a lightly floured surface—and I mean lightly, we don’t want a dry crust—take one ball and roll it out into a circle. Try to keep the thickness consistent, about 1/8 of an inch thick. And aim for about 6 to 7 inches across. Consistency in thickness is absolutely vital for a successful pocket!
Now, decide your cooking method. For the best, guaranteed pocket, you need ferocious heat. If you’re using the oven, make sure your baking stone or heavy sheet pan has been preheating inside the oven at 475°F (245°C) for at least 30 minutes. When you slide one or two pitas directly onto that blazing hot surface, watch closely; they should puff dramatically within a minute or two! It’s such a thrill to see that happen.
If you’re using a cast-iron skillet—which I often prefer because it’s less fuss—get that skillet on the stovetop over medium-high heat until it’s shimmering hot. Place one dough circle right on the dry pan. After about a minute, you’ll see bubbles popping up. Flip it! Keep watching. On the second or third flip, that puff should happen. If it doesn’t, your pan wasn’t hot enough, so crank it up for the next one. The secret to that signature warm pita bread is that quick blast of heat.
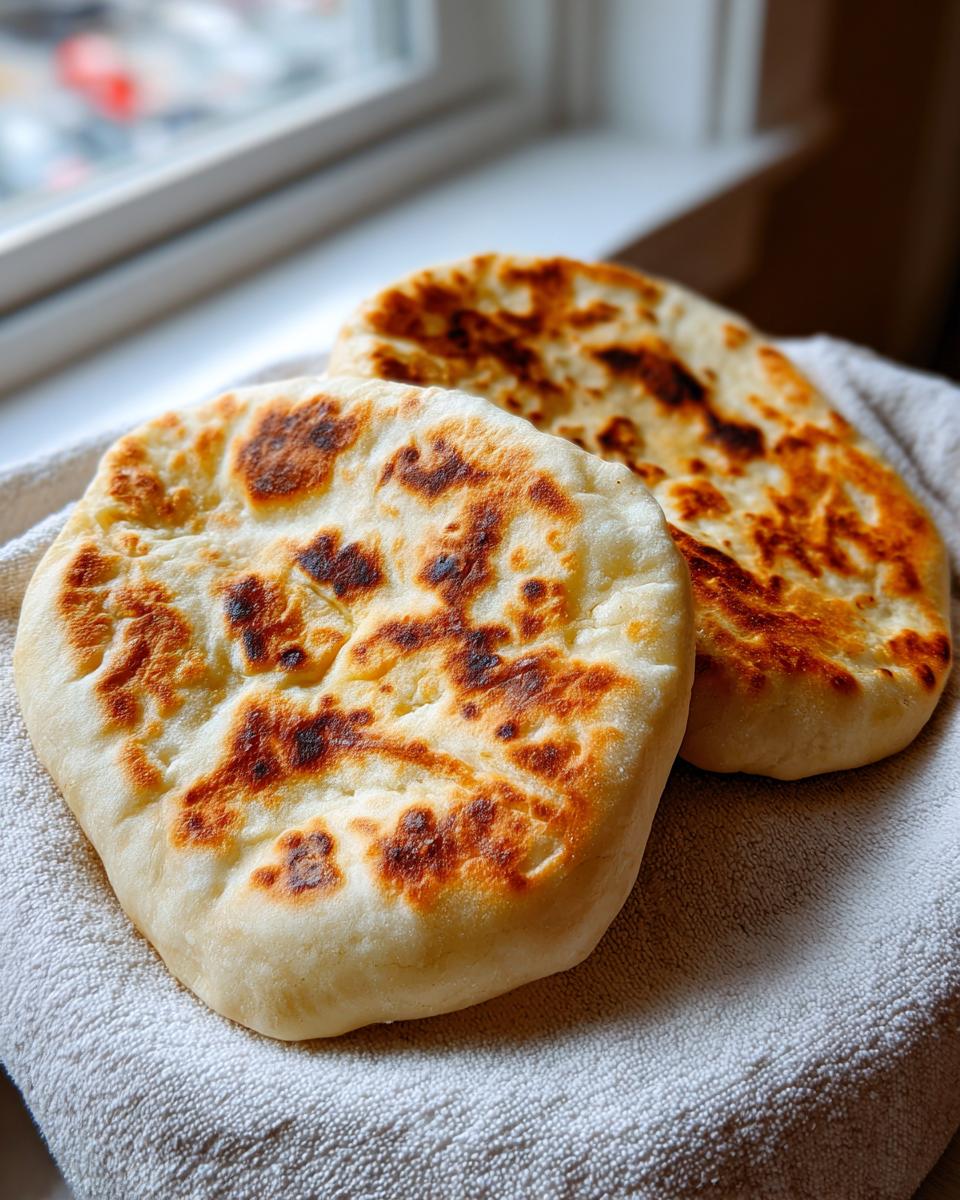
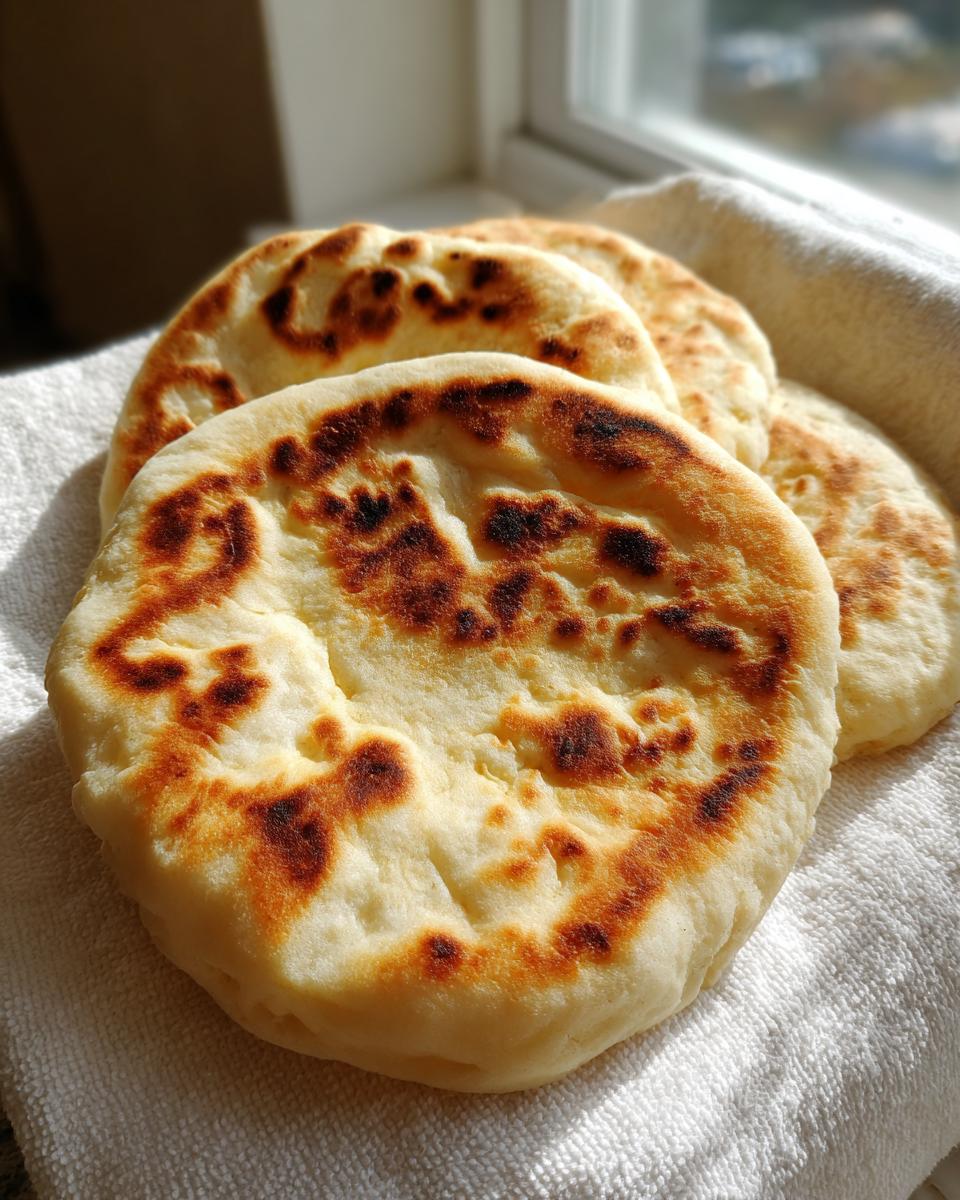
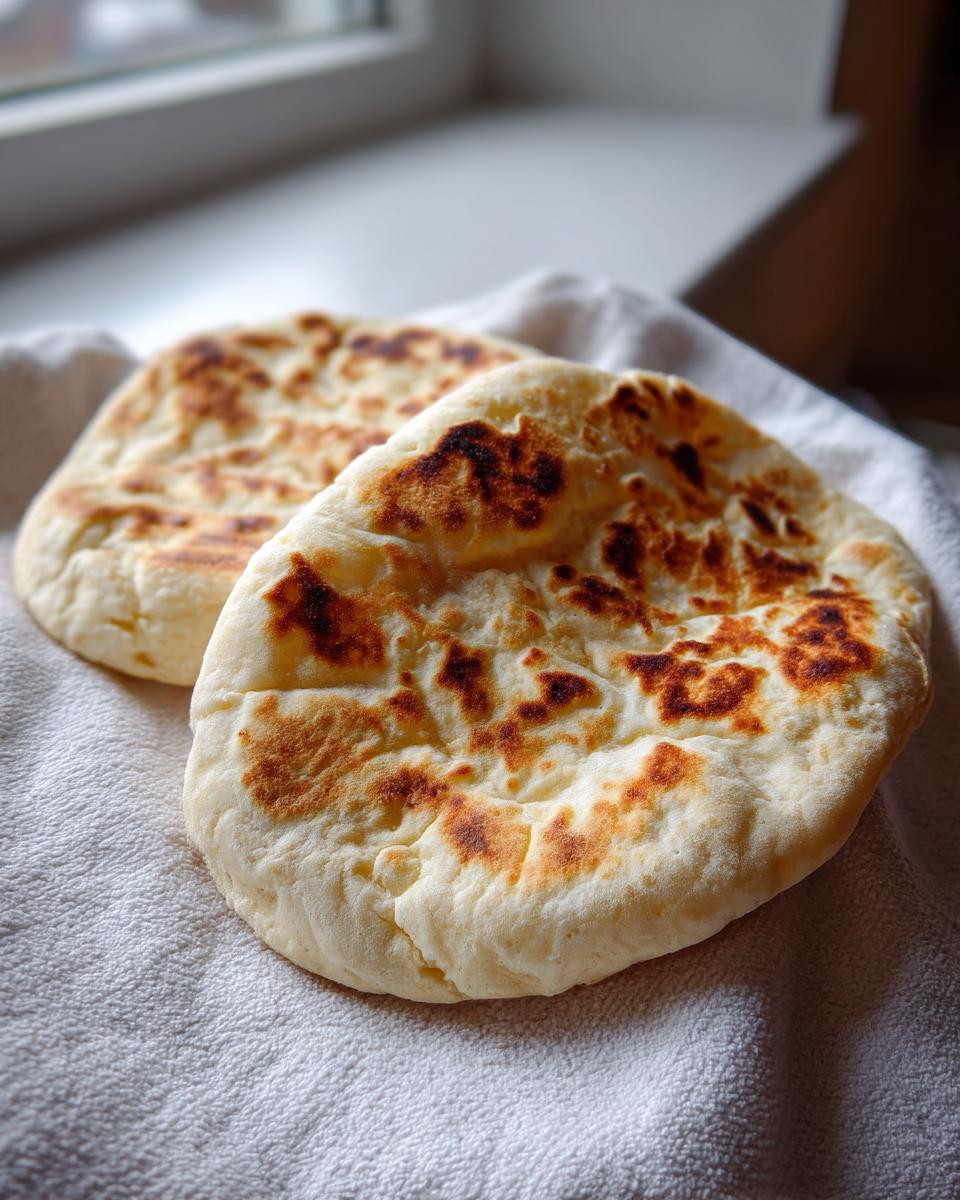
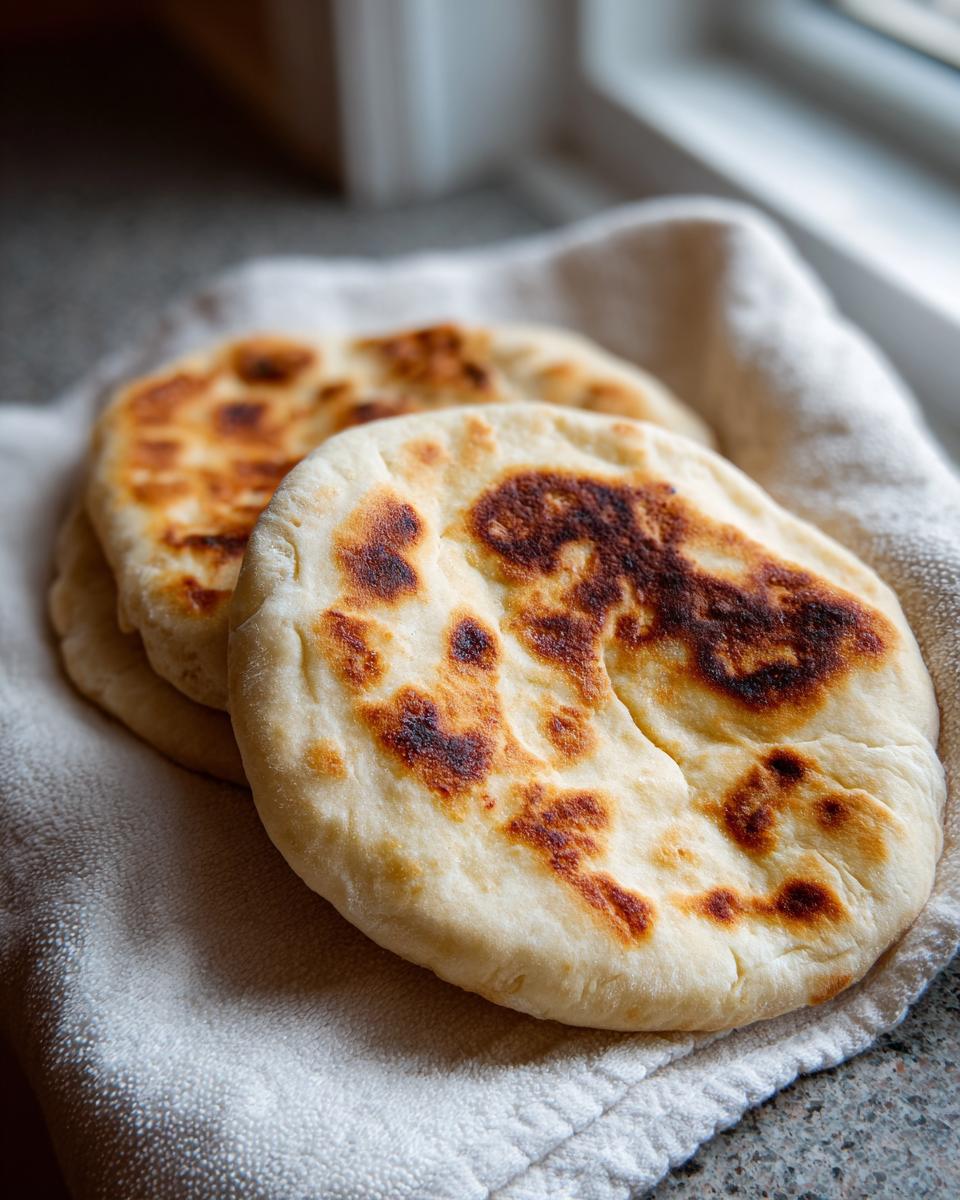
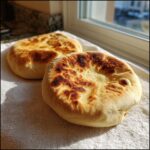
As soon as they’ve puffed and have those lovely golden brown spots, pull them off the heat. Immediately transfer your cooked pita bread over to a clean kitchen towel and wrap it up tight. Don’t skip this wrapping step! The trapped steam is what keeps them incredibly soft and fluffy as you finish the batch.
Tips for Success When Making Soft Pita Bread
Don’t get discouraged if your first pita doesn’t balloon up like a birthday balloon! I’ve been there, staring at a flatbread thinking, “Where is my beautiful pocket?” The absolute number one secret, which I cannot stress enough, is the heat. Your oven or skillet needs to be blazing hot—seriously hot—before that dough touches the surface. That intense, direct temperature is what shocks the dough into puffing up properly.
Also, remember what I said right after cooking: get them wrapped up immediately in a kitchen towel. That steam is your best friend for longevity; it locks in the moisture so you get that wonderfully yielding texture, making sure your soft pita bread stays soft. If you’re looking for more assurance on getting that perfect puff, you can check out some other established tips for pita bread recipes, but honestly, focus only on the heat!
Serving Suggestions for Your Fresh Pita Bread
Now that you’ve got this amazing batch of warm pita bread—soft, pliable, and ready for action—the only hard part is deciding what to put in them! Seriously, the payoff after all that kneading is immediate gratification. These are far better than any store-bought excuse for a wrap.
This bread is absolutely phenomenal for dipping. You must try it scooped through a giant bowl of classic hummus; the texture holds up so much better than crackers, which is why everyone loves pita bread for hummus and tzatziki. You can wrap up some of my crispy falafel recipe balls inside, or use them as the perfect vehicle for slicing up some marinated chicken from my chicken shawarma recipe. You could even split them open and toast them slightly to make amazing pita chips!
Storage and Reheating for the Best Pita Bread Experience
So, unless you have a very large crowd coming over, you’re probably going to have some leftover pita bread. Don’t stress about that—we need to keep them soft! The key here is moisture control. As soon as that batch is done puffing and you’ve transferred the discs to the clean kitchen towel, fold that towel over them completely.
Once they’ve cooled slightly, transfer the stack into an airtight container or a zip-top bag. If you’re storing them at room temperature, they should stay beautifully soft for about two days. If you need longer, they definitely freeze well! Just make sure they are completely cooled before bagging them up; otherwise, you’ll get condensation and that will make them sticky rather than pliable.
Now for reheating—because nobody wants cold pita bread, even if it’s still soft. Forget the microwave; that just makes them tough later. The absolute best way to bring them back to life, and sometimes even get a second puff, is back on the heat! Heat up your cast-iron skillet again over medium heat—no oil needed. Lay a pita on the dry, hot surface for just about 30 seconds per side.
You’ll see them soften up almost instantly, and if they were a little flattened when you stored them, this quick blast of heat often encourages them to puff up slightly again! Instant gratification! It makes your leftover bread taste like it just came out of the oven, so you can get back to enjoying your pita bread wraps or dipping!
Frequently Asked Questions About Pita Bread
I know you might have a few outstanding questions now that you’ve seen how easy it is to start baking your own pita bread from scratch. Every time I post this recipe, people ask me about variations or what went wrong if their bread didn’t puff. Let’s clear up some of those common worries so you feel totally ready!
Can I make this pita bread recipe without yeast?
That’s a great question, especially if you’re in a real hurry! For this specific recipe, the answer is, unfortunately, no, if you want the true, classic pita bread experience. The yeast is absolutely necessary here; it’s what gives us that beautiful rise and those signature pockets. Without the yeast, you’re basically making a very thick, round, unleavened flatbread.
If you are desperate for something quick and need a quick flatbread making option right this second, there are no-yeast recipes out there that use baking powder for a little lift, but they tend to be denser and won’t puff into a pocket the same way. For that wonderful, chewy, and pillowy pita bread texture, we need that yeast to work its wonders!
How do I ensure my pita bread is fluffy and not dense?
This is the million-dollar question, and it all ties back to the two main things we covered: yeast activity and heat! If your bread comes out dense, nine times out of ten, it’s one of two things. First, make absolutely sure your yeast was active when you started. If that warm water mixture didn’t foam up after 10 minutes, you need to start over with fresh yeast because the flavor won’t develop, and the rise will die.
The second, and most crucial factor, is heat! When you place your rolled dough into the oven or skillet, that surface has to be screaming hot. This intense heat creates the necessary steam explosion for the puff. If your pitas are flat, try preheating your baking stone or skillet for a minimum of 30 minutes, or even longer, at the highest setting. That intense heat ensures you get that wonderfully fluffy flatbread lift!
By the way, if you’re interested in other Mediterranean foods that cook up beautifully, my Greek salad recipe is the perfect accompaniment! And if you are curious about the non-pocket style, you can check out how others make the pocketless Greek pita bread recipe.
Nutritional Estimates for Homemade Pita Bread
Now, I know some of you are tracking things, and I totally get it! I studied nutrition science, so I always try to give you guys a general idea of what’s in what we make. But listen, before you jump into these numbers, you have to know something important: these figures are just estimates, honey.
Because we’re making this pita bread from scratch, the exact brand of oil you use or how thick you roll your dough? That changes things! These numbers are based on dividing the recipe into 8 equal servings, using the ingredients listed in the recipe card. Trust me, even with these estimates, homemade soft pita bread usually wins out over the highly processed store-bought versions anyway!
Based on what we put in, here’s a rough breakdown per one pita:
- Serving Size: 1 pita
- Calories: 170
- Sugar: 1g (Nice and low!)
- Sodium: 250mg
- Fat: 3g
- Carbohydrates: 32g
- Protein: 5g
If you’re watching saturated fats, good news—it stays really low at about 0.5g per piece! This is what I love about simple, whole-food recipes for your daily pita bread wraps; you know exactly what you’re putting in!
Share Your Fluffy Pita Bread Creations
Now listen, I can tell you all day long how amazing this homemade pita bread recipe is, but what I really want is to see what *you* create! Baking should be fun, and sharing those little kitchen wins makes it even better. I put so much work into making sure this recipe is reliable, and I’d love to hear if these puffy masterpieces worked for you!
If you’ve whipped up a batch of these soft and fluffy pitas—whether you used the skillet method or the oven—please do me a huge favor and leave a rating right down below. If you gave it 5 stars because you finally made bread that pockets beautifully, tell us why! And hey, if you ran into a snag, like your dough was sticky or your pitas stayed flat, drop a comment too. I read every single one, and I’m always happy to jump in and troubleshoot your batch of pita bread from scratch.
Don’t be shy about snapping a photo either! Tag me on social media with your gorgeous, warm pita bread. Seeing you all confidently making authentic Middle Eastern bread in your home kitchens? That’s why I started Kings Cook in the first place. If you’re stuck in a dinner rut and need more reliable classics, have a peek at my About Page to see what else we’ve got cooking!
PrintSoft and Fluffy Homemade Pita Bread with Perfect Pockets
Make soft, fluffy pita bread at home that puffs perfectly to create pockets. This easy recipe uses simple ingredients and works well in the oven or on a skillet, making it ideal for wraps or dipping with hummus.
- Prep Time: 20 min
- Cook Time: 15 min
- Total Time: 1 hour 50 min
- Yield: 8 servings 1x
- Category: Bread
- Method: Baking/Skillet Cooking
- Cuisine: Middle Eastern
- Diet: Vegan
Ingredients
- 1 teaspoon active dry yeast
- 1 teaspoon granulated sugar
- 1 cup warm water (about 105-115°F)
- 2 1/2 cups all-purpose flour, plus more for dusting
- 1 teaspoon salt
- 2 tablespoons olive oil
Instructions
- Activate the yeast: In a small bowl, combine the warm water, sugar, and yeast. Let it sit for 5 to 10 minutes until foamy.
- Mix dry ingredients: In a large bowl, whisk together the flour and salt.
- Combine: Pour the yeast mixture and olive oil into the flour mixture. Mix until a shaggy dough forms.
- Knead: Turn the dough out onto a lightly floured surface. Knead for 5 to 7 minutes until the dough is smooth and elastic.
- First rise: Place the dough in a lightly oiled bowl, turning to coat. Cover the bowl with plastic wrap or a damp towel and let it rise in a warm place for 1 to 1.5 hours, or until doubled in size.
- Divide and rest: Punch down the dough gently. Divide it into 8 equal pieces. Roll each piece into a smooth ball. Cover the balls and let them rest for 15 minutes.
- Shape the pitas: On a lightly floured surface, roll each dough ball into a circle about 6 to 7 inches in diameter and about 1/8 inch thick.
- Heat the cooking surface: Preheat your oven to 475°F (245°C) with a baking stone or heavy baking sheet inside, or heat a cast-iron skillet over medium-high heat.
- Cook the pitas: Place one or two rolled pitas directly onto the hot surface. Cook for 1 to 3 minutes per side. The bread should puff up dramatically, creating the pocket. If using the oven, the puffing happens quickly. If using a skillet, flip when bubbles form, then flip again to encourage the puff.
- Keep warm: Transfer the cooked pita bread to a clean kitchen towel and wrap them to keep them warm and soft while you cook the remaining dough.
Notes
- For the softest texture, wrap the warm pitas immediately in a clean kitchen towel after cooking. The trapped steam keeps them pliable.
- If your dough does not puff, your oven or skillet was likely not hot enough. High, direct heat is necessary to create the steam that forms the pocket.
- You can substitute half the all-purpose flour with whole wheat flour for a slightly heartier bread.
Nutrition
- Serving Size: 1 pita
- Calories: 170
- Sugar: 1
- Sodium: 250
- Fat: 3
- Saturated Fat: 0.5
- Unsaturated Fat: 2.5
- Trans Fat: 0
- Carbohydrates: 32
- Fiber: 2
- Protein: 5
- Cholesterol: 0