
Oh, my goodness, do I have a treat for you today! If you’re anything like me, moments spent tucked away in the kitchen, creating something warm and delicious from scratch, are pure gold. And when that something happens to be a plate piled high with tender, pillowy pierogi, well, that’s just happiness folded into dough. These aren’t just dumplings; they’re a hug from the inside out, a taste of tradition that feels like coming home. As you can read more about my own philosophy on my About page, I truly believe cooking should be a joyful, confidence-building experience, and making these yourself is such a rewarding part of that! Forget those store-bought imposters – this homemade pierogi recipe is designed to be totally doable, completely reliable, and absolutely worth every single minute!
- Why You'll Love This Homemade Pierogi Recipe
- Gather Your Ingredients for Authentic Pierogi
- Mastering the Dough for Your Pierogi
- Crafting the Perfect Potato Cheese Pierogi Filling
- Assembling Your Homemade Pierogi
- Cooking Your Pierogi: Boiling and Pan-Frying
- Serving Your Delicious Polish Dumplings
- Tips for Perfect Pierogi Every Time
- Ingredient Notes and Substitutions for Pierogi
- Make-Ahead and Freezer Tips for Pierogi
- Frequently Asked Questions About Pierogi
- Estimated Nutritional Information for Pierogi
- Share Your Homemade Pierogi Creations!
Why You’ll Love This Homemade Pierogi Recipe
Making pierogi from scratch might sound like a big undertaking, but trust me, it’s totally doable and SO worth it! Here’s why you’ll be hooked:
- Unbeatable Flavor: Nothing beats the taste of homemade! We’re talking tender dough, a delicious potato-cheese filling, and that perfect golden sear.
- Surprisingly Simple: With this recipe, I’ve broken down every step so it feels manageable, even if you’ve never made dumplings before.
- Pure Comfort Food: These are the ultimate cozy meal – perfect for a chilly evening or when you just need a little food therapy.
- So Rewarding: There’s a special kind of satisfaction that comes from creating these beautiful little packages of deliciousness all by yourself!
Gather Your Ingredients for Authentic Pierogi
Alright, let’s get our ducks in a row and gather everything we need for these amazing Polish dumplings! Trust me, having everything prepped makes the whole process so much smoother. Here’s what you’ll want to have on hand:
For the Dough:
- 3 cups all-purpose flour
- 1 teaspoon salt
- 1 large egg
- 1/2 cup warm water
- 1/4 cup sour cream
For the Filling:
- 2 pounds russet potatoes, peeled and quartered
- 1 cup shredded cheddar cheese
- 1/2 cup farmer’s cheese or ricotta cheese
- 1/4 cup finely chopped sautéed onions
- Salt and black pepper to taste
For Cooking and Serving:
- 4 tablespoons butter
- 1 large onion, thinly sliced
- Sour cream for serving
Mastering the Dough for Your Pierogi
Okay, let’s talk dough! This is where the magic really starts to happen for your homemade pierogi. Don’t be intimidated; it’s actually pretty straightforward and feels so satisfying. First things first, grab a big bowl and whisk together your flour and salt. In a separate little bowl, give that egg a quick whisk with the warm water and the sour cream. Sour cream is our secret weapon here, adding just a touch of richness and tenderness that you’ll really taste later!
Now, make a little well in your dry ingredients and pour in the wet stuff. Start mixing! It’ll look a bit shaggy at first, and that’s totally fine. Turn it out onto a lightly floured surface – I like to use my clean countertop because it gives me plenty of room. Now, the fun part: kneading! You want to work it for about 5 to 7 minutes. Don’t go too hard, just a gentle push, fold, and turn. You’re looking for a dough that’s smooth, elastic, and feels lovely in your hands. Once it’s just right, pop it back into the bowl, cover it with a damp cloth (this keeps it from drying out!), and let it rest for a good 30 minutes. This little break makes it so much easier to roll out later, trust me!
Crafting the Perfect Potato Cheese Pierogi Filling
Now that our dough is resting and getting happy, let’s focus on the heart of our delicious pierogi: the filling! This potato and cheese combo is just classic comfort. You’ll want to start by boiling those peeled and quartered russet potatoes until they’re super tender – like, fork-tender. If you’re a potato lover like me, you might even want to check [these roasted potatoes] for another way to enjoy them!
Drain them really, really well. Honestly, get as much water out as you can! Then, mash them up until they’re smooth as silk. I like to use a potato ricer for this, but a sturdy masher works just fine too. Now, stir in that shredded cheddar cheese – sharp cheddar is my go-to for a little zing! Mix in your farmer’s cheese (or ricotta if that’s what you have – it’s a great substitute!) and those finely chopped sautéed onions. Oh, and don’t forget salt and pepper to taste! Give it all a good mix until everything is beautifully combined. You want it flavorful, smooth, and not too watery. If it seems a little dry, don’t be afraid to add a tiny splash of milk or even a bit more cheese!
Assembling Your Homemade Pierogi
Alright, my friends, it’s time to bring all our hard work together and start assembling these gorgeous pierogi! This is the part where you really start seeing your delicious dumplings come to life. First, let’s get that dough ready again. Give it a quick knead if it feels a little stiff, and then divide it into four equal pieces. Working with just one piece at a time is key – it keeps the rest of the dough from drying out. Roll it out nice and thin on your lightly floured surface. Think about the thickness of a quarter, maybe just a tad thinner. Then, grab your 3-inch round cutter (a glass rim works great too!) and cut out as many circles as you can.
Now for the filling! Spoon about a tablespoon of that yummy potato and cheese mixture right into the center of each dough circle. Don’t overstuff them; we need room to seal! This is super important: fold that dough circle in half to make a little half-moon shape. Now, really press those edges together! You want a super firm seal so none of that yummy filling escapes during cooking. You can even pinch them a bit, or use the tines of a fork to make a pretty, secure edge. Make sure there are absolutely no air pockets hiding in there. Lay your finished **pierogi** on a lightly floured baking sheet while you work on the rest. It’s like making little edible pockets of joy!
Cooking Your Pierogi: Boiling and Pan-Frying
Alright, we’ve made the dough, we’ve crafted the perfect filling, and we’ve assembled all our beautiful homemade pierogi! Now for the best part: cooking them until they’re just perfect. It’s a two-step dance, and trust me, it’s totally worth it for that amazing flavor and texture we’re going for.
First, we boil! Get a big pot of generously salted water going and bring it to a rolling boil. Carefully drop your pierogi in, but don’t overcrowd the pot – give them some space! They’ll sink at first, which is normal. Watch ’em closely; when they float to the top, that means they’re cooked and ready to come out. You’re looking at about 3-5 minutes after they start floating. Use a slotted spoon to gently scoop them out.
Next up? The glorious pan-fry! Melt about 4 tablespoons of butter in a large skillet over medium heat. While that’s melting, you can thinly slice up one extra onion to sauté in the butter until it’s soft and lovely and just starting to turn golden. Add your boiled pierogi to the skillet. Let them cook for about 2-3 minutes per side. You want them to get this gorgeous golden-brown color and just a little bit of crispiness. It gives them such a delicious depth of flavor. Serve these beauties immediately with those sweet, sautéed onions and maybe check out some of my favorite [delicious side dishes] to round out your meal!

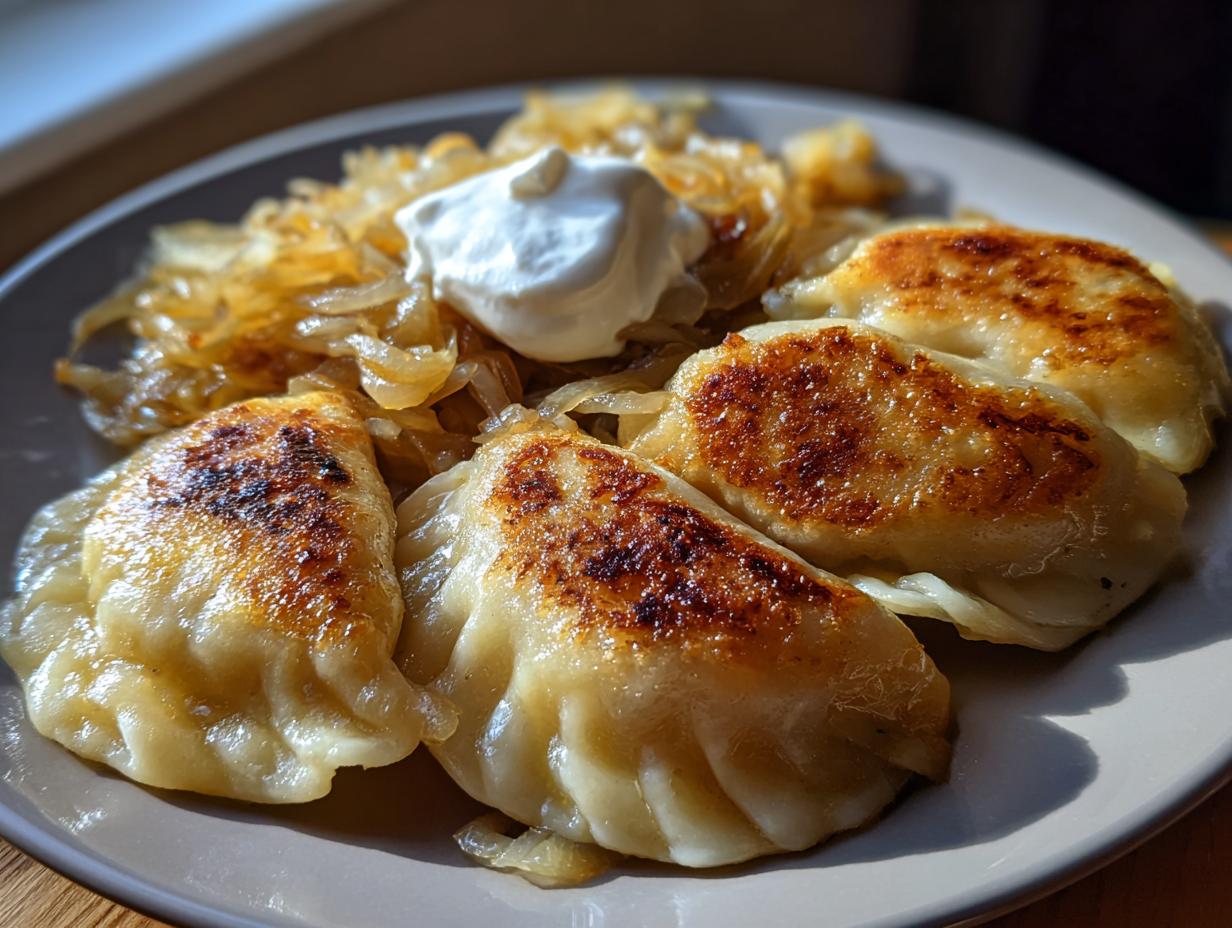
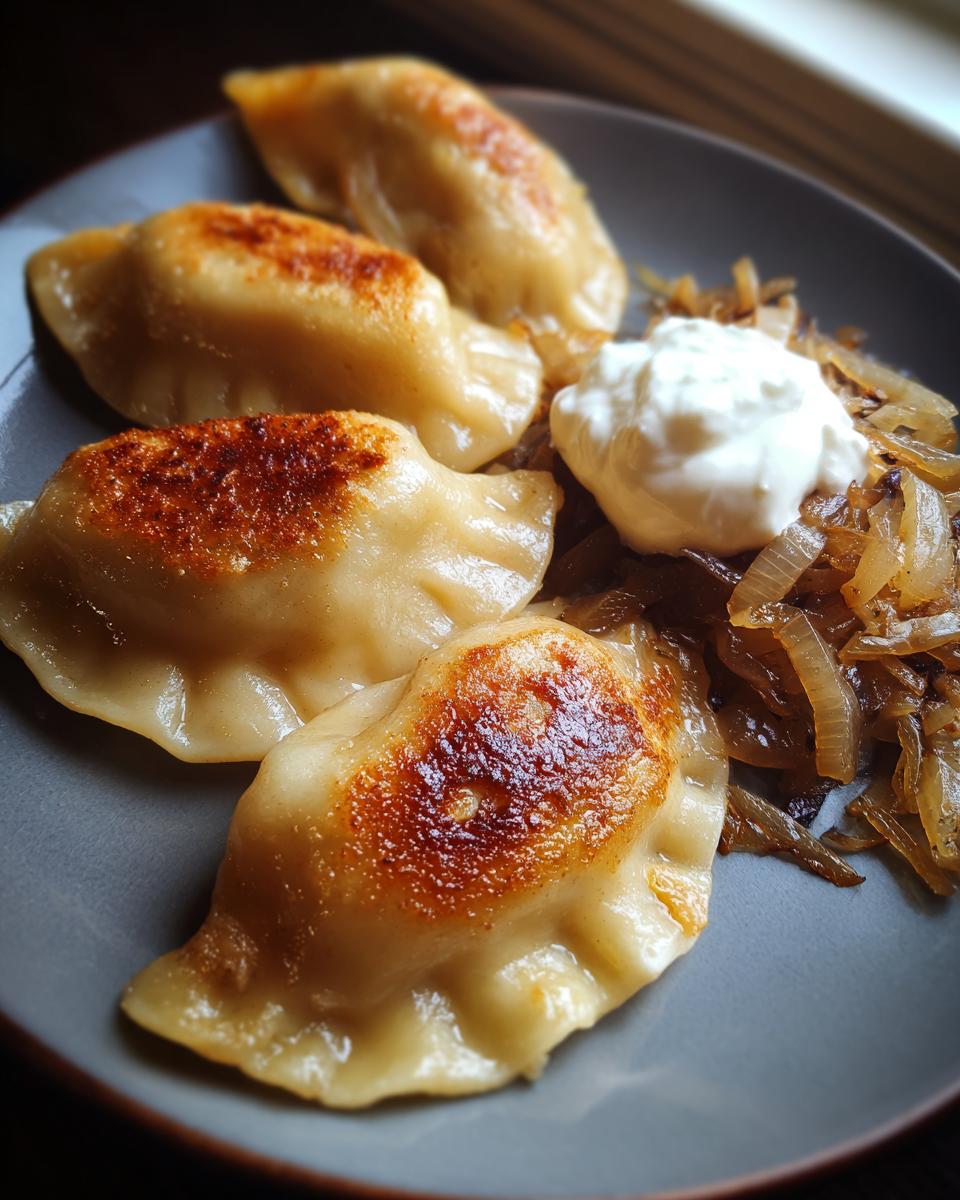
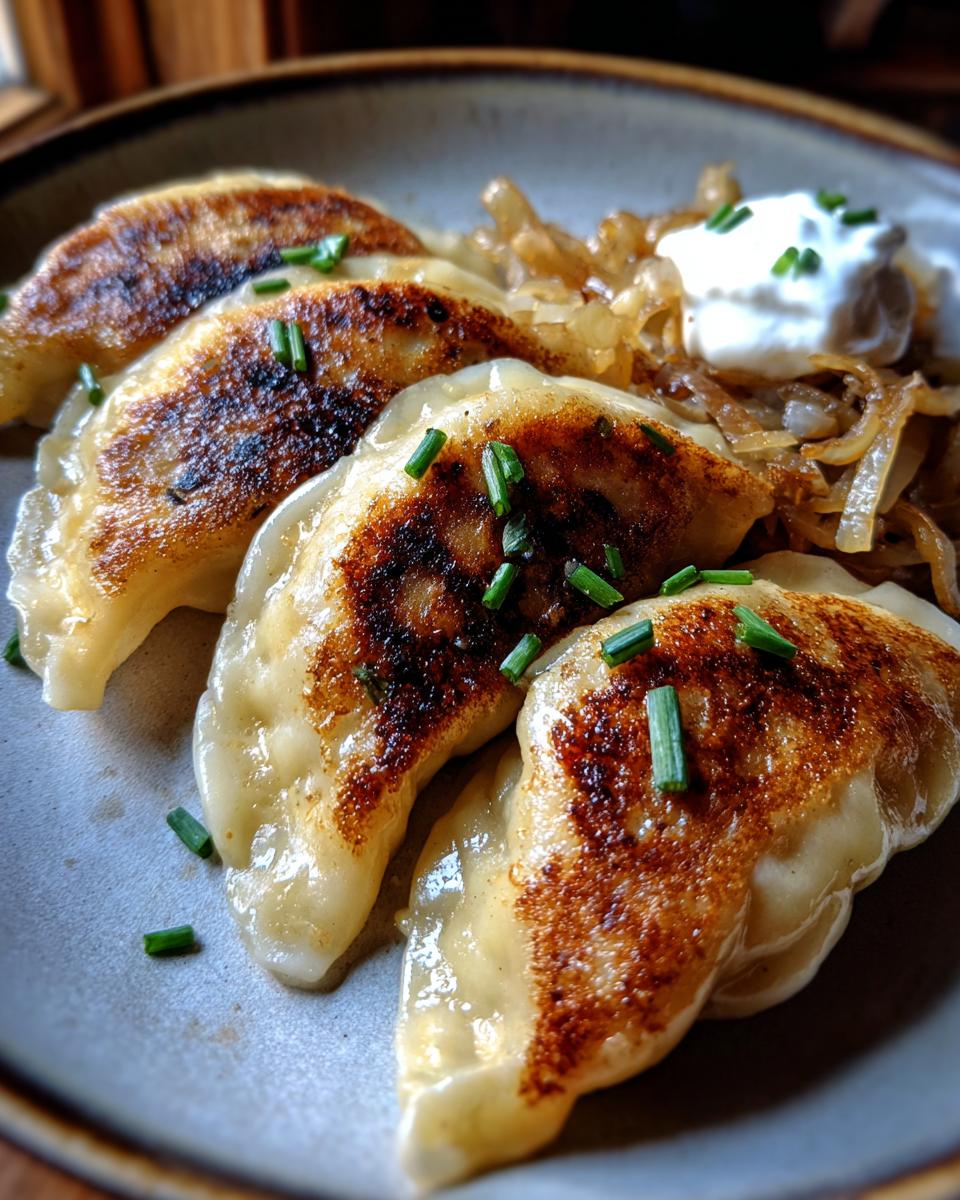
Serving Your Delicious Polish Dumplings
Okay, the moment of truth! Your pierogi are cooked, golden brown, and smelling absolutely divine. It’s time to serve them up hot! Pile those beautiful dumplings onto plates, making sure to include plenty of those sweet, sautéed onions right alongside them. A generous dollop of cool sour cream is the perfect finishing touch – that creamy tanginess is just heavenly with the savory filling. Serve them immediately while they’re nice and warm; that’s when they’re truly at their peak!
Tips for Perfect Pierogi Every Time
You’ve put in the work, and now you want those homemade pierogi to be absolutely perfect, right? I’ve got a few tricks up my sleeve that have saved me (and my delicious dumplings!) more times than I can count. First off, if your dough feels sticky when you’re rolling it out, just dust your surface and your rolling pin with a *tiny* bit more flour. Don’t go crazy, though – too much flour can make the dough tough. And when you’re sealing them up, really press those edges down firmly! It’s the best way to stop any leaks. Sometimes, I do a little double crimp just to be extra sure. If you notice the boiled pierogi sticking together before pan-frying, a tiny bit more butter in the pan usually does the trick. It’s all about paying attention to the little details, and you’ll get the hang of it in no time!
Ingredient Notes and Substitutions for Pierogi
A few ingredients in here might have you scratching your head, but don’t worry, there are easy fixes! Farmer’s cheese is traditional and gives a fantastic texture, but if you can’t find it, good ol’ ricotta cheese is a perfectly yummy substitute that works beautifully in this filling. For the potatoes, russets are my faves because they’re nice and starchy, but any good mashing potato will do! Just make sure to drain them super well so your filling isn’t watery. And seriously, fresh is best when you can get away with it!
Make-Ahead and Freezer Tips for Pierogi
You know, one of the best things about making pierogi is how wonderfully they freeze! If you’ve got a little extra time one afternoon, go ahead and make a big batch. Once your pierogi are assembled and sealed, lay them out in a single layer on a baking sheet that you’ve lightly floured or lined with parchment paper. Pop that baking sheet into the freezer for about an hour, or until the pierogi are firm to the touch. This stops them from sticking together. Then, just transfer them to a freezer-safe bag or container. When you’re ready to cook them from frozen, don’t thaw them! Just toss them straight into boiling salted water, adding a few extra minutes to the boiling time, and then pan-fry as usual. Easy peasy!
Frequently Asked Questions About Pierogi
Have questions about making your own pierogi from scratch? I get it! It’s a bit of a process, but so worth it. Here are a few things folks often wonder about:
Can I use different fillings for my pierogi?
Absolutely! While potato and cheese is a classic for a reason, the world of pierogi fillings is huge! You can try sauerkraut and mushroom, sweet cheese (like a dessert pierogi!), or even a savory meat filling. Get creative!
How do I prevent my pierogi from breaking during cooking?
The key is a really good seal! Make sure you press those edges together firmly when you fold them. You can even do a little crimp with your fingers or a fork. Also, be careful not to overfill, and make sure your water isn’t boiling too wildly when you add them in!
Can I make the pierogi dough ahead of time?
You sure can! Once you’ve made the dough and it’s rested, you can wrap it tightly in plastic wrap and keep it in the fridge for a day or two before you plan to assemble. It might be a little firm, so let it sit at room temperature for about 15-20 minutes before you roll it out.
What’s the best way to serve pierogi?
Oh, the classics are best! Sautéed onions and a generous dollop of sour cream are just divine with these potato cheese pierogi. Some people also love a little melted butter, or even some crispy bacon bits if you’re feeling fancy! Enjoy them warm right after they’re cooked.
Estimated Nutritional Information for Pierogi
Just a quick note on nutrition: the numbers for these homemade pierogi can really vary depending on the exact ingredients you use, especially the type of cheese and how much butter you use for frying! But, for about 4-5 pierogi, you’re generally looking at around 350 calories, roughly 15g of fat (with about 7g of that being saturated), and about 40g of carbs. It’s comfort food, after all, and packed with that wonderful, hearty goodness!
Share Your Homemade Pierogi Creations!
I truly hope you loved making these pierogi as much as I do! Please, tell me all about it! Leave a comment below with your experience, how they turned out, or any fun twists you added. And if you snap a pic of your beautiful creations, tag me on social media – I’d be absolutely thrilled to see your homemade masterpieces! You can also always reach out via my [contact page] if you have any questions!
Print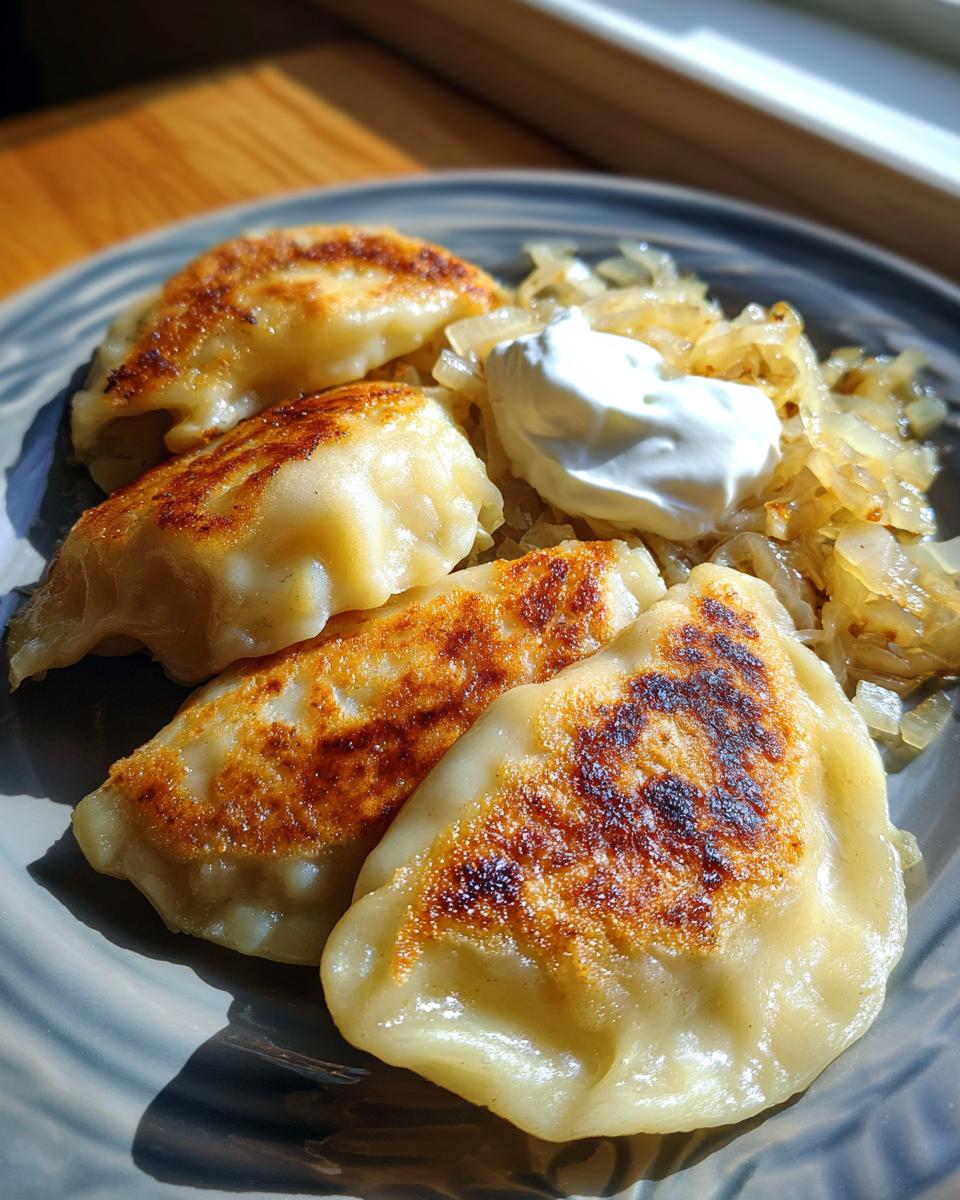
Homemade Pierogi Recipe

Learn to make traditional Polish dumplings from scratch, filled with potato and cheese, then boiled and pan-fried for a comforting meal.
- Prep Time: 45 min
- Cook Time: 30 min
- Total Time: 75 min
- Yield: 24-30 pierogi 1x
- Category: Main Course
- Method: Boiling and Pan-Frying
- Cuisine: Polish
- Diet: Vegetarian
Ingredients
- For the Dough:
- 3 cups all-purpose flour
- 1 teaspoon salt
- 1 large egg
- 1/2 cup warm water
- 1/4 cup sour cream
- For the Filling:
- 2 pounds russet potatoes, peeled and quartered
- 1 cup shredded cheddar cheese
- 1/2 cup farmer’s cheese or ricotta cheese
- 1/4 cup finely chopped sautéed onions
- Salt and black pepper to taste
- For Cooking and Serving:
- 4 tablespoons butter
- 1 large onion, thinly sliced
- Sour cream for serving
Instructions
- Make the dough: In a large bowl, whisk together flour and salt. In a separate bowl, whisk the egg, warm water, and sour cream. Gradually add the wet ingredients to the dry ingredients, mixing until a shaggy dough forms. Turn the dough out onto a lightly floured surface and knead for 5-7 minutes until smooth and elastic. Cover with a damp cloth and let rest for 30 minutes.
- Prepare the filling: Boil the potatoes until fork-tender. Drain well and mash them until smooth. Stir in the cheddar cheese, farmer’s cheese, sautéed onions, salt, and pepper. Mix until well combined.
- Assemble the pierogi: Divide the dough into four equal portions. Working with one portion at a time, roll it out thinly on a lightly floured surface. Use a 3-inch round cutter to cut out circles. Place about 1 tablespoon of filling in the center of each circle. Fold the dough in half to create a half-moon shape, pressing the edges firmly to seal. Ensure there are no air pockets.
- Boil the pierogi: Bring a large pot of salted water to a boil. Carefully add the pierogi in batches, being careful not to overcrowd the pot. Cook for 3-5 minutes, or until they float to the surface. Remove with a slotted spoon.
- Pan-fry the pierogi: Melt the butter in a large skillet over medium heat. Add the sliced onions and cook until softened and lightly browned. Add the boiled pierogi to the skillet and cook for 2-3 minutes per side, until golden brown and slightly crispy.
- Serve: Serve the pierogi immediately with the sautéed onions and a dollop of sour cream.
Notes
- For a richer flavor, you can add a pinch of nutmeg to the potato filling.
- If you don’t have farmer’s cheese, ricotta cheese is a good substitute.
- Make sure to seal the pierogi edges very well to prevent the filling from leaking out during boiling.
- You can freeze uncooked pierogi on a baking sheet until firm, then transfer them to a freezer bag for later use. Cook from frozen, adding a few extra minutes to the boiling time.
Nutrition
- Serving Size: 4-5 pierogi
- Calories: 350
- Sugar: 3g
- Sodium: 400mg
- Fat: 15g
- Saturated Fat: 7g
- Unsaturated Fat: 8g
- Trans Fat: 0g
- Carbohydrates: 40g
- Fiber: 3g
- Protein: 12g
- Cholesterol: 50mg