
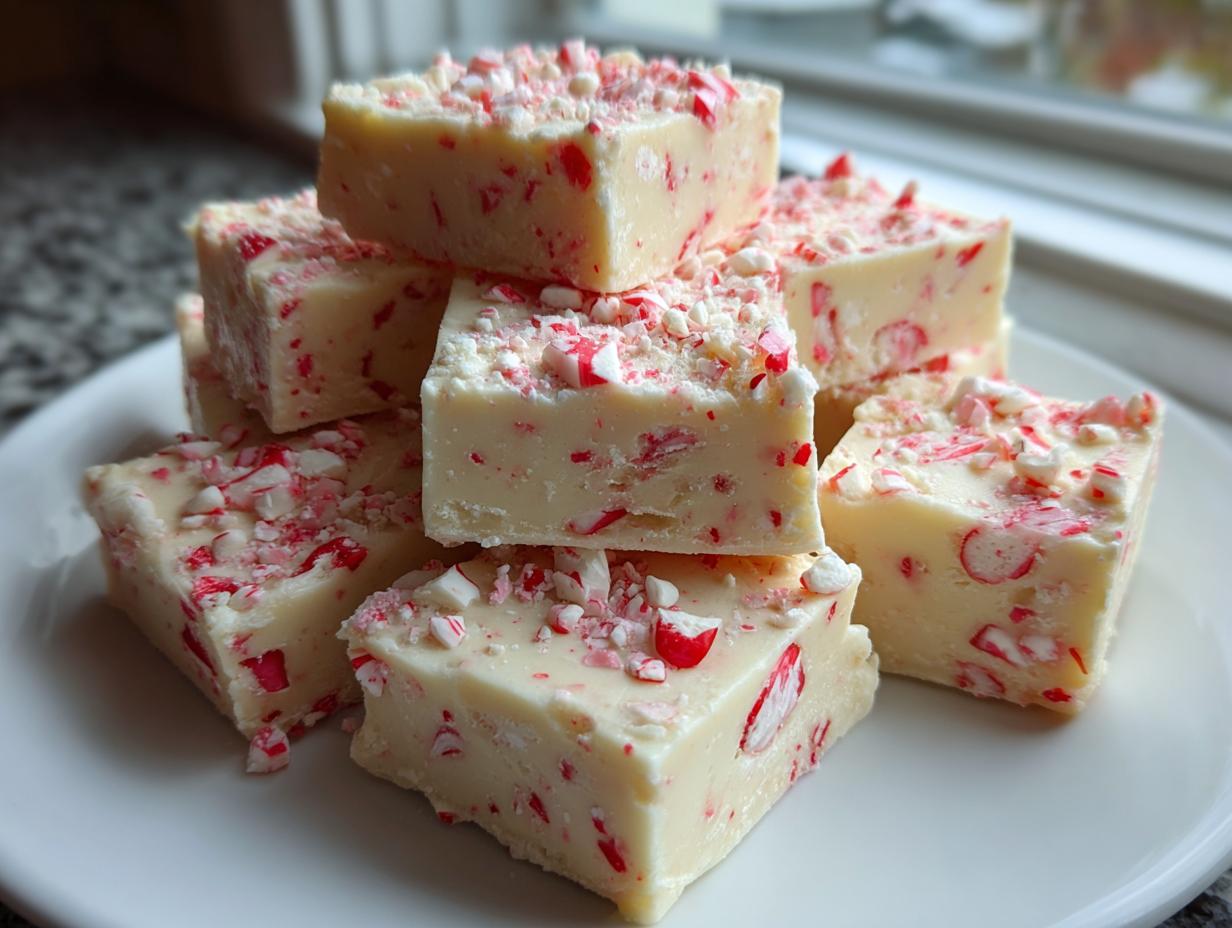
Is your holiday baking list looking a little too long and complicated? Trust me, I get it. Between the cookies and the big centerpiece desserts, sometimes you just need a fast, spectacular sweet that requires zero oven time. That’s where this unbelievably creamy **peppermint fudge** swoops in to save the day!
This isn’t one of those fussy recipes that needs a candy thermometer or hours of stirring. Nope! We are making a no-bake wonder, and I promise, it has that perfect, beautiful texture. When I test recipes here at Kings Cook, reliability is my number one standard, and this simple graham cracker-free, white chocolate-based **peppermint fudge** delivers every single time. Get ready to make your new favorite Christmas treat!
- Why This Easy Peppermint Fudge Recipe Is a Holiday Must-Make
- Gathering Ingredients for Your Peppermint Fudge
- Step-by-Step Instructions for No Bake Fudge Holiday Success
- Tips for Perfect Peppermint Fudge Every Time
- Storing and Gifting Your Homemade Peppermint Treats
- Frequently Asked Questions About Peppermint Fudge
- Estimated Nutritional Data for Peppermint Fudge
- Share Your Festive Chocolate Fudge Creations
Why This Easy Peppermint Fudge Recipe Is a Holiday Must-Make
Look, you want that holiday magic without losing your weekend, right? That’s why this recipe knocks it out of the park. It’s one of the easiest batch recipes I’ve ever developed—truly perfect for when you’re short on prep time but still need something show-stopping for your cookie platter. We’re getting that beautiful, cool mint flavor that pairs so well with the rich base.
This quick sweet is fantastic for making ahead since it tastes even better after a day in the fridge, making it ideal for last-minute **Holiday Gift Fudge** needs. Plus, it looks so incredibly festive nestled next to your peanut butter cookies!
Achieving the Best Peppermint Fudge Texture
If you’ve ever had a grainy or oily fudge, you know it’s a huge letdown. That’s where my obsession with technique comes in! We keep this batch ultra-creamy by relying on sweetened condensed milk. This ingredient is a lifesaver because it provides the necessary sugars and fats to coat the chocolate perfectly. As long as you don’t overheat that white chocolate base, you guarantee that famous **Best Peppermint Fudge Texture**—smooth, soft, and truly melt-in-your-mouth.
Simple Ingredients for Festive Chocolate Fudge
When I call something easy, I mean it! This recipe sings because it’s built on just five core items. That means less time browsing pantry shelves and more time enjoying the holiday hustle. It’s the definition of an **Easy Peppermint Fudge Recipe**. You get massive flavor payoff from very few components, which is exactly what we busy home cooks need during December. For more ideas on simple treats, check out my list of favorite dessert recipes!
Gathering Ingredients for Your Peppermint Fudge
Okay, let’s talk what you need to grab before you start melting anything. Since this is a **no bake fudge holiday** treat, ingredient quality really matters because there’s nowhere to hide! We’re keeping it super simple, just five things if you count the extracts separately, but don’t worry; you should have most of this stuff on hand already.
You will need one full 14-ounce can of sweetened condensed milk—please don’t try to substitute evaporated milk here; it just won’t work the same magic. Then grab two cups of good white chocolate chips, one teaspoon of peppermint extract, one small teaspoon of vanilla extract because it deepens the flavor, and one cup of crushed candy canes.
Ingredient Notes and Candy Cane Fudge Recipe Substitutions
When we talk white chocolate chips, go for the good stuff, okay? The baking chips work well because they melt smoothly, but if you use the nice baking bars, you’ll get even better results for that quintessential **White Chocolate Peppermint Candy** taste. Make sure your peppermint extract is fresh because old extract tastes kind of dusty, and you won’t get that bright, cool bite you expect in a perfect **Candy Cane Fudge Recipe**.
If you run out of candy canes mid-crush or if they just aren’t available, any hard peppermint candy will work! Just check the bag to make sure it’s pure peppermint flavored, not mixed berry or something weird like that. We want that classic flavor shining through!
Step-by-Step Instructions for No Bake Fudge Holiday Success
Finally, the fun part! Because this is designed as a true **No Bake Fudge Holiday** miracle, the assembly is incredibly fast. Before you even look at the microwave, make sure your 8×8 pan is ready. You absolutely must line it with parchment paper, and I mean make sure it hangs over the sides. That overhang is your secret weapon for lifting the whole slab out later without having to dig around the edges!
Once that paper is nestled in, grab your microwave-safe bowl and let’s get melting. We’re moving fast here, but precision is key to keeping this **peppermint fudge** creamy.
Melting the Base for Creamy Winter Desserts
Toss your white chocolate chips and the can of condensed milk together. Now, here’s where you need patience—it’s tempting to crank the microwave power, but trust me, don’t do it! We microwave in short bursts, maybe 30 seconds at a time, stirring vigorously between each blast. If you blast it for too long, that white chocolate gets gritty fast, and boom, you’ve ruined that incredible **melt in your mouth fudge** texture we’re aiming for.
Keep stirring until it looks like pourable silk. If you decide to use the stovetop method (which feels way more dramatic, I guess!), use a double boiler—medium-low heat only! We want smooth, not scorched.
Assembling and Setting the Peppermint Fudge
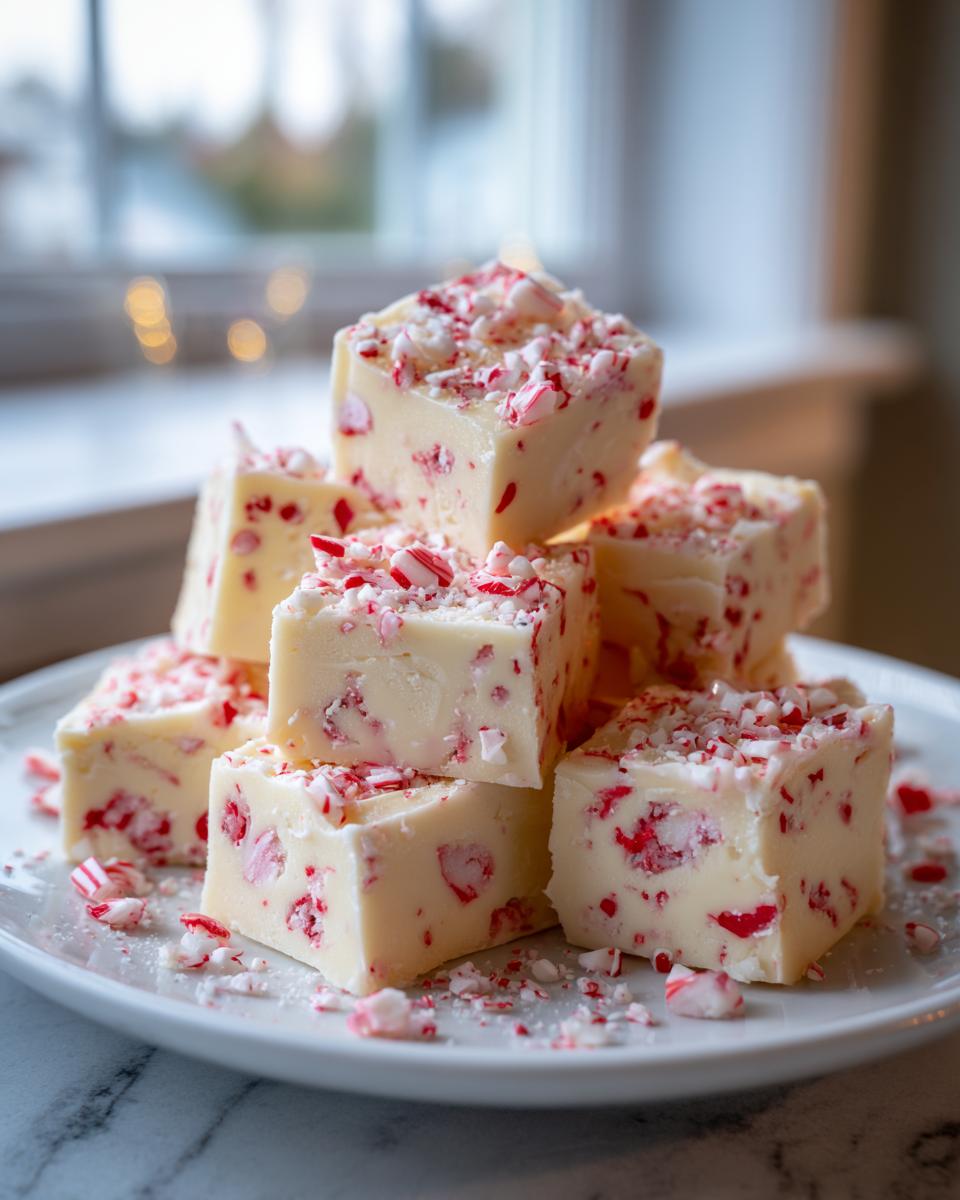
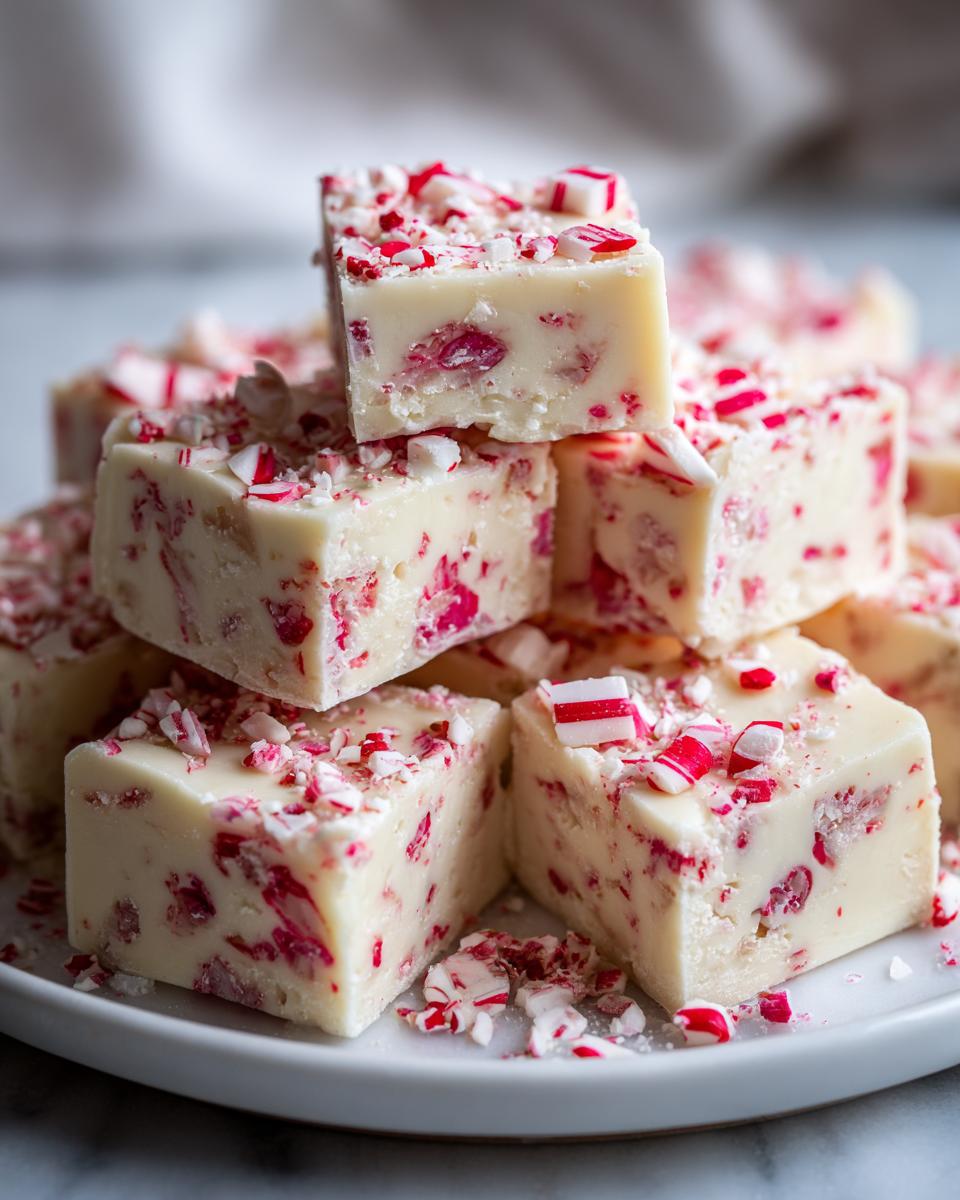
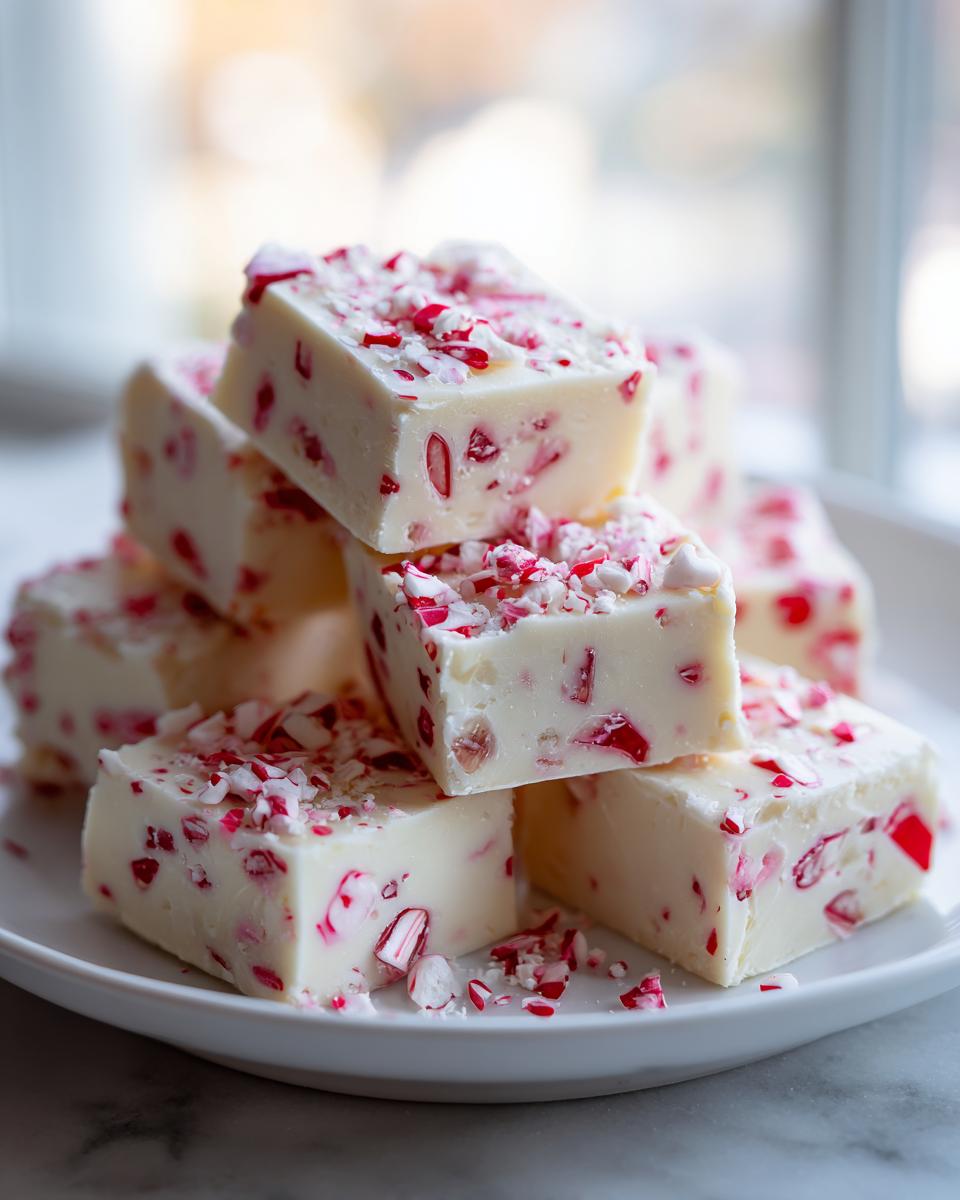
Once the base is smooth and glossy, kill the heat and quickly stir in your peppermint and vanilla extracts. Now, gently fold in about three-quarters of your crushed candy canes. Don’t over-mix once the candy goes in, or you’ll end up with pink fudge! Spread that base into your prepared pan evenly. Sprinkle the reserved candy canes right on top and press them down just slightly so they stick.

Now we wait! Pop it in the fridge for at least three hours. If you’re feeling fancy, grab half the mixture before adding the peppermint to one half, and gently swirl them together for a beautiful layered effect before topping. You can find some other easy appetizers and quick snacks on the blog for your party trays!
When it’s time to slice, just lift the whole sheet out by grabbing the parchment paper overhang. For the best clean cuts, some people find running a sharp knife under hot water helps—I found that tip floating around on this recipe site, and it’s genius!
Tips for Perfect Peppermint Fudge Every Time
Even though this is an easy recipe, I always have a few little tricks up my sleeve to make sure your **peppermint fudge** is nothing short of spectacular. Getting that clean slice, for example? That’s half the battle with homemade fudge! If you rush it, you end up with messy squares, which look less than pretty if you’re packaging these up as gifts.
Also, we need to talk about balance. Mint can easily take over, turning your creamy treat into something that tastes like toothpaste! We avoid that by using a good amount of vanilla; it rounds out that sharp peppermint flavor, ensuring you get that incredible, balanced taste that makes people ask for your recipe.
Making Layered Peppermint Fudge Variations
If you want to impress people, forget just having the candy on top! You can easily turn this into stunning **Layered Peppermint Fudge** or a beautiful swirl. Remember how I mentioned dividing the base? Do that *before* you add the peppermint extract to one half. Then, dollop spoonfuls of the plain base and the mint base alternately into your pan.
Take a butter knife and gently drag it through the layers just once or twice. Don’t go crazy swirling! You just want soft ribbons of color weaving through the white base. This technique gives you that gorgeous “Peppermint Swirl Fudge” look you see everywhere this time of year, and it really elevates this simple **Candy Cane Fudge Recipe**.
Storing and Gifting Your Homemade Peppermint Treats
Making this perfect **peppermint fudge** is only half the battle; now we have to keep it delicious until it’s time to enjoy it! Since this doesn’t have any flour or delicate creams, it’s actually super sturdy. My number one instruction? Keep it in the fridge. Store the finished fudge in a good, airtight container. It should stay wonderfully creamy and fresh for at least two weeks, which is fantastic timing for holiday prep!
This recipe is practically born to be **Holiday Gift Fudge**. I always cut mine into small squares—people tend to eat more fudge than they intend to! Wrap those little gems tightly in parchment paper first, then stack them in clear cellophane bags tied with a bright red ribbon. It just looks so festive sitting on someone’s counter!
If you are pairing it with something like my fudgiest brownies, make sure you don’t stack the two sweets directly against each other, or the mint flavor might transfer. For more easy holiday sweet ideas, you can always check what other people are making over at this great candy site!
Frequently Asked Questions About Peppermint Fudge
I get so many questions about how to keep this **peppermint fudge** perfect, especially when people are making big batches for gifting. It’s all about these little details! I’ve gathered the ones I hear most often right here so you can troubleshoot before you even start mixing. Even for an **Easy Peppermint Fudge Recipe**, there are always little things that can trip us up.
Can I use real peppermint oil instead of extract in this peppermint fudge?
Oh, you certainly can, but you have to be SO careful! Peppermint oil, the pure essential oil, is way more concentrated than standard extract. If you substitute one-for-one, you might end up with fudge that burns your tongue, honestly! I suggest starting with just one or two drops of the oil. You can always add more, but you can’t take it out once it’s in there. Since pure oil is potent, it really amps up that mint factor, which is great if you like a strong kick in your **Candy Cane Fudge Recipe**.
What is the best way to get clean slices of this Christmas Fudge Ideas?
This is my absolute favorite question because messy fudge drives me crazy! First, let it chill thoroughly—I mean at least four hours, or even overnight, is ideal for those super clean slices. Second, the knife matters. Before you cut, dip a long, sharp knife into a tall glass of very hot water. Wipe the blade dry quickly with a clean towel, and then make your cut. The heat melts just the tiniest layer of the fudge, allowing the knife to glide right through without any dragging or cracking. It works magic for making your squares look perfectly professional for your **Christmas Fudge Ideas**!
If you want to check out other simple recipes that are perfect for sharing, take a peek at my favorites, like my chocolate chip cookies; they go great alongside fudge!
Estimated Nutritional Data for Peppermint Fudge
Now, I always tell people right up front: these numbers are just what my kitchen calculated based on specific store-bought brands, so treat them as educated guesses! Since this is such a simple **peppermint fudge** recipe relying heavily on sugar and white chocolate, the counts are what you’d expect for a decadent holiday treat.
Here is the overview for one small square:
- Calories: 130
- Fat: 6g
- Carbohydrates: 19g
- Protein: 2g
- Sugar: 18g
It’s rich, but honestly, you’re only grabbing one square, right? I promise that small indulgence is worth it when the holidays roll around!
Share Your Festive Chocolate Fudge Creations
That’s it! You’ve reached the end of the line, and now you have a tray full of glossy, minty, melt-in-your-mouth **Festive Chocolate Fudge**! I honestly hope you loved how easy this recipe was. It always brings such a smile to my face knowing I’m sending something reliable out into the world for your holiday tables.
I really want to see what you do with this! Did you use a tiny bit of cocoa powder in half the batch to make it a chocolate swirl? Did you go wild with extra candy cane crumbles? Tag me on Instagram or Facebook! If you take a second to leave a quick rating below, it also tells me that this recipe works wonderfully in your kitchen, too. I love hearing from you all, so please share your successes!
If you’re curious about how I started Kings Cook and why I’m so passionate about making everyone feel like royalty in their own cooking space, you can read all about my journey on my About Page. Now go enjoy that perfectly cool, minty fudge!
PrintEasy White Chocolate Peppermint Fudge

Make creamy, melt-in-your-mouth peppermint fudge using simple ingredients. This no-bake recipe is perfect for holiday gifting or festive dessert trays.
- Prep Time: 10 min
- Cook Time: 5 min
- Total Time: 3 hours 15 min
- Yield: 36 small squares 1x
- Category: Dessert
- Method: No-Bake
- Cuisine: American
- Diet: Vegetarian
Ingredients
- 1 (14 ounce) can sweetened condensed milk
- 2 cups white chocolate chips
- 1 teaspoon peppermint extract
- 1/2 teaspoon vanilla extract
- 1 cup crushed candy canes or peppermint candies
Instructions
- Line an 8×8 inch baking pan with parchment paper, leaving an overhang on the sides for easy removal. Lightly grease the paper.
- In a medium, microwave-safe bowl, combine the white chocolate chips and sweetened condensed milk.
- Microwave in 30-second intervals, stirring well after each interval, until the mixture is completely smooth and melted. This usually takes 1 to 2 minutes total. Do not overheat.
- Stir in the peppermint extract and vanilla extract until fully combined.
- Gently fold in about 3/4 cup of the crushed candy canes, reserving the rest for the topping.
- Pour the fudge mixture into the prepared pan and spread it evenly.
- Sprinkle the remaining 1/4 cup of crushed candy canes over the top of the fudge. Gently press them into the surface.
- Refrigerate the fudge for at least 3 hours, or until firm enough to slice.
- Lift the fudge out of the pan using the parchment paper overhang. Cut into small squares before serving or packaging.
Notes
- For a swirl effect, divide the melted fudge base in half. Stir peppermint extract into one half. Layer spoonfuls of both mixtures into the pan and gently swirl with a knife before topping with candy canes.
- If you prefer a stovetop method, melt the chocolate and condensed milk together in a double boiler over medium-low heat, stirring constantly until smooth.
- Store the finished fudge in an airtight container in the refrigerator for up to two weeks.
Nutrition
- Serving Size: 1 square
- Calories: 130
- Sugar: 18g
- Sodium: 35mg
- Fat: 6g
- Saturated Fat: 4g
- Unsaturated Fat: 2g
- Trans Fat: 0g
- Carbohydrates: 19g
- Fiber: 0g
- Protein: 2g
- Cholesterol: 10mg