
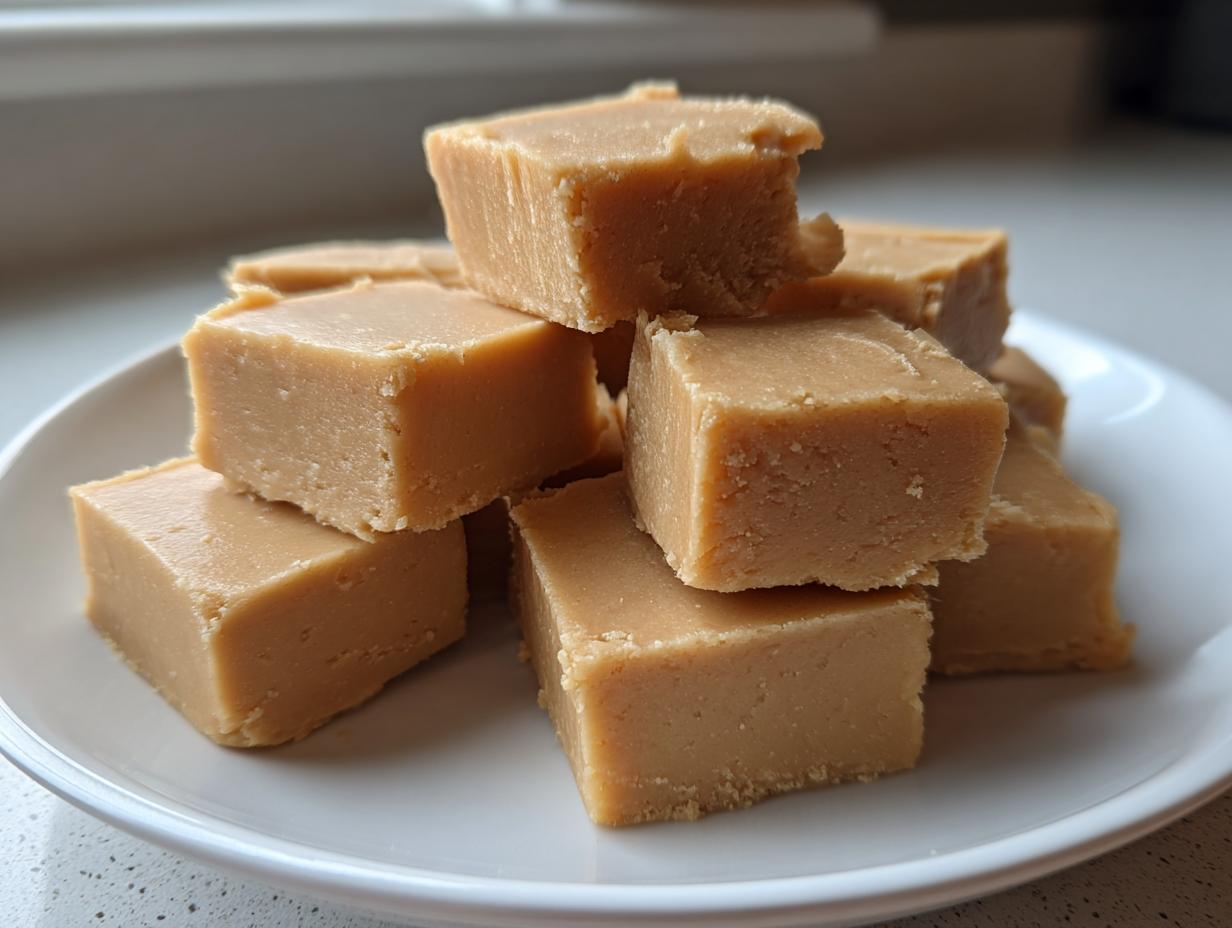
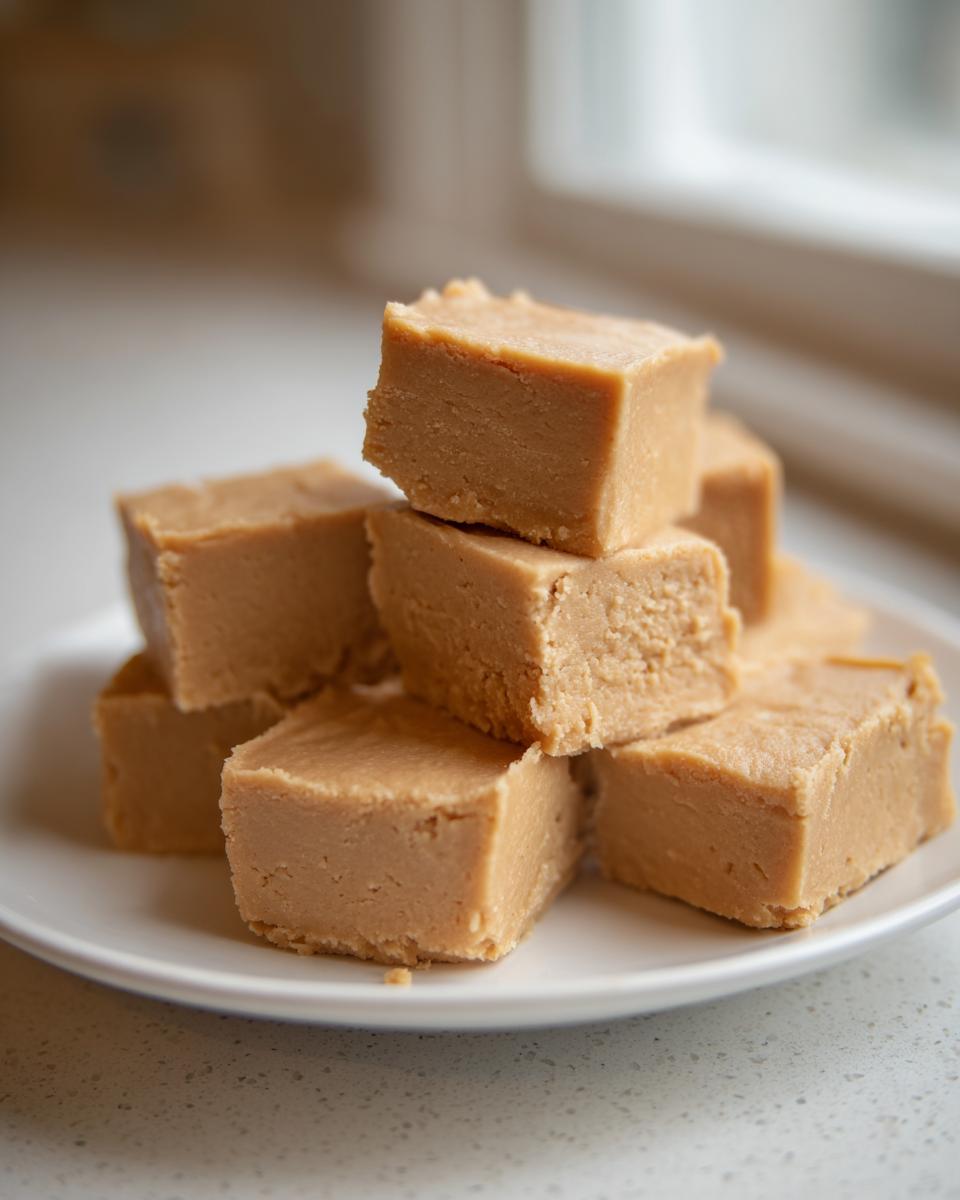
Oh, goodness, there are few things more satisfying than that first bite of perfectly made, melt-in-your-mouth candy, right? If you’re anything like me, sometimes you just need that classic, comforting taste of true peanut butter goodness without spending hours over a hot stove. That’s why I’m sharing my recipe for the best peanut butter fudge ever. This isn’t one of those grainy, crumbly versions you sometimes get; this is irresistibly creamy stuff, and the best part? It’s an incredibly easy fudge recipe that uses just a handful of ingredients.
When I bring food photos to this blog, I want you to trust that it will work for you. Every single step in this creamy peanut butter fudge recipe has been rigorously tested right here in my kitchen to ensure you get that dreamy texture people talk about—no guesswork needed! If you’re looking for a no bake peanut butter dessert that truly sings, get ready, because this is it.
We keep things simple here at Kings Cook, focusing on flavors that remind us of home. You can find some of my other great sweets in my best dessert recipes collection, but trust me, you’ll want to save this one immediately!
- Why This Irresistibly Creamy Peanut Butter Fudge is Your New Favorite
- Gathering Ingredients for the Best Peanut Butter Fudge Ever
- Microwave Fudge Tutorial: Making Quick Fudge Idea Peanut Butter Fudge
- Tips for Success When Making Old Fashioned Peanut Butter Candy
- Storage & Reheating Instructions for Your Decadent Peanut Butter Dessert
- Frequently Asked Questions About Creamy Peanut Butter Fudge
- Estimated Nutritional Data for Peanut Butter Fudge
- Share Your Homemade Candy Recipes Creation
Why This Irresistibly Creamy Peanut Butter Fudge is Your New Favorite
I know, I know. There are a million fudge recipes out there, but I promise you, ours hits differently. This isn’t just quick candy; it’s a genuine, velvety indulgence made accessible for your busy weeknights. If you crave that classic flavor without the fuss or worry of overheating sugar, you’ve found your winner.
- It’s unbelievably fast! Since this is a true no bake peanut butter dessert, your active time is under 15 minutes.
- You get that signature, dense yet soft texture that just melts the second it hits your tongue.
- It’s perfect for gifting! You can easily make two or three batches at once when the holidays roll around.
- It truly lives up to its name as an easy fudge recipe—seriously, if you can stir, you can make this!
Achieving That Dreamy Texture
Traditional cooked fudge is tricky because you are managing exact temperatures. If you boil it too long, it turns grainy; not long enough, and it stays sticky goo. What we skip here is that entire cooking process! By microwaving the milk and peanut butter just enough to blend, we create a base that sets up smoothly when the powdered sugar is incorporated, guaranteeing that dreamy, uniform texture every single time. Just make sure your peanut butter isn’t one of those natural kinds that separates—we need the emulsified stuff for this magic to work!
Perfect for Holiday Fudge Gifts and Parties
I always keep the ingredients tucked away because you never know when you’ll need a last-minute gift. This fudge cuts beautifully into perfect little squares, making it ideal for neighbor plates or tucking into cute cellophane bags for teachers. It holds up so well, too! It makes a wonderful simple dessert for parties because you can prepare it the day before, and it just sits on the counter looking gorgeous until people start diving in.
Gathering Ingredients for the Best Peanut Butter Fudge Ever
This is where we really shine, friends. When I call this a nearly instant treat, I mean it. A lot of recipes out there push a true 3 ingredient fudge recipe, but honestly, adding just a little vanilla and the necessary butter for the pan makes this taste so much more complete—like something straight out of a classic candy shop. We focus on quality here so you don’t have to worry about failures later.
The main cast of characters is simple: sweetened condensed milk, peanut butter, and powdered sugar. That’s it for the body of the fudge! Before you start, take a quick look at my recipe for peanut butter cookies; using quality peanut butter in that recipe taught me exactly what works best in candy, too.
Ingredient Notes and Substitutions for Peanut Butter Fudge
Let’s talk details because details make the difference between good and legendary fudge. First, the peanut butter: Please, please use the standard, creamy variety, like Jif or Skippy. You know, the kind that doesn’t separate and needs stirring? Natural peanut butter often contains oils that change the setting structure, and we want this peanut butter fudge to be perfectly smooth, not oily.
Second, that powdered sugar simply must be sifted. If you toss in those little clumps, your fudge will have pockets of sugary grit, and we are aiming for that melt in your mouth treat experience! The sweetened condensed milk is our binder here—it provides the sugar structure without any cooking required, which is the real secret sauce for this fudge with sweetened condensed milk recipe.
And finally, don’t skip the melted butter for greasing! That little bit seals the deal for easy lifting later.
Microwave Fudge Tutorial: Making Quick Fudge Idea Peanut Butter Fudge
If you were worried about using the stove, don’t be! We are diving deep into the magic of the microwave to create this amazing peanut butter fudge. This is truly the ultimate microwave fudge tutorial because it minimizes cleanup and speeds up the process dramatically. You need to start by grabbing your biggest microwave-safe bowl—we are mixing right in here!
The exciting part is the initial heating. You’ll combine the condensed milk and peanut butter and just zap it for 60 seconds. Stir it until it looks like smooth silk. If it’s still lumpy, give it another 15 to 30 seconds, but be careful not to overheat it, or you’ll start cooking things you didn’t mean to!
Step-by-Step Instructions for Perfect Peanut Butter Fudge
Getting the powder in correctly is essential for that creamy peanut butter fudge result. Here is my exact process for success:
- First, get your baking dish ready! I showed you how to grease it above, but seriously, use parchment paper with an overhang. Trust me, lifting fudge out is less scary that way.
- Combine the condensed milk and peanut butter in your bowl and microwave in short bursts until they are perfectly smooth and mixed—no lumps allowed.
- Stir in the vanilla now. It gives the candy a little depth.
- This next part needs patience: You will add that sifted powdered sugar gradually. Don’t dump it all in at once, or you’ll create a sticky mess that’s impossible to mix. Add about a third, stir until just combined, and repeat. Keep going until the whole thing is a thick and uniform gorgeous mass.
- Press it firmly into your prepared pan. Use a spatula or even a piece of wax paper on your hand to push it right into the corners.
- Now, the hard part that tests your patience with this quick fudge idea: chilling! It has to go into the fridge for a minimum of two hours. You can rush it a little, but if you cut it before those two hours, it will crumble, and that ruins the ‘melt-in-your-mouth’ factor.
Tips for Success When Making Old Fashioned Peanut Butter Candy
Achieving that perfect, old-fashioned texture in fudge means being gentle during the final mixing stages and being patient during the setting phase. This old fashioned peanut butter candy relies on the right balance of sugar and fat to stay soft but sliceable. I remember one time, I got so excited about cutting it that I pulled it out after only 45 minutes in the fridge—what a disaster!
What happened was that the bottom half was firm, but the top was practically pudding. It made for a messy situation when I tried to serve it at a neighbor’s potluck. I felt sheepish! So, I learned my lesson: Don’t mess with the chill time. It’s critical for this homemade candy recipe.
Here are my tried-and-true secrets to ensure your fudge is perfect, sliceable, and worthy of being called the best peanut butter fudge ever:
- Press Firmly, But Don’t Overwork: When you press the candy into the pan (Step 5), use gentle, even pressure. You want it dense enough to hold its shape, but if you press too aggressively, you can actually drive out air pockets that help keep it soft. Think ‘firm encouragement,’ not ‘punching down dough.’
- The Hot Knife Trick: If you plan on giving these away as holiday fudge gifts, presentation matters! Once the fudge is completely chilled, take a large, sharp knife and dip it into a glass of very hot water. Wipe the blade dry quickly with a paper towel, and then make your cut. Dipping and wiping between every full slice keeps the blade clean and gives you those beautifully sharp edges. It makes such a professional difference!
- Room Temperature Check: Even if you’ve chilled it until it’s firm, if your kitchen is really warm, the fudge can soften right back up while you’re cutting it. If this is happening, pop the whole pan back into the fridge for 20 minutes halfway through cutting. Keeping it cold keeps it firm!
If you’re looking for more simple treats that shine at gatherings, you might enjoy browsing my collection of easy dessert ideas—many of them require zero oven time!
Storage & Reheating Instructions for Your Decadent Peanut Butter Dessert
Okay, you made the prettiest, creamiest fudge ever—now, how do you keep it looking and tasting perfect until you can eat it all? Since this is a no-bake confection, storage is a little different than throwing a cake in a container. The good news is that this decadent peanut butter dessert is quite stable, but for maximum creaminess, we have a couple of options.
If you plan on sharing these Peanut Butter Melt in Your Mouth Treats quickly (say, within the next two or three days), you can absolutely leave them on the counter. Just be sure they are packed tightly into an airtight container. If you use a container that’s too large, the fudge can dry out around the edges, and we certainly don’t want that!
However, if you’re making this ahead of time for a big party or if your kitchen runs a little warm—which, mine does in the summer—the refrigerator is your best friend. Chilling isn’t just about making it firm enough to cut; it really helps maintain that wonderfully dense texture. In the fridge, sealed up tight, this fudge lasts for nearly two weeks. I’ve tested it, and it’s still glorious!
Do I ever need to reheat it? Nope! Absolutely not. Fudge is best served slightly cool or at a cool room temperature. If you pull it out of the fridge, just let it sit on the counter for about 15 minutes before you slice it or serve it. That little bit of time softens it just enough to bring out that amazing peanut butter flavor without letting it get sloppy. It’s truly a low-maintenance dream dessert!
Frequently Asked Questions About Creamy Peanut Butter Fudge
I always get questions when I post this super simple recipe because people can’t believe how delicious a quick fudge idea can turn out! Seriously, this recipe for creamy peanut butter fudge is foolproof, but let’s tackle the few things folks often wonder about before they dive in.
Can I use crunchy peanut butter in this peanut butter fudge recipe?
Oh, you absolutely can try, but brace yourself for a texture change! Remember, we are aiming for the smooth, silky, melt-in-your-mouth experience. Using crunchy peanut butter means you’ll have little peanut fragments throughout the whole batch. If you love texture and want to make it a bit more rustic, go for it! But if you’re aiming for that unbelievably smooth result that screams easy fudge recipe, stick to the creamy version, like I always do. It just blends in seamlessly that way.
What is the best way to cut the fudge cleanly?
This is one of my biggest secrets for making this a perfect homemade candy recipe, especially if you are doing holiday fudge gifts! The key here is patience and temperature control. First, make sure it’s totally set—I mean rock-solid from the fridge, which takes a full two hours minimum. Then, as I mentioned earlier, grab a very sharp, large knife and dip it into hot water. Wipe it bone-dry, make one clean slice, then immediately dip and wipe again before the next cut. This keeps the blade hot and prevents the fudgy texture from dragging or smearing the sides. A little effort on the cutting makes them look like they came from a professional shop!
We have so many great sweet ideas over on the easy fudge recipe page, but this one remains the king of speed and creaminess! If you master this, you’re halfway to becoming a candy-making wizard at home.
Estimated Nutritional Data for Peanut Butter Fudge
I always like to include a quick look at the numbers, just so you know what you’re getting into with this delightfully rich and decadent peanut butter dessert! When I bake something this easy and delicious, I know people are curious. Keep in mind that these numbers are just my best estimates based on the ingredients you use, especially the brand of peanut butter.
This recipe is designed to yield about 36 small squares. If you cut them bigger (and I don’t blame you if you do!), the per-square stats will obviously change. These values are calculated assuming you get those 36 perfect pieces that came out of the chilling process beautifully.
Here’s a snapshot:
- Calories: Approximately 165 per square
- Total Fat: About 9 grams (Remember, some of that is the good fat from the peanuts!)
- Carbohydrates: Around 20 grams
- Sugar: 19 grams (It is fudge, after all!)
- Protein: About 4 grams
- Sodium: Roughly 75 mg
- Saturated Fat: About 3 grams
Basically, it’s a sweet treat that delivers a satisfying punch of energy and peanut butter goodness in a tiny package! This simple dessert for parties is going to disappear fast, so don’t stress too much over the exact figures—just enjoy the fact you made this incredible creamy peanut butter fudge with almost zero effort!
Share Your Homemade Candy Recipes Creation
Now that you’ve made this unbelievably simple and irresistibly creamy peanut butter fudge, I absolutely want to hear all about it! That’s the best part of my job here at Kings Cook—seeing you conquer a recipe and feel that boost of confidence in the kitchen. I hope this proved that making beautiful, decadent sweets doesn’t have to be hard or time-consuming.
Did you manage to keep your hands off it long enough for it to chill properly? Did it disappear instantly at your party? Please take a second and leave a comment below telling me how your homemade candy recipes attempt went! A simple rating, a quick note about substituting ingredients, or even just a “Wow, Kate, this worked!” keeps me motivated to keep testing and sharing the very best recipes.
And if you snapped any photos—because this fudge looks gorgeous cut into those perfect little squares—tag me online! Seeing your creations makes me so proud. Remember, every time you successfully make something delicious like this, you are proving that anyone can master their kitchen. If you want even more fail-proof sweets, check out my full collection of homemade candy recipes for your next kitchen conquest. Happy cooking, my friends!
PrintIrresistibly Creamy Easy Peanut Butter Fudge
This recipe delivers rich, creamy peanut butter fudge that melts in your mouth. It uses simple ingredients for a quick, no-bake treat perfect for gifting or parties.
- Prep Time: 15 min
- Cook Time: 2 min
- Total Time: 2 hours 17 min
- Yield: 36 small squares 1x
- Category: Dessert
- Method: No Bake
- Cuisine: American
- Diet: Vegetarian
Ingredients
- 1 (14 ounce) can sweetened condensed milk
- 1 cup creamy peanut butter
- 3 cups powdered sugar, sifted
- 1 teaspoon vanilla extract
- 1/4 cup unsalted butter, melted (for greasing pan)
Instructions
- Lightly grease an 8×8 inch baking pan with melted butter or line it with parchment paper, leaving an overhang for easy removal. Brush the parchment paper lightly with more melted butter.
- In a large microwave-safe bowl, combine the sweetened condensed milk and peanut butter. Microwave on high for 60 seconds.
- Stir the milk and peanut butter mixture until completely smooth. If necessary, microwave for another 15-30 seconds until fully combined and smooth.
- Stir in the vanilla extract.
- Gradually add the sifted powdered sugar, mixing well after each addition until the mixture is thick and uniform. You may need to switch to a sturdy spoon or use your hands toward the end.
- Press the fudge mixture evenly into the prepared 8×8 inch pan. Use a spatula or wax paper to press it down firmly.
- Chill the fudge in the refrigerator for at least 2 hours, or until firm enough to cut.
- Once firm, lift the fudge out of the pan using the parchment overhang. Cut into small squares.
Notes
- For an extra rich flavor, use high-quality peanut butter.
- If you prefer a slightly firmer fudge, add 1/2 cup of melted chocolate chips to the mixture before adding the powdered sugar.
- This fudge stores well in an airtight container at room temperature for up to one week, or refrigerated for up to two weeks.
Nutrition
- Serving Size: 1 square
- Calories: 165
- Sugar: 19
- Sodium: 75
- Fat: 9
- Saturated Fat: 3
- Unsaturated Fat: 6
- Trans Fat: 0
- Carbohydrates: 20
- Fiber: 1
- Protein: 4
- Cholesterol: 5