
Oh, I know that feeling! You see those beautifully airy, butter-soaked English muffins in a bakery case and think, “There’s just no way I can make something that good at home.” Well, friend, I’m here to tell you that thought is completely wrong! I spent weeks testing and re-testing, because my promise here at Kings Cook is reliability. These homemade english muffins are the absolute best because they use a super simple, no-knead method, and yet they deliver on that classic, perfect ‘nooks and crannies’ texture every single time. Trust me, once you taste these fresh from your own skillet, you’ll never look back at a plastic bag of store-bought ones again. They are truly my pinnacle of from scratch baking!
If you’re looking for more fabulous morning treats, check out my go-to spots for breakfast and brunch recipes while you wait for this dough to rise!
- Why You Will Love These Homemade English Muffins
- Essential Ingredients for Perfect Homemade English Muffins
- Step-by-Step Instructions: How to Make Homemade English Muffins
- Tips for Achieving the Best Homemade English Muffins Texture
- Serving Suggestions for Your Homemade English Muffins
- Storage and Reheating Instructions for Homemade English Muffins
- Frequently Asked Questions About Homemade English Muffins
- Estimated Nutritional Data for Homemade English Muffins
- Share Your Homemade English Muffins Creations
Why You Will Love These Homemade English Muffins
I promise you, these aren’t just good; they are genuinely superior to anything you’ll find pre-packaged. Why did I spend so much time perfecting this English Muffin Recipe? Because you deserve this level of breakfast glory!
- They are shockingly easy! This is a true no knead bread technique, which means your hands get much less work than you expect.
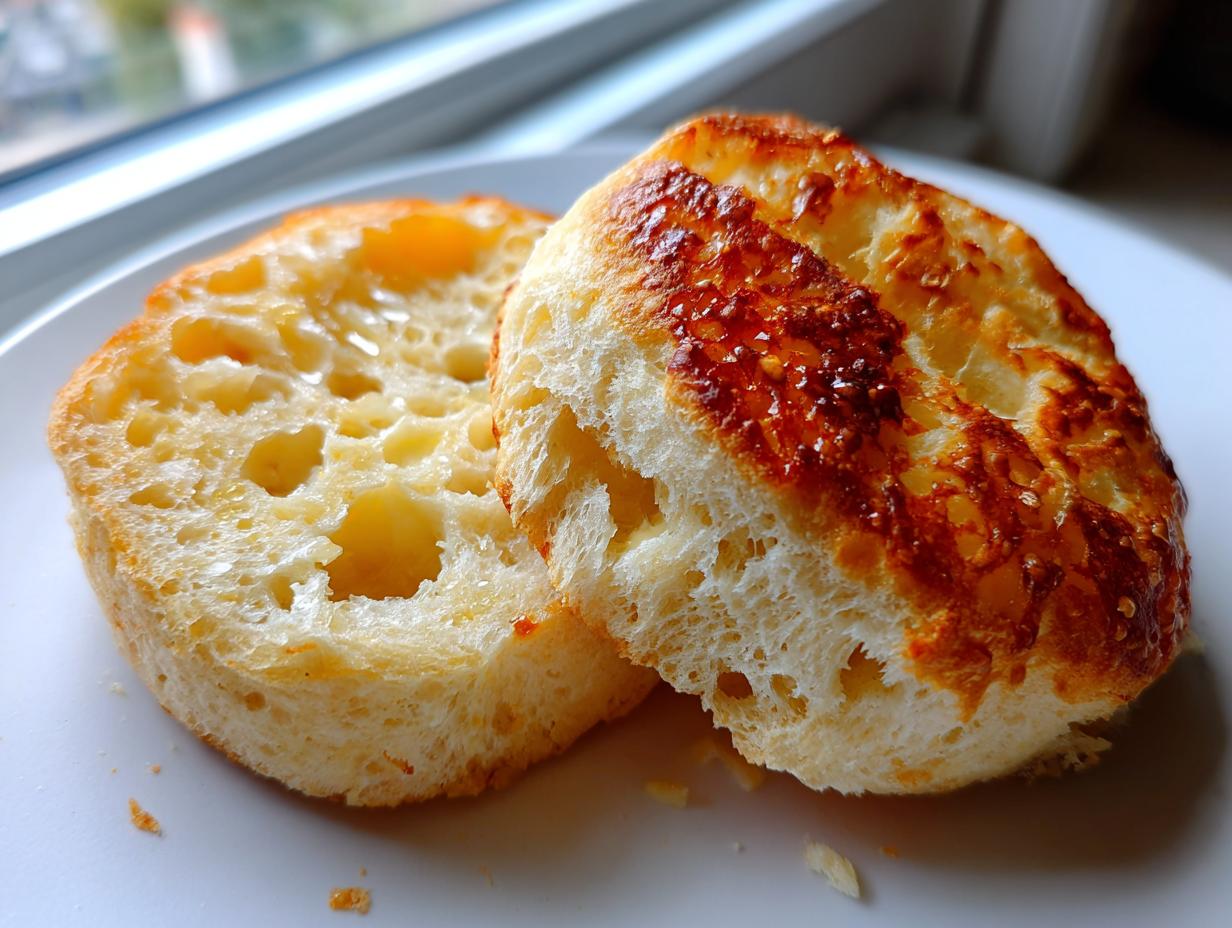
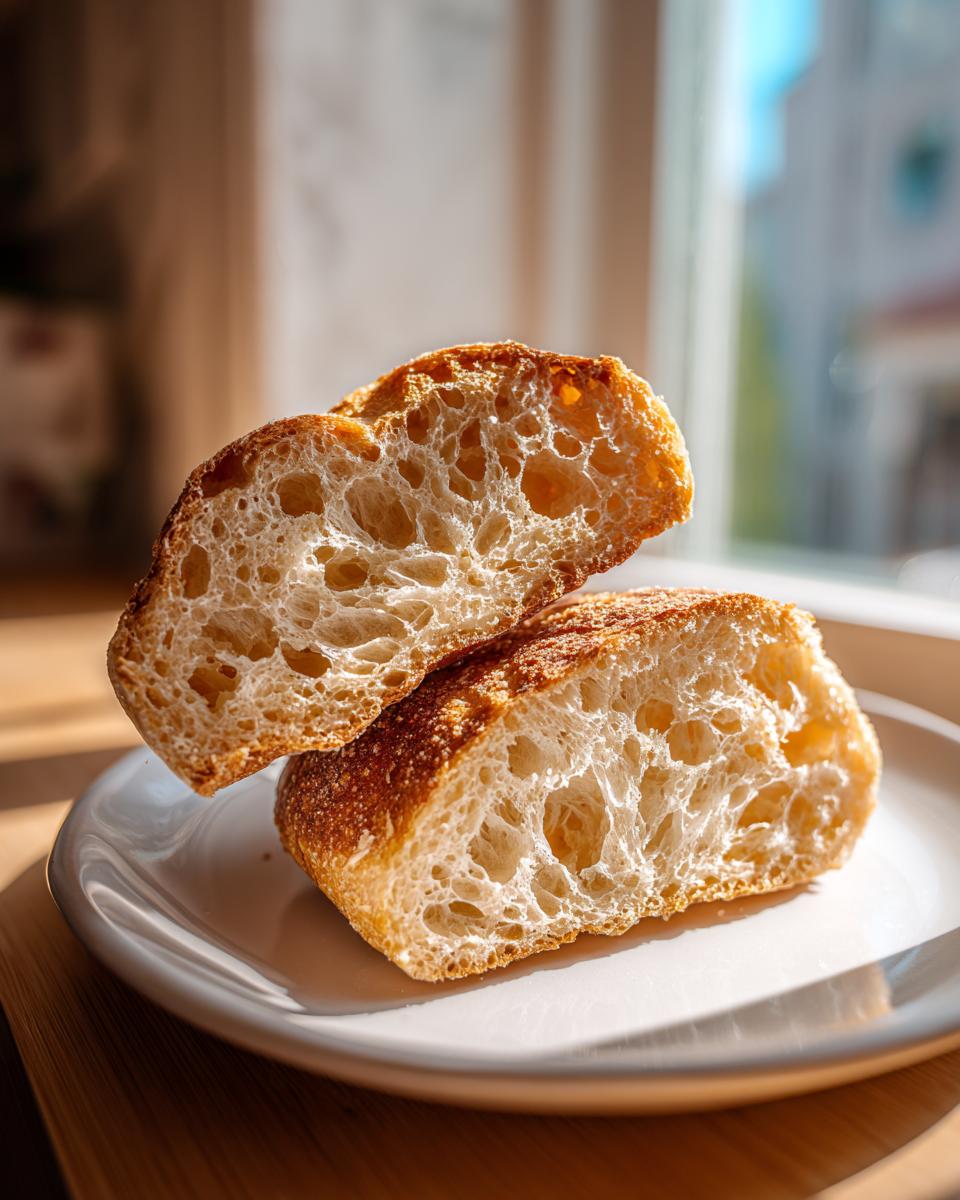
- The texture is unbelievable—soft, fluffy, and packed with those famous deep nooks ready to soak up melted butter or jam.
- You are making them from scratch baking, which just feels better, doesn’t it?
- They are miles better than anything you can buy! Say goodbye to flat, sad, flavorless store-bought versions.
- We use a simple skillet method, so you don’t need any fancy bread machinery or an oven for the main cooking phase.
- Perfect for weekend projects or even easier weeknight homemade breakfast ideas when you plan ahead slightly.
Essential Ingredients for Perfect Homemade English Muffins
Okay, let’s talk about what you need. I know you don’t want to run all over town for obscure ingredients, so I kept this list simple. Every item here is something you can grab during your regular grocery run! Part of my goal on Kings Cook is making from scratch baking feel accessible, not impossible, and these homemade english muffins certainly prove that point. You won’t need much to get started on making what I promise will be the best english muffins you’ve ever had.
Here is what you need right on hand:
- 3 cups All-Purpose Flour
- 1 tablespoon Granulated Sugar
- 1 teaspoon Salt
- 1 packet Active Dry Yeast
- 1 1/2 cups Warm Water (about 105-115°F)
- 2 tablespoons Unsalted Butter, melted, plus more for griddling
- Cornmeal or semolina, for dusting
Ingredient Notes and Substitutions for Homemade English Muffins
Just a few quick secrets here about these components. The temperature of your water is super important for success with this recipe. We need that yeast happy, so please aim for between 105°F and 115°F. Too hot and you’ll kill it; too cold and it just won’t wake up!
Also, don’t skip the cornmeal or semolina for dusting the sheets. This isn’t just for looks; it’s what gives us that wonderful, slightly gritty base texture that distinguishes these from a regular slice of bread. And since we are relying on this to be a quick result, make sure you’re using active dry yeast successfully so we can stick to that quick rise time required for this excellent no knead bread style dough.
Step-by-Step Instructions: How to Make Homemade English Muffins
Finally, we get to the fun part! This is where we take that simple mixture and turn it into gorgeous, bakery-quality homemade english muffins. Because this is a no knead bread method, we rely more on time and the right mixing technique than on brute force. If you follow these instructions exactly, especially regarding the heat level later on, you will be rewarded with those beautiful internal tunnels we crave. I’ve broken this down into the key phases of step by step baking so nothing gets missed.
Mixing the Shaggy Dough for Your Homemade English Muffins
First things first, grab your biggest bowl! In that bowl, just whisk together your flour, sugar, salt, and that active dry yeast. It’s important that the dry ingredients are well distributed before we add the liquid. Now, slowly pour in your warm water—remember that 105°F zone?—and the tiny drizzle of melted butter. Grab a sturdy wooden spoon—no fancy mixer needed here! Mix it only until everything is just barely combined. Seriously, stop stirring when you still see a few stray flour streaks. If you see a smooth ball forming, you’ve gone too far! This dough is supposed to be shaggy and a bit sticky. That’s the secret to keeping things light for those fluffy english muffins.
Proofing and Shaping Your Classic English Muffins
Cover that bowl tightly with some plastic wrap so it doesn’t dry out, and find a cozy, warm spot for it to hang out. It needs about an hour to an hour and a half to double in size. Don’t touch it while it’s resting! Once it’s puffy and happy, you need to transfer it onto a surface dusted lightly with flour. Very gently, pat the dough out until it’s about ¾ of an inch thick. We must treat this dough gently because we don’t want to knock out all those air bubbles we worked hard to create during the rise. Use a 3-inch round cutter to stamp out your shapes. Gather those scraps, pat them down just once, and cut the last few. Place them a little far apart on a rimless baking sheet that you’ve generously dusted with cornmeal—this is critical for texture! If you’re waiting for these to rise, maybe check out my easy no-bake oatmeal cookies!
The Secret to Nooks and Crannies Texture: Skillet Cooking Homemade English Muffins
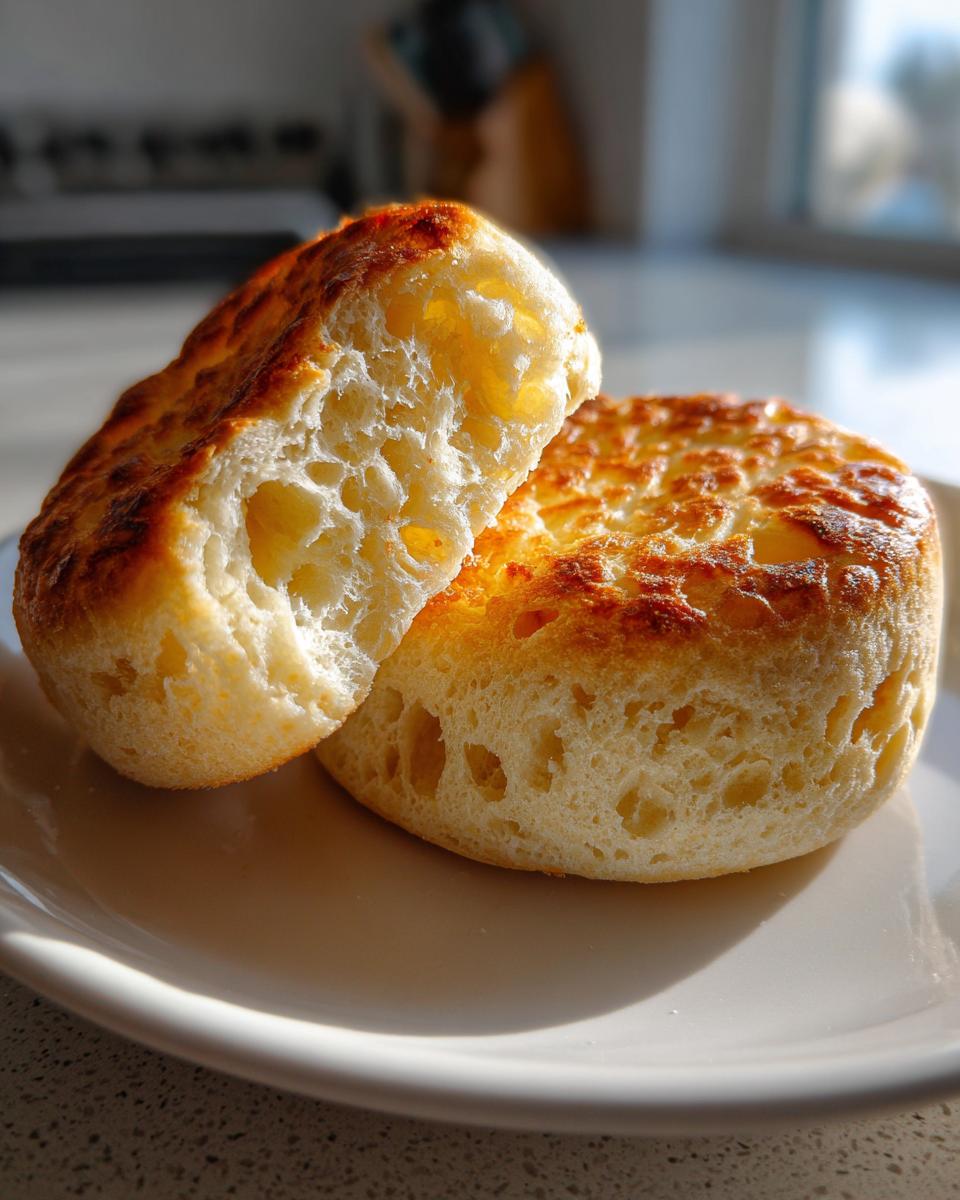
This step is absolutely where the magic happens! If you want those famous nooks and crannies texture, low and slow is the mantra. Heat up your cast iron skillet or heavy griddle over medium-low heat. Don’t let it get ripping hot! Brush it lightly with some melted butter. Place your rested muffins onto the buttered surface. You’ll cook them for a good 8 to 12 minutes per side. Look for a soft, light golden brown color. If they are turning dark brown quickly, your heat is too high, and the inside won’t cook properly. We need that low heat to let the interior structure set up perfectly. Head over to this guide for visuals if you want an extra look at how the color should be! These are the best skillet baked goods you’ll ever make.
Tips for Achieving the Best Homemade English Muffins Texture
You’ve cooked them perfectly, they look golden, and now the biggest temptation hits: slicing them open immediately! Please, please listen to me on this, because this tiny bit of patience is what separates a good muffin from an absolutely legendary one. The key to maximizing those stunning nooks and crannies texture doesn’t stop when they leave the skillet; it happens as they cool.
First, let them cool completely on a wire rack. If you cut into them while they are warm or hot, they will compress! You’ll squeeze all that beautiful airy structure right out of the center. Wait until they are totally cool—it’s tough, I know, especially when they smell this good.
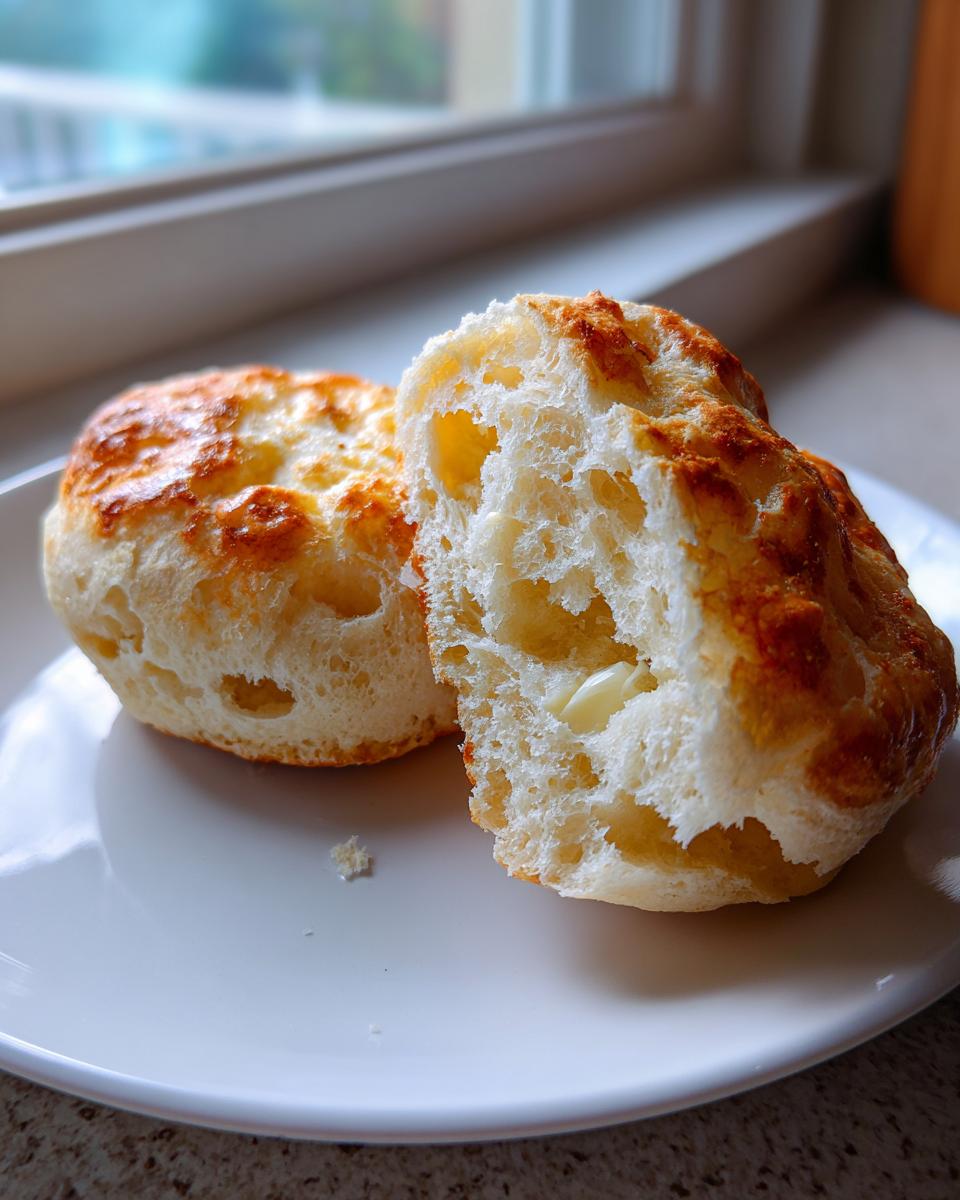
Second, this is non-negotiable for the true English muffin experience: You *must* split these open with a fork, not a knife. A knife slices straight through the dough’s structure, closing off all those little air pockets we worked so hard for! When you use a fork, you gently pierce around the edges and pull apart. This action leaves those signature, jagged, buttery tunnels inside. It just makes the final toasting process so much better, ensuring every little nook holds onto melting butter like a sponge. If you follow these two simple rules—cool completely, then use a fork—you are guaranteed the best homemade english muffins texture possible!
Serving Suggestions for Your Homemade English Muffins
Now that you have these incredible, fluffy breakfast items, what do you do? Toast them immediately, of course! There is nothing better than splitting a warm, freshly made homemade english muffin and watching butter instantly melt into the deep pockets.
Butter and jam or honey are always my first choice—it really lets that fresh bread flavor shine. But don’t just stop there! These are perfect for building epic breakfast sandwiches because they hold up so well. Try them with fried eggs and sharp cheddar cheese. They are sturdy enough to handle runny yolks without falling apart, unlike those flimsy store-bought ones.

For a weekend spread, you can treat them almost like you would French toast! If you’re tired of the same old routine, you can definitely check out my recipes for French toast or my pancakes for other great ways to upgrade your brunch game, but I have a feeling these muffins will steal the show!
Storage and Reheating Instructions for Homemade English Muffins
Since these are absolutely the real deal—pure from scratch baking with no weird preservatives—we need to treat them right when we store them. Don’t expect them to last forever on the counter like the ones from the grocery store, but honestly, they probably won’t last that long anyway! They are just too tempting.
If you plan on eating them all within two days, you can keep them stored loosely covered at room temperature. I usually put mine in a paper bag and then place them in a bread box. Keeping them sealed in plastic traps moisture, and that makes them go soft and mushy, which ruins that perfect exterior crust we worked so hard to achieve!
For longer storage, freezing is your best friend. Once they are completely cool—and I mean totally cool, no warmth left whatsoever—split them open first! Splitting them before you freeze them is a game-changer. Place waxed paper between each half so they don’t stick together. Then bag them up airtight and straight into the freezer they go. They keep beautifully like this for up to three months.
How to Reheat to Restore Freshness
The best part about these homemade english muffins is that reheating brings them right back to that perfect, toaster-ready state. Forget the microwave; that’s just going to make them tough!
If they were refrigerated, give them a quick pass through the toaster just like you would a store-bought one. If they are frozen and split, toss them directly into the toaster slots. They might take an extra minute or two, but you’ll get that slightly crisp edge and a steaming hot interior that’s ready for melting butter. If you want to warm up a whole batch from frozen without toasting individually, you can lay them out on a sheet pan and warm them in a low oven (about 300°F) for about 8 minutes. Make sure they are split open so they warm evenly. For more great baking preservation tips, check out this resource, though I suspect they won’t last long enough to need freezing! They disappear fast when they are this good.
Frequently Asked Questions About Homemade English Muffins
I know you might have a few little lingering doubts now that you see how simple this recipe is! That’s totally normal when trying a new bread. I’ve gathered the questions folks ask me most often about getting these homemade english muffins absolutely perfect. Rest assured, we tackle the texture, the timing, and the difficulty level right here!
Can I make these Homemade English Muffins without a skillet?
You certainly can bake them, but honestly, you sacrifice the best part—the *crannies*! The skillet cooking method over low heat is what helps create those beautiful, slightly golden-brown outer surfaces and really develops the interior tunnels. If you must, you can bake them on a baking sheet in a 375°F oven for about 15 to 20 minutes, but the texture won’t be quite as authentic. For the real bakery experience, stick to the griddle!
How long does the dough for homemade english muffins need to rise?
Since this is such an easy no knead bread dough, we let time do the heavy lifting! After you mix the shaggy dough, just cover it up and let it sit in a warm spot for anywhere between one hour to an hour and a half. I always tell people to stop watching the clock and start watching the dough. You’re looking for it to look visibly puffed up and doubled in size. If your kitchen is cold, it might take that extra 30 minutes, so don’t rush it!
What is the secret to getting the best Nooks and Crannies Texture in my homemade english muffins?
This is the million-dollar question! There are honestly two secrets working together. Secret number one is cooking them low and slow on the griddle—medium-low heat only! If the heat is too high, the outside burns before the inside structure—those air bubbles—has time to set up. Secret number two, which I cannot stress enough, is splitting them open with a fork after they cool completely. Never use a knife! The fork tears the crumb texture just right, leaving everything open and ready to receive butter. That combination is how you guarantee amazing homemade breakfast ideas!
Estimated Nutritional Data for Homemade English Muffins
Okay, I know for some of us, tracking nutrition is important, even when we’re making treats from scratch! Since these homemade english muffins are made with simple, wholesome ingredients, you actually have great control over what goes in them. I ran the numbers based on the recipe provided, but remember, this is just an estimate, because sometimes I use a little more butter on the griddle than the recipe calls for, or maybe your brand of flour is slightly different!
I always want you to feel confident about the ingredients you are using in your kitchen. These numbers are based on the recipe yielding 10 muffins, so you can see exactly what one serving looks like.
- Serving Size: 1 muffin
- Calories: 180
- Sugar: 2g
- Sodium: 250mg
- Fat: 3g
- Saturated Fat: 2g
- Carbohydrates: 34g
- Protein: 6g
Please take these figures as a great starting point for your own tracking. The biggest variable you have is that butter we brush on the skillet—if you go heavy, you’ll certainly bump up the fat content, but trust me, those fluffy english muffins are worth every little bit!
Share Your Homemade English Muffins Creations
And that’s it! You did it! You’ve moved past staring at internet pictures and actually created beautiful, authentic, scratch-made homemade english muffins. I sincerely hope you loved that process as much as I do. Now I need to hear all about them! Did you manage to keep the heat low enough to get those perfect pockets? Did you manage to remember to split them with a fork?
Please, please leave a rating for this recipe right down in the comments. That’s how I know my testing really paid off for folks like you! I absolutely adore seeing pictures of what you create in your kitchens. If you snap a photo of your perfectly golden, butter-soaked, fluffy english muffins, tag me! Seeing your success is genuinely the best part of running Kings Cook.
If you loved how straightforward this English Muffin Recipe was, and you want to feel that special sense of accomplishment every single day, have a peek at my About Page. I’m here to help you master your kitchen, one delicious recipe at a time. Happy toasting!
PrintEasy Homemade English Muffins with Classic Nooks and Crannies
Make superior English muffins from scratch using this simple, no-knead recipe. Achieve the signature fluffy texture and perfect crannies for toasting.
- Prep Time: 20 min
- Cook Time: 25 min
- Total Time: 1 hour 55 min
- Yield: 10 servings 1x
- Category: Breakfast
- Method: Skillet Cooking
- Cuisine: American
- Diet: Vegetarian
Ingredients
- 3 cups All-Purpose Flour
- 1 tablespoon Granulated Sugar
- 1 teaspoon Salt
- 1 packet Active Dry Yeast
- 1 1/2 cups Warm Water (about 105-115°F)
- 2 tablespoons Unsalted Butter, melted, plus more for griddling
- Cornmeal or semolina, for dusting
Instructions
- In a large bowl, whisk together the flour, sugar, salt, and yeast.
- Pour in the warm water and melted butter. Mix with a wooden spoon until just combined into a shaggy dough. Do not overmix; this is a no-knead recipe.
- Cover the bowl with plastic wrap and let the dough rise in a warm place for 1 to 1.5 hours, or until doubled in size.
- Lightly dust a clean surface with flour. Gently turn the dough out onto the surface. Pat the dough into a rectangle about 3/4 inch thick.
- Use a 3-inch round cutter to cut out the muffins. Gather the scraps, gently re-pat, and cut out remaining muffins.
- Generously dust a baking sheet or rimless cookie sheet with cornmeal or semolina. Place the cut muffins on the prepared sheet, leaving space between them.
- Cover the muffins loosely and let them rest for 30 minutes.
- Heat a large, heavy skillet or griddle over medium-low heat. Lightly brush the cooking surface with melted butter.
- Cook the English muffins for 8 to 12 minutes per side. You are looking for a golden brown color, not dark brown. Keep the heat low to cook through and develop the nooks and crannies.
- Remove the muffins from the skillet and let them cool completely on a wire rack before splitting them open with a fork.
Notes
- For the best ‘nooks and crannies’ texture, cook the muffins slowly over medium-low heat. High heat will brown the outside before the inside is fully cooked.
- Split the muffins using a fork rather than a knife to preserve the internal structure and maximize the nooks.
- If you do not have a round cutter, you can use a drinking glass with a rim dipped in flour.
Nutrition
- Serving Size: 1 muffin
- Calories: 180
- Sugar: 2
- Sodium: 250
- Fat: 3
- Saturated Fat: 2
- Unsaturated Fat: 1
- Trans Fat: 0
- Carbohydrates: 34
- Fiber: 2
- Protein: 6
- Cholesterol: 5