

If your holiday calendar is packed, I totally get it! Sometimes you need a holiday treat that looks like you spent hours on it but actually took maybe 30 minutes of actual hands-on time. That’s kind of my whole mission here at Kings Cook—making sure you don’t feel stressed in the kitchen, especially when the season gets busy. That’s why I’m thrilled to share these absolutely adorable, no-bake grinch oreo balls. They are tiny, bright green, and everyone goes wild for them at parties. Who knew crushing some cookies and adding cream cheese could result in something so perfectly festive? Trust me, making these simple, fun treats will make you feel like a holiday baking royalty without ever turning on the oven!
- Why You Need These Grinch Oreo Balls for Your Holiday Table
- Gathering Ingredients for Your Grinch Oreo Balls
- Step-by-Step Instructions for Festive Oreo Truffles
- Tips for Perfect Green Christmas Sweets
- Presentation and Serving: Bite Sized Christmas Party Food
- Storage and Gifting Your Grinch Oreo Balls Recipe
- Frequently Asked Questions About Grinch Oreo Balls
- Estimated Nutritional Information for Candy Coated Oreo Balls
- Share Your Whimsical Dessert Ideas
Why You Need These Grinch Oreo Balls for Your Holiday Table
Every single year, my holiday dessert spread needs something quick, cute, and unbelievably crowd-pleasing. These truffles check every single box. Honestly, they are my secret weapon when I need to fill out a massive platter without adding another hour of baking time. If you’re looking for something that travels well and disappears instantly, stop scrolling—you’ve found it!

- They look festive without any real artistic talent required, which I absolutely love.
- They are rich, chocolatey, and the little green color just screams holiday fun.
- You can mix the base days ahead, which is a huge lifesaver when schedules get tight. If you need more savory additions for your spread, definitely check out my favorite appetizers and snacks ideas!
Perfect No Bake Holiday Treats
Since these are genuinely No Bake Holiday Treats, you get to completely skip the oven drama. That means no fighting for oven space when you’re trying to roast a big dinner, and no frantic cooling times. You just mix, roll, chill, and dip. It’s pure, stress-free holiday magic, ready to go whenever the party starts!
Whimsical and Kid Friendly Christmas Recipes
Let’s be real: the kids adore these! They are one of the most requested Kid Friendly Christmas Recipes we make. They get such an absolute kick out of seeing the bright green and finding that little red heart on top. We usually let the younger ones tackle the rolling part—it’s messy, but it keeps them busy and feeling involved in the fun, Grinch Themed Food preparation!
Gathering Ingredients for Your Grinch Oreo Balls
Okay, time for the fun part—getting the stuff! Since these are so simple—just four main things plus the hearts—you won’t need a specialized shopping trip. But let’s talk about quality, because even simple recipes suffer if your base ingredients aren’t up to snuff. We need those chocolate sandwich cookies, our trusty cream cheese, and the coating that makes them green. Don’t skimp on the coating; that’s where the magic color happens!
Ingredient Notes and Substitution Tips
When it comes to getting that bright, true Grinch green, you have to use the right coating. I highly recommend grabbing dedicated green candy coating wafers instead of trying to dye white chocolate chips. Liquid coloring can sometimes seize up the chocolate or make it too thick to dip properly. If you use wafers, you usually don’t need to add anything, but I always keep a teaspoon of coconut oil handy. It’s optional, but stirring it in melts the coating down just perfectly so your Grinch Oreo Balls aren’t too thick.
For the cookies, stick to standard chocolate sandwich cookies—the ones with the vanilla filling. You don’t need to worry about removing the filling; it’s the binder that helps hold this no-bake dough together when mixed with the cream cheese. Keeping it simple means less work for you!
Step-by-Step Instructions for Festive Oreo Truffles
Alright, now that we have our cute little mountains of ingredients ready, let’s get these Festive Oreo Truffles mixed up! Remember, since this is a no-bake situation, the textures need your attention more than the oven timer. We need everything blended perfectly so they hold their shape when they get dipped in that bright coating. It’s going to look a little bit like dirt at first, but please stick with me because the final result is worth it!
- First things first, toss those whole little chocolate cookies into your food processor. Pulse them, pulse them, pulse them until they are just fine, dusty crumbs. See? Easy start!
- Dump those crumbs into a mixing bowl. Now, grab that softened cream cheese and toss it right in there with them.
- Mix it up until it’s completely incorporated. It should turn into a thick, wonderful, rollable dough.
- Grab a tablespoon or even just use your clean hands, and roll the mixture into little balls, maybe about an inch wide. I usually get about 28 of them! Pop these onto a parchment-lined tray.
- Crucial step: Get these balls into the fridge for at least 30 minutes. They HAVE to be cold before we dip them, or they just melt right back into goo underneath that beautiful coating.
- While they chill, melt your green candy coating according to the package directions—I often add that drop of coconut oil here for smoothness.
- Once firm, dip each ball completely into the green coating. Use a fork and gently tap the fork against the side of the bowl—that’s how you shake off the excess so you don’t waste coating!
- Place the coated ball back on the parchment paper immediately. While it’s still wet, gently press one tiny red heart sprinkle right on top. That’s the Grinch’s heart!
- Let them set up until they feel completely dry. If you’re impatient like me, pop them into the fridge for 15 more minutes to speed things up. Then, you can admire your amazing Christmas dessert creations!
Making the Oreo Cream Cheese Base
When you are combining those cookie crumbs and the cream cheese, you need a good mix. If you don’t have a hand mixer, don’t panic! I’ve done this countless times using just a very sturdy wooden spoon. It takes a little more elbow grease, but the result is the same—a firm, chocolatey dough. If you find it too sticky to roll even after mixing, just pop the whole bowl into the freezer for about ten minutes before rolling. That little chill helps everything firm up nicely.
Chilling and Coating the Grinch Oreo Balls
Listen, the chilling step is non-negotiable if you want professional-looking results! If those centers are too soft when they hit that warm, melted coating, they will start to slump and slide right off the fork—what a mess! Once they are chilled, dipping goes so much smoother. Remember the tap! Tapping the fork quickly against the side of the bowl before you place the ball down on the parchment paper is the professional baker’s trick for getting a clean shell without a messy puddle of green chocolate around the bottom of your lovely ball.
Tips for Perfect Green Christmas Sweets
We all want our treats to look as good as they taste, right? Since these are meant to be stunningly festive, achieving that perfect, vibrant shell on these Green Christmas Sweets is key. The good news is that once you know a couple of little secrets about melting the coating, you won’t have any issues with cracks or clumping. I’ve learned a few things the hard way over the years, so let me save you the headache!
Achieving Smooth Candy Coating
The biggest mistake folks make when dipping anything is overheating the coating. Whether you’re using the microwave or a double boiler, you need patience. If microwaving, put those wafers (or chocolate) in for 30 seconds, stir well, then do 15-second bursts after that. Stop stirring the second it’s mostly melted—the residual heat will smooth out the rest! If you scorch it, it gets thick and burns fast, meaning you’ll end up with clumpy little volcanoes instead of smooth spheres. Nobody wants a volcano truffle!

The Grinch Heart Placement
This is the crucial final touch that turns a green ball into a Grinch ball! You must place that little red heart sprinkle immediately after you pull the ball out of the green coating. As soon as you set the ball back on the parchment, gently touch the tiny red heart right onto the top curve. It needs the wet coating to act like glue. If you wait even 30 seconds, the coating will start to set up, and the heart will just fall right off later. Keep a small bowl of those heart sprinkles right next to your dipping station for speed!
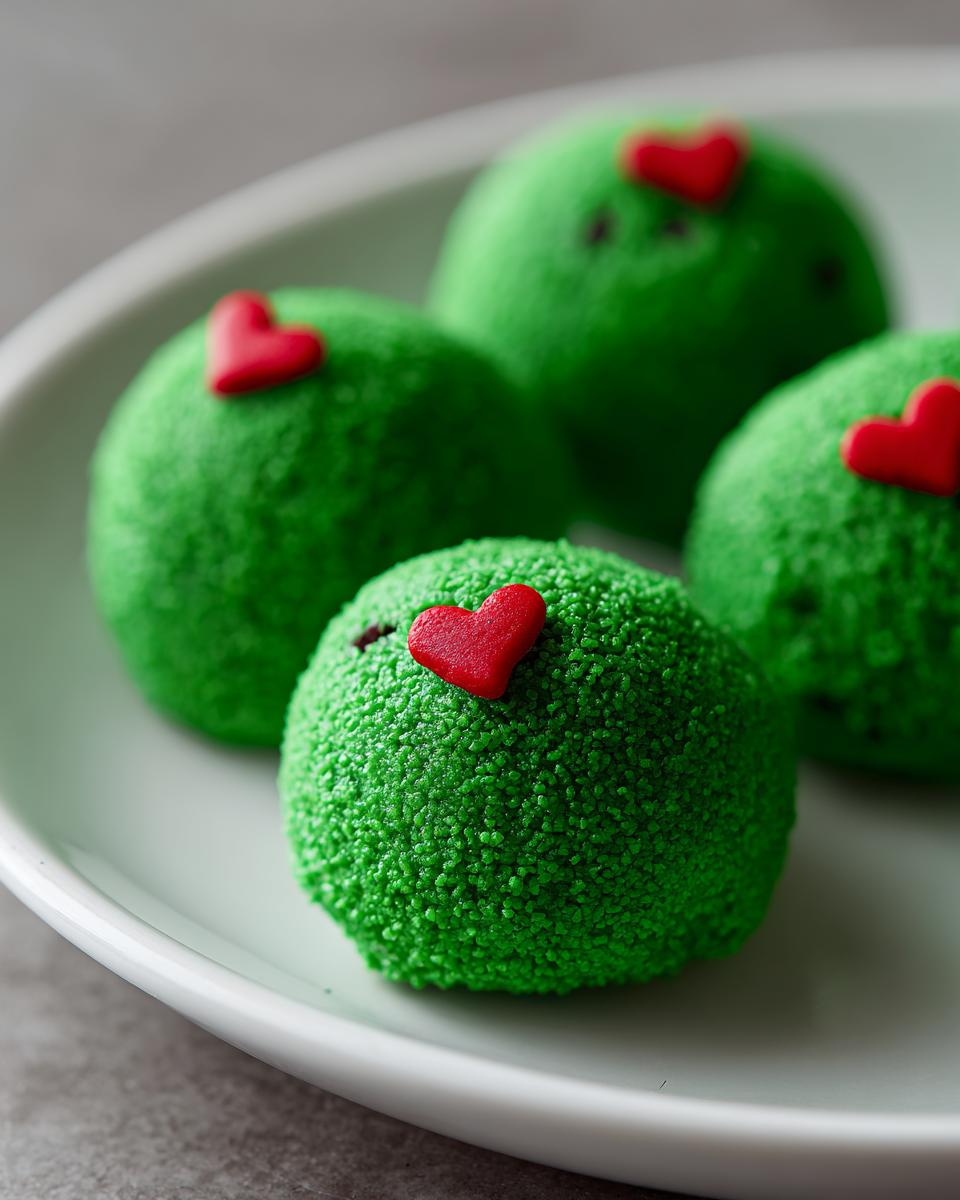
Presentation and Serving: Bite Sized Christmas Party Food
Once these little guys are set, the real fun begins: plating them up! These Bite Sized Christmas Party Food items look amazing clustered up. We aren’t aiming for perfection here; we’re aiming for whimsy, remember? I always set them out on my tiered white serving plates to really make that bright Grinch green pop against the porcelain. It’s such a simple way to instantly elevate your dessert table!

If you’re heading out to a cookie exchange or a busy friend’s potluck, these transport like a dream. Just keep them in a single layer in a container with a tight lid. If you don’t have a fancy tiered stand, even just lining them up neatly on a simple platter surrounded by some green candy cane pieces or shiny red M&Ms makes them look fabulous.
Don’t forget, if you need ideas for things to serve alongside these sweet bites, I have tons of savory inspiration too! You can browse all my favorites over on my appetizers and snacks page for balancing out all that sugar!
Storage and Gifting Your Grinch Oreo Balls Recipe
One of the best things about these little guys, besides being no-bake, is how long they last! If you’re baking for gifts or need to get ahead of a busy day, you’ll be happy to know that these store wonderfully. Since they contain cream cheese—even though they are coated—you absolutely must keep them cool. I generally store my finished Grinch Oreo Balls recipe batches in a sturdy, airtight container right in the refrigerator. They stay fresh and delicious for up to two whole weeks this way!
This longevity makes them fantastic for making ahead for cookie exchanges or even packaging up as sweet little homemade presents. They really are among the best Christmas gifts from the kitchen because they look so professional!
Make-Ahead and Freezer Tips
If you have a marathon mixing session planned, you don’t have to finish them all at once. The base mixture—that chocolatey dough you roll into balls—is wonderful for making ahead. You can roll all your little spheres, place them on a parchment-lined tray, and freeze them for about an hour until they are solid discs. Then, you can transfer those frozen balls into a zip-top bag. They thaw quickly!
Alternatively, I have frozen the fully coated and decorated Grinch Oreo Balls before, and they usually do just fine, provided they are sealed well. I’d still advise eating them within a month if they are frozen, just to make sure that candy coating stays perfectly crisp and doesn’t get any weird condensation when they thaw back out!
Frequently Asked Questions About Grinch Oreo Balls
Can I use different cookies instead of Oreos for these Festive Green Treats?
That’s a great question! You certainly *can* try substituting other cookies, but honestly, I really wouldn’t recommend it if you want the classic texture. The whole structure of these Festive Green Treats relies on the combination of the hard wafer and that sweet, sticky vanilla filling that comes in the standard chocolate Oreos. If you use something like vanilla wafers, the dough might come out too crumbly, and if you use plain chocolate cookies without the filling, it will definitely need more cream cheese.
Sticking to the original cookie ensures that perfect, decadent density once it’s chilled. The filling acts as a little bit of extra binder, which we desperately need when we’re making something so small and rich!
How do I get the green color so bright?
You know how frustrating it is when you try to color something white and it ends up looking sickly pale? That’s why I always steer folks toward dedicated green candy coating wafers. They are already colored bright green, and they melt beautifully. If you *must* use white chocolate chips because that’s what you have on hand, then you absolutely need to use a good quality gel food coloring, not the regular liquid dropper kind.
Liquid coloring adds water, and water mixed with melted chocolate is how you end up with seized, un-dippable goop! A tiny dab of gel coloring into the melted white chocolate works wonders and keeps that coating smooth enough to give your Grinch Oreo Balls that vibrant, Grinchy hue we are aiming for.
Are these Easy Christmas Desserts safe to leave out at a party?
This is an important one, especially since they are so easy to pop in your mouth! Because we use real cream cheese in the base, these are not something you want sitting out on the counter for eight hours. For food safety, keep them refrigerated until about 30 minutes before guests arrive. They hold up really well for a couple of hours at room temperature, which is usually plenty of time for a party!
If your party is long, I suggest keeping a platter in the fridge and refreshing them halfway through. If you’re looking for other great options that don’t require constant chilling, you might want to check out my roundup of my best easy Christmas desserts that are shelf-stable!
Estimated Nutritional Information for Candy Coated Oreo Balls
I always like to give you a general idea of what you’re looking at, just for peace of mind! Remember, since we are using specific brands of Oreos and different types of candy coating, this information is just an estimate. Think of these delightful Candy Coated Oreo Balls as a festive indulgence for the holidays, not daily fuel!
- Serving Size: 1 ball
- Calories: Approximately 150
- Sugar: Roughly 15g
- Fat: Around 9g
- Protein: About 1g
This is based on the yield of about 28 truffles per batch. If you make them smaller or larger, these numbers will certainly change!
Share Your Whimsical Dessert Ideas
That’s it! You’ve officially made the cutest little holiday dessert imaginable. I am so excited for you to serve these up. Once you’ve tried making these grinch oreo balls, please come back and let me know how they turned out! Did the little heart stick perfectly? Did your kids love them?
Leave me a comment below and give the recipe a rating so other busy bakers know how simple and fun these were to create. If you snapped a picture, tag me on social media—I absolutely live to see your finished creations!
If you need another quick, fantastic holiday recipe that doesn’t involve the oven, don’t forget to check out my roundup of great easy Christmas desserts. Happy snacking, my friend!
PrintNo-Bake Grinch Oreo Balls

Make these adorable, bite-sized Grinch Oreo Balls for a festive, no-bake Christmas treat. They feature a chocolatey center coated in bright green candy, perfect for holiday parties or gifting.
- Prep Time: 25 min
- Cook Time: 5 min
- Total Time: 60 min
- Yield: 28 servings 1x
- Category: Dessert
- Method: No-Bake
- Cuisine: American
- Diet: Vegetarian
Ingredients
- 1 package (14.3 oz) Oreo cookies
- 8 oz cream cheese, softened
- 12 oz green candy coating wafers (or white chocolate chips with green food coloring)
- 1 teaspoon coconut oil (optional, for smoother melting)
- Small red heart sprinkles (for the Grinch’s heart)
Instructions
- Place the entire package of Oreo cookies into a food processor. Pulse until you have fine crumbs.
- Transfer the Oreo crumbs to a medium bowl. Add the softened cream cheese. Mix with a hand mixer or sturdy spoon until the mixture is fully combined and forms a thick dough.
- Roll the dough into small, uniform balls, about 1 inch in diameter. You should get about 24 to 30 balls. Place the balls on a baking sheet lined with parchment paper.
- Chill the Oreo balls in the refrigerator for at least 30 minutes. This step helps them firm up before dipping.
- Melt the green candy coating wafers according to package directions. If using, stir in the coconut oil for a thinner consistency.
- Dip each chilled Oreo ball into the melted green coating, ensuring it is fully covered. Tap the fork gently on the side of the bowl to remove excess coating.
- Place the coated ball back onto the parchment-lined baking sheet. Immediately press one small red heart sprinkle onto the top of each ball to resemble the Grinch’s heart.
- Allow the candy coating to set completely at room temperature, or speed up the process by chilling them for another 15 minutes.
Notes
- If you do not have a food processor, place the Oreos in a large zip-top bag and crush them using a rolling pin.
- For the brightest green color, use candy coating wafers specifically designed for melting, rather than standard chocolate chips.
- These **No Bake Holiday Treats** store well in an airtight container in the refrigerator for up to two weeks.
Nutrition
- Serving Size: 1 ball
- Calories: 150
- Sugar: 15
- Sodium: 85
- Fat: 9
- Saturated Fat: 5
- Unsaturated Fat: 4
- Trans Fat: 0
- Carbohydrates: 16
- Fiber: 0
- Protein: 1
- Cholesterol: 5