
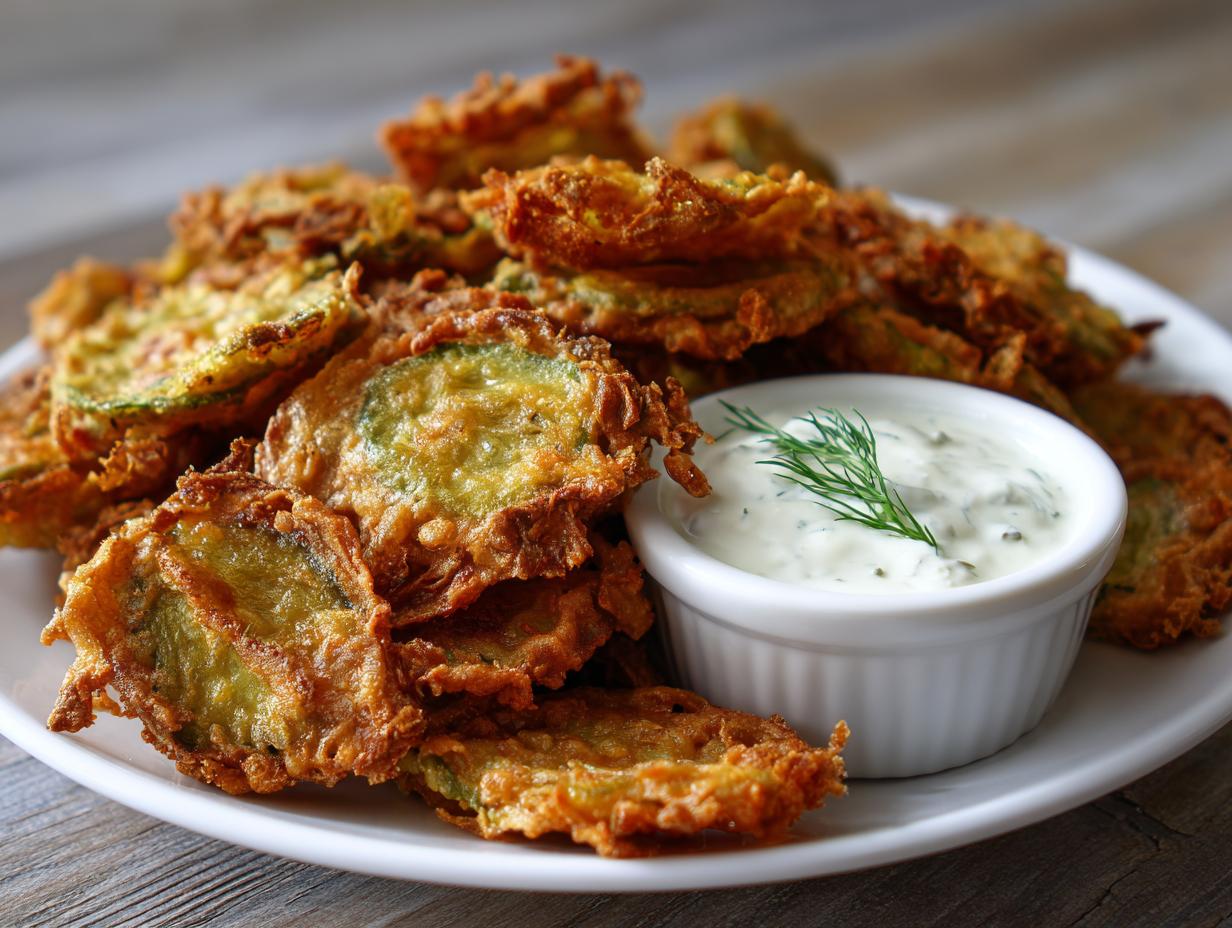
Oh, friends, are you having one of those moments where only something perfectly salty, tangy, and unbelievably crunchy will do? I know I am! That’s why I’m so excited to share what I consider the absolute Best Fried Pickles recipe out there. Forget those soggy, disappointing versions you’ve tried before. The goal here at Kings Cook is total confidence in the kitchen, and making restaurant-quality fried pickles that deliver that perfect *snap* is totally achievable!
Seriously, we are talking about golden, crispy perfection in under 30 minutes total time. Can you believe it? This recipe is fantastic for a spontaneous Tuesday night snack or when you suddenly need incredible appetizers for unexpected guests. Trust me, once you nail this easy batter, you’ll feel like you’ve unlocked a secret weapon for game days!
- Why This Recipe Delivers the Best Fried Pickles
- Gathering Your Ingredients for Crispy Fried Pickles
- Step-by-Step Instructions for Classic Fried Pickles
- Tips for Making Restaurant Style Fried Pickles
- Variations: Texas Roadhouse Copycat Recipe and Air Fryer Fried Pickles
- Serving Suggestions for Your Fried Pickles with Ranch Dip
- Storage and Reheating Instructions for Leftover Fried Pickles
- Frequently Asked Questions About Fried Pickles
- Share Your Homemade Fried Pickles Experience
Why This Recipe Delivers the Best Fried Pickles
I spent way too long trying to make truly crunchy fried pickles, and honestly, some batches were just sad, soggy messes. But no more! This recipe is my go-to because it focuses exactly on what matters: that shatteringly crisp coating and fast results. You deserve the best, and that’s what we’re making today.
- Unbeatable Crispiness: That golden crust stays intact, even with a tangy pickle inside!
- Speedy Snack: Ready from start to finish in just about 25 minutes.
- Incredible Flavor: The seasoning blend is perfectly balanced—salty, savory, with just a hint of heat.
Achieving Ultimate Crunch with Club Soda
This is my big secret, folks, and it’s not complicated! Standard liquids like plain milk or water just don’t cut it if you truly want that airy, light crunch. We use cold club soda or seltzer water in the batter. When the cold, bubbly liquid hits that hot oil, the carbonation creates tiny pockets in the batter as it cooks. Those pockets expand right away, resulting in a crust that’s light, fluffy, and sticks around long after you pull them out of the fryer.
Quick Prep Time for Perfect Fried Pickles
When the craving hits, you don’t want to wait an hour, right? That’s why I love these Fried Pickles. We’ve cut down the prep work significantly by focusing only on essential steps. Since the ranch dip chills while you fry, you’re basically done in the same amount of time it takes to heat the oil. They are perfect for those last-minute Game Day Snack Ideas!
Gathering Your Ingredients for Crispy Fried Pickles
Okay, let’s talk ingredients! The beauty of these Crispy Fried Pickles is that you likely have most of this stuff right now. I made sure that when I put this recipe together, I wasn’t asking you to hunt down anything fancy. We need just a few things for the pickles themselves, plus components for that amazing homemade ranch dip we talked about.
The most crucial first step before ANYTHING else is draining those dill pickles really well. Seriously, pat them dry like you mean it! Moisture is the enemy of a crunchy coating, and we are fighting for the crunchiest snack ever!
Ingredients for the Homemade Ranch Dip
This dip is creamy, herby, and tastes so much better than anything bottled. Mix all these up in a small bowl, give it a good whisk until it’s perfectly smooth, and then pop it in the fridge. Chilling it gives those dried herbs time to really bloom and taste fantastic by the time the pickles are done frying. Don’t skip that chilling step!
- 1/2 cup mayonnaise
- 1/4 cup sour cream
- 1/4 cup buttermilk
- 1 teaspoon dried dill weed
- 1/2 teaspoon onion powder
- 1/2 teaspoon garlic powder
- Pinch of salt and pepper
What You Need for the Fried Pickles Batter
This is where the magic happens for our Crunchy Snack Recipes texture. We separate the dry stuff from the wet stuff before bringing them together gently. Always remember that cold club soda is the secret ingredient in this batter—it keeps things super light and fizzy right before they hit the heat!
For the Dry Mix, grab:
- 1 cup all-purpose flour
- 1 teaspoon salt, pepper, paprika
- 1/2 teaspoon garlic powder
- 1/4 teaspoon cayenne (if you like a little kick!)
For the Wet Mix:
- 1 large egg and 1/2 cup milk, whisked
- The all-important 1/2 cup of club soda or seltzer water (added last!)
Step-by-Step Instructions for Classic Fried Pickles
This is the part where we turn simple ingredients into crunchy gold! I’ve broken this down into really clear steps because technique matters so much when you’re aiming for that crunchy texture every time. Pay close attention to drying those pickles and keeping your oil temperature right where it needs to be. We want them golden fast, not oily and sad!
Preparing the Pickles and the Ranch Dip First
Before anything else, we focus on getting rid of excess water. Moisture equals sad, non-crispy pickles, and we are not having that! Take your well-drained dill pickle chips or spears and lay them out between a few layers of paper towels. Gently press down—don’t squash them, just press to soak up the brine residue. While they sit there drying, whisk up that chilled ranch dip we talked about earlier. The sooner it chills, the better those herbs taste when they meet the hot, Tangy Appetizers.
Mixing the Easy Batter Recipe for Frying
In a medium bowl, whisk your dry ingredients—flour, spices, salt, pepper—until they look happy and combined. Next, combine the egg and milk in a separate small cup. Pour the wet into the dry, but stop mixing as soon as they just come together. Seriously, stop! A few lumps are totally fine and actually desirable. Now, gently fold in that cold club soda last. You want to see a few bubbles remaining; those are your crunch insurance policies for our Easy Batter Recipe for Frying.
Frying and Finishing Your Fried Pickles
Pour about two inches of oil into your heavy pot and get that heat up to exactly 375°F. If you don’t have a thermometer, you’re guessing, and we don’t guess with perfect Fried Pickles! Batter your dried pickles, let the excess drip off, and carefully lower them into the hot oil. Work in small batches; overcrowding cools the oil instantly and ruins the crust. Fry for just 2 or 3 minutes until they are beautifully golden brown all over. Scoop them straight out with a slotted spoon onto a clean wire rack lined with paper towels—this lets the bottom breathe! Immediately sprinkle them with a tiny bit more salt while they’re sizzling. Serve them up hot with that cold ranch!
Tips for Making Restaurant Style Fried Pickles
You’ve got the basic technique down now, but if you want to elevate these from ‘good homemade’ to ‘I can’t believe this isn’t from a restaurant’ status, there are a couple of little tricks I swear by. Since my goal is to make sure you look like a kitchen genius, let me share a few extra pointers to guarantee those gorgeous, crunchy, restaurant-style results every single time you make Fried Pickles.
These aren’t hard changes, just tiny adjustments that make a big difference in the final texture. Trust me on these game-changing moves!
Getting Extra Crispy Fried Pickles with Chilled Batter
Okay, remember how we talked about the cold club soda? That’s step one. But if you want to go the extra mile for that truly shatteringly crisp exterior? Chill the entire mixed batter for about fifteen minutes before you start frying! When cold batter hits super-hot oil (375°F!), the shock factor makes the coating set instantly and puff up slightly. If your batter gets too warm while you’re dipping batch after batch, the crispiness starts to deflate. A quick 15-minute rest in the fridge keeps everything tight and light. Try this for your next batch of Crunchy Snack Recipes!
Spears Versus Chips: Which Fried Pickle is Best?
Honestly, there’s no true right or wrong answer here, but you might prefer one over the other based on what you’re craving! Pickle chips (slices) cook faster and give you more surface area for that crispy coating in every single bite. They are fantastic for dipping and dunking.
However, if you prefer something heartier that really stands up to the ranch dip, go for spears. If you start with whole dill pickles, you’ll want to quarter them lengthwise before you start the drying process. These Fried Pickle Spears keep their tangy center nice and cool while the outside gets perfectly golden brown. It’s all about personal preference for that ultimate bite!
Variations: Texas Roadhouse Copycat Recipe and Air Fryer Fried Pickles
Gosh, I love that you’re diving into the ways we can tweak this base recipe! We all have different cravings, right? Maybe you’re aiming for that unmistakable restaurant flavor, or perhaps you want something a little lighter for game day snacking without breaking out the deep fryer. This recipe base is fantastic because it adapts so easily. You can certainly make restaurant-quality treats right here in your own kitchen!
Whether you’re looking for that specific salty kick or just trying to keep things healthier, I’ve got you covered with a couple of popular modifications. It’s all about controlling those spices and the cooking method!
Making a Texas Roadhouse Copycat Recipe
I know so many of you are searching specifically for that recognizable flavor, that addictive saltiness that makes you order them every time you visit. If you want to nail that famous flavor profile, you have to adjust your seasoning blend a tiny bit. For the absolute best Texas Roadhouse Copycat Recipe experience, you need to be more generous with the salt and pepper in your dry flour mix.
Don’t just measure it; taste your dry blend lightly on your finger (before adding the wet ingredients, of course!). It should taste noticeably saltier than you might normally use. Then, once the pickles come out of the oil and drain, hit them again with a light sprinkle of fine sea salt right away. That double-doshing of saltiness is the key to unlocking that crispy, savory flavor we all crave in Fried Pickles!
Trying Air Fryer Fried Pickles for a Healthier Snack
If deep frying just isn’t your thing this week—maybe you’re skipping the oil cleanup or looking for a lighter option—the air fryer is your new best friend! You absolutely can bake these up successfully, and they still come out wonderfully crunchy, as long as you treat them right. Since we aren’t submerging them in oil, they need a little help staying golden.
For Air Fryer Fried Pickles, you’ll prepare the batter exactly the same way, but skip the deep-frying step entirely. Instead, place your battered pickles in a single layer in the air fryer basket. You must spray them generously—and I mean *generously*—with cooking spray or a thin stream of oil. Set your air fryer to around 380°F to 390°F and cook them for about 8 to 12 minutes, flipping them halfway through. They won’t have the exact same texture as deep-fried, but they are certainly a delicious, Healthy Fried Pickles alternative!
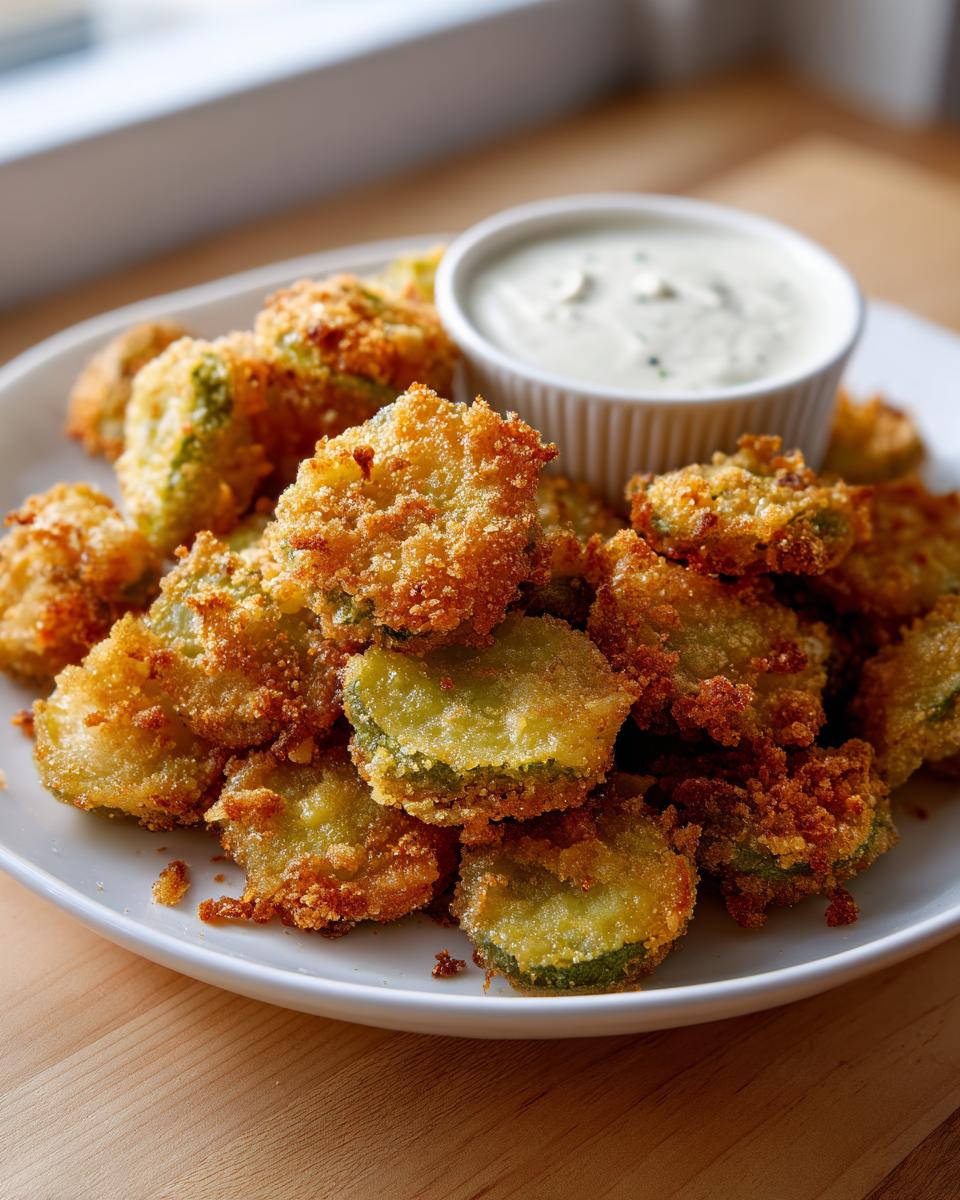
Serving Suggestions for Your Fried Pickles with Ranch Dip
The moment those Fried Pickles come out of the oil, golden and steaming hot, the very first thing you absolutely must do is serve them immediately alongside that homemade ranch dip we doctored up earlier. That cool, creamy, herb-flecked dip is the perfect counterpart to the hot, salty, tangy crunch of the pickle. Seriously, there is no better combination in the appetizer world than Fried Pickles with Ranch Dip; it’s a classic for a reason!
But don’t stop there! If you are setting these out for a party or a big game day (and trust me, you should be!), offer a little variety so everyone finds their favorite pairing. Since these snacks are so popular, having options just makes you look like the most thoughtful host.
- Spicy Kick: Set out a small bowl of Sriracha mayo. Just whisk a spoonful of Sriracha right into a little extra mayo. The creamy heat cuts through the fried batter beautifully.
- Smoky Delight: If you like a rich flavor, try our smoky chipotle aioli. It adds a depth that pairs surprisingly well with the dill flavor.
- For the Purist: A side of simple ketchup is always welcome, though I think it’s criminal when you have that amazing ranch waiting!
Remember, whether you serve these as a main party centerpiece or a quick snack, the key is presenting them hot! If you’re serving a crowd, use a large platter and arrange the pickles so they aren’t piled too high, which helps keep that crucial crunchy coating intact instead of trapping steam.
Storage and Reheating Instructions for Leftover Fried Pickles
Okay, let’s address the elephant in the room: the few leftover fried pickles—if there are any! I’m going to be honest with you, just like I would with my own family. These babies are designed to be eaten the second they come out of the oil, when the coating is crisp, and the flavor is at its peak. Freshly made is always the absolute best way to enjoy them.
However, life happens, and sometimes you end up with a few stragglers. The good news is you can save them, but you have to be smart about reheating to resurrect that crucial crunch. Do yourself a favor and keep them out of the refrigerator for too long; the moisture from the pickle will start seeping into that lovely batter.
If you must store them, place them in a single layer on a paper towel in an airtight container. They’ll only last a day or so this way before they get soft. But don’t worry, we can fix them up!
Bringing Back the Crunch with the Oven or Air Fryer
The microwave? Absolutely not! Throwing these in the microwave is like signing their crispy death warrant—they just steam themselves into mush, and we’ve worked too hard for that!
For reheating, you have two fantastic options that respect the integrity of the batter. The oven works perfectly for a bigger batch. Preheat it to about 375°F (190°C). Lay the pickles out in a single layer on a baking sheet lined with a wire rack if you have one—this helps air circulate underneath. Bake them for about 8 to 10 minutes, or until they feel firm and the outside is properly crisp again. Keep a close eye on them so they don’t burn!
The Quickest Reheat: Air Fryer Method
If you’re just reheating a small handful, the air fryer is incredibly fast and effective. Set your air fryer to about 370°F (188°C). Place your leftovers in a single layer, give them a quick spritz of oil spray just for insurance, and cook them for about 4 to 6 minutes. Shake the basket halfway through. They come out looking almost freshly fried! It’s the quickest way to enjoy those tangy bites again without waiting for the big oven to preheat.
Frequently Asked Questions About Fried Pickles
I totally get it—when you’re making something fun like this, you always have a few last-minute questions about ingredients or timing. That’s perfectly normal! I put together answers to the biggest questions I hear about achieving that perfect crunch and dealing with substitutions. Don’t let a small question stop you from making these amazing Fried Pickles!
If you have more burning questions, feel free to drop them down below; I love chatting about perfecting these favorites. You can also check out some of my other game day dipping recipes like my deviled eggs while you’re here!
Can I use pickle spears instead of chips for these Fried Pickles?
Absolutely! This recipe works beautifully whether you use chips or spears. If you opt for spears, your main adjustment is that you need to make sure they are dried really well—sometimes spears hold onto more brine than chips do. If you are using full-size whole pickles, you’ll want to cut them lengthwise into quarters before you start the drying process. This helps them cook evenly and gives you a satisfying, hearty bite. Spears are fantastic because they really show off that crispy coating!
What oil temperature is necessary for Crunchy Snack Recipes?
This is arguably the most important detail! For the absolute best results in these Crunchy Snack Recipes, you need that vegetable oil maintained strictly at 375°F (190°C). Why such a specific temperature? If your oil is too cold, the batter soaks it up like a sponge before it has a chance to crisp, leading to oily, soggy messes. If it’s too hot, the outside burns before the pickle inside even gets warm! Hitting that sweet spot ensures the batter puffs up instantly and cooks just long enough to become golden perfection.
Can I make the batter ahead of time for this Easy Fried Pickle Recipe?
This is where we have to be careful with our chemistry! Because this Easy Fried Pickle Recipe relies heavily on that cold club soda to create those crucial bubbles, I really advise against making the batter hours ahead of time. The bubbles will deflate as it sits, and you’ll lose that fantastic airy lift we are aiming for. You can mix the flour/spice mix ahead of time, sure, but mix the wet ingredients and the soda in right before you plan to start frying. If you need a tiny head start, mix everything *except* the club soda, chill it for up to an hour, and then just stir the cold soda in right before you dip the first pickle. That keeps the bubbles active!
Share Your Homemade Fried Pickles Experience
Well, that’s it! We’ve gone from a jar of pickles to a platter of the most addictive, crunchy, salty snacks you could imagine. I truly hope you feel that same spark of confidence I get when I hear that sizzling oil and see that perfect golden color emerge. Making something this delicious and restaurant-quality right at home is such a win!
Now, I want to hear all about it! Did you stick strictly to the recipe, or did you spice up that batter with something wild? Are you serving these with the homemade ranch, or did you try a spicy alternative? Please take a moment to rate this recipe down below using the stars—it helps other home cooks like you decide if these are the next must-make appetizer for their crew!
Don’t be shy about leaving a comment sharing your results, tips, or any fun party stories related to these amazing snacks. I absolutely love connecting with you all and seeing what you create in your kitchens. If you enjoyed this journey into perfectly crispy frying, feel free to check out my About Page to learn more about what we’re cooking up next here at Kings Cook!
Happy Snacking, my friends!
PrintCrispy Fried Pickles with Easy Homemade Ranch Dip
Make restaurant-style crispy fried pickles at home. This easy batter recipe delivers a perfectly crunchy coating on tangy dill pickle slices, ready fast as a game day snack or party appetizer. Serve with a simple, creamy ranch dipping sauce.
- Prep Time: 10 min
- Cook Time: 15 min
- Total Time: 25 min
- Yield: 4 servings 1x
- Category: Appetizer
- Method: Deep Frying
- Cuisine: American
- Diet: Vegetarian
Ingredients
- 1 jar (16 ounces) dill pickle chips or spears, drained well
- 1 cup all-purpose flour
- 1 teaspoon salt
- 1 teaspoon black pepper
- 1 teaspoon paprika
- 1/2 teaspoon garlic powder
- 1/4 teaspoon cayenne pepper (optional, for heat)
- 1 large egg
- 1/2 cup milk
- 1/2 cup club soda or seltzer water (for crispiness)
- Vegetable oil, for frying
- For the Ranch Dip: 1/2 cup mayonnaise, 1/4 cup sour cream, 1/4 cup buttermilk, 1 teaspoon dried dill weed, 1/2 teaspoon onion powder, 1/2 teaspoon garlic powder, pinch of salt and pepper
Instructions
- Prepare the pickles: Place the drained pickle slices or spears between layers of paper towels and press gently to remove as much moisture as possible. Set aside.
- Make the ranch dip: In a small bowl, whisk together the mayonnaise, sour cream, buttermilk, dill weed, onion powder, garlic powder, salt, and pepper until smooth. Cover and refrigerate while you prepare the pickles to allow flavors to blend.
- Prepare the batter: In a medium bowl, whisk together the flour, salt, black pepper, paprika, garlic powder, and cayenne pepper (if using).
- In a separate small bowl, whisk the egg and milk together. Pour the wet ingredients into the dry ingredients. Whisk until just combined; do not overmix. Gently stir in the club soda until the batter is slightly bubbly. A few lumps are fine.
- Heat the oil: Pour vegetable oil into a deep, heavy-bottomed pot or Dutch oven to a depth of about 2 inches. Heat the oil over medium-high heat until it reaches 375 degrees Fahrenheit (190 degrees Celsius). Use a thermometer to check the temperature for best results.
- Coat and fry: Dip the dried pickle slices into the batter, allowing excess to drip off. Carefully lower the battered pickles into the hot oil, working in small batches to avoid overcrowding the pot.
- Fry for 2 to 3 minutes, turning once, until the coating is golden brown and crispy.
- Remove the fried pickles with a slotted spoon and transfer them to a wire rack lined with paper towels to drain excess oil. Sprinkle lightly with extra salt immediately after frying.
- Serve the hot, crunchy fried pickles immediately with the chilled homemade ranch dipping sauce.
Notes
- For extra crispy fried pickles, chill the batter in the refrigerator for 15 minutes before using.
- If you prefer spears over chips, use whole dill pickles cut lengthwise into quarters.
- To make this a Texas Roadhouse copycat recipe, ensure your batter seasoning is heavy on the salt and pepper.
Nutrition
- Serving Size: 1/4 of recipe
- Calories: 350
- Sugar: 3
- Sodium: 950
- Fat: 25
- Saturated Fat: 4
- Unsaturated Fat: 21
- Trans Fat: 0
- Carbohydrates: 25
- Fiber: 1
- Protein: 5
- Cholesterol: 75