
Ever stare at a beautiful sushi platter and think, “There’s no way I could make that at home”? I totally get it! For the longest time, I felt the same way. But let me tell you, making your own sushi, especially the super popular California roll, is way more doable than you think. It’s one of those kitchen adventures that’s actually super rewarding and just plain fun. My goal here at Kings Cook is to help you feel totally confident in the kitchen, and honestly, rolling up your first perfect California roll is a HUGE confidence builder! Trust me, it’s easier than it looks, and so delicious. Let’s dive in and make some magic!
- Why You'll Love This California Roll Sushi Recipe
- Essential Ingredients for Your California Roll Sushi
- Step-by-Step Guide to Making Perfect California Roll Sushi
- Mastering Your Sushi Rolling Technique: Pro Tips for Perfect Rolls
- Ingredient Notes and Substitutions for California Roll
- Frequently Asked Questions About Making Sushi
- Estimated Nutritional Information for California Roll
- Serving Your Delicious Homemade Sushi
Why You’ll Love This California Roll Sushi Recipe
Seriously, folks, this recipe is a winner! Here’s why you’re going to be obsessed:
- Super Beginner-Friendly: If you’ve never rolled sushi before, this is your perfect starting point. I’ve broken down every single step.
- Delicious & Satisfying: You get that classic crab, creamy avocado, and crisp cucumber combo that just works, all wrapped up in perfectly seasoned rice.
- Fun Activity: Make it a date night or a family project! It’s so much fun to make together.
- Impress Your Friends: Whip these out at your next get-together and watch their jaws drop. Homemade sushi, who knew!
Essential Ingredients for Your California Roll Sushi
Alright, let’s talk about what you’ll need to make these amazing California rolls. Don’t worry, these are all pretty easy to find at most grocery stores here in the States. You’ve got your classic sushi staples, plus our star players!
- 1 cup sushi rice: This is a special short-grain rice that gets nice and sticky.
- 1 1/4 cups water: For cooking that perfect sushi rice.
- 2 tablespoons rice vinegar: Gives the rice that signature tang.
- 1 tablespoon sugar: Just a touch to balance the vinegar.
- 1/2 teaspoon salt: Enhances all those yummy flavors.
- 4 sheets nori seaweed: These are the dark, papery sheets that help hold everything together.
- 1/2 cup imitation crab meat, shredded: This is what makes it a California roll! Totally easy to find.
- 1/2 avocado, thinly sliced: Gotta have that creamy goodness!
- 1/2 cucumber, julienned: For that fresh, crisp crunch. Make sure they’re cut into thin matchsticks.
- Toasted sesame seeds for garnish: A little sprinkle adds such a nice look and nutty flavor.
- Soy sauce, for serving: Essential for dipping!
- Wasabi, for serving: If you like a little kick!
- Pickled ginger, for serving: Great for cleansing your palate between bites.
Step-by-Step Guide to Making Perfect California Roll Sushi
Okay, deep breaths! This is where the magic happens. Making sushi at home might seem a little daunting at first, but trust me, if you follow these steps, you’ll be rolling like a pro in no time. It’s all about getting a little practice and paying attention to a few key details.
Preparing the Sushi Rice
This is arguably the MOST important part of any good sushi! Start by rinsing your sushi rice really well under cold water. Keep rinsing until the water runs clear – this gets rid of excess starch and is key for that lovely, non-mushy texture. Then, cook it up with your water. Once it’s done and has rested (don’t skip that resting time!), it’s time to season it. Gently fold in the rice vinegar, sugar, and salt mixture. Don’t mash the rice, just fold it in until it’s all beautifully combined and glossy. And here’s a crucial tip: let that seasoned rice cool down completely to room temperature! Warm rice just won’t work right for rolling.
Assembling Your California Roll
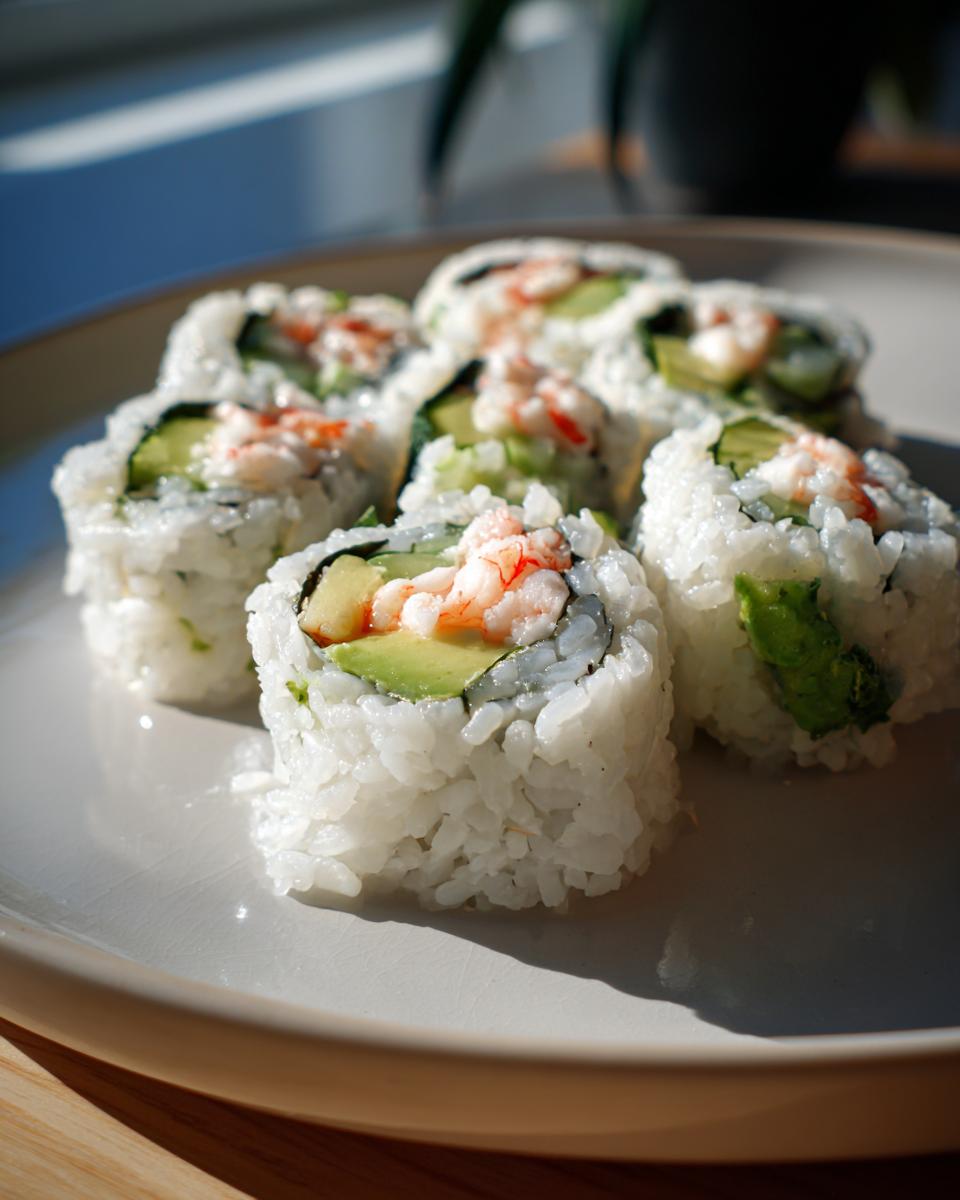
Get your bamboo rolling mat ready! I like to cover mine withplastic wrap; it makes cleanup a breeze and stops the rice from sticking to the mat itself. Lay one sheet of nori, the shiny side down, right onto that plastic-wrapped mat. Now, wet your hands a little – this is your best friend for handling sticky rice. Spread an even, thin layer of that cooled sushi rice all over the nori. Leave about an inch bare at the top edge; that’s our “glue” for sealing the roll. Sprinkle on those toasted sesame seeds if you’re using them – they look so pretty! Then comes the fun part: arranging your fillings. Lay down that shredded crab, a line of avocado slices, and those crisp cucumber sticks horizontally across the rice, about a third of the way up from the bottom. Don’t overstuff it, or rolling will be a nightmare!
Rolling and Sealing the Sushi
This is the moment of truth! Grab the edge of the bamboo mat closest to you, along with the nori and fillings. Start to roll it up and over the filling, using the mat to guide it and apply gentle, even pressure. You want a nice, tight roll, but don’t squeeze so hard that everything squishes out! As you reach the end, dab a tiny bit of water along that bare 1-inch strip of nori. Finish rolling; the water will act like glue and seal your beautiful sushi roll shut. Ta-da! You just rolled sushi!
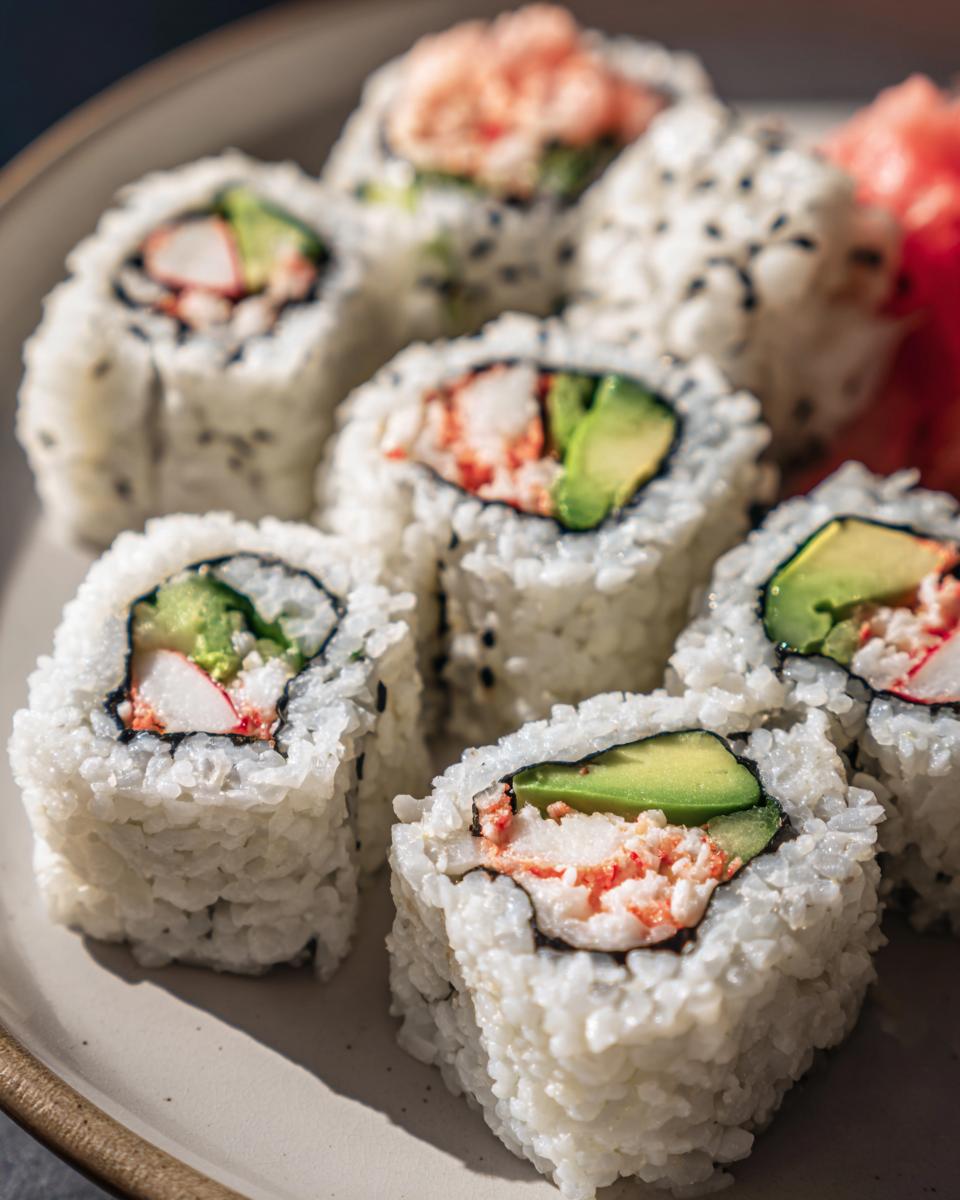
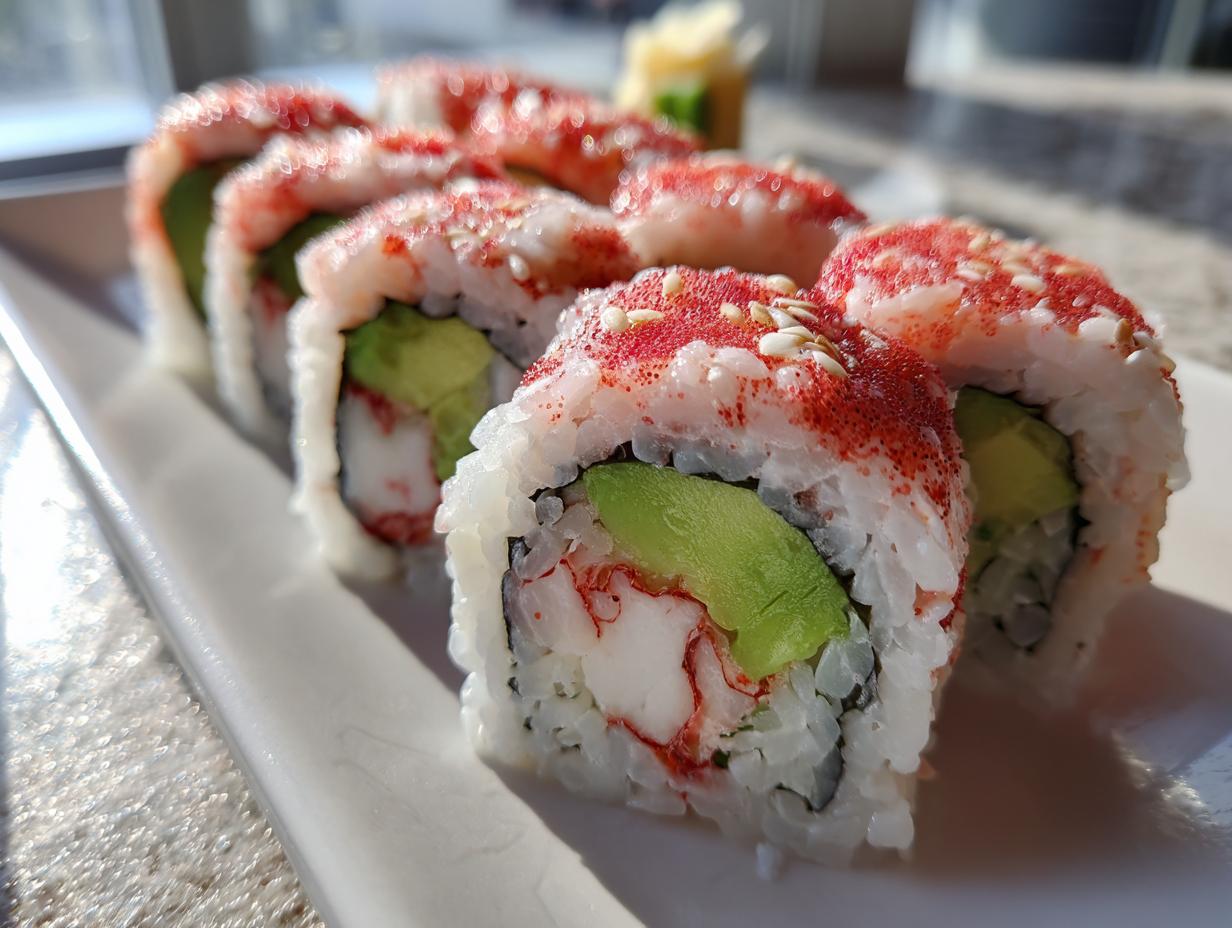
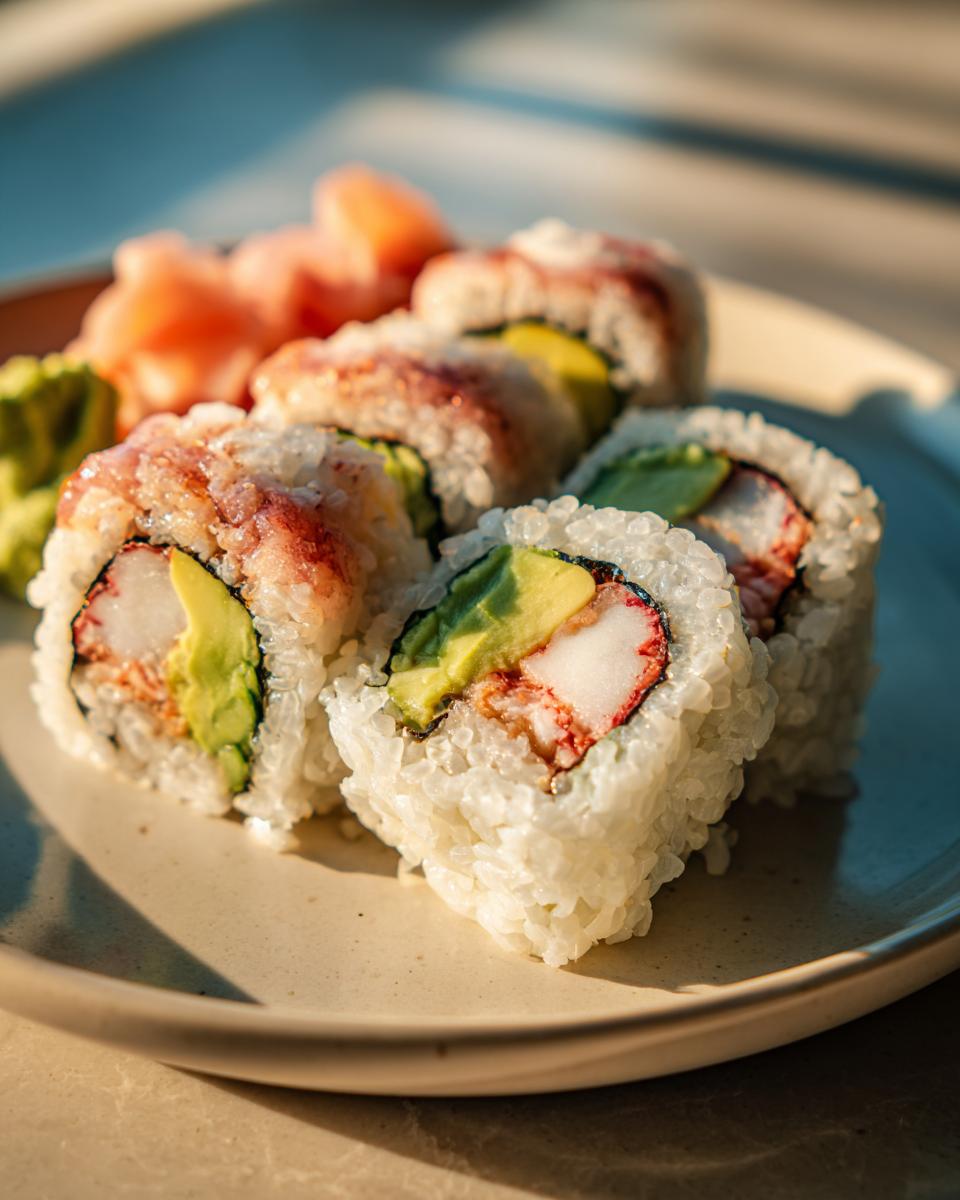
Slicing Your Homemade Sushi Rolls
Now for the grand finale: slicing! Use your sharpest knife, and here’s the secret: wipe it with a damp cloth *between each cut*. This stops the rice from sticking and gives you those super clean, professional-looking slices. Carefully slice each roll into about 6 to 8 pieces. Take your time with this step; a clean slice makes all the difference in presentation and makes your gorgeous homemade sushi easy to eat.
Mastering Your Sushi Rolling Technique: Pro Tips for Perfect Rolls
Okay, so we’ve covered the basics, but let’s talk about leveling up your sushi game. Even when I was first starting out, there were a few little tricks I learned that made a HUGE difference. It’s all about getting that perfect roll, you know? That satisfying feeling when you slice it and it holds together beautifully!
First off, rice consistency is key. Make sure your sushi rice is cooled to room temperature – warm rice is way too sticky and will make a mess. Also, don’t go overboard with the rice layer on your nori. A thin, even layer is what you want; too much rice makes rolling super difficult. For filling placement, think about keeping it neat and not piling it too high. A little bit of everything in a straight line is perfect. And when you roll? Gentle but firm pressure is the name of the game. Don’t squish it, but don’t be afraid to use that bamboo mat to tuck and tighten.
Ingredient Notes and Substitutions for California Roll
Let’s chat about those ingredients for a sec! The classic California roll uses imitation crab, and it’s totally delicious and super easy to find. But hey, if you want to go for the real deal, absolutely use real shredded crab meat! It’s a bit pricier, but oh-so-worth-it sometimes. And speaking of fillings, don’t be afraid to get creative after you nail the basic roll. Cooked shrimp, a little bit of cream cheese for that extra richness, or even some thinly sliced teriyaki chicken can be amazing additions. The avocado and cucumber are pretty standard, but you could even try some thinly sliced mango for a tropical twist!
Frequently Asked Questions About Making Sushi
Got questions about whipping up your own sushi? I’ve totally got you covered! Making homemade sushi can feel a little mysterious at first, but with a few answers to common questions, you’ll be rolling like a pro in no time. Don’t let any lingering doubts stop you from trying this fun recipe!
Can I make sushi without a bamboo mat?
Absolutely! While a bamboo mat really helps, it’s not totally essential. You can use a clean kitchen towel or even a piece of sturdy cardboard wrapped in plastic wrap. The key is to have something flexible that you can use to guide the rolling process and apply gentle, even pressure to get a tight sushi roll. Just get creative!
What kind of rice is best for sushi?
For the best sushi, you really want to use short-grain Japanese rice, often labeled as “sushi rice.” This type of rice is stickier than regular long-grain rice, which is exactly what you need to hold your rolls together and make them easier to eat. Don’t try to use fluffy, individual grains – they just won’t stick!
How do I prevent my sushi from falling apart?
This is a common worry, but it usually comes down to a few things. Make sure your sushi rice is cooked and seasoned correctly and, super important, cooled to room temperature. Don’t overfill your nori sheets with rice or fillings! A thin, even layer of rice and a moderate amount of filling is best. And when you roll, use that bamboo mat to tuck and tighten firmly, but gently, to create a compact roll. A damp knife for slicing also helps keep everything together.
Can I make sushi if I’m a total beginner?
100%! That’s exactly why I created this California roll recipe. It’s one of the most beginner-friendly sushi rolls out there because the ingredients are simple and the rolling technique is pretty straightforward. If you can spread rice and roll up a burrito, you can totally make sushi! Just take your time, follow the steps, and don’t worry if your first few rolls aren’t picture-perfect. They’ll still taste amazing!
Estimated Nutritional Information for California Roll
Now, let’s talk about what you’re putting into your body with these delicious California rolls! Please remember that these numbers are just estimates, and they can totally change depending on exactly how much you pile on or the specific brands you use. But for a typical roll serving (about 6 pieces), you’re looking at something like this:
- Calories: Around 250
- Fat: About 8g (with 1g saturated)
- Protein: Roughly 10g
- Carbohydrates: Around 40g (with 3g fiber)
- Sugar: Approximately 5g
- Sodium: Around 400mg
It’s a pretty balanced bite, right? Packed with flavor and enough goodies to keep you happy!
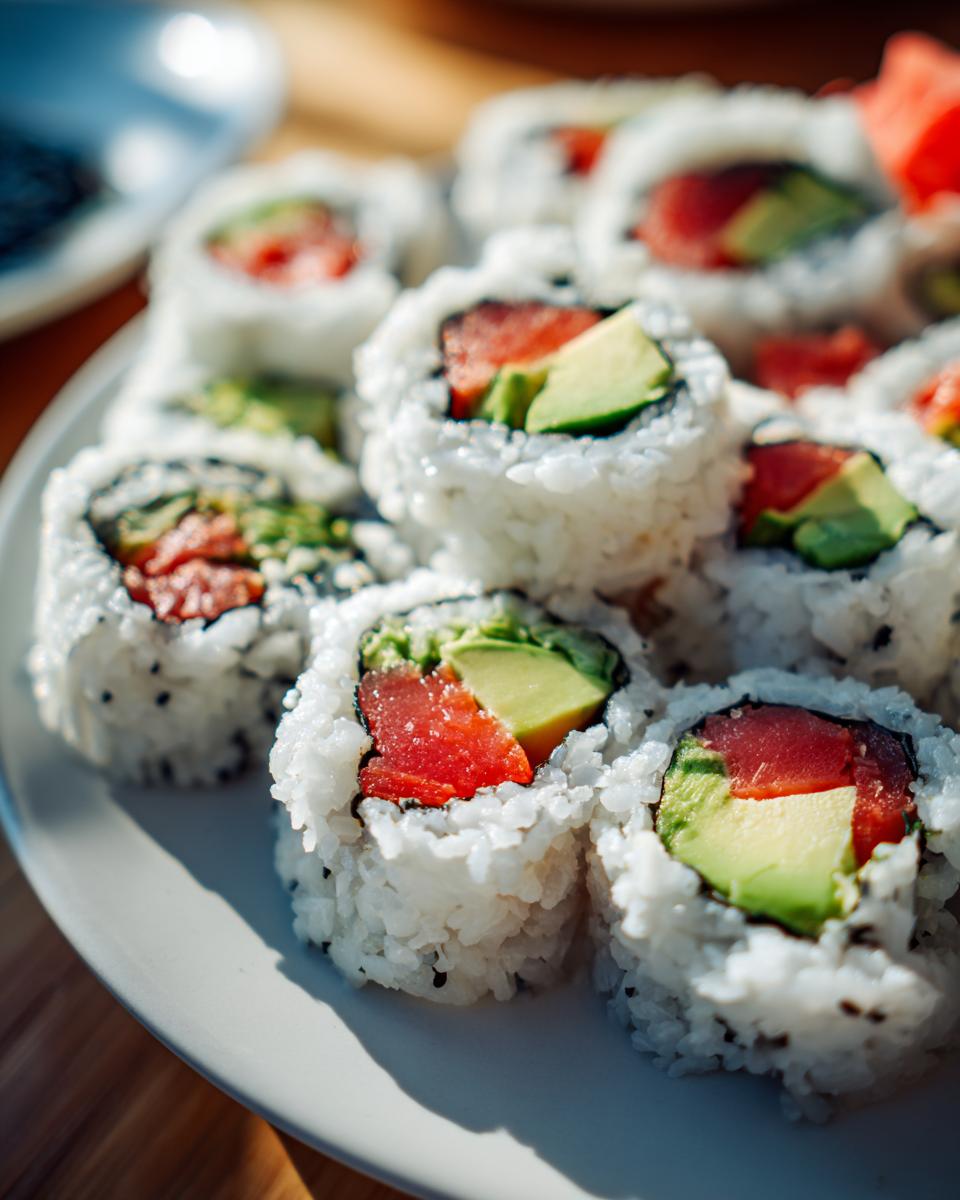
Serving Your Delicious Homemade Sushi
Alright, your beautiful California rolls are ready! Time to plate them up. Don’t forget the classic trio: a little dish of soy sauce for dipping, a tiny dab of fiery wasabi if you’re brave, and some pickled ginger to keep your palate fresh. You could even serve them alongside some smoked salmon dip or air fryer fried pickles for a fun appetizer spread. Arrange those neat little rounds so everyone can see your handiwork. Trust me, they look just as good as they taste!
PrintEasy California Roll Recipe

Learn how to make delicious California rolls at home with this beginner-friendly recipe. Perfect for a fun cooking project or a special meal.
- Prep Time: 25 min
- Cook Time: 20 min
- Total Time: 45 min
- Yield: 4 servings 1x
- Category: Main Course
- Method: Rolling
- Cuisine: Japanese-American
- Diet: Vegetarian
Ingredients
- 1 cup sushi rice
- 1 1/4 cups water
- 2 tablespoons rice vinegar
- 1 tablespoon sugar
- 1/2 teaspoon salt
- 4 sheets nori seaweed
- 1/2 cup imitation crab meat, shredded
- 1/2 avocado, thinly sliced
- 1/2 cucumber, julienned
- Toasted sesame seeds for garnish
- Soy sauce, for serving
- Wasabi, for serving
- Pickled ginger, for serving
Instructions
- Rinse sushi rice under cold water until water runs clear. Combine rice and water in a saucepan. Bring to a boil, then reduce heat, cover, and simmer for 15 minutes. Remove from heat and let stand, covered, for 10 minutes.
- In a small bowl, whisk together rice vinegar, sugar, and salt until dissolved.
- Transfer cooked rice to a large bowl. Pour the vinegar mixture over the rice and gently fold it in with a rice paddle or spatula until well combined. Let the rice cool to room temperature.
- Place a bamboo rolling mat on a clean surface. Cover the mat with plastic wrap.
- Place one sheet of nori, shiny side down, on the plastic-wrapped mat. Wet your hands to prevent sticking and spread a thin, even layer of sushi rice over the nori, leaving about a 1-inch border at the top.
- Sprinkle toasted sesame seeds over the rice.
- Arrange a line of imitation crab, avocado slices, and cucumber juliennes horizontally across the rice, about one-third of the way up from the bottom edge.
- Using the bamboo mat, carefully lift the bottom edge of the nori and roll it tightly over the filling. Continue rolling, applying gentle pressure, until you reach the top border. Moisten the top border with a little water to seal the roll.
- Remove the roll from the mat. Repeat with the remaining nori, rice, and fillings.
- Using a sharp knife, slice each roll into 6-8 pieces. Wipe the knife with a damp cloth between cuts for cleaner slices.
- Serve immediately with soy sauce, wasabi, and pickled ginger.
Notes
- For best results, use sushi-grade rice.
- Ensure your knife is sharp and damp for easy slicing.
- You can substitute real crab meat for imitation crab if desired.
- Experiment with other fillings like cooked shrimp or cream cheese.
Nutrition
- Serving Size: 1 roll (approx. 6 pieces)
- Calories: 250
- Sugar: 5g
- Sodium: 400mg
- Fat: 8g
- Saturated Fat: 1g
- Unsaturated Fat: 7g
- Trans Fat: 0g
- Carbohydrates: 40g
- Fiber: 3g
- Protein: 10g
- Cholesterol: 15mg