
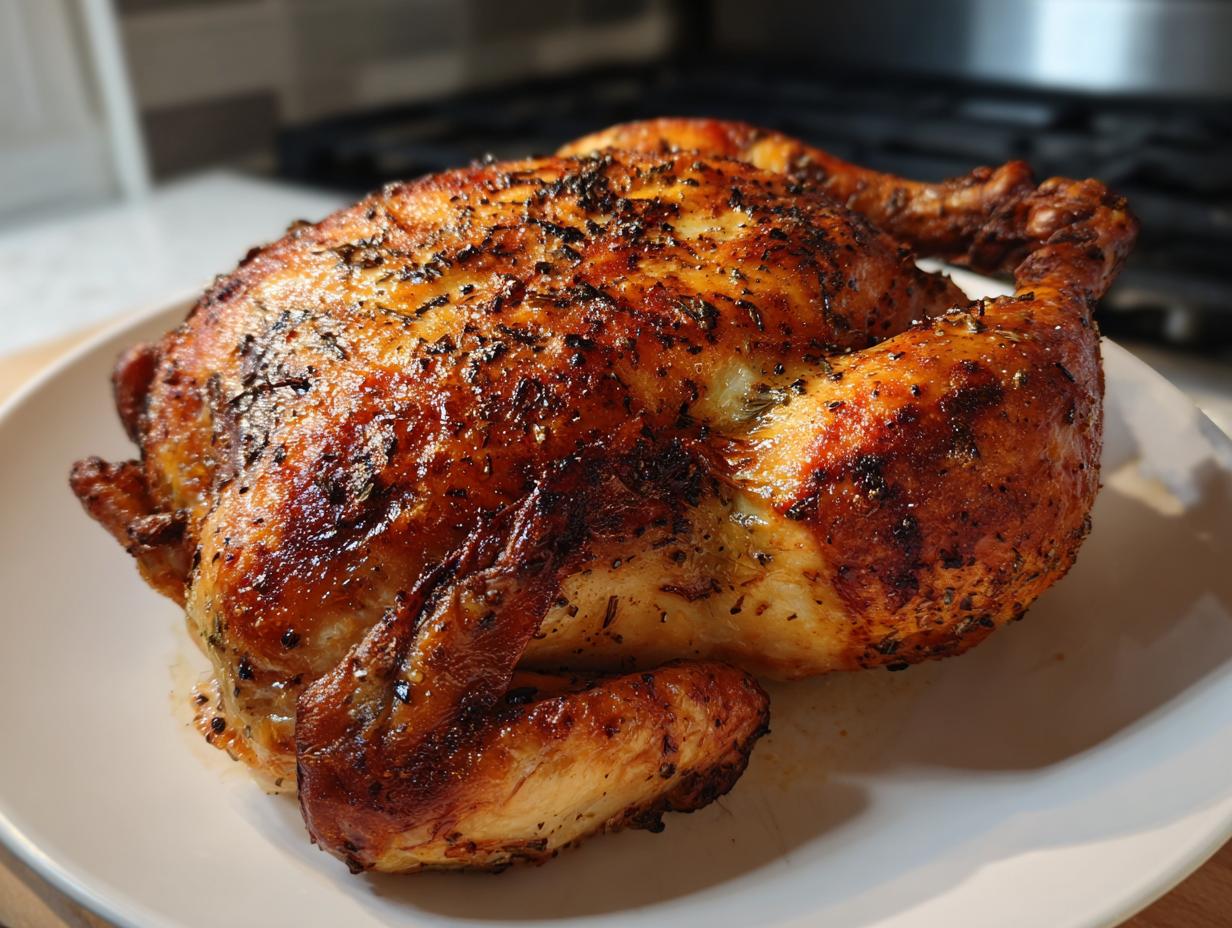
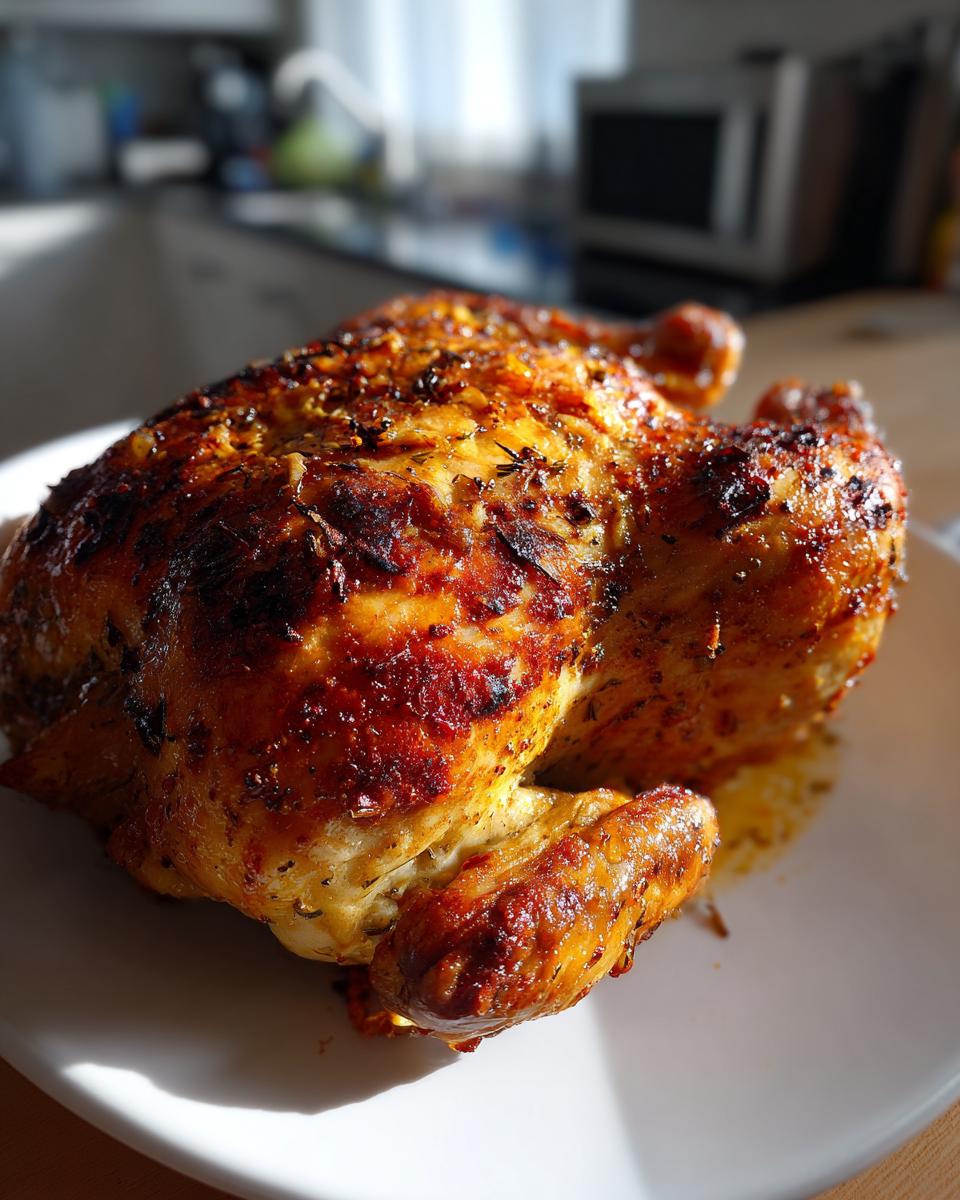
If you’ve ever looked at a picture of a golden, perfect roasted chicken and thought, “No way I can pull that off,” I’m here to change your mind right now! This Ultimate Easy Garlic Herb Butter Roast Chicken is my promise to you that you can nail that crispy skin and impossibly juicy meat every single time. When I started Kings Cook, my goal was to take intimidating classics—like the perfect whole roasted chicken—and break them down so anyone could succeed. Trust me, this recipe is rigorously tested and it absolutely works. Forget dry dinners; get ready for comfort food that feels like royalty!
- Why This Is the Best Roasted Chicken Recipe You Will Ever Make
- Gathering Ingredients for Your Garlic Herb Butter Roasted Chicken
- Step-by-Step Instructions for a Classic Roast Chicken
- Tips for the Best Roast Chicken Technique
- Making This Easy Whole Chicken a Weeknight Chicken Dinner
- Serving Suggestions for Your Lemon Roasted Chicken Meal
- Storage and Reheating Instructions for Leftover Roasted Chicken
- Frequently Asked Questions About How to Roast Chicken
- Nutritional Estimates for This Classic Roast Chicken
- Share Your Experience Making This Roasted Chicken
Why This Is the Best Roasted Chicken Recipe You Will Ever Make
I get it; cooking a whole bird can be scary! People worry about weird textures or dry meat, but this classic roast chicken recipe eliminates all that guesswork. My friends who swore they couldn’t cook have made this successfully for holiday dinners. It really is the simplest path to an impressive meal.
Here’s what makes this recipe shine:
- It’s unbelievably easy—no trussing or complicated equipment needed.
- It delivers that perfect contrast: shatteringly crisp skin and seriously juicy meat.
- It’s fast enough to feel achievable for a weeknight dinner!
If you want the absolute best results when making a roasted chicken, this method gives you reliable flavor every time. You can read more about my favorite tips for technique here: Best techniques for roasting.
Achieving Ultimate Crispy Skin Chicken
Crispy skin is the name of the game here, my friends! You have to treat the skin right from the start. The number one thing you must do is pat the chicken completely dry with paper towels. Seriously, I mean bone-dry. Moisture is the enemy of crispiness! Then, we blast it with high heat—425°F—for those initial 15 minutes. That heat shock helps the butter work its magic and starts rendering out the fat rapidly. That little head start guarantees you end up with amazing Crispy Skin Chicken.
Secrets to Juicy Roasted Chicken
How do we keep the breast meat from drying out while the thighs finish cooking? It all comes down to the butter barrier and patience at the end. We rub half of that glorious garlic herb butter *directly onto the meat* underneath the skin. That fat melts and bastes the muscle the whole time it cooks. But the biggest secret? The rest period! You absolutely must let the chicken rest for a solid 15 minutes after it comes out. Don’t peek! This lets all those juices redistribute, making sure every slice is the definition of Juicy Roasted Chicken.
Gathering Ingredients for Your Garlic Herb Butter Roasted Chicken
Okay, the best part about this recipe is that you won’t need to make a special trip to a fancy market! Everything here—the star of the show, the chicken, and the simple herbs—is easily found at your standard American grocery store. That’s total accessibility right there, which keeps this fuss-free and great for when you need a reliable dinner fast.
Here’s what you need to pull together that incredible garlic herb butter:
- One whole chicken, about four or five pounds.
- Four tablespoons of unsalted butter, and it really needs to be softened up first!
- Two cloves of garlic—make sure they are minced nice and fine.
- Dried herbs: rosemary, thyme, and oregano (one teaspoon of each).
- Salt and pepper, because flavor rules!
- Half a lemon and a small onion for stuffing the cavity—they steam the inside to keep it tender.
That’s honestly the entire list! Simple, wholesome, and ready to make your kitchen smell amazing.
Step-by-Step Instructions for a Classic Roast Chicken
Alright, now for the fun part! Getting this roasted chicken into the oven is way easier than you think. We break it down into three simple phases. Remember, preparation is everything, but the actual cooking is mostly hands-off. Before you even look at the bird, make sure your oven is cranked up to 425°F (220°C). You want that heat waiting for you!
Preparing the Herb Butter and Chicken
First things first: water has to go! Grab your paper towels and pat that whole chicken down until she feels totally dry—I mean, everywhere: the top, under the wings, and inside the cavity. Now, mix up that softened butter with your minced garlic and all those dried herbs, salt, and pepper. I like to use my fingers to gently separate the skin from the breast meat, just a little bit, and rub about half that glorious butter right there onto the meat. Rub the rest all over the outside of the skin. Then, stuff those lemon halves and the onion pieces inside the cavity. That’s it for prep!
The Roasting Process: Temperature Control for Perfect Roasted Chicken
We use a two-stage approach here! Pop the chicken in the pan and roast it at that high 425°F for just 15 minutes. Don’t touch it! This kicks off the browning beautifully. After that first blast, immediately drop the temperature down to 375°F (190°C). Now, let it roast for another hour or so. My biggest tip for anything involving meat this size is using a meat thermometer. You’re looking for 165°F right in the thickest part of the thigh. Cooking by time is a guess; cooking to temperature is perfection!
Resting Your Chicken for Maximum Juiciness
I know you’ll be tempted to carve the minute it comes out, but please, please don’t! This is where all the magic locks in. When you pull that perfectly cooked bird out, you need to tent it loosely with foil—just drape some foil over the top without touching the skin, which keeps it crispy. Let it sit undisturbed for a full 15 minutes. That resting time lets all those hot juices settle back into the meat fibers. Skip this, and all that juiciness runs onto your cutting board instead of staying in your dinner. I promise, this step seals the deal for a truly juicy roasted chicken.
For more instruction on timing and heat, check out my full guide on how to roast chicken like a pro!
Tips for the Best Roast Chicken Technique
Even with a perfect recipe, sometimes you just need one or two little nudges to take your cooking from good to absolutely legendary. Mastering the Best Roast Chicken Technique isn’t about complicated steps; it’s about fixing tiny problems before they even happen. I use these tricks every single time I make my weekend roast chicken. It ensures the skin stays magnificent and we keep that internal moisture locked in tight.
Using a Wire Rack for Even Cooking
Okay, this is one of those small upgrades that makes a huge visual difference! If you have a wire rack that fits inside your roasting pan—use it! My recipe notes mention this, but I want to elaborate: when you put the chicken directly on the bottom of the pan, the skin touching the metal traps steam. Steam equals soggy skin, and we absolutely do not want that!
Setting the chicken up on a rack allows air to circulate completely around the underside of that bird. This gentle flow of hot air cooks the bottom skin evenly, giving you an all-over golden finish. It works like a mini rotisserie inside your oven! Honestly, it’s a game-changer if you’re striving for that perfect, all-around crispiness.
Handling Browning Issues
You might notice that gorgeous golden color appearing faster than the internal temperature is rising—especially if your chicken is on the smaller side or your oven runs hot. That’s when you need your best friend: aluminum foil. If the skin is looking deeply browned and glorious, but that thermometer isn’t quite hitting 160°F yet, just grab a piece of foil and loosely tent the top of the chicken.
Don’t press that foil down onto the crisp skin; just let it hover like a little roof over the breast area. This protects the already-browned skin from burning while the internal temperature catches up. It’s the ultimate fail-safe for ensuring you get that golden crust without ending up with dried-out meat. For more ways to perfect your roasting game, I love looking at how other culinary experts handle their birds. Take a peek at Ina Garten’s approach when you have a moment: Ina Garten’s Roast Chicken secrets.
Also, remember that lovely butter mixture? That’s why we put half of it *under* the skin. That keeps the meat around the outside tender while the outside crisps up! If you just rub butter on top, all that goodness melts right off before it can really work its magic. For more butter-specific tips, see my rundown on butter roasted chicken methods!
Making This Easy Whole Chicken a Weeknight Chicken Dinner
I know what you’re thinking: “A whole roast chicken? That sounds like a three-hour Sunday project.” Not with this recipe! This is truly my go-to for when I want something that looks spectacular but doesn’t require me babysitting the oven all evening. It’s the definition of an Easy Whole Chicken dinner!
Because most of the time is passive roasting, this fits perfectly into the rhythm of a busy evening. While the chicken is in the oven, I’m tackling the side dishes, setting the table, or just taking five minutes to breathe. That initial 15 minutes of prep is all the active work you do for the main event! When you nail the timing using the two-stage heat method, this easily becomes your favorite reliable Weeknight Chicken Dinner.
I personally love making this on a Tuesday because while the bird rests, I quickly whip up a simple pan sauce with just broth, maybe a splash of white wine, and scraping up all those amazing browned bits. If you’re looking for other speedy dinners that use simple methods, I’ve got a whole collection you can check out here: Quick Weeknight Meals.
And honestly, if you need another idea for super easy whole birds that cook fast, check out how Krystel does her rotisserie style chicken—it’s another great option when time is tight! Easy Rotisserie Style.
Serving Suggestions for Your Lemon Roasted Chicken Meal
So, you’ve pulled off the perfect roasted chicken. Now what? We can’t just eat glorious poultry on its own, although I’ve certainly been tempted! The beauty of this garlic and herb flavor profile is that it plays so nicely with classic, hearty American sides. Because we’ve got that bright citrus note from the lemon stuffed inside, it really opens up the door for side dishes that can stand up to the richness of the butter but aren’t too heavy.
If you’re aiming for a true Sunday Dinner vibe, you absolutely need starch to soak up those pan drippings—which, by the way, are liquid gold. My go-to pairing, hands down, is creamy mashed potatoes cooked with roasted garlic. If you want to keep the flavor theme going, check out the recipe I developed for Garlic Herb Roasted Potatoes; they roast right alongside the chicken if you have the space!
For something green, you want brightness to cut through that rich butter. Steamed green beans are classic, but if you want to elevate it just a touch, try my Honey Glazed Carrots. The slight sweetness from the honey pairs wonderfully with the savory herbs lingering on the chicken skin!
If you decided to skip the lemon entirely and just focus on the herbs, this bird is still incredible—it becomes a fantastic base for almost any side, making it an easy pivot for a standard meal. But let’s stick with the citrus for a second; that slight tang really elevates everything, which is why I love serving this as a Lemon Roasted Chicken style meal. It just adds that little unexpected freshness. Enjoy every bite!
Storage and Reheating Instructions for Leftover Roasted Chicken
The absolute best part about making a whole roasted chicken is waking up the next day knowing you have ready-made, delicious dinner components! But we have to treat those leftovers right, don’t we? Otherwise, that perfect juiciness we worked so hard for turns into shoe leather in the microwave.
For safe storage, get that chicken cooled down quickly. Once it’s fully cooled to room temperature (don’t leave it sitting out for more than two hours—that’s the food safety rule!), wrap the pieces tightly in foil or pop them into an airtight container. You can keep this in the fridge for about three to four days. I usually carve everything off the skeleton right away, which makes it much easier to grab exactly what I need later.
Now, when it comes time to reheat, moisture is your absolute best friend. You cannot just blast a piece of chicken breast in the microwave dry; it will fight back! For slicing meat, I highly recommend using a little liquid. Place your pieces in a baking dish and add just a tablespoon or two of broth—chicken broth is ideal, but water works in a pinch. Don’t drown it! Just add enough liquid so you can cover the dish tightly with foil.
Pop that covered dish into a low oven, maybe around 300°F (150°C), until it’s warmed through. The steam trapped under the foil gently reheats the meat, protecting those precious juices we sealed in with the resting period. If you’re just reheating a small piece, a quick 30 seconds in the microwave with a drop of broth works too, but don’t walk away—microwave heat is sneaky!
Don’t forget the carcass! You can save the bones to make amazing homemade stock later. Toss them in a big pot with some water and leftover vegetable scraps. It turns into the best base for soup or even gravy later on. Leftovers this good deserve a little effort to keep them tasty!
Frequently Asked Questions About How to Roast Chicken
I always get so many questions after people try this recipe because everyone wants their first try at a whole roasted chicken to be spectacular! It’s great hearing what you all are wondering about. Here are the big ones I hear again and again when you are trying to master this classic meal.
What temperature should I cook a roasted chicken to?
This is the most important safety and texture question! You are aiming for 165°F (74°C). But where you check matters! You need to insert your meat thermometer into the thickest part of the thigh, making sure the tip isn’t touching the bone, because the bone will read hotter. Once it hits 165°F, pull it out immediately. Remember, it will continue to cook slightly during that all-important rest period, so pulling it out right at temp is perfect.
Can I use fresh herbs instead of dried herbs in the butter?
Oh, absolutely! Fresh herbs are always a win if you have them growing in your window box. When substituting fresh herbs for dried ones in a recipe like this, a good rule of thumb is to triple the amount. So, if I call for one teaspoon of dried rosemary, you’ll want about three teaspoons of finely chopped fresh rosemary. They impart a brighter flavor, which is lovely, but they need more bulk to pack the same punch as their dried cousins. Stuffing the cavity with whole sprigs too adds a wonderful aroma!
How do I ensure my oven roasted chicken breast stays moist?
If you worry about the breast drying out, you’re probably not alone! We tackle this from three angles in the recipe. First, the butter barrier *under* the skin protects the meat as it cooks. Second, we use the two-stage temperature method so the breast cooks gently after the initial crisping. And third—and this cannot be stressed enough—YOU MUST LET IT REST for 15 minutes! Seriously, check out this guide on why that rest matters so much for maintaining those juices: The best roast chicken guide. Don’t risk it by carving too soon!
If you ever want to try something totally different after mastering the classic, I have a great recipe for chicken shawarma that uses similar flavor profiles but cooks way faster!
Nutritional Estimates for This Classic Roast Chicken
Now, I always say that cooking shouldn’t feel clinical; we’re making food that tastes amazing, not just counting macros! However, since I know many of you are curious about what goes into this wonderful bird, I put together a quick estimate. This information is based on dividing the entire recipe by four servings, meaning one serving is roughly one-quarter of the whole chicken, including skin and some butter drippings.
Just a head’s up: these numbers are estimates based on standard ingredient weights. Your actual nutritional content will vary slightly based on the size of your roasted chicken and exactly how much butter you manage to keep on the plate versus how much runs off!
- Serving Size: 1/4 chicken
- Calories: Approximately 450
- Protein: Around 45g (That’s a powerhouse meal!)
- Fat: About 28g (Remember, this includes the healthy fats from the butter and natural chicken fat.)
- Saturated Fat: Roughly 12g
- Cholesterol: 150mg
- Carbohydrates & Sugar: 0g (Woohoo! A fantastic low-carb option.)
- Sodium: Varies, but estimated around 450mg (This depends heavily on how aggressively you salt the bird, so adjust to your needs!)
See? It’s hearty, it’s pure comfort food, and best of all, it’s incredibly high in protein. It’s a classic American dinner that delivers on taste and keeps you feeling satisfied! I hope this helps you fit this fantastic meal into your week, whether you are watching those stats or just keeping things simple.
Share Your Experience Making This Roasted Chicken
Okay, now that your kitchen probably smells exactly like my kitchen should right now—like roasted herbs and garlic perfection—I absolutely need to hear from you! Making this roasted chicken is about building confidence, and I truly want to celebrate your success.
Did you nail that crispy skin? Did you finally realize how easy this whole process really is? Please, don’t keep your victory a secret! At the top of the page, you should see a spot to give this recipe a rating—five stars if it blew your expectations away, or whatever score feels right based on your experience.
More importantly, scroll down to the comments section below and tell me everything! Did you try adding some smoked paprika to the butter? Maybe you skipped the lemon and used orange instead? I love hearing about the little tweaks you make to make the recipe uniquely yours. Every comment helps the next reader feel more comfortable trying it out.
If you shared your creation on Instagram or Facebook, please tag me! Seeing your golden, beautiful birds pop up in my feed is the best compliment I could ever receive. If you ran into any trouble or have a question, this is also the place to ask. You can always reach out directly through my contact page here: Ask Kate Directly. I’m here to help you master your kitchen, one perfect chicken at a time!
PrintUltimate Easy Garlic Herb Butter Roast Chicken with Crispy Skin

Make a juicy, flavorful whole roasted chicken with crispy skin using simple garlic and herb butter. This recipe is easy enough for a weeknight but impressive enough for guests.
- Prep Time: 15 min
- Cook Time: 75 min
- Total Time: 90 min
- Yield: 4 servings 1x
- Category: Dinner
- Method: Roasting
- Cuisine: American
- Diet: Low Fat
Ingredients
- 1 whole chicken (about 4–5 lbs)
- 4 tablespoons unsalted butter, softened
- 2 cloves garlic, minced
- 1 teaspoon dried rosemary
- 1 teaspoon dried thyme
- 1 teaspoon dried oregano
- 1 teaspoon salt
- 1/2 teaspoon black pepper
- 1 lemon, halved
- 1 small onion, quartered (optional)
- Fresh herbs (rosemary, thyme sprigs) for cavity (optional)
Instructions
- Preheat your oven to 425°F (220°C). Remove the chicken from its packaging and remove any giblets from the cavity. Pat the entire chicken dry, inside and out, using paper towels. This step is key for crispy skin.
- In a small bowl, combine the softened butter, minced garlic, dried rosemary, dried thyme, dried oregano, salt, and pepper. Mix until you have a uniform herb butter.
- Gently loosen the skin over the chicken breasts and thighs. Rub about half of the herb butter mixture directly onto the meat under the skin. Rub the remaining butter all over the outside of the chicken skin.
- Place the lemon halves and onion quarters inside the chicken cavity. If using, place a few fresh herb sprigs inside as well.
- Place the chicken breast-side up in a roasting pan or a large cast-iron skillet.
- Roast at 425°F (220°C) for 15 minutes to start crisping the skin.
- Reduce the oven temperature to 375°F (190°C). Continue roasting for another 50 to 70 minutes, or until a meat thermometer inserted into the thickest part of the thigh (without touching bone) reads 165°F (74°C). Baste with pan drippings halfway through this period if desired.
- Remove the chicken from the oven. Tent loosely with foil and let it rest for 15 minutes before carving. This resting period keeps the meat juicy.
Notes
- For extra crispy skin, place the chicken on a wire rack set inside the roasting pan.
- If the skin begins to brown too quickly before the chicken is done, loosely tent the top with foil.
- Use the pan drippings to make a simple gravy or sauce for serving.
Nutrition
- Serving Size: 1/4 chicken
- Calories: 450
- Sugar: 0
- Sodium: 450
- Fat: 28
- Saturated Fat: 12
- Unsaturated Fat: 16
- Trans Fat: 0
- Carbohydrates: 0
- Fiber: 0
- Protein: 45
- Cholesterol: 150