
Oh my gosh, there is simply nothing better than walking into your kitchen when something glorious is baking—that comforting cloud of warm yeast and toasty flour wrapping around you! If you think making that perfect loaf with a crackly, golden exterior and a soft, chewy center is reserved for professional bakers, I’m here to tell you that’s just not true. I’m Kate Connolly, and every recipe here at Kings Cook is rigorously tested because I want you, the home cook, to feel completely confident. This easy Italian bread recipe proves you can achieve that amazing bakery-style quality right here, right now, using just the basics.
- Why This Easy Italian Bread Recipe Works for Beginners
- Ingredients for Your Homemade Italian Bread Loaf
- Step-by-Step Instructions for Bakery Style Bread at Home
- Tips for Perfecting Your Crusty Italian Bread
- How to Serve Your Warm Fresh Bread
- Storage and Reheating Instructions for Italian Bread
- Frequently Asked Questions About This Easy Italian Bread Recipe
- Estimated Nutritional Information for Italian Bread
- Share Your Homemade Italian Bread Baking Journey
Why This Easy Italian Bread Recipe Works for Beginners
I totally get it—yeast can be intimidating! You think you need a fancy mixer or an artisan background to get that restaurant-quality loaf. Nope! This recipe for **Homemade Italian Bread** is designed specifically for you to succeed, even if this is your first time trying to make bread from scratch. I tested this so many times in my own kitchen so you don’t have to worry about disappointing results. This simple method is perfect for getting a great loaf whether you plan to serve it dripping with olive oil or turn it into amazing bruschetta!
Here are the core reasons why this recipe is so foolproof:
- We use very accessible, everyday ingredients. No hunting required!
- The steps are broken down into manageable time blocks, which helps when you’re learning the dough feel.
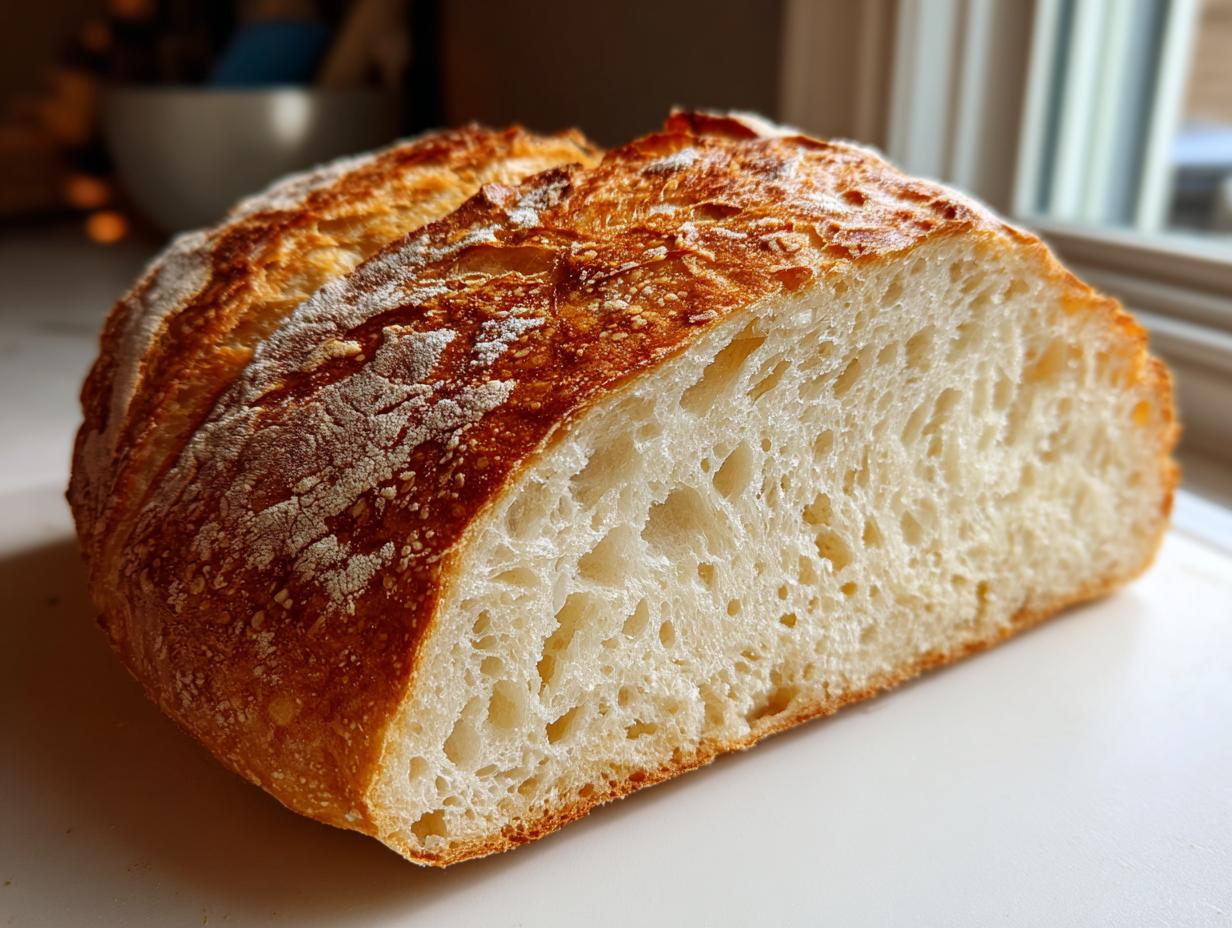
- You get that incredible texture every single time: **Crusty Bread Recipe** on the outside meets beautifully **Soft Inside Bread** on the inside.
It’s really a classic technique for an Italian bread, just stripped down to the absolute essentials without sacrificing flavor.
Achieving the Perfect Crusty Bread Recipe Texture
That golden, shiny, crackly crust you see in bakeries? That’s all thanks to steam! Seriously, this is the one little trick that separates good homemade bread from show-stopping bread. When you place that little pan of hot water in the oven during the first half of the bake time, the humidity keeps the crust soft just long enough to expand fully. Once the steam goes away, the super hot oven air hits that exposed dough, setting that beautiful, crisp shell perfectly.
Ingredients for Your Homemade Italian Bread Loaf
When you’re making something as simple and honest as this Yeast Bread Recipe, you absolutely have to use good, straightforward ingredients. My promise is that you likely have most of this in your pantry already! I’ve listed everything out below, and trust me, there are no fancy hidden items you need to hunt down at specialty stores. Accuracy matters here, so pay close attention to the water temperature—that’s key for waking up our lazy little yeast friends!
Here is what you will need to get started:
- 3 1/2 cups all-purpose flour (the standard kind works beautifully)
- 1 1/2 teaspoons salt (don’t skip this, it makes a huge flavor difference!)
- 1 teaspoon granulated sugar (just a tiny bit to feed the yeast)
- 2 1/4 teaspoons active dry yeast (that’s one standard packet, don’t use instant here)
- 1 1/2 cups warm water (aim for 105-115°F—it should feel comfortably warm, not hot)
- 2 tablespoons olive oil (a good quality one makes the crumb taste amazing)
This short list is what makes it such an Easy Italian Bread Recipe. We keep it simple so you can focus on the technique!
Step-by-Step Instructions for Bakery Style Bread at Home
Now for the exciting part—turning those simple pantry items into an incredible loaf of italian bread! I want you to think of this process as satisfying and straightforward. We’re following a classic path here to ensure you get that Bakery Style Bread at Home look and feel. Remember what I always say: baking is chemistry you can eat, and following these steps precisely is how we guarantee success for our Easy Bread Recipe! Every step, from the mixing to the final bake, is vital for getting that golden, rustic look we love, much like my recipe for focaccia.
Activating the Yeast and Mixing the Italian Bread Dough
First things first: make sure that water is just right—warm, not scalding! Mix your warm water, sugar, and yeast together in a big bowl. You MUST let this sit for a full five minutes until it looks foamy and bubbly on top. If it doesn’t foam up, we need to start over with new yeast because that means your bread won’t rise. Once it’s foamy, stir in your olive oil and the salt. Then, start adding the flour slowly, about half at first, mixing it until it’s just combined into a shaggy mess. Keep adding the rest until you can’t mix it easily with a spoon anymore.
Kneading and First Rise for Soft Inside Bread
Time to get messy! Turn that shaggy dough onto a lightly floured counter. You need to knead this dough for a good 8 to 10 minutes. I know it feels like forever, especially if you are new to this! When it’s done, it shouldn’t feel sticky anymore; instead, it should be smooth and elastic, pulling back nicely when you poke it. That’s the secret—that elasticity gives you that wonderful final Soft Inside Bread texture. Then, lightly oil a clean bowl, tuck the dough ball in, cover it up, and let it hang out in a warm spot for 1 to 1.5 hours until it has doubled in size. Don’t rush this part; the first rise builds all the structure!
Shaping and Final Proofing for Your Rustic Italian Loaf
Once it’s doubled, gently punch the air out—don’t just mangle it, though! Shape the dough into a nice, rustic loaf shape right on your parchment paper or in your pan. Then, cover it again loosely and let it sit for its second rise, which usually takes 30 to 45 minutes. The dough should look puffy. Then, get your oven screaming hot to 400°F! Before it goes in, brush the top lightly with water—this just helps get that *incredible* golden color. It bakes for about 30 to 35 minutes. If you want that super crispy crust that links back to these great techniques, you’ll want to spray the inside walls of your oven with water during those first ten minutes!
Tips for Perfecting Your Crusty Italian Bread
So, you think you’re done once the dough goes in the oven? Not quite! If you want to move your loaf from just “good” to truly “bakery-quality,” you need to focus on a couple of details that make all the difference for that signature texture. Since we are aiming for the absolute Best Italian Bread experience, let’s talk about moisture and tools!
We already talked about the steam trick briefly, but I want to emphasize it: that steaming-hot environment during the first part of the bake is non-negotiable if you are chasing a Crusty Bread Recipe. It keeps the surface pliable so the loaf can spring up high before the crust hardens. If you don’t have a professional steam setup, just use a shallow metal pan on the bottom rack while the oven preheats. Then, when you slide your loaf in, pour about a cup of boiling water into that hot pan—carefully! It will generate a huge puff of steam.
Now, what if you don’t own a stand mixer? Forget about it! My grandmother certainly didn’t use one when she made her bread making tips for the family. You can absolutely make this dough from scratch using nothing more than your hands and a sturdy counter. The 8 to 10 minutes of kneading specified in the instructions is the most important workout you’ll give the dough. It takes a bit more arm strength, but you get a really nice feel for when the dough is ready, which is an intuition I think every home baker should develop when working with simple italian bread dough.
One last thing: serving! If you plan on dipping this in the garlic-infused olive oil after your pasta course, you have to serve it warm. If you need to reheat leftovers later, skip the microwave—it turns the crumb gummy. Instead, place the slices directly on a baking sheet for about 5 minutes at 350°F, or try reheating the whole loaf for 10 minutes. Check out more general tips on the topic over at this great resource. A little warmth brings back that perfect Golden Crust Bread experience every time!
How to Serve Your Warm Fresh Bread
Okay, you waited patiently, and now you have this gorgeous, aromatic loaf of Homemade Italian Bread cooling down. What now? Don’t let that perfect texture go to waste by letting it sit around sadly! I love treating a fresh loaf like this as the centerpiece of the table. It’s the ultimate comfort food and makes any simple American weeknight meal feel a little richer.
If you’re serving it alongside your main course, think about what needs a good mop-up partner. A slightly warm slice is perfect for soaking up the last bits of sauce from a big bowl of spaghetti or dunking into a hearty vegetable soup. I always keep some good quality olive oil and maybe some flaky salt or dried herbs nearby for something quick.
Best Uses for Dinner Side Bread
This really shines as a Dinner Side Bread. While it is fantastic just plain, try slicing it thick and basting it lightly with melted butter mixed with garlic powder and parsley. Pop it under the broiler for just a minute until it’s fragrant—instant garlic bread! This bread is also the ideal base when you’re serving lighter mains, like maybe a crisp Caesar salad, because it has enough spine to hold up without being too heavy. For sandwiches, make sure the bread cools slightly so it doesn’t smash down when you load it up!
Storage and Reheating Instructions for Italian Bread
The hardest part about baking Homemade Italian Bread is waiting for it to cool, I know! But once it’s cool enough to handle, how do you keep that amazing crust you worked so hard for? The number one rule in my kitchen—and I’m going to be firm about this—is: Do NOT refrigerate your bread. Ever! Seriously, the fridge is bread’s mortal enemy; it pulls out all the moisture and makes that beautiful crust go soft and leathery almost instantly. That cheating, Quick Italian Loaf you bought at the store might survive in the fridge, but our quality, From Scratch Bread deserves better treatment.
For short-term storage, say, the next day, you want to keep it out on the counter in a way that lets the outside breathe while protecting the cut side. I usually use a large paper bag—a brown grocery bag works perfectly—or wrap it tightly in clean kitchen linen. This helps keep that crispy exterior intact for almost 24 hours. If you have an open cut side, place that side down on a clean wooden cutting board so the crust stays protected from air but the cut side doesn’t get soggy.

If you baked a big batch and know you won’t eat it all right away, freezing is the only way to go. Once the loaf is completely cool—and I mean *stone cold*—wrap it tightly first in plastic wrap, and then maybe foil or put it in a heavy-duty freezer bag. This double layer keeps freezer burn away. When you’re ready for that Warm Fresh Bread smell again, just pull the loaf out, keep it wrapped, and let it thaw on the counter for a few hours. Then, pop it right into a 350°F oven for about 10 minutes until the crust reheats and crackles again. Trust me, freezing works much better than the fridge for preserving the quality of your fresh loaf!
Frequently Asked Questions About This Easy Italian Bread Recipe
I always get so many questions once people start baking this loaf! It’s wonderful how many of you are jumping in to try **From Scratch Bread** for the first time. It’s natural to wonder if you can speed things up or switch things around, so let’s tackle the most common questions I hear from my readers about achieving that perfect slice of Artisan Bread Simple Recipe goodness.
Can I make this a Quick Italian Loaf by reducing the rise time?
Oh, I know the temptation when you want that **Warm Fresh Bread** right now! The truth is, you *can* try to rush the rise times—you might only let it sit for 30 minutes the first time and 20 minutes the second time—but I really caution you against it if you’re looking for that amazing chewiness. Those rising periods aren’t just waiting time; that’s when the yeast does the hard work establishing the internal structure. If you cut that short, you’ll end up with dough that’s dense and doesn’t have those lovely air pockets we want for the **Chewy Interior Bread**. Patience is the secret ingredient for successful **Beginner Bread Baking**!
What if I don’t have a baking stone for my Artisan Bread Simple Recipe?
Please don’t run out and buy a baking stone just for this! While a stone holds tons of heat and radiates it evenly, we have much simpler ways to mimic that effect here at home. In the main instructions, I mentioned placing a shallow pan on the bottom rack to create the steam environment, which is the most important part for the crust. For the actual baking surface, a standard metal baking sheet lined with parchment paper works absolutely perfectly for this recipe. If you want a tiny bit more heat retention like a stone, you can use an old cast iron skillet you already own; just heat it up empty in the oven while you preheat, and then carefully place your loaf (on its parchment paper) right on top of the hot skillet during baking. It gives you a little extra push for that gorgeous Golden Crust Bread!
To see more solutions for common baking hurdles, check out some great advice compiled over at this fantastic page!
Estimated Nutritional Information for Italian Bread
Now, listen, I am a cook, not a certified nutritionist! I always tell people that when you are baking something this wonderful and From Scratch Bread-based, you aren’t really counting calories—you’re counting happiness, right? But I know some of you need the numbers, especially if you are planning out menus or just curious about what you’re dipping in that olive oil!
Based on the simple ingredients listed in the recipe—flour, yeast, water, olive oil—here are my best estimates for one slice of this Yeast Bread Recipe, assuming you get about 12 hefty slices from the finished loaf. Remember, these are just ballpark figures based on standard measurements, so your final numbers might shift a tiny bit!
- Calories: About 150 per slice
- Total Fat: Roughly 2 grams. (We use oil, but it’s not a heavy fat bread!)
- Carbohydrates: Solid at about 30 grams, which is what fuels you up!
- Protein: Around 5 grams, which is great for a bread this light.
- Sugar and Cholesterol: Very, very low—just 1 gram of sugar! Yay for simple ingredients!
This information shows that even though our finished italian bread is deeply flavorful and feels totally indulgent, it fits right into a balanced meal plan. It’s honest, wholesome food. Just be careful not to overdo it on the butter you slather on afterwards!
Share Your Homemade Italian Bread Baking Journey
Alright, my friend, you’ve done the kneading, you’ve smelled that amazing aroma filling your whole house, and you’ve finally sliced into that perfect, golden loaf! Now the job isn’t quite done—I really want to hear about it! Seeing your results is genuinely the best part of my whole cooking process here at Kings Cook. Did you manage that crackly crust? Did the interior turn out as soft and chewy as we hoped for?
Please, take a moment and leave a star rating right below this post. Those ratings really help other home cooks decide if this is the right recipe for them. And if you snapped a picture of your beautiful finished **italian bread** loaf, I’d love to see it! Tag me on social media or leave a comment right here describing your experience. Hearing how this recipe worked in your kitchen—whether you tweaked the rise time a little or nailed the oven steam trick—is how we all learn and improve together.
If you loved making this straightforward and rewarding recipe, I encourage you to dive into my About Page to see more about why I focus on simple, tested foods. Or, if you are looking for more rustic baking inspiration, check out another great crusty idea over at this recipe for more tips on getting that artisanal feel!
PrintEasy Crusty Homemade Italian Bread for Beginners

Bake bakery-style Italian bread at home with this simple recipe. You will achieve a golden, crispy crust and a soft, chewy interior using basic ingredients.
- Prep Time: 20 min
- Cook Time: 35 min
- Total Time: 2 hours 30 min
- Yield: 1 loaf 1x
- Category: Bread
- Method: Baking
- Cuisine: Italian
- Diet: Vegetarian
Ingredients
- 3 1/2 cups all-purpose flour
- 1 1/2 teaspoons salt
- 1 teaspoon granulated sugar
- 2 1/4 teaspoons active dry yeast (1 packet)
- 1 1/2 cups warm water (about 105-115°F)
- 2 tablespoons olive oil
Instructions
- In a large bowl, mix the warm water, sugar, and yeast. Let this stand for 5 minutes until foamy.
- Add the olive oil, salt, and half of the flour to the yeast mixture. Mix until just combined.
- Gradually add the remaining flour until a shaggy dough forms.
- Turn the dough out onto a lightly floured surface. Knead for 8 to 10 minutes until the dough is smooth and elastic.
- Lightly oil a clean bowl. Place the dough in the bowl, turning to coat. Cover the bowl with plastic wrap or a clean towel.
- Let the dough rise in a warm place for 1 to 1.5 hours, or until doubled in size. This is your first rise.
- Gently punch down the risen dough. Shape it into a loaf.
- Place the loaf on a baking sheet lined with parchment paper or in a prepared loaf pan. Cover loosely.
- Let the dough rise again for 30 to 45 minutes, or until puffy. This is your second rise.
- Preheat your oven to 400°F (200°C). Place a shallow pan on the bottom rack to create steam later.
- Just before baking, brush the top of the loaf lightly with water. Score the top of the loaf with a sharp knife if desired.
- Bake for 30 to 35 minutes, or until the crust is golden brown and the internal temperature reaches 200°F. For extra crust, spray the oven walls with water during the first 10 minutes of baking.
- Remove the bread from the oven and let it cool completely on a wire rack before slicing.
Notes
- For a crispier crust, place a pan of hot water on the bottom rack of the oven while preheating and baking.
- If you do not have a stand mixer, you can mix and knead this dough entirely by hand.
- This bread is excellent served warm with butter or dipped in olive oil.
Nutrition
- Serving Size: 1 slice
- Calories: 150
- Sugar: 1
- Sodium: 250
- Fat: 2
- Saturated Fat: 0.3
- Unsaturated Fat: 1.7
- Trans Fat: 0
- Carbohydrates: 30
- Fiber: 1.5
- Protein: 5
- Cholesterol: 0