
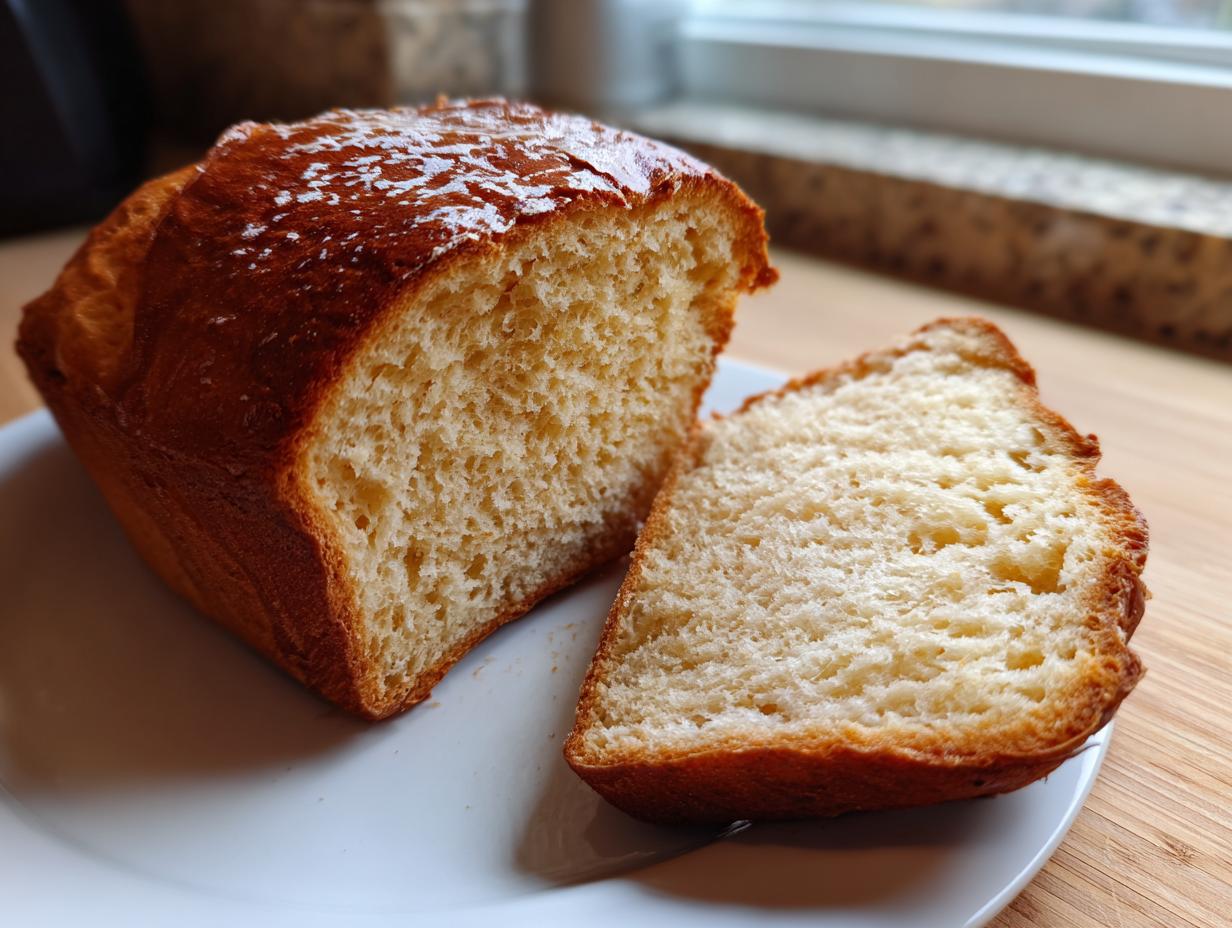
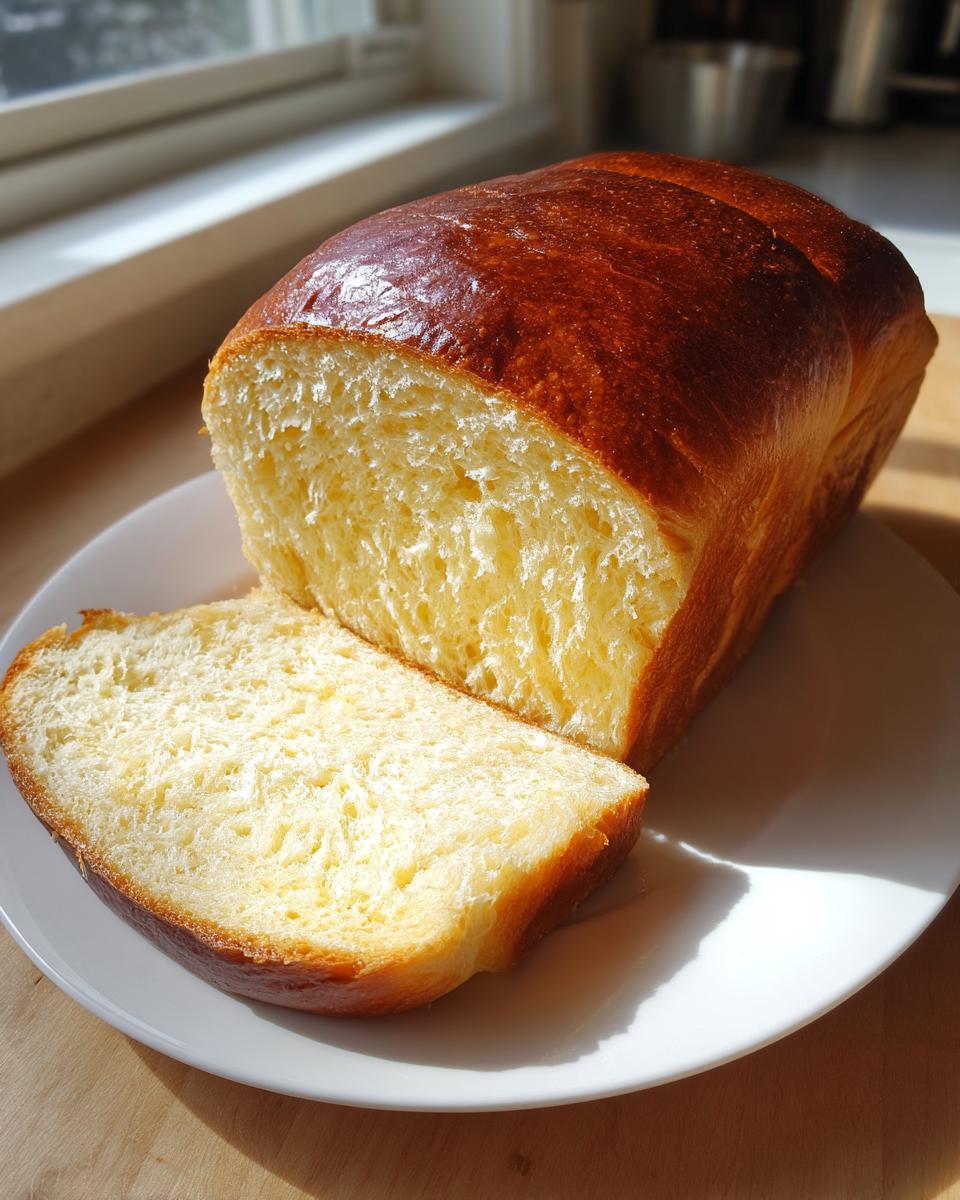
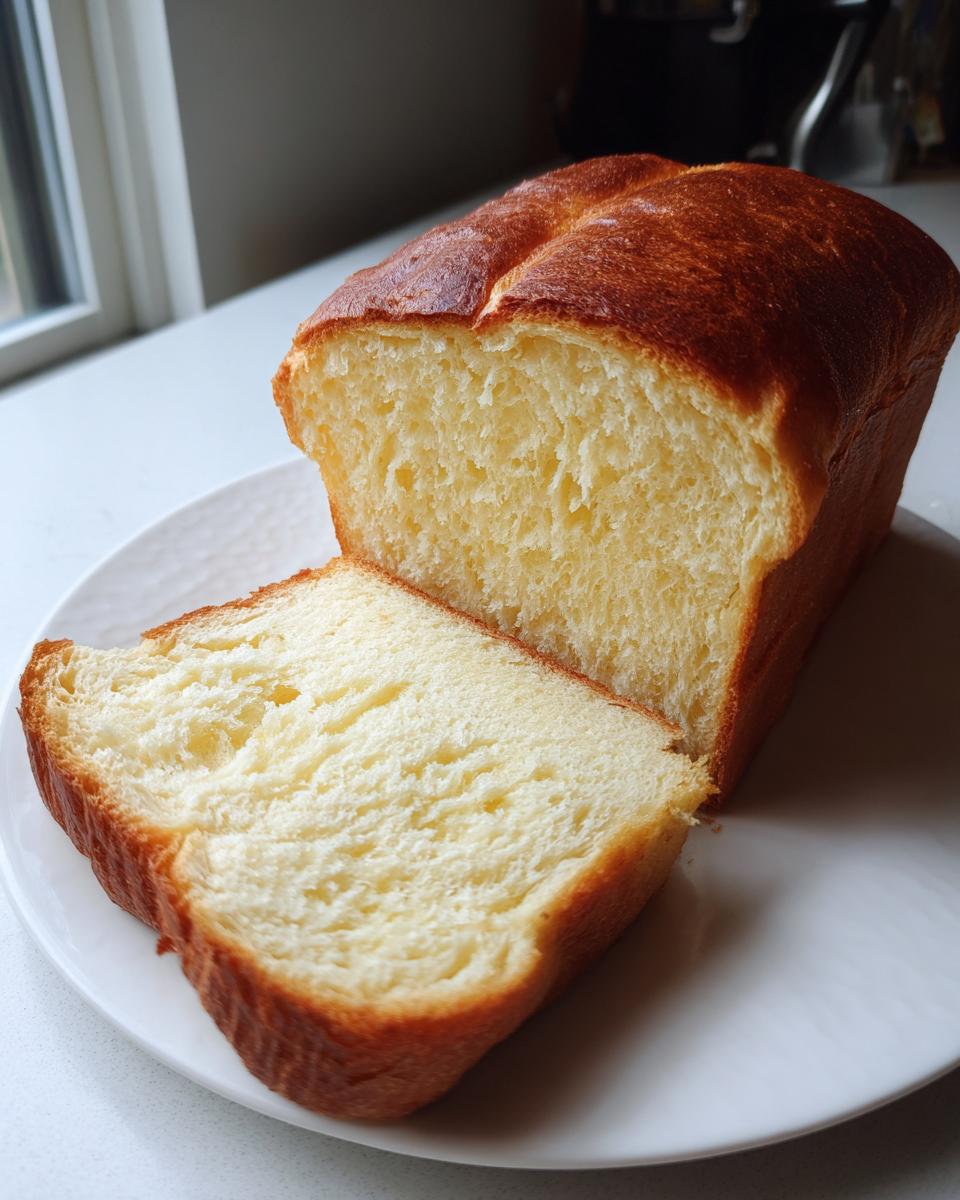
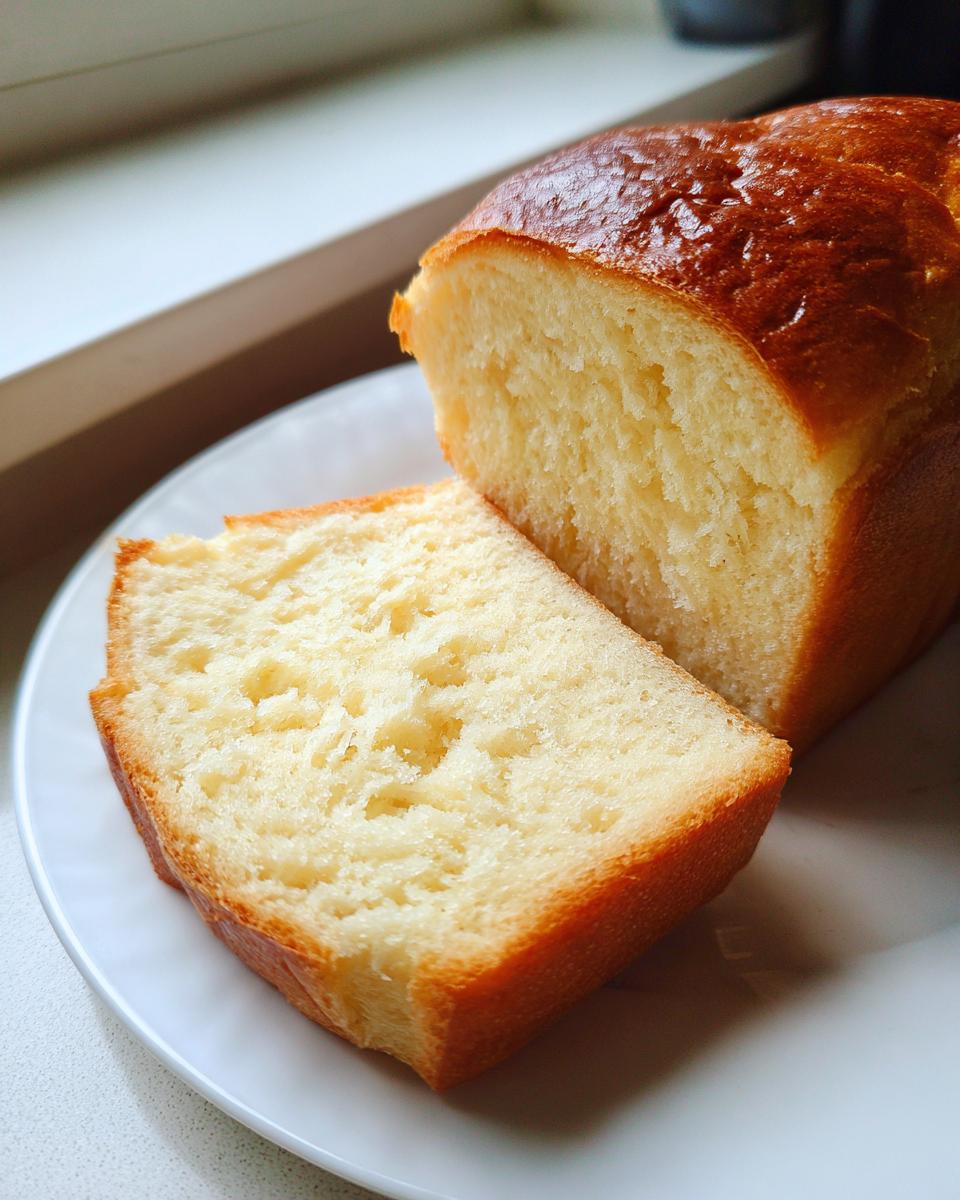
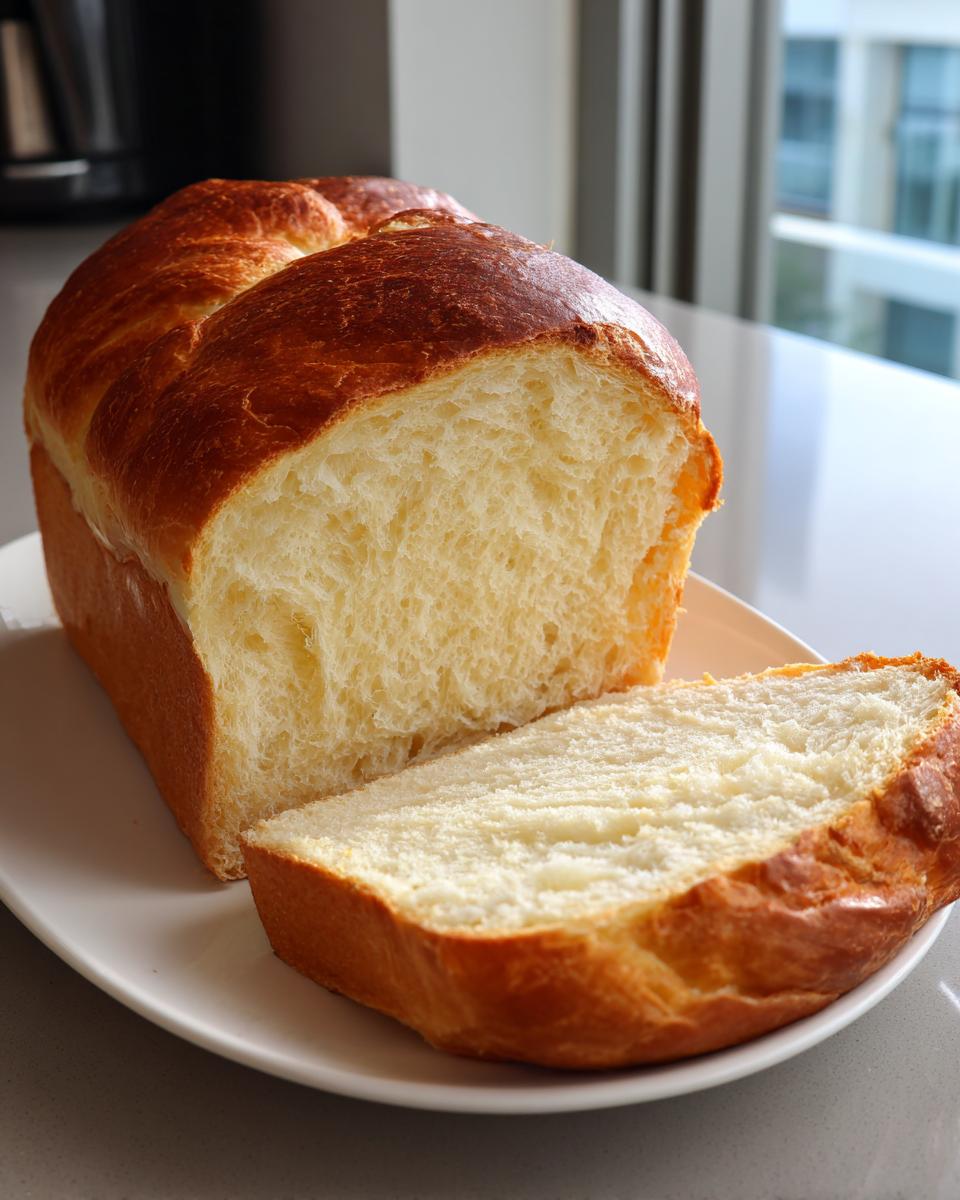
Have you ever walked into a bakery and inhaled that scent of pure, pillowy softness? I’m talking about bread so tender it practically melts when you press it. Well, I’m here to tell you that you absolutely do not need a professional oven or fancy imported flour to achieve that magic right in your own kitchen! This condensed milk bread recipe is my absolute keeper for delivering that cloud-like texture every single time. Trust me, after testing variations endlessly to make sure they were foolproof, I found the sweet spot. We rely on simple, accessible ingredients, and the sweetened condensed milk does most of the heavy lifting to give us that rich flavor and unbelievable moisture. This is the softest loaf you’ll ever bake, I promise!
- Why This Sweetened Condensed Milk Bread Recipe Works (EEAT Focus)
- Gathering Your Ingredients for Perfect Condensed Milk Bread
- Step-by-Step Instructions for Easy Homemade Bread
- Tips for Success with Your Tender Crumb Bread
- Variations: From Loaf to Sweet Condensed Milk Rolls
- Serving Suggestions for Your Rich Flavored Bread
- Storage and Reheating Instructions for Condensed Milk Bread
- Frequently Asked Questions About Sweet Sandwich Bread
- Share Your Soft Fluffy Bread Creations
- Share Your Soft Fluffy Bread Creations
Why This Sweetened Condensed Milk Bread Recipe Works (EEAT Focus)
Honestly, when I first tried baking with condensed milk, I was worried it would just taste sickly sweet, like candy. But trust me, it’s a complete game-changer when you want the ultimate soft fluffy bread. The science behind it is simple but brilliant. That high concentration of sugar and milk solids in the can acts as a powerful moisture retainer in the dough. This means that even after a day or two, your loaf doesn’t dry out like some standard white breads sometimes do. It keeps that amazing, almost cake-like structure.
I remember the first time I pulled one of these loaves out—it was almost bouncy! It had this beautiful golden crust and a crumb so fine; I actually texted my sister a picture right then because I was so proud of that tender crumb bread. That’s the moment I knew this sweetened condensed milk bread recipe was genuinely special and deserved a permanent spot here on Kings Cook. It gives such a wonderfully rich flavored bread without needing tons of extra steps. It’s the easiest path to bakery-style perfection, check out how similar results were achieved over at Lyndy’s Kitchen; we all chase that soft texture!
Gathering Your Ingredients for Perfect Condensed Milk Bread
Okay, let’s get down to the good stuff! Gathering your ingredients is where we ensure this bread turns out perfectly soft, every single time. Since this is an easy homemade bread recipe, we really rely on treating each component right. Don’t look at the list and panic; these are pantry staples, but the details matter!
You’ll need exactly 1 cup of warm milk—and I mean *warm*, think bathwater temperature, around 105°F to 115°F, because we need happy yeast! Make sure your egg has had about 30 minutes on the counter to come to room temperature; this helps it blend much smoother into the dough for better structure later on. Also, have your butter melted and ready, but not scorching hot.
Ingredient Notes and Substitutions for Your Condensed Milk Bread
A little twist here and there can change things, so I always advise sticking close to this recipe, especially your first time baking this condensed milk bread. However, if you want that extra decadence, go ahead and swap that 2% milk for whole milk; it really enhances that rich flavor we’re aiming for!
When it comes to flour, please don’t scoop your measuring cup straight into the bag! The biggest beginner mistake is packing the flour in. You want to use the ‘scoop and level’ method. Gently spoon the flour into your measuring cup until it overflows, then sweep the excess off level with a straight edge. This keeps the dough from getting too heavy, which is the enemy of a truly soft fluffy bread!
Step-by-Step Instructions for Easy Homemade Bread
This is where the magic happens, and trust me, this is truly achievable even if you’re new to beginner bread baking! While this might look like a lot of steps, they are all super simple and designed to give you that bakery-style softness we talked about. The key is patience during the waiting periods. Don’t rush the rises; that’s where all the fluff gets developed in this condensed milk bread recipe!
Activating Yeast and Mixing the Condensed Milk Bread Dough
First things first, we wake up the yeast! Grab your warm milk—remember, around 105°F—and sprinkle in your active dry yeast along with just a tiny pinch of that granulated sugar. Let this sit for about 5 to 10 minutes. If it gets foamy and bubbly on top, great! Your yeast is alive and ready to work its magic.
Once that’s frothy, whisk in the rest of your sugar, the wonderful sweetened condensed milk, your room-temperature egg, and the melted butter. Whisk it smooth. Then, we add the dry stuff. Stir in the salt first, and then slowly add your flour until it just starts clinging together into what looks like a shaggy, messy ball. Don’t overmix right now; that comes later!
Kneading and Achieving the First Rise for Fluffy Yeast Bread
Now, it’s time for the workout! Turn that shaggy dough out onto a lightly floured counter. You need to knead this for a full 8 to 10 minutes. I know, I know, your arms might get tired, but keep working it until the dough transforms. It should go from sticky and rough to perfectly smooth and elastic—it will feel very soft compared to standard pizza dough. Pop that smooth ball into a lightly oiled bowl, turn it over so it’s coated, cover it up, and tuck it away somewhere warm for an hour to an hour and a half. It needs to double in size!
Shaping and Baking Your Sweet Bread Baking Masterpiece
Once it’s doubled, gently punch that air out—it’s satisfying! Shape the dough into a tight log and carefully place it into your greased 9×5 inch loaf pan. Cover it loosely again and let it have its second rest for about 45 to 60 minutes. You are looking for the dough to crest about an inch above the rim of the pan; that’s your sign it’s ready.
Preheat that oven to 350°F (175°C). Bake it for about 30 to 35 minutes. You want that gorgeous golden brown color, but the best test for this sweet bread baking success is checking the center temperature; aim for 200°F. If you want my full guide on checking yeast bread doneness without a thermometer, check out my tips for focaccia bread right here!
As a pro-tip, you can see some fantastic results from others following similar methods at Amelia’s blog. Just remember, patience wins when those rises are happening!
Tips for Success with Your Tender Crumb Bread
You’ve done the hard part, friend! Now, here are a couple of crucial things to remember so you get that perfect, pillowy slice every time. The single biggest rookie mistake I see people make with any soft loaf, especially this tender crumb bread, is slicing into it too fast. I know it smells divine—and trust me, I’ve been tempted a thousand times!—but resist the urge.
If you cut this sweetened condensed milk bread while it’s still warm, all that internal steam rushes out, and you end up squishing the delicate structure we worked so hard to create. Let it cool completely on a wire rack—at least an hour, maybe more. That cooling period is actually part of the final baking process that sets that beautiful texture.
Also, think about how you want to slice it! If you use this loaf for toast, a serrated knife works fine. But if you want those perfect, soft sandwich slices, use a very sharp, thin knife and a light sawing motion. For more tips on keeping your sweet baked goods wonderfully soft, check out my guide on gooey cinnamon rolls; the cooling rules are the same!
For more inspiration on keeping things simple and delicious, take a look at what they are doing over at Reviewtique!
Variations: From Loaf to Sweet Condensed Milk Rolls
I love that this recipe is so versatile! While the loaf is fantastic for thick slices of toast, sometimes I just need a dinner roll situation, or maybe some sweet treats for a party. Good news: turning this into sweet roll recipe buns is so easy, and it still locks in that moisture you love.
After your dough finishes its first rise—that’s when it’s doubled and puffy—instead of shaping it into a tight log for the loaf pan, just gently punch it down and divide it evenly. Makes about 12 soft pieces. Roll each piece into a neat ball; these will become your perfect condensed milk buns.
Place those balls into a greased 9×13 inch baking pan. Let them have their second rise until they are beautifully puffed up and touching. You’ll only bake these for about 20 to 25 minutes at the same temperature. They come out golden with that incredible soft texture you expect! You can find my basic guide for handling yeast dough balls for my regular dinner rolls here, but the process for these sweet ones is identical. For stunningly fluffy rolls, you must check out the inspiration from Bellies Kitchen!
Serving Suggestions for Your Rich Flavored Bread
Now that you have this gorgeous, slightly sweet loaf, the fun part is deciding how to eat it first! Because this is such a rich flavored bread, it shines with the simplest toppings. For me, nothing beats a thick slice toasted until the edges are just crisp, slathered with good quality salted butter and a drizzle of blackberry jam—it’s heavenly for a weekend breakfast.
But don’t stop there! This bread is robust enough to handle a little extra love, which makes it one of the best breakfast bread ideas around. Leftover slices make the most incredible French toast you’ve ever had. The condensed milk keeps the inside incredibly custardy when dipped! You can find my favorite way to turn any leftover bread into gold in my ultimate French toast guide. Honestly, you just can’t go wrong with this versatile loaf!
Storage and Reheating Instructions for Condensed Milk Bread
Keeping this soft bread soft is key, right? Because of all that wonderful moisture from the condensed milk, you absolutely *do not* want to store this loaf in the refrigerator. Cold temps actually dry out bread texture much faster. Keep it tightly wrapped—plastic wrap or even aluminum foil works perfectly—and store it at room temperature for up to three days.
If you have leftovers after that, an airtight container is your best friend. When you want a slice or two, don’t just microwave it; that can make it doughy! Instead, toast a slice lightly, or pop it into a 350°F oven for just three minutes. It heats up beautifully and brings back that fresh, almost bakery-fresh softness. For more tips on keeping homemade loaves perfect, check out the guide on I Am Food Lover!
Frequently Asked Questions About Sweet Sandwich Bread
I know you’ve got questions rolling around in your head once you finish baking something this good! It’s totally normal. Baking yeast bread, even easy homemade bread like this, sometimes feels like a little bit of science mixed with art. Here are a few things I hear most often when folks are striving for that perfect bakery style bread at home using my sweet sandwich bread recipe.
Can I use regular milk instead of warm milk for the yeast?
Oh, that’s a great question that goes right to the heart of keeping this recipe easy! You can technically use milk that’s just room temperature, but I really, really push for that warm milk (105°F to 115°F) for the yeast activation step. Why? Because the yeast needs that gentle warmth to wake up and start feeding happily. If your milk is too cold, you risk the yeast falling asleep, and then your bread won’t rise. If it’s too hot, you’ll kill your yeast, and that means a flat, dense loaf. We want happy yeast for an easy, successful rise, so grabbing that thermometer is worth the one second it takes!
How do I ensure my condensed milk bread stays incredibly soft?
This is the goal, isn’t it? That cloud-like texture! The richness from the sweetened condensed milk is definitely working hard in your favor here, giving you superior moisture compared to a standard milk bread recipe. But the biggest key to maintaining that incredible softness is twofold. First, you absolutely must let the loaf cool completely on a wire rack before you wrap it up and store it. Slicing too early traps steam and ruins that crumb!
Second, when you store it, keep it wrapped securely at room temperature—never in the fridge. The cold air pulls moisture right out. If you plan to keep it longer than three days, actually slice it first, wrap the slices tight, and pop them into the freezer. When you pull one out, toast it straight from frozen; it makes the best toast ever and keeps the loaf texture perfect!
For more beginner tips on nailing yeast doughs, be sure to check out my general guide on making easy homemade bread. Happy baking!
Share Your Soft Fluffy Bread Creations
I absolutely love seeing what you all bake up in your kitchens! Getting that perfect, soft loaf of condensed milk bread is a real achievement, and I want to hear all about it. Did the rolls turn out fluffier than you expected? Did you serve it alongside a favorite dinner?
Please drop a comment below and let me know how your loaf turned out, give the recipe a star rating so other home cooks know it’s a winner, and tell me what you ate it with! If you share pictures on social media, tag me! I always look through inspiration posted by readers like you. You can find a little more about my mission to help your kitchen confidence over on my About Page. Happy sharing, and thank you for trusting Kings Cook with your baking adventures! Don’t forget to look up other great ideas like the one from DIY Joy!
PrintEasy Soft & Fluffy Sweetened Condensed Milk Loaf Bread
You can make this incredibly soft, slightly sweet bread using sweetened condensed milk. This recipe yields a tender crumb perfect for breakfast or snacking, and it is simple enough for beginner bread baking.
- Prep Time: 20 min
- Cook Time: 35 min
- Total Time: 2 hr 55 min
- Yield: 1 loaf (about 12 slices) 1x
- Category: Baking
- Method: Yeast Baking
- Cuisine: American
- Diet: Vegetarian
Ingredients
- 1 cup warm milk (about 105-115°F)
- 1 packet active dry yeast (2 1/4 teaspoons)
- 1/4 cup granulated sugar
- 1/2 cup sweetened condensed milk
- 1 large egg, room temperature
- 1/4 cup unsalted butter, melted
- 1 teaspoon salt
- 3 1/2 cups all-purpose flour, plus more for dusting
Instructions
- Activate the yeast: In a large bowl, combine the warm milk, yeast, and a pinch of the sugar. Let this stand for 5 to 10 minutes until foamy.
- Mix wet ingredients: Add the remaining sugar, sweetened condensed milk, egg, and melted butter to the yeast mixture. Whisk until combined.
- Add dry ingredients: Stir in the salt and then gradually add the flour, mixing until a shaggy dough forms.
- Knead the dough: Turn the dough out onto a lightly floured surface. Knead for 8 to 10 minutes until the dough is smooth and elastic. It will feel soft.
- First rise: Place the dough in a lightly oiled bowl, turning to coat. Cover the bowl with plastic wrap or a clean kitchen towel. Let it rise in a warm place for 1 to 1.5 hours, or until doubled in size.
- Shape the loaf: Gently punch down the risen dough. Shape it into a log and place it into a greased 9×5 inch loaf pan.
- Second rise: Cover the loaf pan loosely and let the dough rise again in a warm spot for 45 to 60 minutes, or until the dough has crowned about 1 inch over the rim of the pan.
- Bake: Preheat your oven to 350°F (175°C). Bake for 30 to 35 minutes, or until the top is golden brown and the internal temperature reaches 200°F (93°C).
- Cool: Remove the bread from the pan immediately after baking and cool completely on a wire rack before slicing for the best tender crumb.
Notes
- For richer flavor, use whole milk instead of 2% milk.
- If you prefer sweet rolls instead of a loaf, divide the dough into 12 equal pieces after the first rise, shape into balls, and place them in a greased 9×13 inch pan before the second rise. Bake for 20-25 minutes.
- This bread is excellent toasted with butter and jam for a satisfying breakfast treat.
Nutrition
- Serving Size: 1 slice
- Calories: 180
- Sugar: 8
- Sodium: 150
- Fat: 4
- Saturated Fat: 2
- Unsaturated Fat: 2
- Trans Fat: 0
- Carbohydrates: 30
- Fiber: 1
- Protein: 5
- Cholesterol: 20