

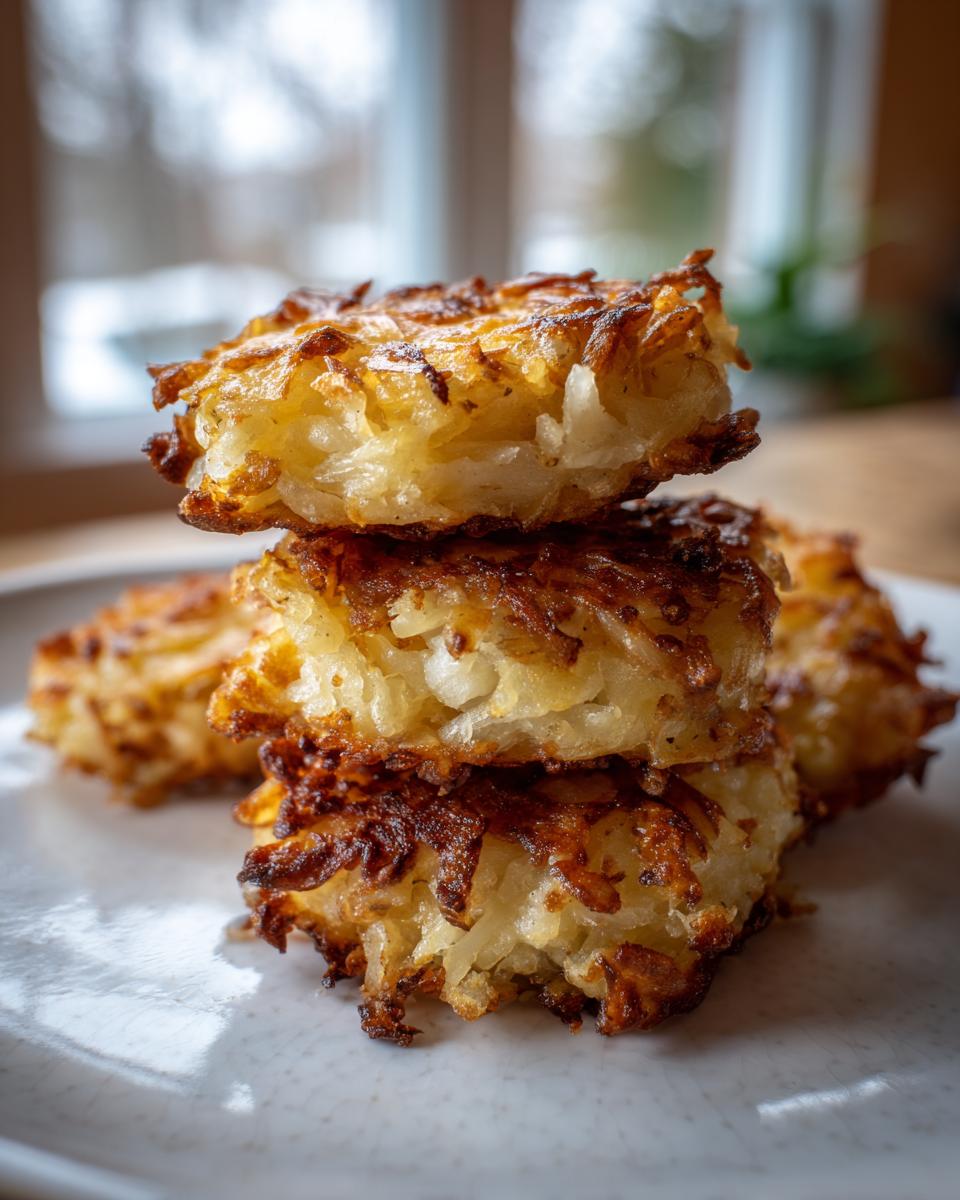
Oh, the sound of a truly amazing latke! Right? We’ve all been there—you bite into what should be a glorious, golden, shatteringly crisp potato pancake, and instead, it’s just… floppy. Ugh. That’s why I had to nail this recipe once and for all. After countless late-night testing sessions in the Kings Cook kitchen, I can confidently say I have the foolproof method for achieving perfectly crispy potato latkes every single time. This isn’t just another recipe; this is the result of rigorous testing, just like everything else I share here at Kings Cook, to make sure you feel confident grabbing that frying pan. Say goodbye to soggy sides!
- Why This is the Best Latke Recipe for Crispy Potato Latkes
- Gathering Ingredients for Perfect Potato Latkes
- Essential Equipment for Making Crispy Potato Latkes
- Step-by-Step Instructions for Mouthwatering Potato Latkes
- Serving Suggestions: Latkes with Applesauce Pairing and Sour Cream Topping Ideas
- Making Potato Latkes Ahead of Time and Storage Tips
- Troubleshooting Common Issues with Potato Latkes
- Frequently Asked Questions About Crispy Potato Latkes
- Estimating the Nutrition for Your Potato Latkes
- Share Your Success Making Potato Latkes
Why This is the Best Latke Recipe for Crispy Potato Latkes
Listen, I know you’re probably scrolling through a dozen different recipes promising crispiness. Who isn’t searching for the Non-Soggy Latkes Method? What makes this one different is that I spent an entire weekend trying to make them fail, just so I could figure out how to make them succeed perfectly every time! The structure of this recipe is built entirely around one crucial goal: eliminating excess moisture before the frying even starts.
- We skip fine grating. We want texture, not shredded mush!
- The oil temperature is carefully managed so the outside gets that deep, golden color before the inside gets steamed.
- Russets are non-negotiable; their starch content is what helps bind things without adding unnecessary sogginess later.
The Secret to Golden Brown Latkes: Moisture Control
If you skip this part, you might as well stop now. I truly mean it! I once tried to cheat this step by just pressing the grated potatoes against the colander, and guess what? I got greasy, pale potato frisbees. Total disaster.
The absolute most important thing for amazing potato latkes is squeezing. You need to treat those grated potatoes like they owe you money! Use a clean kitchen towel—don’t use those flimsy paper towels, they fall apart when wet—wrap everything up tight, and just squeeze until your knuckles turn white. You will be shocked how much water comes out. That starchy water is the enemy of crispy edges. We are fighting for crunch in this kitchen, friend!

Gathering Ingredients for Perfect Potato Latkes
Okay, let’s look at what you need to round up. These potato latkes rely on very simple, hearty ingredients, which I love because you probably already have most of this stuff hanging out in your pantry! Remember, precision matters here, especially with the potatoes. Keep everything measured out so when it’s time to mix everything up quickly, you aren’t scrambling.
For this basic batch, you should grab:
- 3 large Russet potatoes (aim for about 1.5 lbs total weight)
- 1 medium yellow onion (gotta have that savory bite!)
- 2 large eggs, whisked lightly
- About 1/4 cup of plain all-purpose flour
- 1 teaspoon of salt, plus a little extra for seasoning the drained potatoes
- 1/4 teaspoon black pepper
- Enough vegetable or canola oil to fill your skillet about 1/2 inch deep for frying.
Ingredient Substitutions and Notes
A few quick notes before we head to the equipment section. First, please stick with Russet potatoes if you can! Their high starch content is what keeps these so light when pressed dry. If you use waxy potatoes, they just won’t dry out the same way, and we want crispy, not gummy!
For the frying oil, use something neutral with a high smoke point—vegetable, canola, or maybe even sunflower oil works perfectly. Save your fancy olive oil for drizzling salad, trust me.
Now, about variety! If you’re feeling brave, I have a fantastic post coming up that dives deep into the Sweet Potato Latkes Variation, but for this classic recipe, we stick strictly to white potatoes.
Essential Equipment for Making Crispy Potato Latkes
You don’t need a whole arsenal of fancy gadgets to make amazing potato latkes, but you definitely need the right tools for managing the mess and, more importantly, the moisture! Since we are dealing with hot oil here, having the right pan makes all the difference between golden bliss and a frying disaster. Think sturdy and heavy for even heat distribution.
Here is what you absolutely need ready to go before you even touch the potatoes:
- A Great Grater or Food Processor: You need something that shreds the potatoes coarsely. I use the large holes on my box grater most days because I like the texture it creates. If you have a food processor, use the shredding disc—it’s faster, but watch out, those things are sharp!
- The Squeezer: This is key! You need a large, clean, tightly woven kitchen towel or several layers of cheesecloth. This is what you’ll use to wring out all that water.
- A Heavy-Bottomed Skillet: Do not use a flimsy, thin pan. A nice cast iron skillet or a heavy stainless steel pan gives you consistent heat so your latkes cook evenly. Flimsy pans have hot spots, and hot spots mean some patties burn while others stay pale!
- A Wire Rack Over a Baking Sheet: Once they come out of the oil, do not put them straight onto paper towels if you can avoid it. That traps steam underneath, and steam equals soggy! Set up a wire rack over a baking sheet to drain them. The air circulating underneath keeps that bottom super crisp.
Having this gear laid out makes the quick assembly and frying process so much smoother. Trust me, you don’t want to be hunting for a wire rack when your oil is already shimmering hot!
Step-by-Step Instructions for Mouthwatering Potato Latkes
Alright, the prep is done, the equipment is ready, and my heart is beating a little faster—it’s frying time! When making these potato latkes, you have to move quickly once the potatoes are grated, otherwise, they start weeping moisture again. Don’t panic, just follow these steps sequentially like a little dance sequence in the kitchen. Remember, we’re aiming for that deep, satisfying golden color that signals crunch is moments away!
First up, if you need a refresher on how to handle hot oil safely, I walk through my general tips in my fried chicken post—it’s the same principle when dealing with high heat!
The Foolproof Squeezing Technique for Non-Soggy Potato Latkes
This is where many home cooks fail, so pay close attention! After you grate your potatoes and onion, throw that pile right into the center of your clean kitchen towel or cheesecloth. Now, gather the edges up over the mound like you’re pulling a magic trick. Hold it over the sink (or maybe a bowl if you are feeling less dramatic than I am) and squeeze. Really lean into it! You need to force out every last drop of watery starch. I keep squeezing until I feel the mound inside the cloth get significantly heavier and denser. That thick, dry mash is what gives you Crispy Potato Latkes, not the liquid residue!
Frying Tips for Perfectly Golden Brown Latkes
Next, get your oil heating up in that heavy skillet. We need about half an inch of oil, and we are aiming for 350°F. If you don’t have a thermometer, just drop a tiny bit of the potato mixture in. If it starts aggressively sizzling right away, you’re golden! If it just sits there looking sad, wait five more minutes.
Drop heaping tablespoons of your potato mix into the hot oil, but listen to me: do not overcrowd the pan! If you crowd them, the oil temperature plummets, and your latkes will soak it up like sponges. Fry your potato latkes for about three to five minutes per side. You want them deep brown—that’s that yummy, crunchy texture you paid for! Once they look perfectly crisp and golden, use a slotted spoon to move them right onto that waiting wire rack to drain. They’ll stay crispier there!
If you’re looking for other crispy fried delights, check out my tips on making amazing chickpea fritters, too!
Serving Suggestions: Latkes with Applesauce Pairing and Sour Cream Topping Ideas
Now that you have these perfectly crisp, hot little potato treasures, the next big decision is what to serve them with! Honestly, a plain, hot latke is a victory in itself, but we owe it to tradition—and our taste buds—to offer the classic pairings. When I serve these for Hanukkah, I always make sure there are at least two bowls on the table waiting for people to choose their favorite dollop.
If you happen to be looking for other fantastic appetizers to serve alongside your potato latkes, I have a wonderful recipe for a fresh tomato bruschetta that hits a totally different, brighter note.
The Essential Latkes with Applesauce Pairing
You just have to serve them with applesauce, right? That sweet, cool tanginess cuts right through the richness of that fried potato and feels like the most comforting combination on earth. I prefer a chunky, slightly tart homemade sauce, but for grabbing something quick, any good quality applesauce works just fine!
If you are looking for more inspiration on traditional dishes, I saw a lovely pin about a classic recipe over at Mary’s Recipes that might give you some great ideas for rounding out your holiday menu.
My Go-To Sour Cream Topping Ideas
For those who prefer savory over sweet, that rich, cool sour cream is the answer! But don’t just serve plop. A little bit of jazzing transforms boring sour cream into amazing Sour Cream Topping Ideas.
Here are my quick jazz-ups:
- Simple Seasoned Cream: Mix your sour cream with a tiny pinch of salt and maybe a tiny dash of white pepper. That’s it!
- Dill Delight: Stir in finely chopped fresh dill. It adds amazing brightness against the fried potato flavor.
- Chives & Garlic: Mix in finely snipped chives and a tiny, tiny grating of fresh garlic (less is more if you use raw garlic!).
The key is to keep the topping simple so it complements, rather than smothers, the beautiful crunch you worked so hard to achieve on your potato latkes!
Making Potato Latkes Ahead of Time and Storage Tips
This is the question everyone asks, especially when you’re cooking for a big holiday crowd like Hanukkah! Are these potato latkes something you can make the day before? The short answer is: yes, but only if you follow my rules for reheating. If you leave them sitting on a plate after cooking, they are going to steam themselves into a sad, soft pile. We can’t have that after all that squeezing we did to get them crispy!
If you’re making a huge batch and need to keep some warm while you finish the rest, remember that trick I shared earlier: keep them in a single layer on a wire rack set over a baking sheet inside a 200°F oven. That low, steady heat keeps them warm without letting them steam or burn. That batch will stay surprisingly good for about an hour.
For storing leftovers overnight, you have to cool them completely first. Lay them out on a plate or wire rack for about 30 minutes after serving so they stop releasing heat. Then, place them in an airtight container. You want minimal air contact, so a single layer with parchment paper between layers is ideal.
The Best Way to Reheat Crispy Potato Latkes
Never, ever try to microwave leftover potato latkes. They turn into little potato sponges, and all that hard work defying gravity and sogginess goes right out the window. If you want that satisfying crunch back, you have to use dry heat!
My preferred method is the oven or toaster oven. Preheat your oven or toaster oven to about 375°F. Lay the cooled latkes out on a baking sheet—again, no crowding! Pop them in for about 8 to 10 minutes. Keep an eye on them, but this high, dry heat wicks the residual moisture right out and brings back that incredible exterior snap. They should be piping hot and crispy all the way through when you pull them out, ready for another dollop of sour cream!
Troubleshooting Common Issues with Potato Latkes
It happens to all of us! Even with the best instructions, sometimes the fries come out shy, or maybe they turn dark brown before they even feel warm inside. Don’t stress! As I told you before, every batch I test here at Kings Cook has a few hiccups before I perfect it. Think of this troubleshooting section as your safety net. We spent all this time getting that moisture out, so we can handle a few minor cooking hiccups, right?
My Latkes Are Falling Apart When I Flip Them
Oh, that is the worst! It’s like trying to catch smoke. If your potato latkes are basically disintegrating as soon as the spatula touches them, it almost always means one of two things is happening. First, you didn’t squeeze enough water out. Go back and squeeze harder next time! Dry starch is the glue that holds these savory little pancakes together.
Second, you might be trying to flip them too soon. Don’t touch them for at least three minutes! You need that structure to bake into a firm crust before you even think about turning them over. Let the heat do its magic and form that crust first.
Why Are My Latkes Absorbing So Much Oil?
If you pull your latkes out and they feel heavy, oily, and sad, it’s because your oil temperature dropped too low. This is the biggest reason people think frying is difficult: temperature control! If the oil isn’t hot enough (that 350°F sweet spot), whatever you drop in soaks up the oil instead of instantly searing the outside.
Fix this by being patient with the heat. And again, never overcrowd the skillet! If you put 15 pancakes in a pan that can only comfortably hold 8, the temperature drops instantly by 50 degrees, and boom—oil sponges.
They Are Browning Too Fast!
This one usually means your heat is cranked way too high, or your oil might be smoking a little bit. If you see dark browning happening in under two minutes, pull the heat back down immediately! We want a deep golden color, which signals crispness, but we don’t want it to go straight to black and burnt.
If you notice one batch browning too fast, let the pan cool down for two or three minutes before dropping in the next batch. It might sound fussy, but managing that heat is the key to getting those beautiful, consistent Golden Brown Latkes across the entire batch.
Frequently Asked Questions About Crispy Potato Latkes
I’ve rounded up some of the questions I get asked most often when people are tackling their first batch of potato latkes or struggling to get that perfect crunch. These little tweaks can make a huge difference, especially around the holidays when things get hectic!
Can I bake these instead of frying?
Honestly? If you want that classic, almost shattering, crispness that we are aiming for here, deep-frying is the way to go. Baking tends to leave them a bit drier and less consistently browned. That said, if you absolutely must bake them, spread them thinly on a rack set over a baking sheet and bake at 400°F until crisp, flipping halfway. You will probably need to lightly brush them with oil first to mimic the frying effect. It’s a decent alternative, but it won’t give you the same deeply satisfying texture as the classic fried version.
What type of potato is best for potato latkes?
Hands down, you want starchy potatoes. Russets, or Idaho potatoes, are king here! They have the high starch content we need to help bind the mixture once we’ve squeezed out all the obvious water. If you use waxy potatoes, like Reds, they have too much moisture and won’t dry out properly, which leads straight back to that soggy center we are trying to avoid. For the Best Latke Recipe experience, reach for a Russet.
How do I keep them from turning brown before frying?
That quick browning is oxidation working its magic—or evil, depending on your viewpoint! Once your potatoes and onions are grated, you have to move fast. The longer they sit exposed to the air, the faster they turn gray or even slightly brown. If you notice this happening (or if you need to prep ahead slightly), toss the shredded mix immediately with a tiny splash of lemon juice or add your eggs right away to stabilize them.
If you want to see some other staple recipes I rely on when I need something fast and reliable, check out my easy focaccia bread recipe or maybe see what I’ve been using to upgrade my sides, like this amazing quinoa salad!
Are there vegan latkes options?
Yes, absolutely there are! My recipe calls for eggs as a binder, but you can easily substitute those! The key is finding something sticky enough to hold the dry mash together. Many cooks find great success using ground flaxseed mixed with water (a flax egg) or using commercial egg replacers. Since you have to squeeze out so much moisture anyway, stability is easier to achieve than you might think. If you want to see a dedicated recipe that handles the binder swap perfectly, you should definitely check out the options available at Dish Melt for their great Vegan Latkes Recipe!
Estimating the Nutrition for Your Potato Latkes
I get asked about nutrition all the time, and honestly, when you are frying something this delicious, I try not to dwell too much on tiny numbers. But I know that for many of you planning big holiday meals or just trying to keep track, having a rough idea is important! So, I pulled the estimated analysis directly from my ingredient list—everything calculated out beautifully based on the yield of about 12 latkes.
Remember this is a loose guide, okay? Things like how much oil these specific potato latkes actually soak up can change things dramatically! If you squeeze them bone-dry, yours might be lower in fat than my estimates here. But for a baseline, here’s what we are looking at per single, satisfying pancake:
- Serving Size: 1 latke (This recipe yields about 12!)
- Calories: Around 120
- Fat: Approximately 7g (Don’t forget, a lot of this is the frying oil!)
- Saturated Fat: About 1.5g
- Carbohydrates: Roughly 12g
- Protein: About 2g
- Sugar: Just 1g (That low sugar count is why you need the applesauce!)
- Sodium: Around 150mg (This changes based on how much extra salt you add!)
Like I said, consider this a helpful estimate, not a strict mandate! The most important measurement we achieved is that perfect, golden, crunchy texture. And trust me, that’s worth every single gram of fat!
Share Your Success Making Potato Latkes
Well, we did it! We conquered the greasiness, we defeated the soggy middle, and you now have a batch of perfectly crispy, golden, traditional potato latkes ready to be devoured. I am seriously so proud of you for tackling this technique. Frying can feel intimidating, but I know that once you master that crucial squeezing step, you’re going to whip these out every time someone asks for savory potato pancakes!
The best part of running Kings Cook is hearing from you all. I want to know how they turned out! Did you get that satisfying crunch? Were they screaming for applesauce?
Please, please leave a rating right here on the recipe card—anything from one to five stars helps other home cooks know this recipe is the real MVP. And if you have a moment, drop a comment below and tell me about your batch! What oil did you use? How much liquid did you actually manage to squeeze out? I absolutely love celebrating your kitchen wins.
Honestly, seeing your success stories truly validates all those hours I spent testing and re-testing in my own kitchen. If you are looking to learn even more behind-the-scenes tips from me, you can always check out my whole story over on the About Page. Now go enjoy those amazing potato latkes!
PrintUltimate Crispy Potato Latkes Recipe

Follow this foolproof method to make perfectly golden, crispy potato latkes with tender centers. This recipe focuses on moisture removal for the best texture.
- Prep Time: 20 min
- Cook Time: 20 min
- Total Time: 40 min
- Yield: About 12 latkes 1x
- Category: Side Dish
- Method: Frying
- Cuisine: Jewish/American
- Diet: Vegetarian
Ingredients
- 3 large Russet potatoes (about 1.5 lbs)
- 1 medium yellow onion
- 2 large eggs, lightly beaten
- 1/4 cup all-purpose flour
- 1 teaspoon salt
- 1/4 teaspoon black pepper
- Vegetable oil or canola oil, for frying (about 1/2 inch deep in the skillet)
Instructions
- Peel the potatoes and the onion. Grate them using the large holes of a box grater or a food processor fitted with a shredding disc.
- Place the grated potatoes and onion into a clean kitchen towel or several layers of cheesecloth. Wrap tightly and squeeze out as much liquid as possible. This step is essential for crispy latkes. Discard the liquid.
- Transfer the dry potato and onion mixture to a medium bowl.
- Add the beaten eggs, flour, salt, and pepper to the bowl. Mix gently until just combined. Do not overmix.
- Pour enough oil into a large, heavy-bottomed skillet to reach about 1/2 inch depth. Heat the oil over medium-high heat until it reaches 350°F (175°C).
- Carefully drop heaping tablespoons of the potato mixture into the hot oil, flattening them slightly with the back of the spoon to form pancakes about 1/2 inch thick. Work in batches to avoid overcrowding the pan.
- Fry for 3 to 5 minutes per side, until deeply golden brown and crisp. Adjust heat as needed to maintain a steady frying temperature.
- Remove the latkes from the oil and place them on a wire rack set over a baking sheet or on a plate lined with paper towels to drain excess oil.
- Serve the potato latkes immediately with your preferred toppings, such as applesauce or sour cream.
Notes
- For the crispiest results, squeeze the grated potatoes until they feel completely dry.
- If you are making a large batch, keep the finished latkes warm in a single layer on a baking sheet in a 200°F oven while you finish frying the rest.
- For a sweet potato latkes variation, substitute one large Russet potato with one large sweet potato, ensuring you squeeze out all moisture.
Nutrition
- Serving Size: 1 latke
- Calories: 120
- Sugar: 1
- Sodium: 150
- Fat: 7
- Saturated Fat: 1.5
- Unsaturated Fat: 5.5
- Trans Fat: 0
- Carbohydrates: 12
- Fiber: 1
- Protein: 2
- Cholesterol: 40