
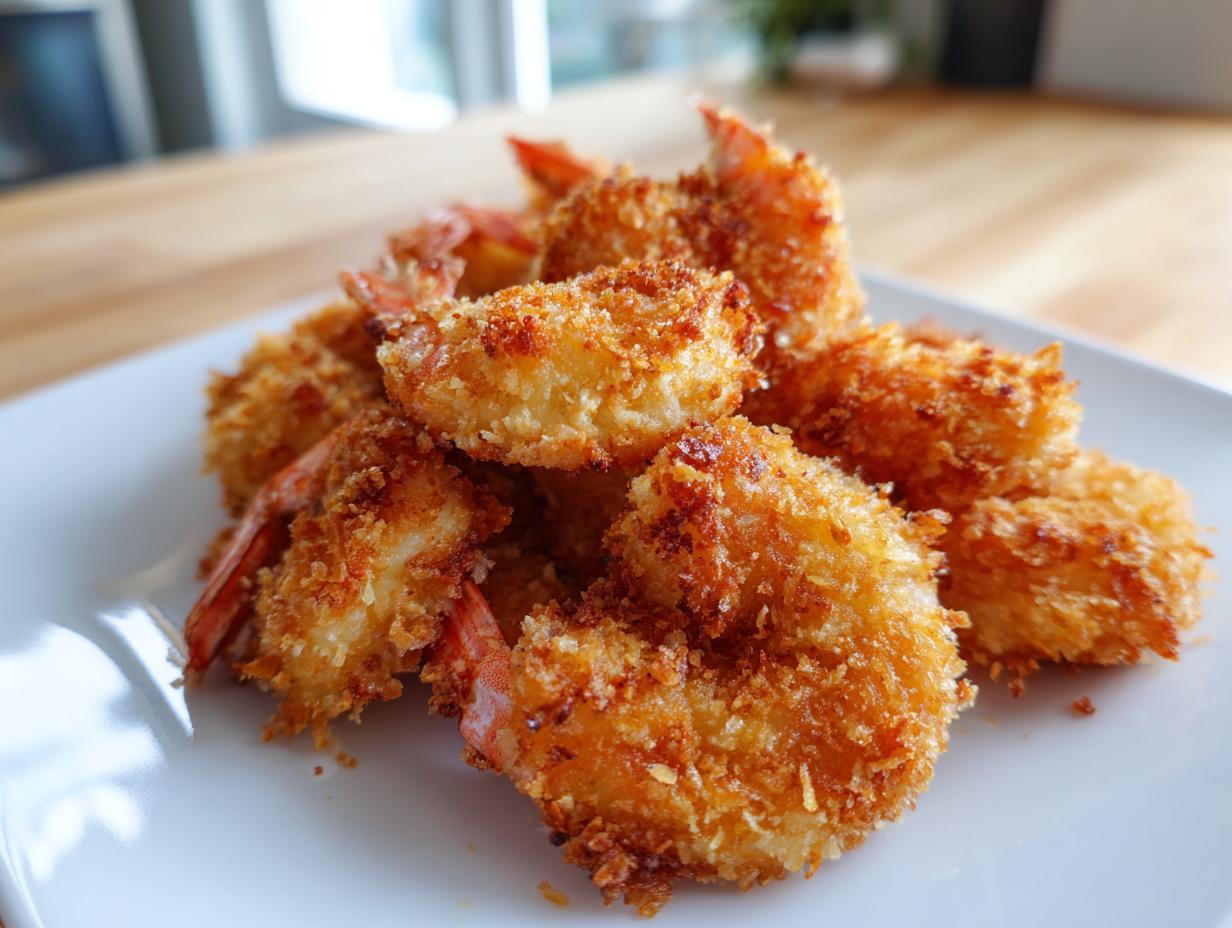
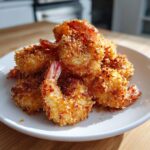
Are you tired of spending good money at seafood shacks only to come home wishing you could recreate that crunchy, golden magic yourself? Good news! We are finally cracking the code on making truly restaurant quality fried shrimp right here on your stovetop. Forget those sad, soggy coatings you might have dealt with when trying to master fried shrimp at home. Listen, I know how frustrating it feels when beautiful seafood ends up disappointing. That’s why I’ve tested this method until I was 100% sure I could give you clear, reliable instructions that guarantee the crispiest texture possible, thanks largely to one amazing little ingredient: Panko.
- Why This Crispy Fried Shrimp Recipe Works: Technique Over Complexity
- Gathering Ingredients for Perfect Fried Shrimp
- Step-by-Step Instructions for Restaurant Quality Fried Shrimp
- Tips for Making the Ultimate Crispy Fried Shrimp
- Serving Suggestions for Your Homemade Fried Seafood
- Storage and Reheating Instructions for Fried Shrimp
- Frequently Asked Questions About Making Fried Shrimp
- Estimated Nutritional Information for Crispy Fried Shrimp
- Share Your Crispy Fried Shrimp Success
Why This Crispy Fried Shrimp Recipe Works: Technique Over Complexity
When people ask me for the secret to a great fry, I always tell them it’s about trusting the process, not just following the ingredients list. We’re aiming for that iconic crunch that stands up to dipping sauce without immediately collapsing. To truly master how to make crispy shrimp, you need two main players working in tandem: the marinade and the breading. It’s not complicated, I promise, but these steps are where we separate the merely good fried shrimp from the spectacular.
If you ever want to elevate any deep-fried seafood you make, check out my tips for crispy Fish and Chips—the technique is similar!
The Buttermilk Marinade Secret for Tender Fried Shrimp
That buttermilk step isn’t just for looks! It’s essential because the mild acid in the buttermilk works a little magic on those proteins, tenderizing the shrimp while they chill. More importantly, that milky coating creates the perfect tacky surface. When the shrimp goes into the flour, the buttermilk holds onto every grain, which is your first step to a secure crust.
Achieving the Best Fried Shrimp Coating with Panko
Now, let’s talk texture. If you want that next-level crunch, you absolutely must use Panko breadcrumbs. They are larger, flakier, and absorb less oil than standard fine breadcrumbs. This is the key to achieving that gorgeous Panko Crusted Shrimp exterior that shatters when you bite into it. Regular breadcrumbs just can’t give you the same altitude; Panko results in a much lighter, crispier crust every single time.
Gathering Ingredients for Perfect Fried Shrimp
Okay, let’s keep this simple, exactly like I promised here at Kings Cook! You don’t need to hunt around town for fancy supplies for this easy fried shrimp recipe. What matters most is getting the shrimp right—I want you to look for large or jumbo, peeled, and absolutely deveined so they are ready to rock.
- 1 lb large or jumbo shrimp, peeled and deveined
- 1 cup buttermilk
- 1 teaspoon salt
- 1/2 teaspoon black pepper
- 1/2 teaspoon paprika
- 1 cup all-purpose flour
- 1 cup Panko breadcrumbs
- 1/4 cup cornstarch
- Vegetable oil, for frying
- Lemon wedges, for serving
Having these simple components ready means we can move straight into the magic steps!
Step-by-Step Instructions for Restaurant Quality Fried Shrimp
This truly is the easy fried shrimp recipe that changes everything. Once you see these steps in action, you won’t feel intimidated by deep-frying again, I promise! We are going to follow the process exactly—technique is everything here to ensure that beautiful, non-soggy crust you are hoping for. Remember, cooking great seafood is all about controlling the heat and keeping things dry whenever possible. Let’s get frying!
Preparing the Shrimp and Buttermilk Soak
First things first: grab those shrimp and pat them down until they are aggressively dry with paper towels. Seriously, this is non-negotiable! If they’re wet, the coating slides right off. Once they are dry, take your buttermilk, salt, pepper, and paprika, and mix them together in a bowl. Toss in your shrimp until every piece is coated in that milky marinade. Now, cover that bowl up and pop it in the fridge. You need to let them hang out for at least 30 minutes—two hours is even better—so they get nice and tender.
Setting Up the Coating Station for Crispy Fried Shrimp
While those guys are marinating, it’s time to set up your dredging station. In one shallow dish, you’ll mix your flour, that glorious Panko, and the cornstarch. The cornstarch is my secret little helper here; it really locks in the crisp factor later on! When you’re ready to coat, pull the shrimp straight from the fridge, letting the extra buttermilk drip off for a second. Dip it into the Panko mix, and here’s the key part: press that coating on gently but firmly. You want the Panko flakes truly stuck to the shrimp so they don’t fall off in the hot oil.

Frying Technique: Maintaining the Perfect Oil Temperature
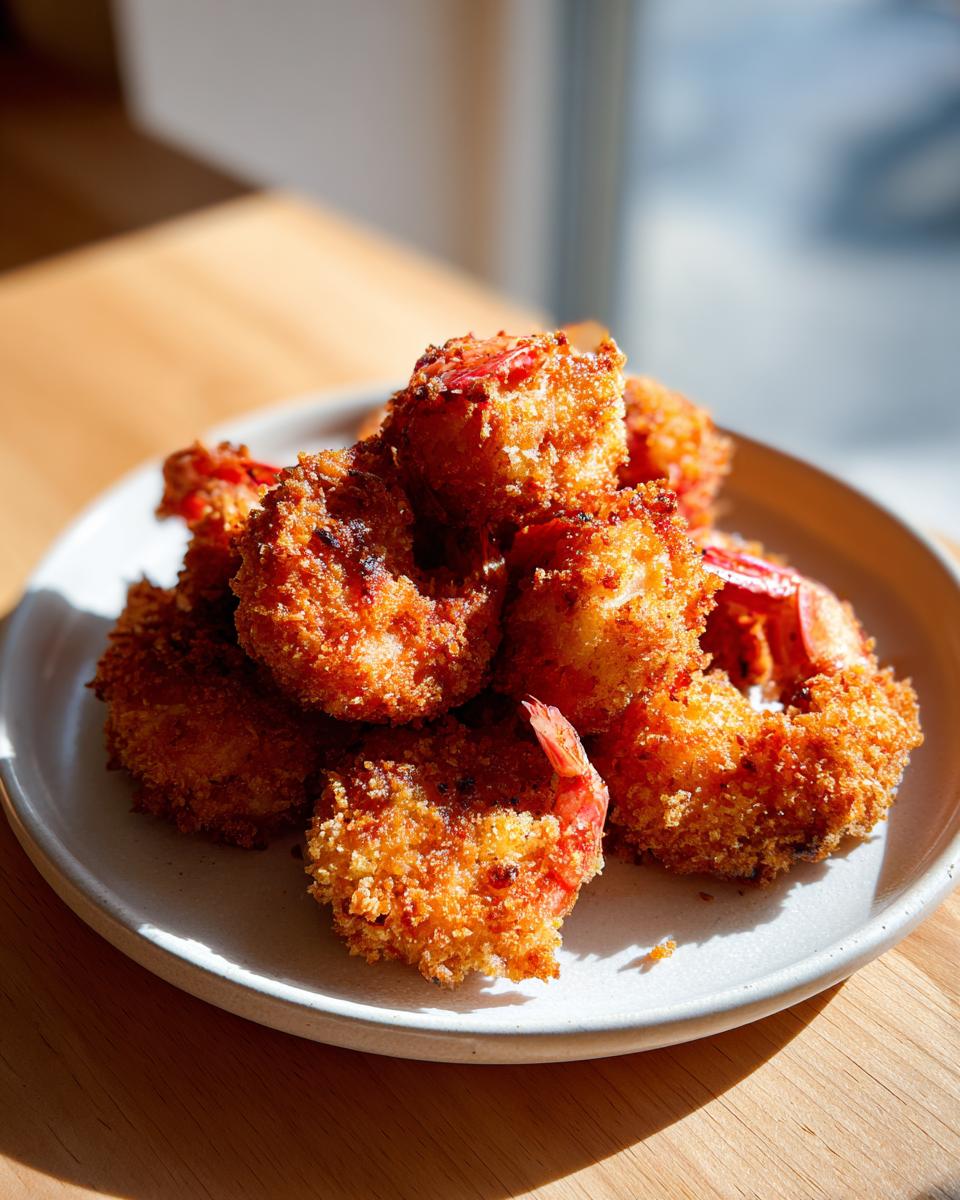
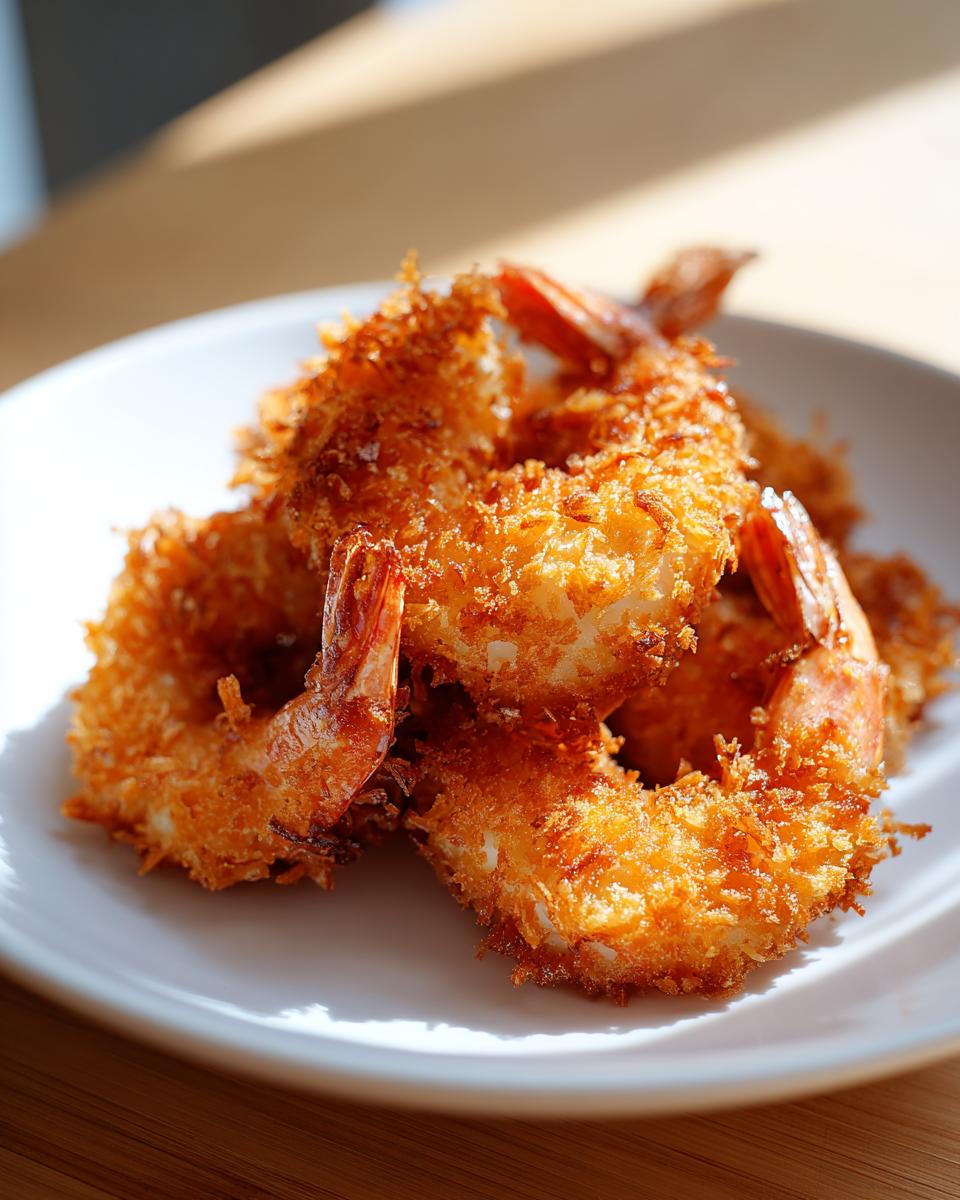
This step determines your success! Pour about two inches of vegetable oil into a deep pot—a Dutch oven works perfectly—and let it heat up to exactly 350°F (175°C). You must use a thermometer; guessing ruins everything here. Once the oil is hot, carefully place your coated shrimp in. Only do 5 to 7 at a time! I cannot stress this enough: if you overcrowd the pot, the temperature drops instantly, and you end up with floppy, oily shrimp instead of that perfect Golden Brown Shrimp crust.
Let them swim for about 2 to 3 minutes on one side until they look beautifully golden. Then, use tongs to flip them and cook the other side until they are opaque all the way through. We want them done inside, but the outside must stay crunchy!
Draining and Serving Your Fried Shrimp
When they look just right, use a slotted spoon to remove the shrimp immediately. Now, this is important for texture: place them on a wire rack that is sitting over a baking sheet! Do not put them straight onto paper towels. Paper towels trap steam right under the crust, and guess what? Soggy shrimp city! We don’t want that. Keep the cooked batches on the rack while the oil comes back up to temp, which is vital before you drop in the next batch. Serve these beauties immediately while they’re hot, preferably with a big squeeze of fresh lemon. If you love making crab cakes, you’ll find this frying method transfers perfectly to those too!
If you’re looking for more amazing ways to serve seafood appetizers, check out my collection of appetizers and snacks!
Tips for Making the Ultimate Crispy Fried Shrimp
We’ve got the main technique down, but the difference between good and absolutely phenomenal fried shrimp is often in these small, extra steps. If you want the absolute best fried shrimp coating—one that really locks in and doesn’t let go—you have to pay attention to chilling and temperature control. Trust me, these little tricks are what make people ask for the recipe!
Quick Chill Trick for Extra Crunchy Fried Shrimp
This is one of those tips I learned from marathon batches of frying chicken, and it works wonders here, too! Once you have coated every single piece of shrimp in that Panko mixture, don’t drop them straight into the oil. Lay them out on a clean baking sheet and pop them into the freezer for about 15 minutes. This quick chill hardens that coating up against the damp meat. When that cold coating hits the hot oil, it instantly sets that crunch, making it super durable!
Southern Style Fried Shrimp Variation
I absolutely love the Panko version, but sometimes you want that deep, comforting crunch of traditional Southern frying. If that’s you, swap it out! Ditch the Panko entirely and mix fine cornmeal in with your all-purpose flour. It gives a slightly different texture—maybe a bit earthier—but it’s still guaranteed to be crispy and delicious. For more insight on making things crunchy, you can see how I handle oil management in my fried chicken recipe, which shares similar principles!
And hey, if you want to see how another great cook tackles this same quest for crunch, check out this guide on making the best crispy fried shrimp for even more perspective!
Serving Suggestions for Your Homemade Fried Seafood
Okay, now that you have these perfectly golden and crunchy beauties, we need to talk about what they deserve to go with! That wonderful crisp texture means they pair perfectly with cool, creamy, or bright flavors. A simple squeeze of lemon juice is mandatory—it just cuts through the richness so nicely. But if you want to go further, we need great shrimp dipping sauces on standby.
Try serving these alongside a fresh, bright salad, like my quinoa salad for something lighter, or pair them as an appetizer next to robust flavors, maybe even some fresh bruschetta if you’re having a party!
Storage and Reheating Instructions for Fried Shrimp
This is an important question! You might have made a big batch of these for game day or a gathering, and now you’re wondering how to handle the leftovers. The main goal when saving these is simple: preserve the crunch. Frankly, like most deep-fried goodies, they are best eaten the minute they come out of the oil, hot and fresh.
But if you must store them? Never, ever put your perfect fried shrimp in an airtight container in the fridge. That traps moisture underneath the crust, and I guarantee you’ll end up with a soggy mess the next day! If you need to save them for later, store them in a single layer on a plate covered loosely with a paper towel, then put that setup into the fridge. Don’t stack them if you can help it.
The absolute worst thing you can do to reheat them is the microwave. Please, don’t do it! The microwave steams the coating and dissolves all that beautiful crispiness we worked so hard for. The microwave is the enemy of crunchy food!
To revive them properly so they taste almost as good as fresh—perfect for turning those leftovers into a Quick Seafood Appetizer the next day:
- Oven Method: Preheat your oven to about 400°F (200°C). Set a wire rack over a baking sheet (remember how we used that for draining them? Keep using it!). Lay the shrimp out on the rack one layer deep. Give them about 8 to 10 minutes. This dries the coating out and brings the crunch back beautifully.
- Air Fryer Method: If you have an air fryer—and I highly recommend one for reheating anything crispy—pop them in the basket at 375°F (190°C) for about 4 to 6 minutes. They come out looking spectacular! If you want some inspiration for other things that crisp up well in there, take a peek at my air fryer fried pickles recipe.
Remember, any method that uses dry, circulating heat is your best friend for bringing back that glorious golden texture!
Frequently Asked Questions About Making Fried Shrimp
It’s totally normal to have a few burning questions when you’re diving into deep frying for the first time, or even when trying a new breading like Panko! I’ve gathered the ones I hear most often from readers who want to nail that restaurant quality fried shrimp experience. These little answers make a huge difference in keeping your coating crunchy and your shrimp happy inside!
What is the best oil temperature for fried shrimp?
This is probably the most crucial detail if you want that perfect golden crust! You absolutely need to keep your oil steady at 350°F (175°C). If the oil is too cold, the coating soaks up too much of it and gets greasy—soggy alert! Too hot, and the outside burns before you get your shrimp perfectly cooked inside. If you can, grab a thermometer; it’s the best insurance policy for amazing fried shrimp.
Can I use regular breadcrumbs instead of Panko for this fried shrimp recipe?
You certainly *can*, but why would you want to, when you’ve got Panko sitting right here? Regular breadcrumbs are much finer and tend to pack down tighter onto the shrimp. This means they absorb more oil during the fry and don’t give you that fantastic, airy, light crunch. Panko is the secret weapon for making the best fried shrimp coating because those flakes stay separated and wonderfully crunchy.
Can this recipe be adapted for Air Fryer Fried Shrimp?
Yes, you absolutely can! While I love the pure decadence of deep frying, the air fryer is fantastic for a lighter take. The key is that you still need to follow the buttermilk soak and the Panko coating technique—that hard shell is what matters! For the air fryer, you’ll want to mist the coated shrimp lightly with oil spray and cook them at about 380°F (195°C) for 8 to 10 minutes, flipping halfway to make sure they brown evenly. If you need any tips on getting things crispy in the air fryer, you can always check out my fried pickles recipe for technique!
If you have any other questions that weren’t covered here, please don’t hesitate to reach out through my contact page!
Estimated Nutritional Information for Crispy Fried Shrimp
Now, let’s talk fuel! When we make fabulous food like this, it’s good to keep a general idea of what we’re consuming, especially since this recipe involves frying. I always want to be transparent with you all about what’s in the final dish.
Please keep in mind that these numbers are just estimates, just like when I calculate nutrition for my crab cakes. The actual values can jump around a bit depending on the exact size of your shrimp or how much oil your coating soaks up. This breakdown is based on serving four people, which means about six pieces of that delicious seafood per person.
Here is the general overview for a single serving size of about 6 shrimp:
- Calories: Around 350
- Total Fat: About 18 grams (Remember, saturated fat is low here!)
- Carbohydrates: Roughly 25 grams (Mostly from the Panko and flour coating)
- Protein: A solid 24 grams of glorious protein!
- Sodium: About 550 mg (This depends heavily on how much salt you add to your buttermilk!)
See? Even though it’s fried, it still packs a serious protein punch and makes for a really satisfying meal or appetizer. It’s all about balance when you’re cooking at home!
Share Your Crispy Fried Shrimp Success
Well, friend, we did it! We took the intimidation factor out of deep frying and created a batch of truly spectacular, crunchy, golden fried shrimp. I really hope you take a moment right now to step back and admire that beautiful plate of seafood you made. Remember when you thought this was too hard? That’s Kate’s mission in action—turning those kitchen doubts into delicious victories!

I absolutely love hearing from you all! Did the buttermilk marinade make a difference? Did you stick with the Panko, or did you try the Southern cornmeal variation I mentioned? Don’t keep that success to yourself!
Take a second, rate this recipe right down in the comments below, and tell me exactly how long you managed to keep them hot before they disappeared. Did they last long enough to even think about saving leftovers? I doubt it!
When you share your culinary triumphs on social media, please tag me! Seeing your perfectly crunchy shrimp makes my day—it proves that anyone can create restaurant quality fried shrimp at home. If you want to read more about my philosophy on building kitchen confidence and why Kings Cook exists, you can always check out my About Page. Happy cooking, and I can’t wait to see what amazing dish you master next!
PrintThe Crispiest Panko Fried Shrimp Recipe
Make restaurant-quality crispy fried shrimp at home using a simple buttermilk marinade and panko coating. This recipe guarantees a golden, crunchy exterior and perfectly tender shrimp inside.
- Prep Time: 45 min
- Cook Time: 10 min
- Total Time: 55 min
- Yield: 4 servings 1x
- Category: Seafood
- Method: Deep Frying
- Cuisine: American
- Diet: Vegetarian
Ingredients
- 1 lb large or jumbo shrimp, peeled and deveined
- 1 cup buttermilk
- 1 teaspoon salt
- 1/2 teaspoon black pepper
- 1/2 teaspoon paprika
- 1 cup all-purpose flour
- 1 cup Panko breadcrumbs
- 1/4 cup cornstarch
- Vegetable oil, for frying
- Lemon wedges, for serving
Instructions
- Pat the peeled and deveined shrimp completely dry with paper towels. This step helps the coating stick.
- In a medium bowl, combine the buttermilk, salt, pepper, and paprika. Add the shrimp and toss to coat. Cover the bowl and refrigerate for at least 30 minutes, or up to 2 hours.
- In a shallow dish, whisk together the flour, Panko breadcrumbs, and cornstarch. This is your dry coating mixture.
- Heat about 2 inches of vegetable oil in a deep, heavy-bottomed pot or Dutch oven to 350°F (175°C). Use a thermometer to maintain the temperature.
- Working in batches, remove the shrimp from the buttermilk, letting excess drip off. Dredge each shrimp thoroughly in the dry coating mixture, pressing gently to make sure the Panko adheres well.
- Carefully place 5 to 7 shrimp into the hot oil, ensuring you do not overcrowd the pot. Overcrowding lowers the oil temperature and causes soggy shrimp.
- Fry for 2 to 3 minutes per side, turning once, until the coating is deep golden brown and the shrimp are opaque throughout.
- Remove the fried shrimp with a slotted spoon and place them on a wire rack set over a baking sheet to drain excess oil. Do not place them directly on paper towels, as this traps steam and softens the crust.
- Repeat with the remaining shrimp, allowing the oil temperature to return to 350°F (175°C) between batches.
- Serve the crispy fried shrimp immediately with lemon wedges or your favorite dipping sauce.
Notes
- For extra crispiness, place the coated shrimp on a tray and chill them in the freezer for 15 minutes before frying. This sets the coating.
- Maintain the oil temperature strictly between 345°F and 355°F for the best results.
- If you prefer a Southern Style coating, substitute the Panko breadcrumbs with an equal amount of fine cornmeal mixed with the flour.
Nutrition
- Serving Size: 6 shrimp
- Calories: 350
- Sugar: 2
- Sodium: 550
- Fat: 18
- Saturated Fat: 3
- Unsaturated Fat: 15
- Trans Fat: 0
- Carbohydrates: 25
- Fiber: 1
- Protein: 24
- Cholesterol: 180