
Are you ever staring down the barrel of a busy week, or maybe a last-minute guest arrival, and realize you need an impressive, sweet treat right now? I totally get it. That frantic search for something homemade that doesn’t require turning on the oven? Been there, done that! That’s why I absolutely had to share my go-to recipe for Cool Whip Candy. This treat makes my list of best dessert recipes for a reason!
This isn’t just any quick dessert; this is the real deal—a no-bake wonder that tastes shockingly like one of those classic, fluffy chocolate bars, you know the one! When I first started Kings Cook, my promise was to take recipes that sound fancy but break them down into steps anyone can master. Trust me, this light and creamy confection is proof that simple ingredients yield spectacular results. Let’s skip the baking stress and dive right into making some incredible, easy candy!
- Why This Easy No Bake Candy Recipe is a Kitchen Essential
- Gathering Ingredients for Your Cool Whip Candy
- Step-by-Step Instructions for Perfect Cool Whip Candy
- Tips for Success with Your Whipped Topping Confections
- Storage and Reheating Instructions for Cool Whip Candy
- Troubleshooting Common Cool Whip Candy Issues
- Estimated Nutrition for This Simple Homemade Candy
- Serving Suggestions for Your Quick Treats
- Share Your Fluffy Chocolate Candy Creations
Why This Easy No Bake Candy Recipe is a Kitchen Essential
If your kitchen clock is ticking faster than your willpower, this is the recipe you need saved. We’re talking about true Easy No Bake Candy here, folks. What makes this Cool Whip Candy my favorite secret weapon? It’s that phenomenal texture we get from just a few staple items. Seriously, when I talk about 3 Ingredient Desserts, I mean it! You just mix, freeze, dip, and done.
The Ultimate 3 Musketeers Copycat Recipe
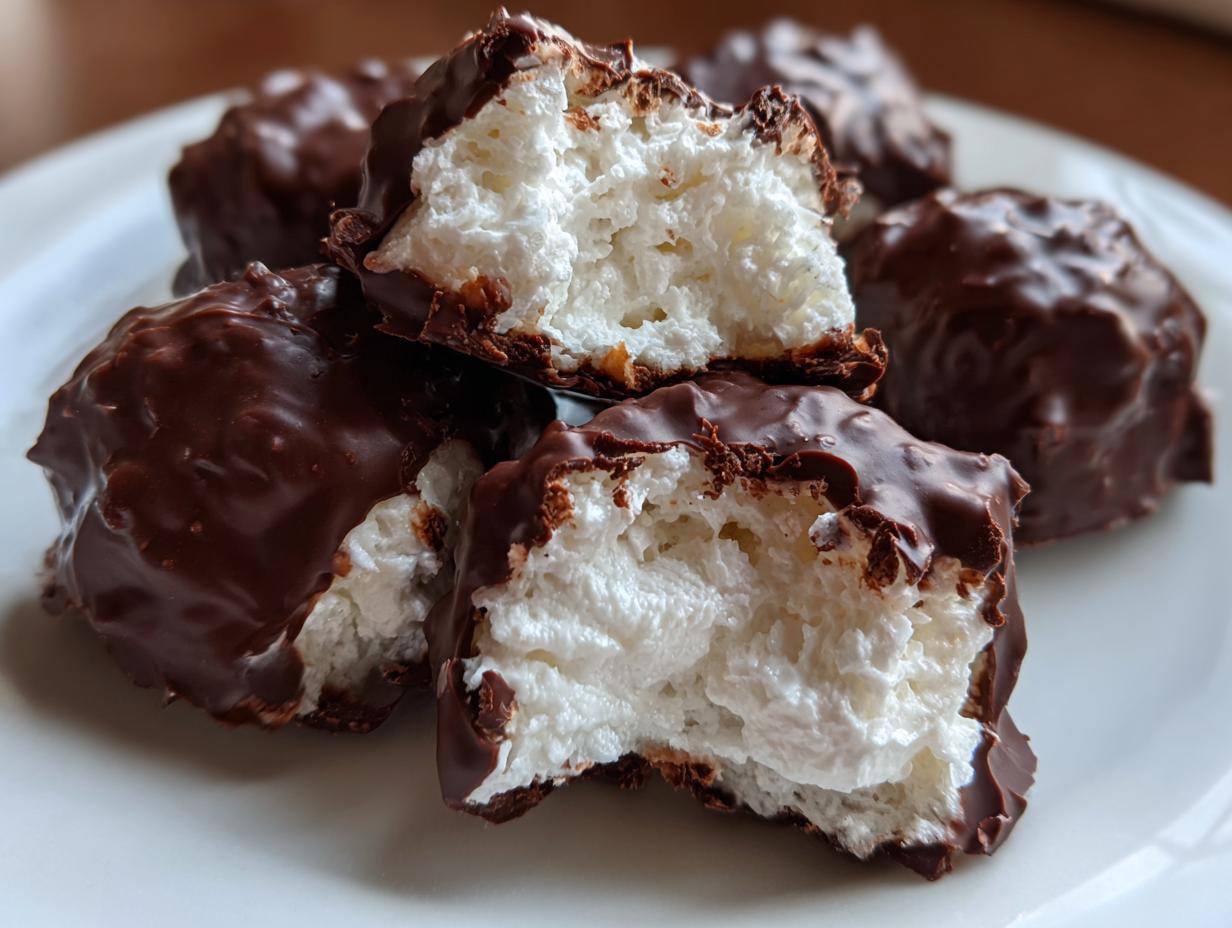
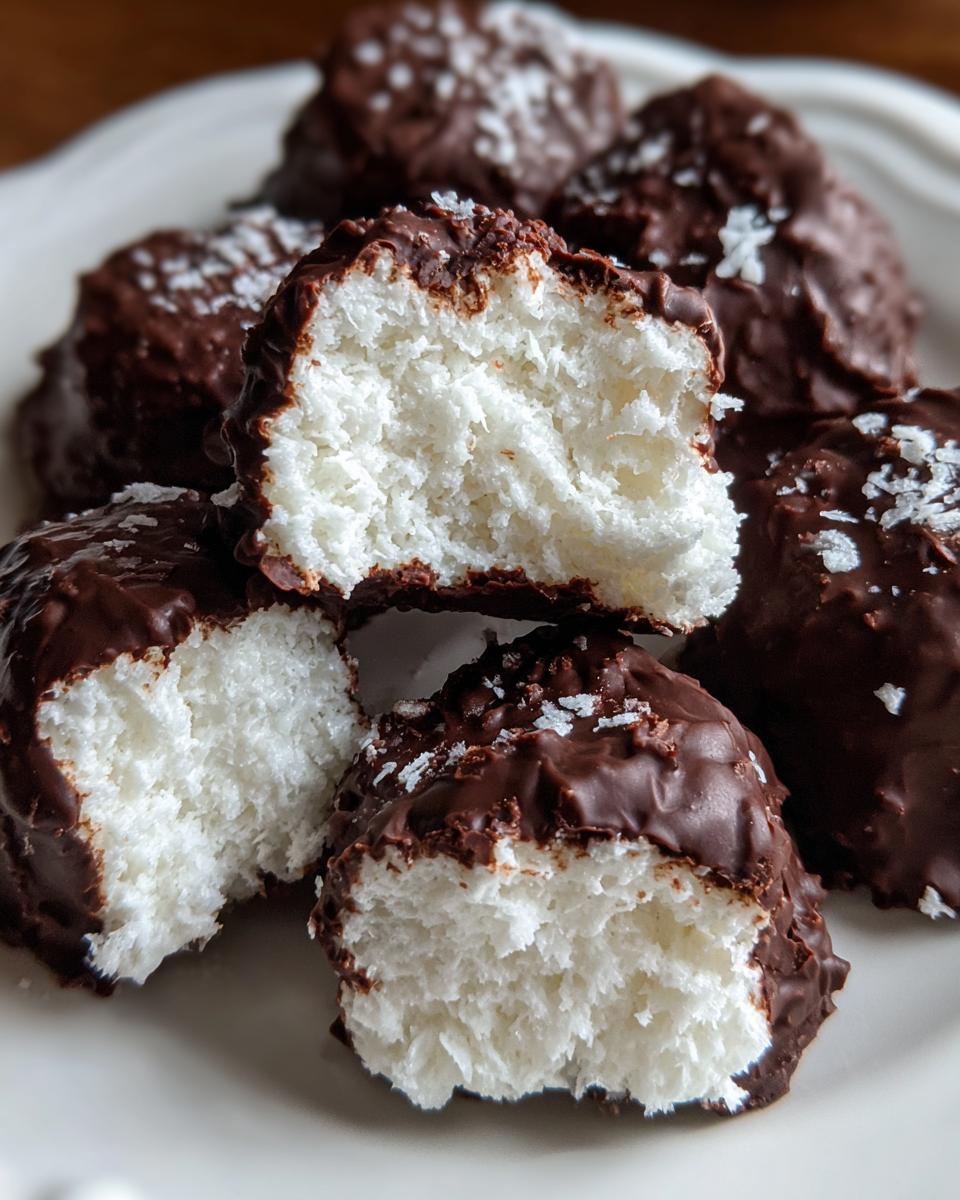
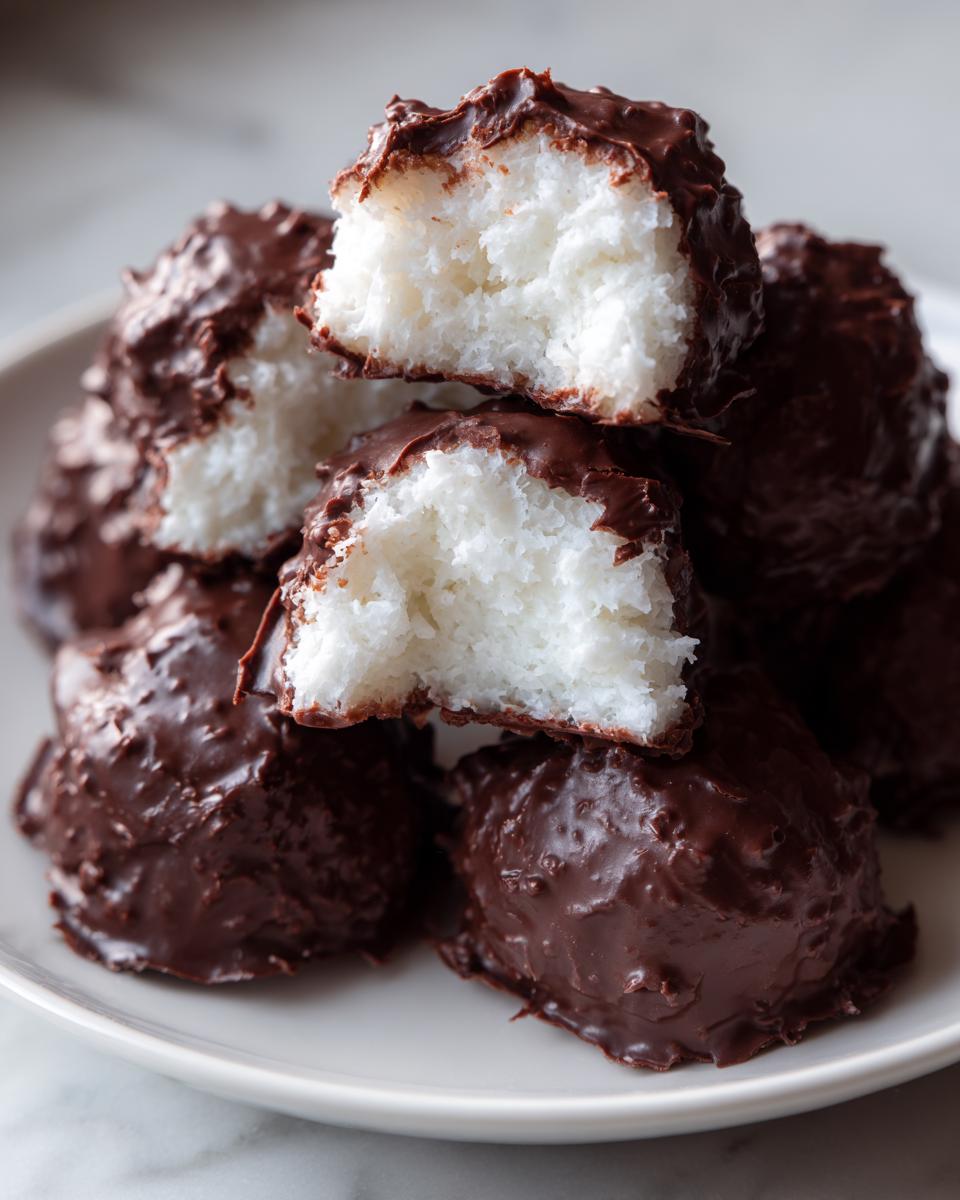
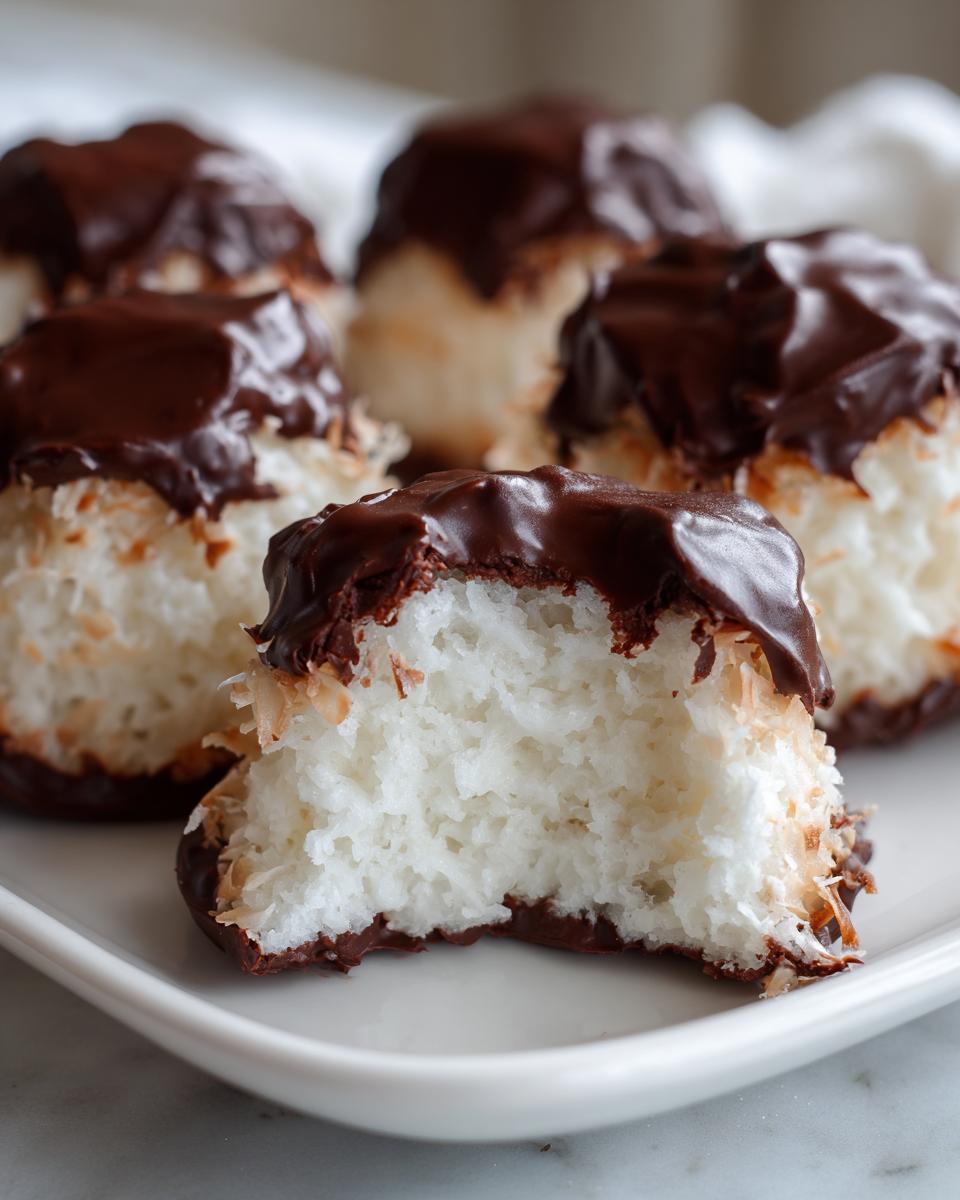
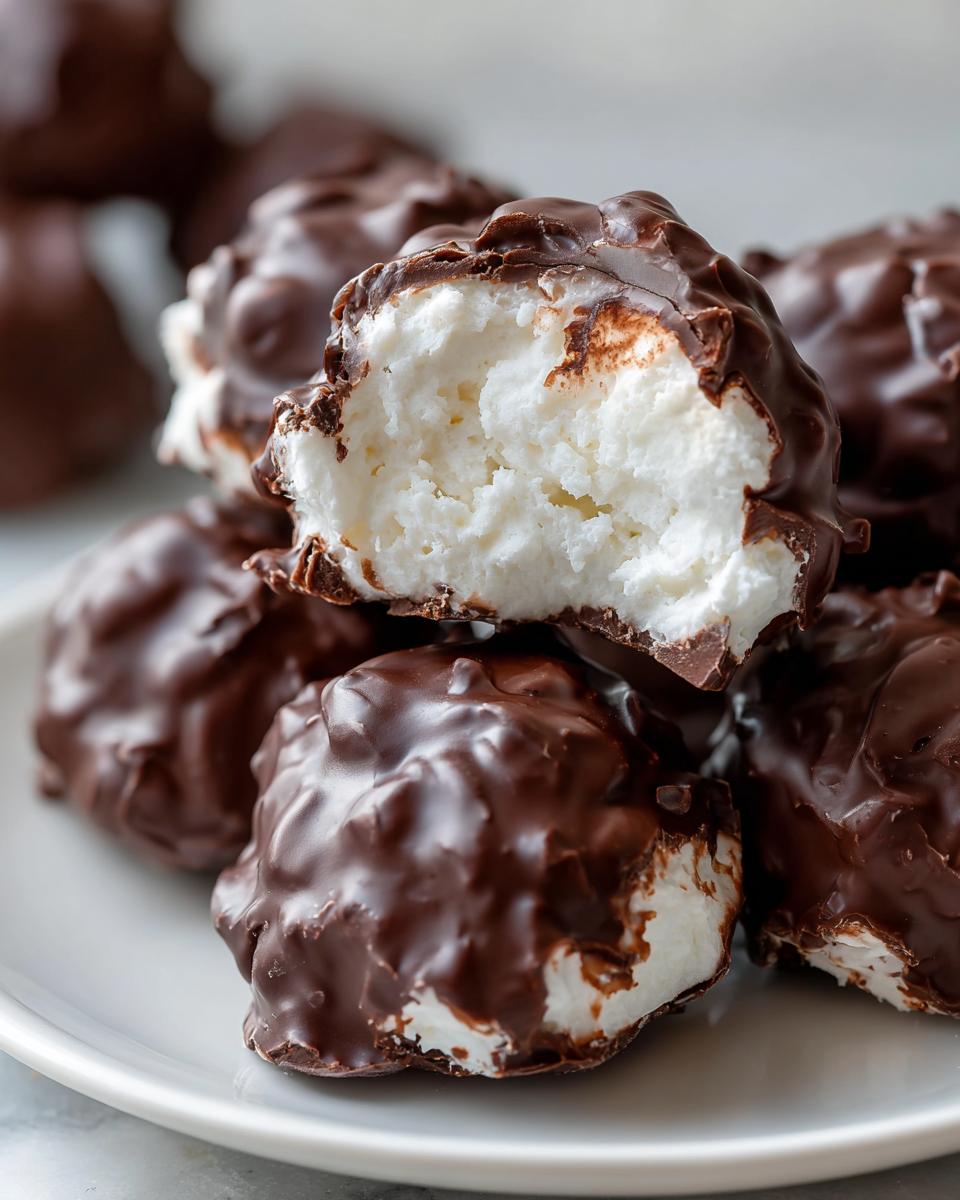
This is what separates this recipe from every other whipped topping recipe out there—it nails that recognizable, airy, melt-in-your-mouth nougat filling. The pudding mix is the magic key that locks in the fluffiness so it doesn’t turn into icy whipped cream. It’s pure nostalgic candy comfort, made faster than takeout.
Quick Holiday Treats Ready in Minutes
Because we aren’t using the oven at all, cleanup is a breeze, and we aren’t adding extra heat to the kitchen during the holidays. This makes it a perfect Kid Friendly Dessert Idea for involving the little ones, too! Pop them in the freezer, and they are ready to go straight onto your Festive Sweet Table before you know it.
Gathering Ingredients for Your Cool Whip Candy
Alright, let’s get real about what we need. Since this is a super simple, three-main-ingredient recipe (plus the coating, of course!), the quality of those few items really matters. I’ve laid out exactly what you need below to make sure your **Cool Whip Candy** filling sets up perfectly and doesn’t get watery.
Make sure you check my list twice before heading to the store; those key details are what keep this from being a sticky mess!
Ingredient Notes and Substitutions for Fluffy Chocolate Candy
If you grab the wrong kind of pudding, you are going to have a bad time. You MUST use the instant vanilla pudding mix—not the kind you cook on the stove! The dry mix is what reacts with the whipped topping to create that thick, fluffy base.
For the chocolate coating, that little bit of shortening or coconut oil is non-negotiable if you want a smooth dip. It thins the chocolate just enough so it doesn’t crack dramatically when you bite into the frozen center. If you swap semi-sweet chocolate chips for milk chocolate, your final look will be lighter, but the method stays the same!
Step-by-Step Instructions for Perfect Cool Whip Candy
Okay, darling, this is where the magic happens, and honestly, it’s so straightforward you’ll wonder why you ever bought candy bars from the store! Follow these steps exactly, especially where the freezer is concerned, and you’ll have professional-looking **Cool Whip Candy** without breaking a sweat. Remember, the goal is fluffy, not flat! This process is one of the easiest sweet fixes on my entire best dessert recipes list.
Creating the Creamy Frozen Treats Filling
First things first: the filling needs to avoid deflation at all costs. I know you want to mix it up fast, but you have to stir gently! Take your thawed whipped topping and gently fold in that dry pudding mix. I mean *fold*, not beat! Stop stirring the second you don’t see any more white streaks. Once mixed, line a baking sheet with parchment—this saves you so much cleanup later. Scoop out little, uniform mounds. They should be about an inch wide. Trust me, making them even means they freeze evenly, which makes dipping so much easier later on.
Now, patience is key for this step. They need serious chill time. Pop that sheet into the freezer for a minimum of two hours until those little mounds are rock solid. We need them frozen solid for the next phase.
Mastering the Chocolate Dipped Candy Coating
While our filling is chilling hard, we melt the coating. Melt your chocolate chips and shortening together in short bursts in the microwave—30 seconds at a time is your friend here. If you overheat chocolate, it seizes up and gets grainy, and we absolutely don’t want that! Stir it until it’s perfectly glossy and smooth.
When the filling is fully frozen, you have to work quickly! Pull the tray out and immediately start dipping. Use a fork or a dipping tool and quickly dunk the frozen mound into the warm chocolate. Let any extra drip off before placing it back on the parchment. It sets up immediately because the filling is so cold! Pop them back in the freezer for about 20 minutes to lock that delicious Chocolate Dipped Candy shell permanently.
Tips for Success with Your Whipped Topping Confections
You’ve followed my steps, but let me give you a few insider tricks that turn good **Cool Whip Candy** into amazing, restaurant-quality treats. The biggest secret to getting that perfect snap on the chocolate shell is temperature control. You absolutely cannot skimp on that initial freeze time! Those little white mounds need to be rock hard—think ice cubes, not refrigerated clay—before they ever hit that warm chocolate. If they are even slightly soft, the heat from the chocolate will melt the top layer, and you’ll end up with a goopy mess instead of that beautiful, crack-free coating, something I learned the hard way when I rushed them for a party, like one of the great tips I saw over at this recipe.
Also, when you are dipping, have a small metal tool ready. Work fast, but don’t rush the drip! A quick jiggle after dipping lets the excess fall away, ensuring you don’t end up with huge chocolate pools around the base of your Creamy Frozen Treats. If you do notice puddles, you can gently scrape the bottom with a small offset spatula before placing it back on the parchment. This guarantees every piece looks professional for your next party!
Storage and Reheating Instructions for Cool Whip Candy
Now that you’ve got these dreamy, fluffy chocolate treats, the last thing you want to do is mess up the storage! Since these are essentially frozen whipped topping confections, they have to stay cold. Do not think about leaving these on the counter for your dessert tray for too long! Never try to “reheat” this candy, obviously—unless you want chocolate soup and sadness.
The absolute best way to keep your **Cool Whip Candy** perfect for weeks is simple: airtight containers only. I usually layer mine between sheets of wax paper or parchment paper so they don’t stick together in a big frozen clump. A flat layer in the container is always better. Pop that container right into the freezer.
They are genuinely best served straight from the freezer, when they have that perfect, firm, almost ice-cream-like texture that mimics a freshly made 3 Musketeers bar. If you let them sit out on the counter for five to ten minutes before serving, they soften up just slightly. That slight softening is excellent if you find them too hard straight out of the deep freeze, and it really brings out that creamy flavor. Just watch the time; if you let them sit too long, that gorgeous chocolate shell might start to sweat, and nobody wants sweaty candy!
Troubleshooting Common Cool Whip Candy Issues
Even with the best intentions, sometimes things go a little sideways in the kitchen, right? I’m happy to talk through the little hiccups I’ve run into while perfecting this **Cool Whip Candy** recipe over the years. If your results aren’t matching that beautiful, fluffy picture I know you have in your head, stick with me, and we’ll fix it! This is how we build confidence, by tackling those inevitable little disasters together.
If you ever get stuck, just remember: freezing time is the easiest thing to adjust. Rushing the freeze is the number one reason people have trouble with these Easy No Bake Candy recipes!
My Filling Won’t Hold Its Shape!
If you scoop your mounds and they immediately start slumping like a sad snowman, that means the filling isn’t cold enough yet. This is almost always fixed by putting it back! Forget the minimum two hours; if it looks soft, put it in the freezer for another hour, or until it’s truly firm to the touch. You cannot dip a soft mound effectively.
Why Is My Chocolate Coating Cracking?
This is a surprising one for many people making frozen treats for the first time. If the chocolate shell cracks after you dip the candy, it means the filling was *too* frozen when you dipped it. Yes, there’s a sweet spot! If the center is like a block of ice, the thin, warm liquid chocolate can’t settle properly, and the rapid contraction when it hits the cold causes those hairline fractures.
The fix? Take the filling out of the freezer about five minutes before you plan to start dipping. You want it hard, but not completely rock-solid. A slight whisper of give on the surface when you touch it is ideal so that the chocolate coating can adhere flawlessly.
My Filling is Flat and Dense—Where Did the Fluff Go?
Oh, the dreaded flat **Cool Whip Candy**! This happens when we get too enthusiastic with the mixing spoon. Remember how I stressed folding gently? The lightness in this candy comes entirely from the air trapped in that thawed Cool Whip. If you beat the dry pudding mix into the whipped topping, you are beating the air right out of it!
To prevent this next time, use only a rubber spatula and gently cut down the middle and fold the batter over itself, turning the bowl as you go. Stop stirring the second you see those last few streaks disappear. That air is your friend; treat it gently!
Estimated Nutrition for This Simple Homemade Candy
Now, I always tell you I focus on great taste over nitpicky counting here at Kings Cook, but since this is a sweet treat, it’s helpful to have a general idea of what’s in what you’re enjoying. Because we base this **Cool Whip Candy** on three simple ingredients—whipped topping, pudding mix, and chocolate chips—the numbers aren’t too scary for a dessert!
The following nutritional breakdown is an estimate based on using the exact ingredients listed in the recipe above and standard versions of those products. Remember, if you use dark chocolate or different brands, these figures will shift slightly. It’s just a guideline, not a guarantee, but it gives you a good baseline!
- Serving Size: 1 piece
- Calories: 120
- Sugar: 15g
- Fat: 6g (with 4g saturated fat)
- Sodium: 95mg
- Carbohydrates: 16g
- Protein: 2g
See? For a chocolate-dipped treat that tastes this indulgent, those numbers are surprisingly reasonable, especially considering how much you save making this Simple Homemade Candy yourself rather than buying pre-packaged bars!
Serving Suggestions for Your Quick Treats
So, you’ve successfully frozen and dipped these little nuggets of chocolate heaven, and now you need to know how to show them off! While they are fantastic eaten straight out of the freezer standing over the sink (don’t judge—I’ve done it!), presenting them nicely elevates these simple **Cool Whip Candy** bites from a quick snack to a proper centerpiece. Given how inexpensive this is to make, it sits proudly as one of my favorite Budget Friendly Candy options for feeding a crowd.
Since this is firmly in the “no oven” category, this recipe is a superstar for your No Bake Holiday Baking spread during the busy season. You have all the baking shows going on, but you need something done fast! Here are my favorite ways to serve these light, fluffy delights.
First, if you are serving these after dinner, they pair wonderfully with a strong cup of coffee. The bitterness of the coffee cuts right through the sweetness of the chocolate and the creamy filling. It’s a perfect contrast!
For parties or holiday gatherings, ditch the paper plates! Arrange the **Cool Whip Candy** on a nice tiered platter. You can really make them look fancy by adding small sprinkles of flaky sea salt right onto the chocolate before it sets up, or even using gold sprinkles for extra holiday bling. Another wonderful presentation idea is to serve them alongside other simple, colorful treats, like brightly colored fudge or peppermint bark. They provide that necessary soft, airy texture contrast to the harder candies on your Festive Sweet Table.
Honestly, the best presentation is just having a big bowl of them ready to go because they disappear so quickly! Who needs fuss when you have something this delicious and this **Easy No Bake Candy** ready to serve?
Share Your Fluffy Chocolate Candy Creations
Okay, my friend, you’ve made the candy! Now comes my favorite part: hearing all about how easy it was for you! I truly believe that once you try this incredibly simple **Cool Whip Candy**, it’s going to stick around as a staple in your recipe rotation. It’s just too good and too fast to ignore.
I put my heart into making sure every single recipe I share here at Kings Cook works perfectly when you test it at home. So, I would absolutely adore it if you came back and let me know how yours turned out. Did you manage to get that perfect chocolate shell coating? Did your family instantly recognize that airy texture? Don’t be shy!
Scroll down below to the comments section and leave me a rating—five stars if you agree this is the best Easy No Bake Candy ever! And if you took a gorgeous picture of your finished **Cool Whip Candy**, please snap a photo and tag me on social media. Seeing your creations is part of what keeps me excited to come back to the kitchen every day. I can’t wait to see what you made!
If you’re looking for more ways to streamline your cooking and baking, feel free to check out my About Page to see more of my kitchen philosophy. Happy treating, and thanks so much for cooking with me!
PrintEasy 3-Ingredient Cool Whip Candy (3 Musketeers Copycat)

Make this incredibly simple, no-bake Cool Whip Candy that tastes just like a fluffy 3 Musketeers bar. It requires only three main ingredients and is perfect for quick holiday treats or any time you need an easy dessert.
- Prep Time: 15 min
- Cook Time: 5 min
- Total Time: 2 hours 20 min
- Yield: 20 servings 1x
- Category: Dessert
- Method: No-Bake/Freezing
- Cuisine: American
- Diet: Vegetarian
Ingredients
- 1 (8 ounce) container frozen whipped topping (Cool Whip), thawed
- 1 (3.9 ounce) package instant vanilla pudding mix (dry mix only)
- 1 cup semi-sweet chocolate chips
- 1 tablespoon shortening or coconut oil (for melting chocolate)
Instructions
- Prepare the filling: In a medium bowl, combine the thawed whipped topping and the dry instant vanilla pudding mix. Stir gently until just combined. Do not overmix, or the texture will deflate.
- Shape the candy: Line a baking sheet with parchment paper. Drop spoonfuls of the mixture onto the prepared sheet, forming small, uniform mounds about 1 inch wide. You should get about 20 to 24 pieces.
- Freeze the filling: Place the baking sheet in the freezer for at least 2 hours, or until the mounds are completely firm. This step is crucial for easy dipping.
- Melt the chocolate coating: In a microwave-safe bowl, combine the chocolate chips and shortening (or coconut oil). Microwave in 30-second intervals, stirring well after each interval, until the chocolate is smooth and fully melted.
- Dip the candy: Remove the frozen mounds from the freezer. Using a fork or dipping tool, quickly dip each frozen mound into the melted chocolate, allowing excess chocolate to drip off. Place the coated candy back onto the parchment-lined baking sheet.
- Set the coating: Return the dipped candy to the freezer for about 15 to 20 minutes, or until the chocolate coating is set firm.
- Serve and store: Serve the Cool Whip Candy immediately, or store it in an airtight container in the freezer until ready to enjoy.
Notes
- For a true 3 Musketeers copycat flavor, ensure you use instant vanilla pudding mix, not the cook-and-serve type.
- If you want a thicker chocolate shell, you can double the amount of chocolate chips and shortening used for the coating.
- This is a great kid-friendly dessert idea since it involves no oven time.
Nutrition
- Serving Size: 1 piece
- Calories: 120
- Sugar: 15
- Sodium: 95
- Fat: 6
- Saturated Fat: 4
- Unsaturated Fat: 2
- Trans Fat: 0
- Carbohydrates: 16
- Fiber: 1
- Protein: 2
- Cholesterol: 5