
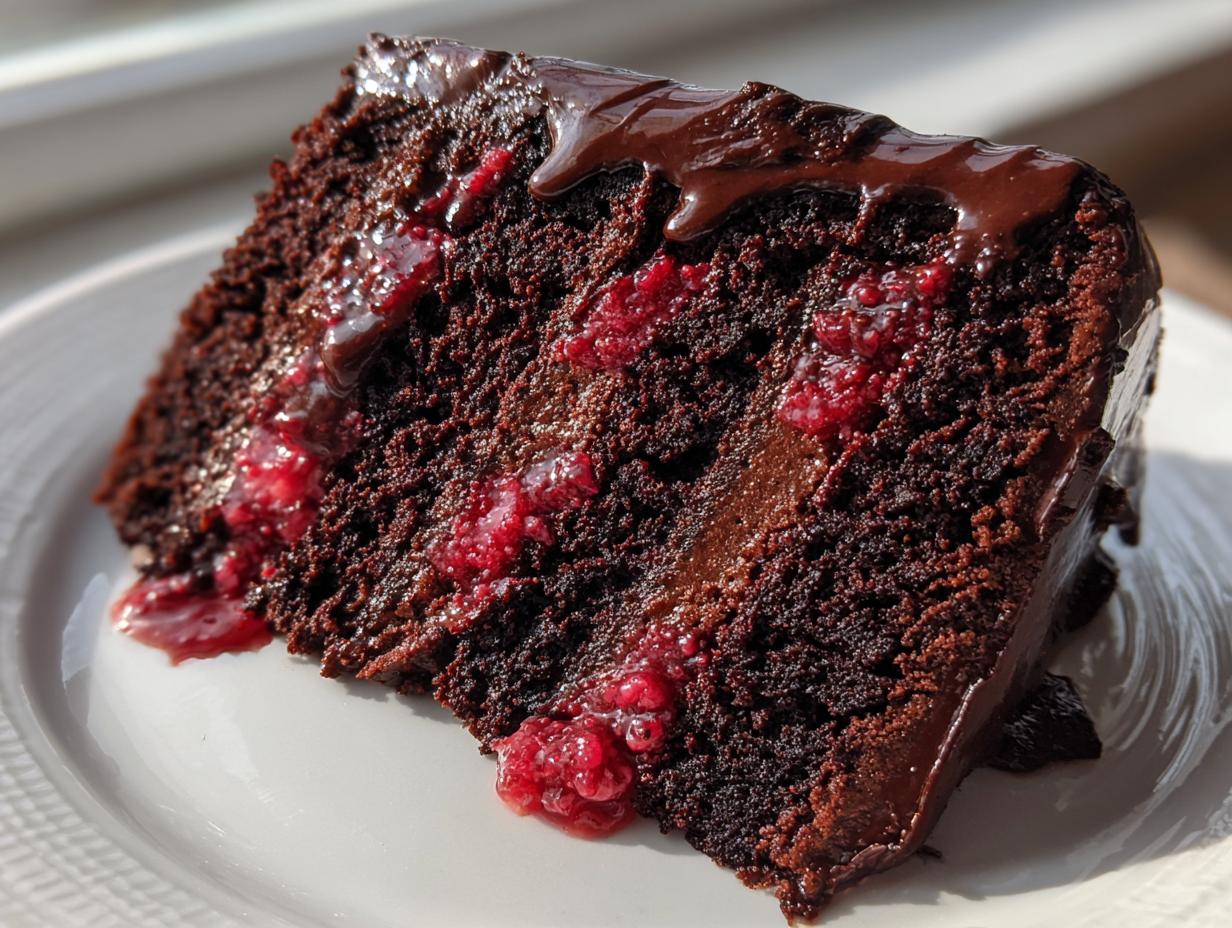
Have you ever seen a dessert that looks so absolutely perfect in a bakery window and thought, “Oh, I could never pull that off at home?” Well, forget that thought right now! Because today, we are tackling the ultimate showstopper: the **chocolate raspberry cake**. This isn’t just any cake—it’s that divine balance between deep, rich chocolate and a bright, tart fruit that just sings on your palate. I promise you, after testing and tweaking this specific combination until the layers were impossibly moist and the flavor profile was perfect, you are going to feel like a true kitchen royal making this. If you want the foundation for this masterpiece, make sure you check out my secrets for the moist chocolate cake base first! Trust me, this is the recipe that proves you can hit that bakery quality right on your own counter!
- Why This Chocolate Raspberry Cake is Your New Celebration Favorite
- Gathering Ingredients for Your Chocolate Raspberry Cake
- Step-by-Step: Baking the Ultimate Chocolate Raspberry Cake
- Assembling Your Chocolate Raspberry Layer Cake
- Ingredient Notes and Substitutions for Your Chocolate Raspberry Cake
- Storage and Reheating Instructions for the Chocolate Raspberry Cake
- Expert Tips for Baking a Bakery Style Chocolate Cake
- Frequently Asked Questions About Making a Chocolate Raspberry Cake
- Nutrition Estimates for This Chocolate Raspberry Cake
- Nutrition Estimates for This Chocolate Raspberry Cake
Why This Chocolate Raspberry Cake is Your New Celebration Favorite
Honestly, why settle for basic when you can create this spectacular masterpiece? This **Chocolate Raspberry Cake** is perfect for those moments that need a little extra sparkle, whether it’s a **Showstopper Birthday Cake** or one of those intimate **Romantic Celebration Desserts**. It truly is an **Elegant Chocolate Dessert**!
-
Achieving the Perfect Moist Chocolate Cake Recipe Layers
We nail the moisture factor here, folks! The secret to our non-negotiable **Moist Chocolate Cake Recipe** layers? It’s that last step of carefully mixing in the boiling water. Sounds weird, I know, but watch what it does for the structure!
-
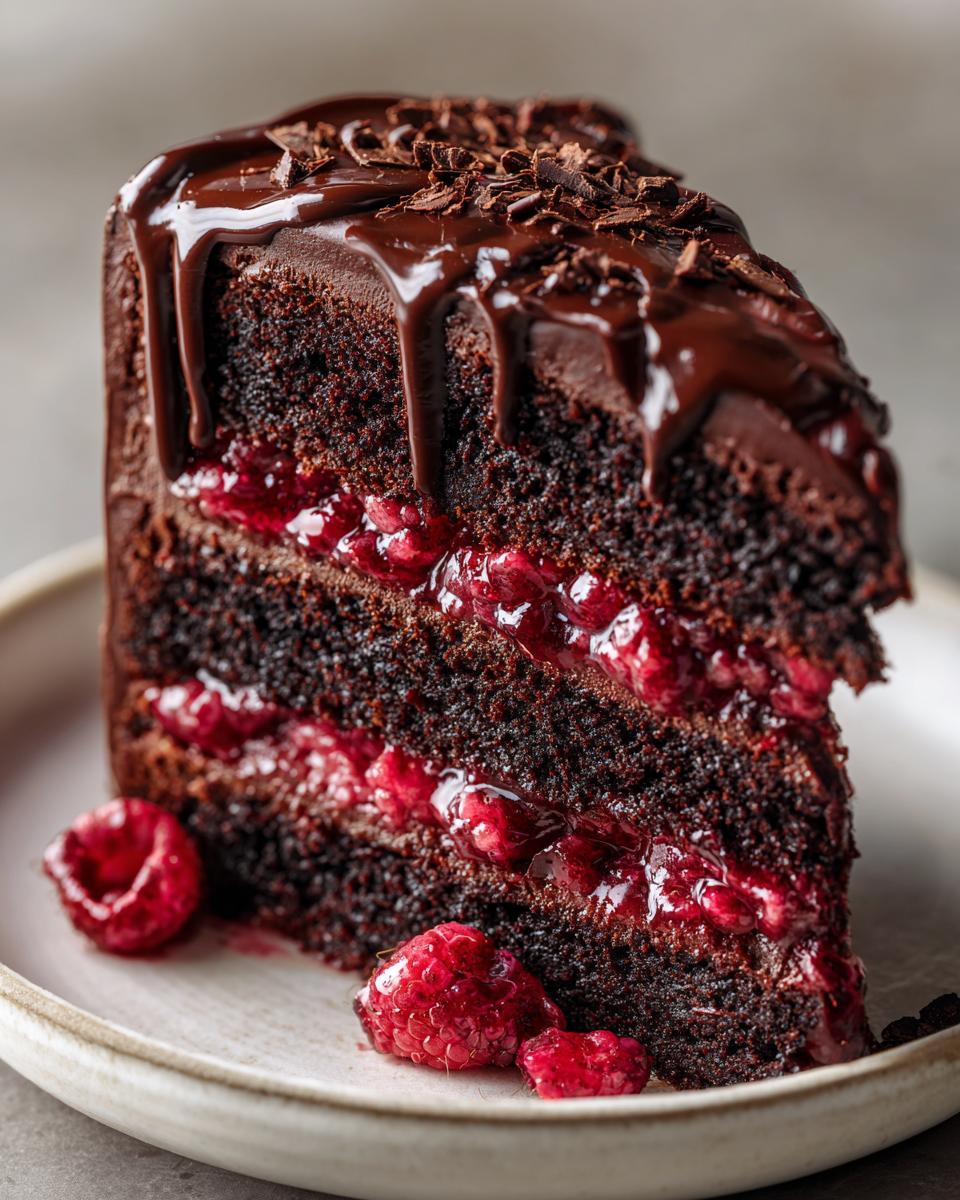
Bright and Tangy Fresh Raspberry Filling
That tartness is essential! The **Fresh Raspberry Filling** cuts right through the richness of the chocolate layers. And guess what? You can use frozen ones if fresh aren’t looking good at the store. Totally accessible!
-
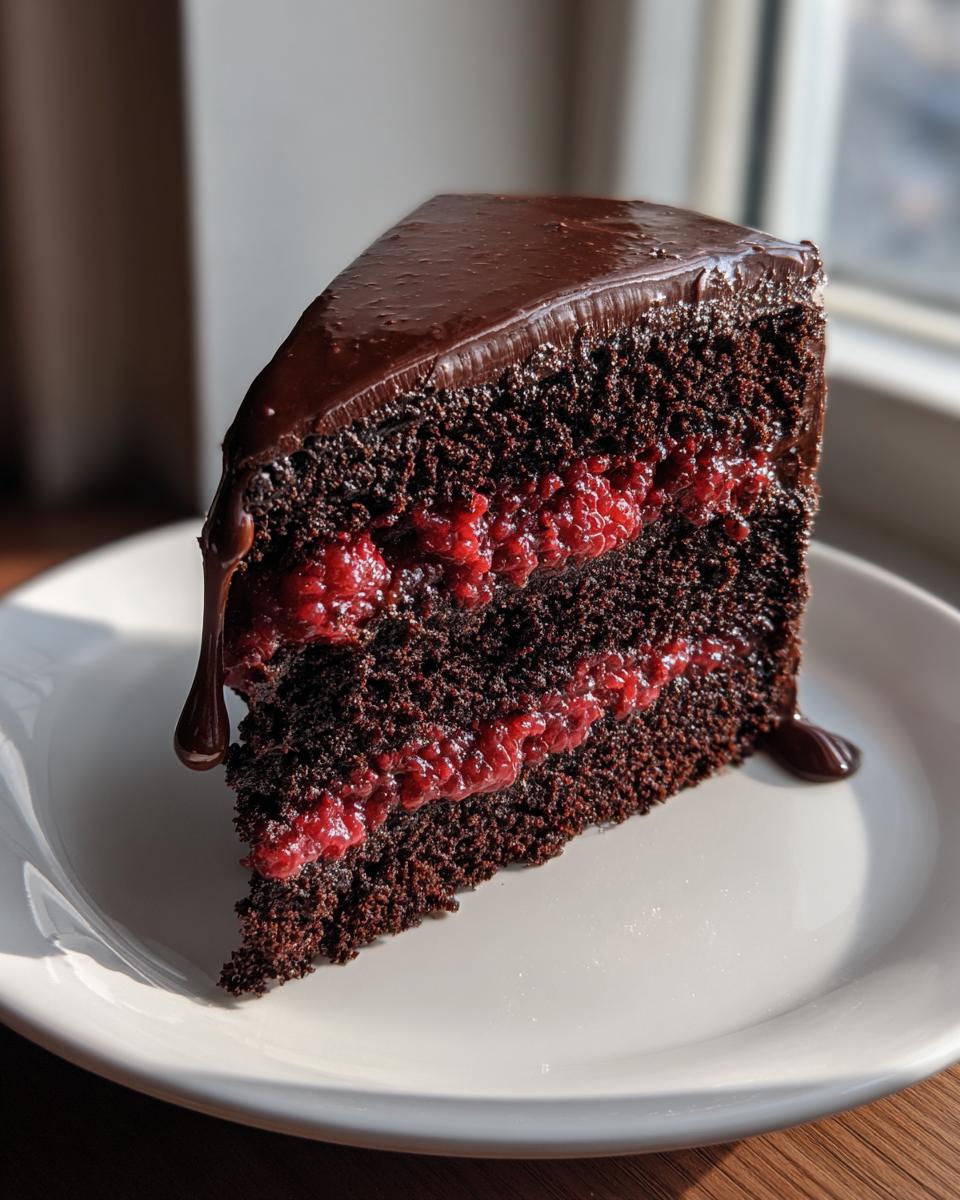
Elegant Finish with Silky Chocolate Ganache Drip Cake
Forget fussy buttercream struggles sometimes. The silky ganache is incredibly easy to make and gives you that gorgeous, professional look instantly. Everyone will think you bought this from a fancy bakery!
Ready to see how we put all these amazing things together? If you need more inspiration for big events, peek at my best dessert recipes collection!
Gathering Ingredients for Your Chocolate Raspberry Cake
Okay, deep breaths! Baking a **Chocolate Raspberry Cake** this spectacular requires attention to detail, and that starts right here with our ingredients. We need precision, especially if we want those bakery results, so please measure carefully! Don’t substitute basic things like the cocoa or the chips unless you have to. I’ve included a link below if you happen to need a quick chocolate addition later!
-
For the Rich Chocolate Sponge Layers
We need the heavy hitters for the cake itself. Remember, that boiling water is non-negotiable; it blooms the cocoa and creates that amazing texture!
- 1 3/4 cups all-purpose flour
- 1 3/4 cups granulated sugar
- 3/4 cup unsweetened cocoa powder
- 1 1/2 teaspoons baking powder
- 1 1/2 teaspoons baking soda
- 1 teaspoon salt
- 2 large eggs
- 1 cup whole milk
- 1/2 cup vegetable oil
- 2 teaspoons vanilla extract
- 1 cup boiling water (seriously, make sure it’s boiling hot!)
-
For the Homemade Fresh Raspberry Filling
This is what brings the brightness! The cornstarch is key here to help it set up nicely between the layers so it doesn’t all squish out when we stack things up.
- 2 cups fresh or frozen raspberries
- 1/2 cup granulated sugar
- 2 tablespoons cornstarch (the magic thickener!)
- 1 tablespoon lemon juice
-
For the Silky Chocolate Ganache
We are using bittersweet chocolate for the best depth of flavor here. Make sure it’s finely chopped so it melts smoothly when the hot cream hits it!
- 1 cup heavy cream
- 8 ounces bittersweet chocolate, finely chopped
Once you have everything measured out, we can move on to the fun part—making the magic happen! If you need a quick fix for an extra decadent topping later, check out my 5-minute silky chocolate sauce recipe!
Step-by-Step: Baking the Ultimate Chocolate Raspberry Cake
This is where we turn ingredients into an absolutely show-stopping **chocolate raspberry cake**! Don’t let the three separate components scare you; we’re going to handle them one at a time. My biggest advice for layers this rich is to really trust your oven thermometer, even if the recipe calls for 350°F. Sometimes my oven runs hot, and those extra few degrees can dry out this delicate sponge!
Preparing the Moist Chocolate Cake Recipe Layers
First things first, preheat that oven to 350°F (175°C) and get those two 8-inch pans greased and floured—a little homemade cake goop never hurt anyone! In a big bowl, whisk all your dry ingredients until they look uniform—that’s your baking powder and soda getting distributed evenly. Then, turn that mixer on medium and beat in the eggs, milk, oil, and vanilla until it’s smooth. Now, here’s the moment of magic: slowly pour in that boiling water while mixing on low speed. The batter will be super thin, and that’s exactly what you want for a **Moist Chocolate Cake Recipe**. Divide it up and bake about 30 to 35 minutes. Test it with a wooden pick—if it comes out with moist crumbs attached, you’re golden!
Cooking the Fresh Raspberry Filling
While those cakes cool down a bit, tackle the filling. Dump your raspberries, sugar, cornstarch, and lemon juice right into a saucepan. Heat it over medium heat, stirring constantly until it starts bubbling and thickens up like a beautiful jam. This usually takes about five to seven minutes. Once it’s thick, pull it off the heat immediately! And listen to me on this: You MUST let this filling cool completely—I mean fridge-cold—before you even think about frosting the cake. Warm filling equals a slimy, sliding mess!
Creating the Silky Chocolate Ganache
For the topping, we need to treat the chocolate gently. Put your finely chopped bittersweet chocolate in a heatproof bowl. Heat the heavy cream on the stove until it’s just starting to steam around the edges—we don’t want a rolling boil, just that lovely simmer. Pour that hot cream right over the chocolate and then you walk away! Seriously, let it sit undisturbed for a full five minutes. This lets the latent heat melt everything evenly. After five minutes, start whisking slowly from the center outwards until it’s gorgeously smooth. We need to let this thicken up on the counter until it’s spreadable, almost like really soft frosting, before we pour it over the cake.
If you need a little refresher on cake handling, maybe check out my tips on pound cake building—the principles of cooling are the same!
Assembling Your Chocolate Raspberry Layer Cake
Alright, we’ve got our beautiful, dark, and moist **Chocolate Raspberry Cake** layers cooled, our tart filling completely chilled, and our ganache thickened up just right. Now it’s time to build this thing! First things first: take a serrated knife and gently level the tops of your cake layers if they domed up while baking. No one wants a tilted cake centerpiece!
Place your first layer right onto your serving stand or cake board. Scoop about half of that gorgeous, thick **Fresh Raspberry Filling** right onto the middle, spreading it out gently so it doesn’t creep right to the edge—we want to maintain a slight border so it doesn’t squeeze out later! Carefully place the second layer on top. If you want a super polished look before the ganache, a thin layer of plain buttercream works wonders to catch crumbs, but honestly, with the ganache top, you can skip that step!
Tips for a Stable Celebration Cake Recipe Structure
Here is my little trick to make sure this **Celebration Cake Recipe** holds its shape perfectly, especially if you’re planning on traveling with it or trying to get those clean drips: after you stack the cake with the filling, pop the whole thing into the fridge for about 20 minutes. Just long enough for the filling to firm up again! This stability prevents the layers from shifting or bulging when you pour that slightly thick ganache over the top later. It just helps everything lock into place!
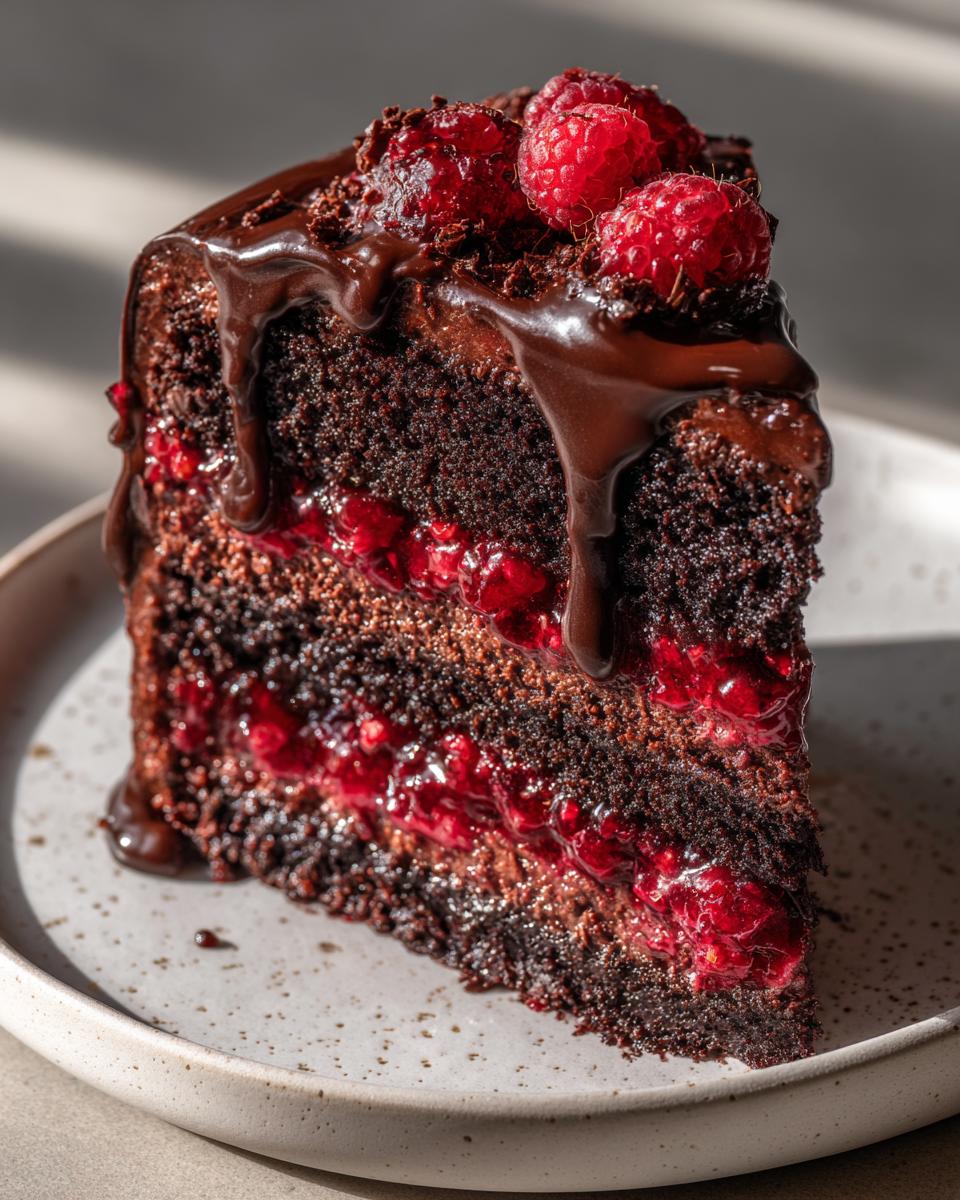
Once it’s chilled briefly, it’s time for the grand finale! Take your slightly thickened ganache—it should droop slowly off the spoon, not rush off—and pour it right onto the center of the top layer. Use an offset spatula to gently encourage it toward the edges. Don’t fuss too much; those slightly uneven drips are what make it look homemade and totally decadent! Finish it off with a crown of those beautiful fresh raspberries while the ganache is still soft. Slice it up, and prepare for compliments!
If you decide you want a lighter touch instead of the heavy ganache, you might prefer a fruity frosting instead. You can see my go-to recipe for a classic vanilla buttercream frosting that you can easily flavor with raspberry jam!
Ingredient Notes and Substitutions for Your Chocolate Raspberry Cake
I always say that knowing *why* an ingredient is there makes you a better baker, and that’s especially true for a decadent showstopper like this **chocolate raspberry cake**! Because we are aiming for that bakery-style richness, there are a few spots where sticking to the plan really pays off, but I know sometimes you just can’t find that one specific thing. So let’s talk about common substitutions!
First, let’s talk chocolate depth. If you want that deep, almost mysterious chocolate flavor that screams “gourmet,” don’t just use regular cocoa powder. When possible, grab the dark or Dutch-processed cocoa powder. It gives you a much richer color and a smoother, less acidic chocolate taste in your **chocolate raspberry cake** layers. It’s a small shift that makes a huge visual and flavor impact!
Now, about the star fruit—the raspberry element. I absolutely love using fresh or frozen berries for the filling because the lemon juice really brightens them up. But if you look in the store and the raspberries are sad, totally dried out, or wildly expensive, don’t panic! You can substitute the fresh/frozen berries and the sugar/cornstarch mixture with 1 1/2 cups of high-quality, thick raspberry preserves. Just heat the preserves gently until they are slightly looser, stir in the tablespoon of lemon juice for that necessary tang, and then let it cool completely before using it to fill the layers. Easy peasy!
For the liquid components—the eggs, milk, and oil—try to bring your eggs and milk out about 30 minutes before you start. Room temperature ingredients mix together much better, leading to a finer crumb. When you’re whipping up the batter, you want everything to emulsify beautifully, and room temp ingredients make that happen! Remember, every detail helps us get closer to that perfect texture, so check out my tips for perfect chocolate chip cookies too—great baking habits transfer everywhere!
Storage and Reheating Instructions for the Chocolate Raspberry Cake
So, you’ve made this **Chocolate Raspberry Cake** masterpiece, and now you need to keep it perfect until the party starts! Because we used a fresh raspberry filling and that luscious ganache topping, this cake definitely needs to be stored chilly. Don’t even think about leaving it out on the counter overnight—we want that filling firm!
You should cover the cake loosely with a cake dome or carefully tent it with foil—make sure the foil isn’t touching the ganache, or you’ll ruin that beautiful drip effect. Store it in the refrigerator. When properly covered, this beautiful **Chocolate Raspberry Cake** will stay wonderfully moist and delicious for about three to four days. That’s great news, because it means you can bake the layers a day ahead!
Here is my most important tip for serving: While it stores beautifully in the fridge, this cake tastes about a thousand times better when it’s not ice cold. Chocolate flavors need to warm up just a tiny bit to really shine, and the ganache gets a better texture. So, about an hour before you plan to slice it, take the whole cake out of the refrigerator and let it come to room temperature on the counter. You’ll find the cake layers are softer and the flavor profile is truly deep and satisfying. It makes slicing so much cleaner, too!
If you happen to have leftovers (which, ha! I doubt it!), you can certainly eat them cold, but I highly recommend that room temperature rest period. If you’re in a rush, just let individual slices sit on the plate for 20 minutes before digging in. If you’re looking for other rich, make-ahead desserts, my fudge brownies recipe is another great candidate for holiday table prep!
Expert Tips for Baking a Bakery Style Chocolate Cake
So, you’ve mastered the assembly and you totally nailed the filling texture—that’s huge! But if you want those professionals at the bakery to scratch their heads wondering how you did it, we need to focus on the tiny details we do *before* the mixing even starts. These little habits are what separate a good home cake from a truly exceptional one. It’s all about controlling the texture, which is the hardest part of any rich **chocolate cake recipe**!
My number one secret weapon for ultra-fine crumb texture is sifting, sifting, sifting! Yes, even for an ingredient like cocoa powder that seems fine already. Cocoa powder and flour—especially if it’s been sitting in your pantry for a bit—can clump up with tiny pockets of trapped air or moisture. If you dump those clumps right into your wet ingredients, they don’t dissolve properly, and you end up with sneaky little dry pockets in your layers. So, always run your flour, sugar, cocoa, baking powder, and baking soda through a fine-mesh sieve into a bowl before you start combining anything. It takes an extra two minutes, but I promise, the uniformity of the final sponge is worth the effort.
The second area where we need some patience is temperature. Remember when I mentioned bringing the eggs and milk to room temperature? That’s not just a suggestion; it’s essential for excellent emulsion! Cold ingredients don’t incorporate uniformly into the creamed fat (butter/oil) and sugar mixture. When you add cold milk to warm, creamed butter, it can cause the mixture to tighten up and break slightly, leading to a less smooth batter. Room temperature milk and eggs glide right into that fat mixture, creating a beautiful, stable emulsion that traps air better. This results in those delicate air bubbles that give you that signature light, yet rich, texture we’re aiming for. If you want to see how I handle room temperature ingredients when making my classic moist chocolate cake recipe, go take a peek!
Finally, be mindful of your mixing time after the flour goes in. Once you see those flour streaks disappear, STOP the mixer. We don’t want overmixing, which creates too much gluten and leads to a tough, chewy cake instead of a soft sponge. Gentle folding and brief mixing times are the hallmark of a delicate, bakery-style bake!
Frequently Asked Questions About Making a Chocolate Raspberry Cake
It’s smart to have questions, because tackling a showstopper like this **chocolate raspberry cake** means you want zero surprises on the big day! I get asked the same things again and again, so let’s clear up those last few hurdles so you can bake with total confidence. I want everyone to feel like they succeeded, whether you’re new to baking or just trying a new recipe style!
Can I make the components of this Chocolate Raspberry Cake ahead of time?
Absolutely! This is one of the best parts about this recipe—it’s a great make-ahead project. You can bake your cake layers up to three days ahead, wrap them tightly in plastic wrap once they are completely cool, and they will store perfectly well at room temperature (or frozen!). Similarly, the **Fresh Raspberry Filling** is fantastic to make a day or two ahead; just keep it chilled in an airtight container. Even the chocolate ganache can be made the day before. Once it firms up, you can reheat it gently—maybe 10 seconds in the microwave at a time—until it returns to that perfect, pourable, fudgy consistency we discussed. The only thing you should absolutely do the *day of* serving is the final assembly, just to make sure those layers haven’t absorbed too much fridge moisture!
What is the best way to get a smooth Chocolate Ganache Drip Cake finish?
The finish totally relies on temperature! Remember how I talked about letting it cool until it’s “spreadable like soft frosting”? That’s key. If the ganache is too hot when you pour it on, it will run straight down the sides instantly, leaving you with zero decorative drip—just a thin, melted mess at the bottom. If it’s too cold, it will set up too fast and you’ll struggle to spread it evenly over the top, causing chunks.
You want it to be just warm enough that it sinks slowly when you nudge it with a spatula, but cool enough that it immediately starts clinging to the sides when it drips over the edge. If you pour it and it’s running too fast, just let it sit on your counter for another 15 minutes to firm up a bit before you try to manipulate it. Trust the process!
Can I use a different fruit besides raspberries in this Decadent Dessert Idea?
Oh, you totally can! This cake structure—rich chocolate sponge, thick filling, silky top—is surprisingly versatile. Raspberries give that fantastic sharp tartness, but cherries are a divine and classic pairing with chocolate. If you swap to cherries, you might want to reduce the added sugar in the filling slightly, as cherries are often sweeter than raspberries. Strawberries also work great, but they tend to hold a bit more water, so you might need to bump up that cornstarch by just half a teaspoon to ensure your filling sets up nicely.
No matter what fruit you choose, always make sure you taste the filling mixture before it cools down completely and adjust the tartness with an extra spritz of lemon juice if needed. It needs that zing to balance that heavy chocolate! For more ideas on pairings, I have a whole section on fruity desserts, including my favorite moist carrot cake variations!
Nutrition Estimates for This Chocolate Raspberry Cake
Look, when you’re making a truly decadent, bakery-style layered cake designed for a celebration, we know we aren’t optimizing for low calories! This **Chocolate Raspberry Cake** is rich, and these numbers reflect that indulgence. Please remember that these are always estimates based on the standard ingredients listed; if you use extra cream or a different brand of chocolate, things shift a little!
- Serving Size: 1 slice
- Calories: 450
- Sugar: 45g
- Sodium: 250mg
- Fat: 28g
- Protein: 5g
It’s a slice of pure celebration, so enjoy it! If you’re looking for lighter fare for snacks or appetizers, check out what I’ve put together in my appetizers and snacks category, though they certainly won’t taste this rich!
Nutrition Estimates for This Chocolate Raspberry Cake
Look, when you’re making a truly decadent, bakery-style layered cake designed for a celebration, we know we aren’t optimizing for low calories! This cake is rich, and these numbers reflect that indulgence. Please remember that these are always estimates based on the standard ingredients listed; if you use extra cream or a different brand of chocolate, things shift a little!
- Serving Size: 1 slice
- Calories: 450
- Sugar: 45g
- Sodium: 250mg
- Fat: 28g
- Protein: 5g
It’s a slice of pure celebration, so enjoy it! If you’re looking for lighter fare for snacks or appetizers, check out what I’ve put together in my appetizers and snacks category, though they certainly won’t taste this rich!
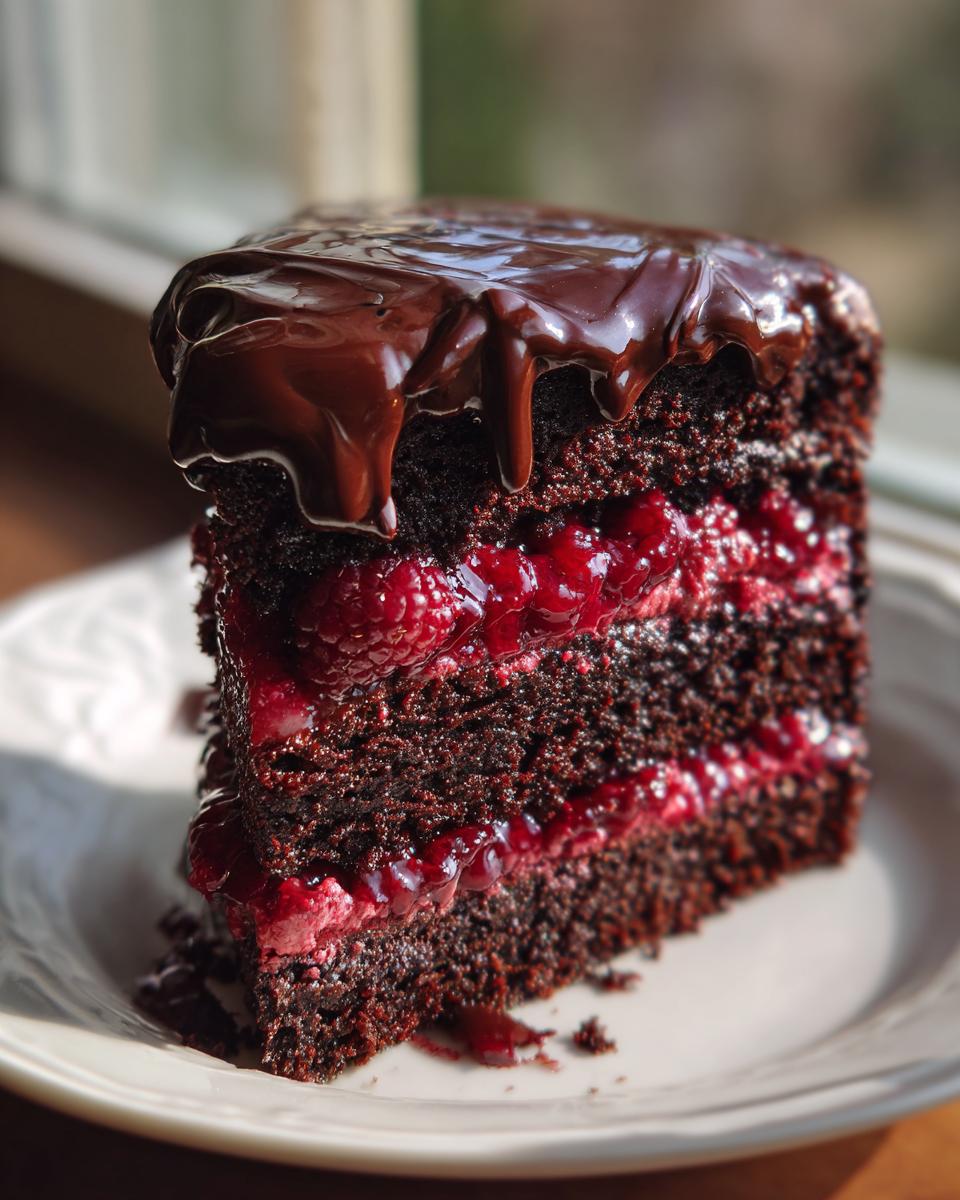
PrintDecadent Chocolate Raspberry Layer Cake with Silky Chocolate Ganache

You will make this showstopper Chocolate Raspberry Layer Cake for your next special occasion. It features moist chocolate cake layers, a vibrant fresh raspberry filling, and a rich chocolate ganache topping for an elegant, bakery-style dessert.
- Prep Time: 40 min
- Cook Time: 35 min
- Total Time: 1 hour 55 min
- Yield: 10 servings 1x
- Category: Dessert
- Method: Baking
- Cuisine: American
- Diet: Vegetarian
Ingredients
- For the Moist Chocolate Cake: 1 3/4 cups all-purpose flour
- 1 3/4 cups granulated sugar
- 3/4 cup unsweetened cocoa powder
- 1 1/2 teaspoons baking powder
- 1 1/2 teaspoons baking soda
- 1 teaspoon salt
- 2 large eggs
- 1 cup whole milk
- 1/2 cup vegetable oil
- 2 teaspoons vanilla extract
- 1 cup boiling water
- For the Fresh Raspberry Filling: 2 cups fresh or frozen raspberries
- 1/2 cup granulated sugar
- 2 tablespoons cornstarch
- 1 tablespoon lemon juice
- For the Silky Chocolate Ganache: 1 cup heavy cream
- 8 ounces bittersweet chocolate, finely chopped
- For Assembly: 1 cup fresh raspberries for garnish
Instructions
- Prepare the Chocolate Cake Layers: Preheat your oven to 350°F (175°C). Grease and flour two 8-inch round cake pans.
- In a large bowl, whisk together the flour, sugar, cocoa powder, baking powder, baking soda, and salt.
- Add the eggs, milk, oil, and vanilla extract to the dry ingredients. Beat with an electric mixer on medium speed for two minutes.
- Carefully stir in the boiling water until the batter is smooth. The batter will be thin.
- Divide the batter evenly between the prepared pans. Bake for 30 to 35 minutes, or until a wooden pick inserted into the center comes out clean.
- Let the cakes cool in the pans for 10 minutes before inverting them onto a wire rack to cool completely.
- Make the Fresh Raspberry Filling: In a small saucepan, combine the raspberries, sugar, cornstarch, and lemon juice.
- Cook over medium heat, stirring constantly, until the mixture thickens, about 5 to 7 minutes. Remove from heat and let it cool completely.
- Prepare the Silky Chocolate Ganache: Place the chopped chocolate in a heatproof bowl.
- Heat the heavy cream in a small saucepan until it just begins to simmer. Do not let it boil.
- Pour the hot cream over the chocolate. Let it sit undisturbed for 5 minutes.
- Whisk the mixture slowly until the ganache is completely smooth and glossy. Let it cool and thicken slightly at room temperature until it reaches a spreadable consistency.
- Assemble the Cake: Once the cake layers are completely cool, level the tops if necessary. Place one layer on your serving plate.
- Spread the cooled raspberry filling evenly over the first layer.
- Top with the second cake layer.
- Pour or spread the slightly thickened chocolate ganache over the top of the cake, allowing some to drip down the sides for a decorative effect.
- Garnish the top with fresh raspberries before serving.
Notes
- For an even richer flavor, use dark cocoa powder in the cake batter.
- If you prefer a lighter frosting, you can substitute the ganache with a raspberry buttercream, using the cooled raspberry filling as the flavor base.
- Chill the cake for at least 30 minutes after frosting to help the ganache set before slicing.
Nutrition
- Serving Size: 1 slice
- Calories: 450
- Sugar: 45g
- Sodium: 250mg
- Fat: 28g
- Saturated Fat: 15g
- Unsaturated Fat: 13g
- Trans Fat: 0g
- Carbohydrates: 50g
- Fiber: 3g
- Protein: 5g
- Cholesterol: 70mg