
You know how sometimes you see a dessert in a bakery window and just sigh because you know you can never recreate that sheer level of decadent perfection at home? Well, forget that feeling! I’m here to tell you that achieving that rich, bakery-style finish with a perfectly moist center is totally within your reach. We’ve been testing versions of this recipe until the cocoa bloom was just right, ensuring every bite delivers the *Ultimate Chocolate Indulgence* you’ve been dreaming about. This is, hands down, the most intensely satisfying chocolate fudge cake I have ever baked, and I promise you, it’s foolproof!
- Why This Is The Ultimate Chocolate Fudge Cake Recipe
- Gathering Ingredients for Your Chocolate Fudge Cake Layers
- Step-by-Step Instructions for the Perfect Chocolate Fudge Cake
- Tips for an Intense Chocolate Flavor Cake
- Ingredient Notes and Substitutions for this Chocolate Fudge Cake
- Make-Ahead and Storage for Your Chocolate Fudge Cake
- Serving Suggestions for This Decadent Chocolate Dessert
- Frequently Asked Questions About Making a Chocolate Fudge Cake
- Nutritional Estimates for Your Chocolate Fudge Cake
Why This Is The Ultimate Chocolate Fudge Cake Recipe
When I developed this recipe, I wasn’t messing around. I wanted the richest, deepest chocolate experience without ever feeling dry or crumbly. This isn’t your average cocoa cake, my friends. It’s designed for those moments when only pure, decadent chocolate will do—birthdays, anniversaries, or just Tuesday afternoon, let’s be honest!
- The flavor foundation is built using high-quality cocoa powder, but we kick that depth up substantially by using hot brewed espresso. Trust me, the cake won’t taste like coffee; it just unlocks an intense chocolate flavor cake profile!
- It bakes up beautifully as a moist homemade cake every single time.
- The frosting is pure velvet—it sets up gorgeously for slicing but stays soft on the tongue.
Achieving That Bakery Style Chocolate Fudge Cake Texture
The texture here is everything. We achieve that legendary moist crumb by using buttermilk instead of plain milk. That slight acidity helps tenderize the flour, keeping everything soft. Then, we pour in the hot espresso right at the end. That heat “blooms” the cocoa powder, making the chocolate flavor explode and ensuring you get those fabulous, fudgy cake layers.
The Secret to Silky Chocolate Frosting for Your Chocolate Fudge Cake
Forget stiff, sugary buttercream! The real magic in making this chocolate fudge cake shine is how we tackle the topping. We start by melting bittersweet chocolate into heavy cream to create a quick ganache base. Once that’s slightly cooled, we beat it into the butter and sugar. This technique is what gives you that incredibly smooth, **Silky Chocolate Frosting** that drapes perfectly over every fudgy layer. It sets up just enough to look professional, but it keeps melting in your mouth.
Gathering Ingredients for Your Chocolate Fudge Cake Layers
Before we even think about turning the mixer on, we need to make sure our workspace looks like a professional pastry kitchen! Being organized is 90% of the battle when executing a showstopper dessert like this. This list ensures you have everything ready to go when the urge to bake this from scratch chocolate cake hits you, because you’re not going to want to stop once you start.
For the Cake Layers, keep your wet and dry items separate for now:
- 1 3/4 cups all-purpose flour
- 1 3/4 cups granulated sugar (Just regular white sugar works perfectly here!)
- 3/4 cup unsweetened cocoa powder, make sure yours is high quality—it makes a difference!
- 1 1/2 teaspoons baking soda
- 3/4 teaspoon baking powder
- 3/4 teaspoon salt
- 2 large eggs, room temperature is always best if you can manage it.
- 1 cup tangy buttermilk (I’ll tell you how to mimic this later if you run out!)
- 1/2 cup standard vegetable oil
- 2 teaspoons vanilla extract
- 1 cup hot, freshly brewed espresso or super strong coffee. This is our secret weapon, remember?
Now for the incredible frosting components. We need to be specific when it comes to melting and creaming:
- 8 ounces bittersweet chocolate, you absolutely must finely chop this so it melts evenly later.
- 1 cup (that’s two full sticks!) of unsalted butter, softened but definitely not greasy or melty.
- 3 cups powdered sugar, sifted! Don’t skip the sifting step for that truly silky texture.
- 1/2 cup unsweetened cocoa powder, also sifted!
- 1/4 cup heavy cream for that rich ganache base.
Step-by-Step Instructions for the Perfect Chocolate Fudge Cake
Okay, now that we have all our gorgeous, rich ingredients laid out, let’s get this bake going! I’ve broken this down into simple phases so you don’t miss a single crucial step in making this incredible chocolate fudge cake. Remember, baking is just following directions carefully, and I promise these directions are easy to follow!
Mixing the Moist Homemade Cake Batter
First things first: preheat your oven to 350°F (175°C) and get those two 9-inch pans greased, floured, and lined with parchment circles—we want these layers to pop right out! In a big bowl, whisk the dry things: flour, sugar, ¾ cup cocoa, soda, powder, and salt. Make sure it’s all combined nicely.
Now add the wet things—eggs, buttermilk, oil, and vanilla—and mix with your electric mixer on medium speed for two minutes. This gets the air in there! The one step that trips people up? Right at the end, carefully pour in that hot espresso while mixing low. Don’t panic; this batter is supposed to be super thin! That super thin liquid is what guarantees you get a wonderfully **Moist Homemade Cake**.
Baking and Cooling Your Fudgy Cake Layers
Divide that thin batter evenly between your two prepared pans. Pop them into your preheated oven for about 30 to 35 minutes. I always test them with a wooden pick inserted right in the center; if it comes out clean, they’re done! You need to let the layers cool in the pans for about 10 minutes before flipping them out onto a wire rack to cool completely. If you try to frost them warm? Well, you’ll end up with a sticky puddle instead of a **chocolate fudge cake**!
Preparing the Silky Chocolate Ganache Frosting
While the cakes cool, we tackle the topping! This is where we transition from a good cake to a truly **Decadent Chocolate Dessert**. First, put your finely chopped bittersweet chocolate into a heatproof bowl. Heat your heavy cream until it’s just simmering—not boiling hard—then pour it right over that chocolate. Let it sit, totally undisturbed, for five whole minutes. Then whisk it until it’s smooth and shiny—that’s your quick ganache base.
In a separate bowl, beat your softened butter until it’s creamy. Now, gradually beat in the sifted powdered sugar and the sifted cocoa powder, alternating with that cooler chocolate mixture. If it seems too stiff to spread later, whisk in another tablespoon of heavy cream if you have it. Keep beating until it’s perfectly smooth!
Assembling Your Showstopper Chocolate Fudge Cake
Once those layers are totally cool—I mean stone cold—it’s time for the fun part. Put your first layer down on your serving plate. Take about a third of that luxurious frosting and spread it evenly over the top. Gently place the second layer on top of that.
Now, use the remaining frosting to cover the top and sides of your entire **chocolate fudge cake**. If you want that super clean, sharp look that screams “bakery-perfect,” you can chill the whole thing for 15 minutes before giving it a final smoothing pass. It just sets up beautifully!
Tips for an Intense Chocolate Flavor Cake
The difference between a good cake and a truly unforgettable one always comes down to the quality of the chocolate components. Since we are going for pure decadence with this chocolate fudge cake, don’t skimp here! My first big tip, which I highlighted in the notes, is the hot espresso. It’s a game-changer for anyone who loves intense chocolate flavor.
Seriously, use the hot liquid! That coffee doesn’t add flavor; it extracts and deepens the rich flavor already present in your cocoa powder. Thinking about dunking those chocolate chip cookies we made earlier in a glass of milk with this cake? Well, this cake stands up all by itself, but a glass of cold milk is always welcome! If you absolutely cannot have coffee in the house, using boiling hot water works, but you will notice the chocolate flavor scale back just a tiny bit. Also, make sure you use **bittersweet chocolate**—not milk chocolate—in that frosting.
When melting it down for the ganache, less stirring is often better initially. We want that deep, dark chocolate taste to shine through without getting any strange textures. It results in the best flavor combination for your **chocolate fudge cake**!
Ingredient Notes and Substitutions for this Chocolate Fudge Cake
When you are aiming for a showstopper like this **chocolate fudge cake**, the ingredients matter, but I totally get it—sometimes the store is out of that one specific item. Don’t panic! Having the flexibility to substitute is part of feeling confident in the kitchen. That’s what my experience has taught me; you need reliable workarounds.
The star ingredient that truly sets up the texture for this Buttermilk Chocolate Cake is, you guessed it, the buttermilk. If you open your fridge and find you’re short, it’s simple to make your own substitute. Just take one cup of regular milk—any kind will do—and stir in one tablespoon of white vinegar or lemon juice. Let that mixture sit on the counter for about five or ten minutes until it curdles slightly. That slightly soured mixture mimics the acidity and thickness of real buttermilk perfectly!
Now, let’s talk about that hot liquid—the espresso. I preach about the espresso because it builds that intense chocolate backbone, but I know not everyone keeps coffee on hand, and that’s fine! You can totally substitute the cup of hot brewed espresso with one cup of boiling hot water. But here’s my honest take: using hot water means you miss out on that magnificent flavor boost. It won’t ruin the cake, but the chocolate flavor will be less deep. You get a fantastic, moist cake, but perhaps not the *ultimate* indulgence we are aiming for with this **chocolate fudge cake**.
For the chocolate in the frosting, please stick to bittersweet or semi-sweet chopped baking bars or high-quality chips. Milk chocolate has too much sugar and milk fat, and it will mess with the delicate balance of the ganache, making the frosting either too soft or grainy. Stick to the plan for the best results!
Make-Ahead and Storage for Your Chocolate Fudge Cake
I know that baking a showstopper like this **chocolate fudge cake** can take a little time, and you might want to spread the love—and the work—over a couple of days, especially if you’re planning for a big birthday bash. Good news! This recipe is incredibly forgiving and actually benefits from some advance planning. That’s because the moisture in the crumb settles down perfectly after it has had a little rest.
If you’re making the cake layers a day ahead, here is my advice for keeping them fresh. Once the layers are completely cool—and I mean bone dry on the surface—wrap each one tightly in a double layer of plastic wrap. Don’t just do one layer; wrapping it twice keeps those moisture-loving air pockets sealed in! You can keep them like this on the counter for about 24 hours, or tuck them into the fridge if your kitchen is warm. If you chill them, let them sit out on the counter for an hour or so before frosting so they aren’t too cold, which helps prevent cracking.
When it comes to the **Silky Chocolate Frosting**? That stuff is robust! It holds up really well at room temperature for a day or two, but if you have to make it way ahead (like more than 36 hours), wrap the leftover frosting tightly in plastic and keep it in the fridge. Just remember to let it come back to soft room temperature and give it a quick, low-speed whisk before using it, otherwise, it’ll be stiffer than you want for spreading.
If you assemble the entire **chocolate fudge cake**—layers frosted and the whole thing covered—it lasts beautifully on the counter, covered loosely with a cake dome, for up to three days! The high sugar content acts like a natural preservative, keeping that fudge flavor intense. If you need it to last longer, or if your kitchen gets really warm, wrap the whole thing well and move it to the fridge. When you bring the chilled cake out to serve, let it sit on the counter for at least an hour. Cold cake always tastes a bit muted; we want the full, rich chocolate experience! For more cake tips, check out my notes on making a great carrot cake moist; the principles for keeping moisture locked in are very similar.
Serving Suggestions for This Decadent Chocolate Dessert
We’ve created this masterpiece—a chocolate cake so rich it practically needs its own velvet rope—so now we have to serve it right! This **Decadent Chocolate Dessert** is incredibly rich all on its own, which is what makes it so perfect for celebrations, but sometimes a little something on the side can elevate the whole experience from great to absolutely unforgettable.
My absolute go-to way to serve slices is beside a generous scoop of high-quality vanilla bean ice cream. The coldness and the creamy vanilla are the perfect, classic counterpoint to the dark, intense chocolate. It’s simple, elegant, and just screams, “This is a special occasion!”
If you are serving this after a big holiday meal or a heavy dinner, sometimes you need something lighter rather than more richness. Fresh berries are fantastic here. Think raspberries or sliced strawberries. Their slight tartness cuts right through that dense fudge, offering a bright contrast that keeps your palate refreshed. A light dusting of powdered sugar over the berries and cake slice finishes it beautifully.
And of course, since we used espresso in the batter to boost that deep chocolate profile, serving a small slice alongside a hot beverage is a must. A strong, dark roast coffee or an espresso shot pulls out those deeper roasted notes we worked so hard to achieve in the cake layers. If you are looking for a breakfast variation later (yes, we eat leftover cake for breakfast!), you can even try serving a thin slice with my famous French toast recipe twist on the side for an over-the-top brunch!
For that extra touch of elegance, especially if you are going for that bakery-style plating, consider a drizzle of raspberry coulis or even a light dusting of edible gold glitter if you’re feeling festive. It helps make this **Velvety Chocolate Dessert** look like it came straight from a high-end pastry shop without any extra work on complex sauces.
Frequently Asked Questions About Making a Chocolate Fudge Cake
It’s totally normal to have questions when diving into a serious baking project! I’ve collected the most common things people ask me about this **chocolate fudge cake**. If you’re worried about substitutions or getting that perfect, clean slice, this section is for you. My goal is always to save you from disappointment and make sure your **Rich Chocolate Cake Recipe** turns out perfectly.
Can I make this chocolate fudge cake ahead of time?
Oh, yes, and I highly recommend it! As I mentioned earlier, this cake tastes even better on Day Two once the flavors have really melded together. If you bake the layers, wrap them tightly, and keep them at room temperature, they are good for a full day. If you need longer storage, pop them in the fridge wrapped up. The fully assembled **chocolate fudge cake** is best kept covered at cool room temperature, but if your house is warm, refrigerate it and let it sit out for an hour before serving so the frosting softens up beautifully.
What is the best way to get a bakery style chocolate fudge cake finish?
This is all about temperature control! After you assemble your layers and give the cake a good crumb coat (a thin layer of frosting just to seal in crumbs), you want to stick the entire thing in the refrigerator for at least 30 minutes. This firms up that base layer of frosting. Once it’s firm, bring it out and apply your final, thicker layer of **Silky Chocolate Frosting**. Use a large, straight offset spatula and run it smoothly around the sides. If you keep your spatula warm (a quick dip in hot water and dried off works wonders), the **bakery style chocolate cake** finish will be incredibly smooth and glossy!
Another quick tip if you are worried about flat layers: sometimes the center puffs up just a touch. You can gently level the tops with a serrated knife before you even start frosting. It’s the easiest way to guarantee stability when stacking for that impressive layer cake look.
We talk a lot about keeping things moist in my kitchen, whether it’s for this cake or my famous apple cinnamon muffins recipe. A well-leveled cake ensures even texture throughout, which is part of that “professional” feel!
Can I use regular milk instead of buttermilk?
Absolutely! If you don’t have buttermilk on hand, don’t let that stop you from making this gorgeous **Decadent Chocolate Dessert**. Just use regular whole milk, and for every cup of milk the recipe calls for (in this case, one cup), stir in one tablespoon of white vinegar or lemon juice. Let it sit on the counter for about 5 to 10 minutes. It will look slightly curdled—that’s perfect! That activated acidity gives you that wonderful tenderness that defines this **Moist Homemade Cake** recipe.
Do I really need the hot espresso? Can I use plain hot water?
This is the question I get asked most often! You *can* use plain hot water instead of the espresso, and you’ll still get a very moist and deeply satisfying cake. The hot water melts the cocoa powder perfectly, which is essential for that fudgy texture. However, the espresso is what takes the flavor from “delicious” to “I need the recipe immediately.” The coffee is an amplifier; it doesn’t make it taste like coffee, it just makes the chocolate taste darker and more complex—think intense dark chocolate bar flavor versus a candy bar. If you skip it, you’ll get a wonderful cake, just slightly less intense.
How do I prevent my frosting from getting too stiff while making the Silky Chocolate Frosting?
That can happen if your kitchen is cool or if you let the butter/ganache mixture cool too long before combining everything. If the frosting starts to feel stiff while you’re beating it, just add one more tablespoon of heavy cream at a time while mixing on low speed. That little bit of extra cold liquid will bring the texture right back to that soft, spreadable consistency we need for this **chocolate fudge cake**.
Nutritional Estimates for Your Chocolate Fudge Cake
Here is the approximate nutritional breakdown for a slice of this incredibly rich **chocolate fudge cake**. Now, I have to give you the standard baker’s disclaimer, because I know you understand! These numbers are estimates. They are calculated based on the exact measurements listed in the recipe using standard US grocery store ingredients. If you use premium imported chocolate or add extra frosting swirls, your calorie count might sneak up a little bit—but honestly, isn’t that part of the fun of eating dessert?
We aimed for richness here, so be prepared for a treat! This is one of those **Decadent Chocolate Desserts** that you savor, not something you eat every day. I am very proud that even with all that rich butter and sugar, we still managed to whip up a cake that is reasonably balanced for a celebration dessert!
- Serving Size: 1 slice
- Calories: 480
- Sugar: 55g
- Sodium: 250mg
- Fat: 28g
- Saturated Fat: 15g
- Unsaturated Fat: 13g
- Trans Fat: 0.5g
- Carbohydrates: 58g
- Fiber: 3g
- Protein: 6g
- Cholesterol: 85mg
Keep in mind these estimates factor in both the cake layers and the amount of **Silky Chocolate Frosting** listed in the recipe. It’s an impressive treat for all that work you put in!
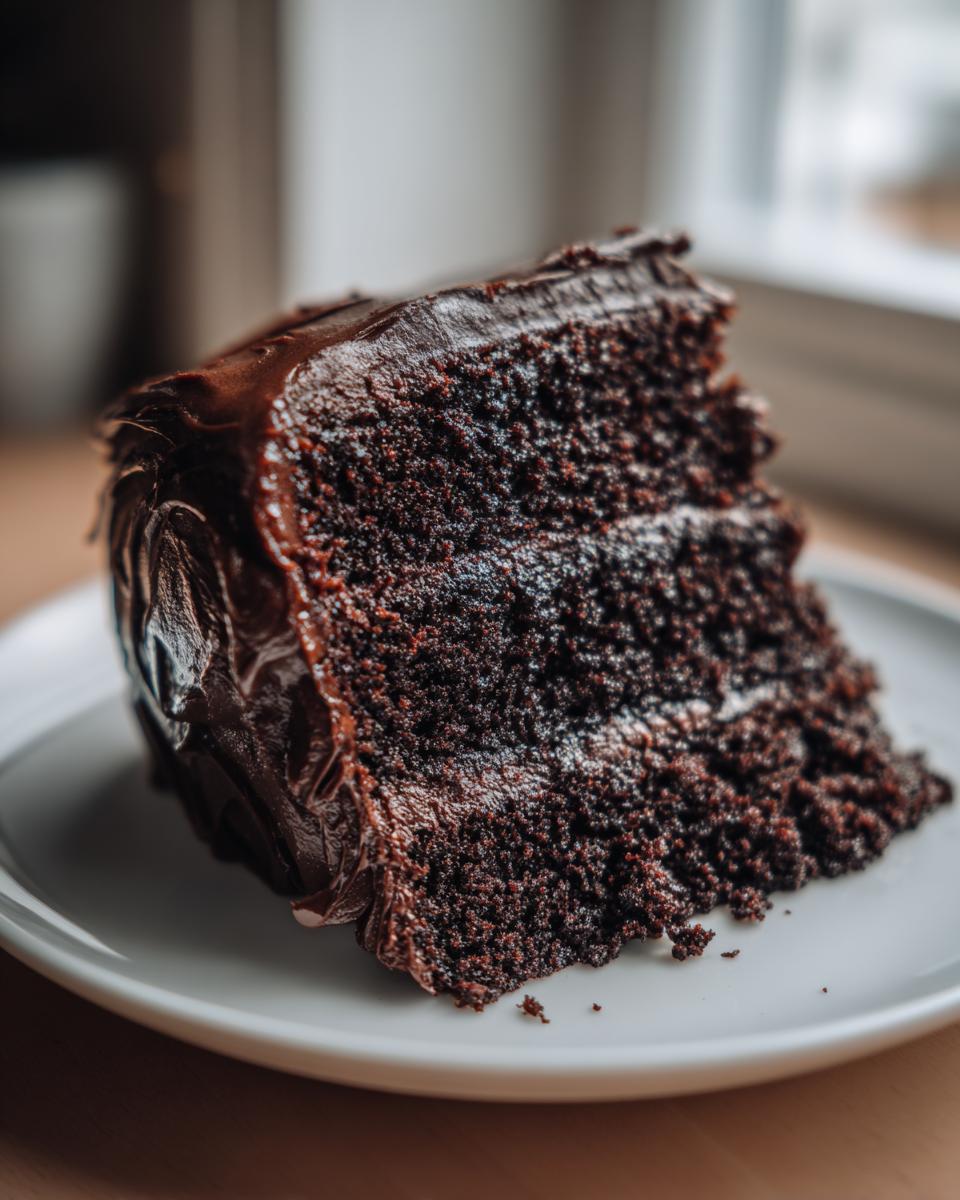
PrintThe Ultimate Moist & Decadent Chocolate Fudge Layer Cake with Silky Ganache Frosting
Bake this intensely rich chocolate fudge cake from scratch. This recipe guarantees moist cake layers and a silky, decadent chocolate ganache frosting, making it the best chocolate cake for birthdays and special occasions.
- Prep Time: 25 min
- Cook Time: 35 min
- Total Time: 60 min
- Yield: 12 servings 1x
- Category: Dessert
- Method: Baking
- Cuisine: American
- Diet: Vegetarian
Ingredients
- 1 3/4 cups all-purpose flour
- 1 3/4 cups granulated sugar
- 3/4 cup unsweetened cocoa powder, high quality
- 1 1/2 teaspoons baking soda
- 3/4 teaspoon baking powder
- 3/4 teaspoon salt
- 2 large eggs
- 1 cup buttermilk
- 1/2 cup vegetable oil
- 2 teaspoons vanilla extract
- 1 cup hot brewed espresso or strong coffee
- 8 ounces bittersweet chocolate, finely chopped (for frosting)
- 1 cup (2 sticks) unsalted butter, softened (for frosting)
- 3 cups powdered sugar, sifted (for frosting)
- 1/2 cup unsweetened cocoa powder, sifted (for frosting)
- 1/4 cup heavy cream (for frosting)
Instructions
- Preheat your oven to 350°F (175°C). Grease and flour two 9-inch round cake pans. Line the bottoms with parchment paper circles.
- In a large bowl, whisk together the flour, sugar, 3/4 cup cocoa powder, baking soda, baking powder, and salt.
- Add the eggs, buttermilk, oil, and vanilla extract to the dry ingredients. Beat with an electric mixer on medium speed for two minutes.
- Carefully pour the hot espresso or coffee into the batter while mixing on low speed until just combined. The batter will be thin.
- Divide the batter evenly between the prepared cake pans.
- Bake for 30 to 35 minutes, or until a wooden pick inserted into the center comes out clean.
- Let the cakes cool in the pans for 10 minutes before inverting them onto a wire rack to cool completely.
- Prepare the Silky Chocolate Ganache Frosting: Place the chopped bittersweet chocolate in a heatproof bowl.
- In a small saucepan, heat the heavy cream until it just simmers. Pour the hot cream over the chocolate and let it sit undisturbed for 5 minutes. Whisk until smooth and glossy. Set aside to cool slightly.
- In a large bowl, beat the softened butter until creamy. Gradually add the sifted powdered sugar and 1/2 cup cocoa powder, alternating with the cooled chocolate mixture, beating until smooth and spreadable. Add more heavy cream, one tablespoon at a time, if the frosting is too stiff.
- Once the cake layers are completely cool, place one layer on a serving plate. Spread about one-third of the frosting evenly over the top. Place the second layer on top.
- Frost the top and sides of the entire cake with the remaining frosting. Chill briefly before slicing for a bakery-style finish.
Notes
- Using hot espresso deepens the chocolate flavor without making the cake taste like coffee. This technique creates an intense chocolate flavor cake.
- For the moistest crumb, do not overmix the batter once the wet ingredients are added.
- If you prefer a thicker, fudgier frosting, allow the ganache component to cool longer before beating it with the butter and sugar.
Nutrition
- Serving Size: 1 slice
- Calories: 480
- Sugar: 55g
- Sodium: 250mg
- Fat: 28g
- Saturated Fat: 15g
- Unsaturated Fat: 13g
- Trans Fat: 0.5g
- Carbohydrates: 58g
- Fiber: 3g
- Protein: 6g
- Cholesterol: 85mg