

If you’re looking for that perfect appetizer that screams comfort but also brings that amazing, irresistible crunch, stop right there! I have spent ages getting this recipe just right because I believe everyone deserves truly great Italian food at home. Today, we’re diving deep into the Ultimate Cheesy Italian Arancini Rice Balls. Seriously, these things are gold—crispy on the outside, gooey with mozzarella on the inside. You might think making quality homemade rice balls is complicated, but trust me, I’ve tested this method dozens of times here at Kings Cook to make sure the steps are simple and the results are always reliable. You’re going to nail these on your very first try! If you want to know more about my philosophy of making cooking easy, check out my story over at the About page.
- Why You Will Love These Crispy Italian Rice Balls
- Essential Ingredients for Perfect Mozzarella Stuffed Rice Balls
- Homemade Arancini Tutorial: Step-by-Step Guide to Making Rice Balls
- Tips for Success When Making Fried Rice Balls
- Variations: Beyond Classic Mozzarella Stuffed Rice Balls
- Storage and Make Ahead Rice Balls Instructions
- Serving Suggestions for Your Italian Rice Balls
- Frequently Asked Questions About Arancini Rice Balls
- Estimated Nutritional Data for Cheesy Rice Balls
- Share Your Homemade Rice Balls Creations
Why You Will Love These Crispy Italian Rice Balls
I know you’ve seen those photos, and maybe you thought they only appear in fancy restaurants downtown. Nope! These cheesy Arancini appetizer bites are totally doable for a Saturday night dinner or when you need something special for a crowd. I promise, this recipe delivers exactly what you hope for when you see a golden, fried appetizer.
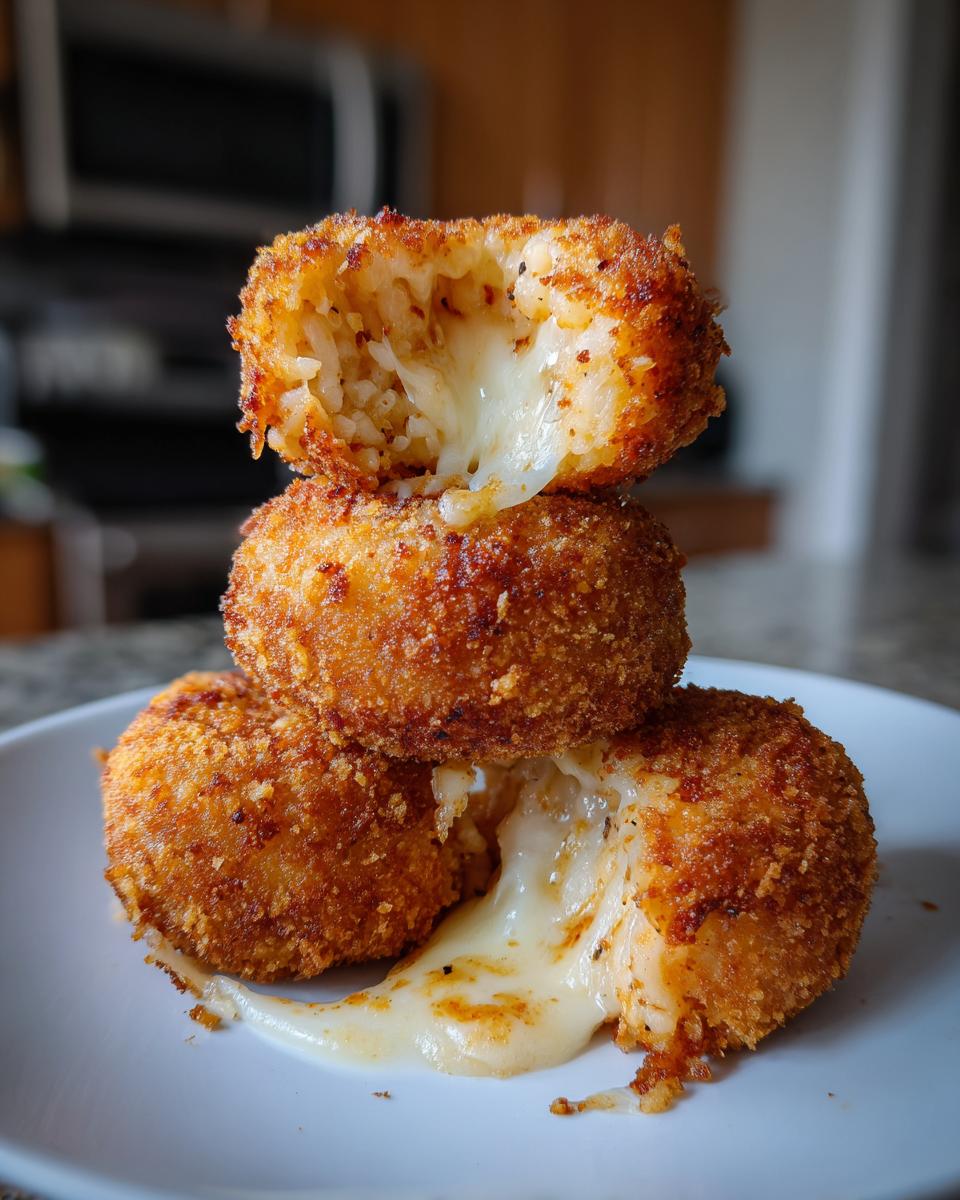
- That Perfect Crunch: We use Panko breadcrumbs, and I mean it when I say they make all the difference. You get that audible, satisfying crunch when you bite in—it’s truly glorious.
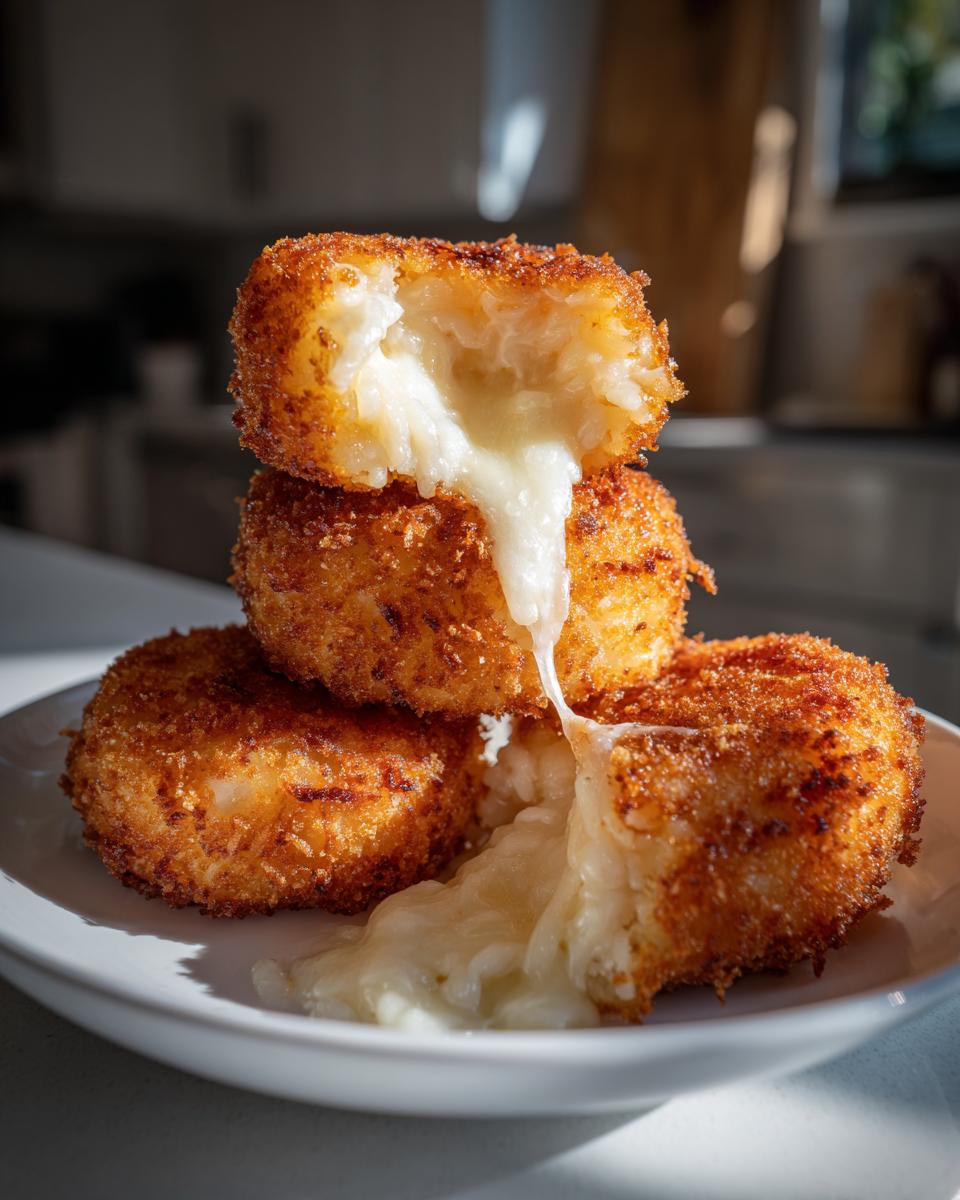
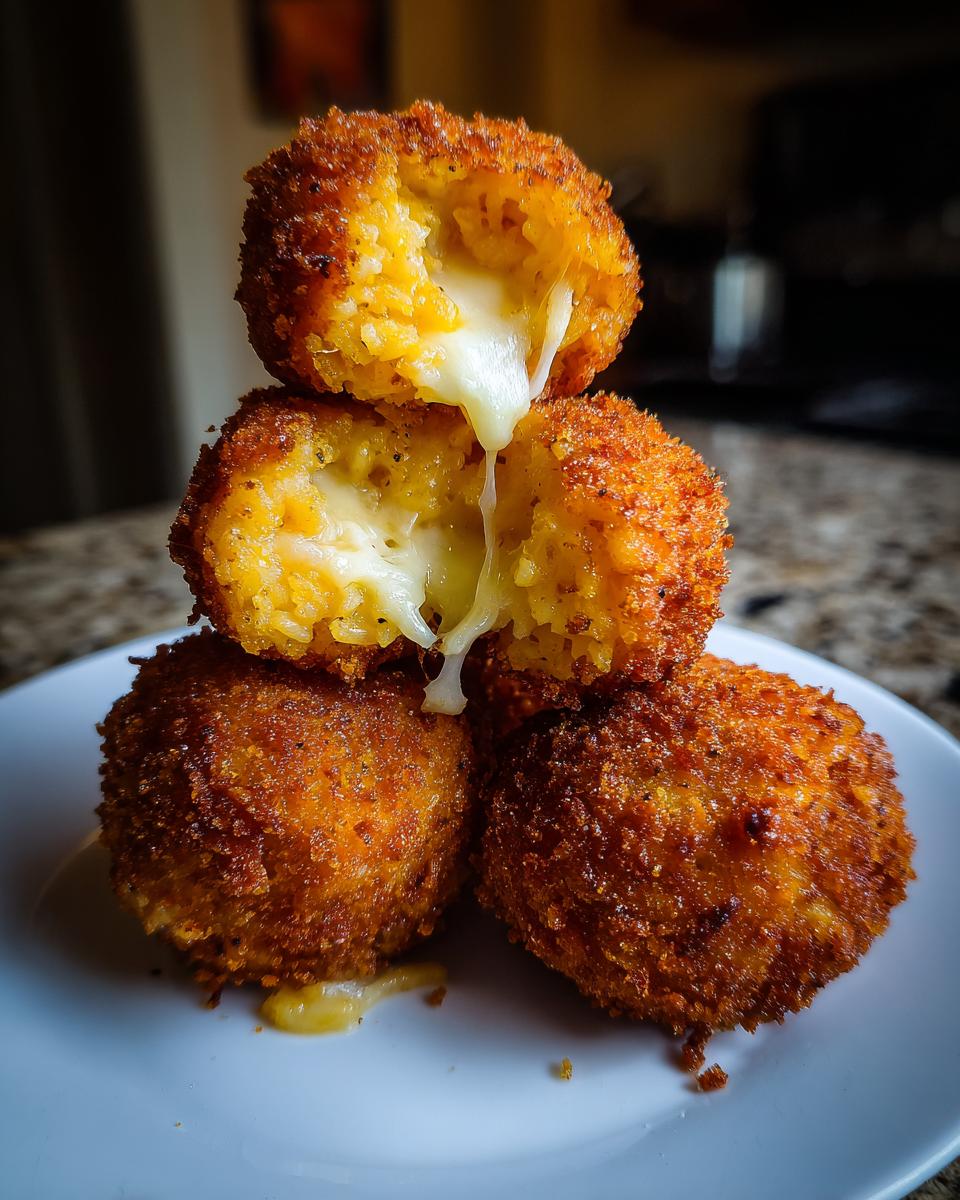
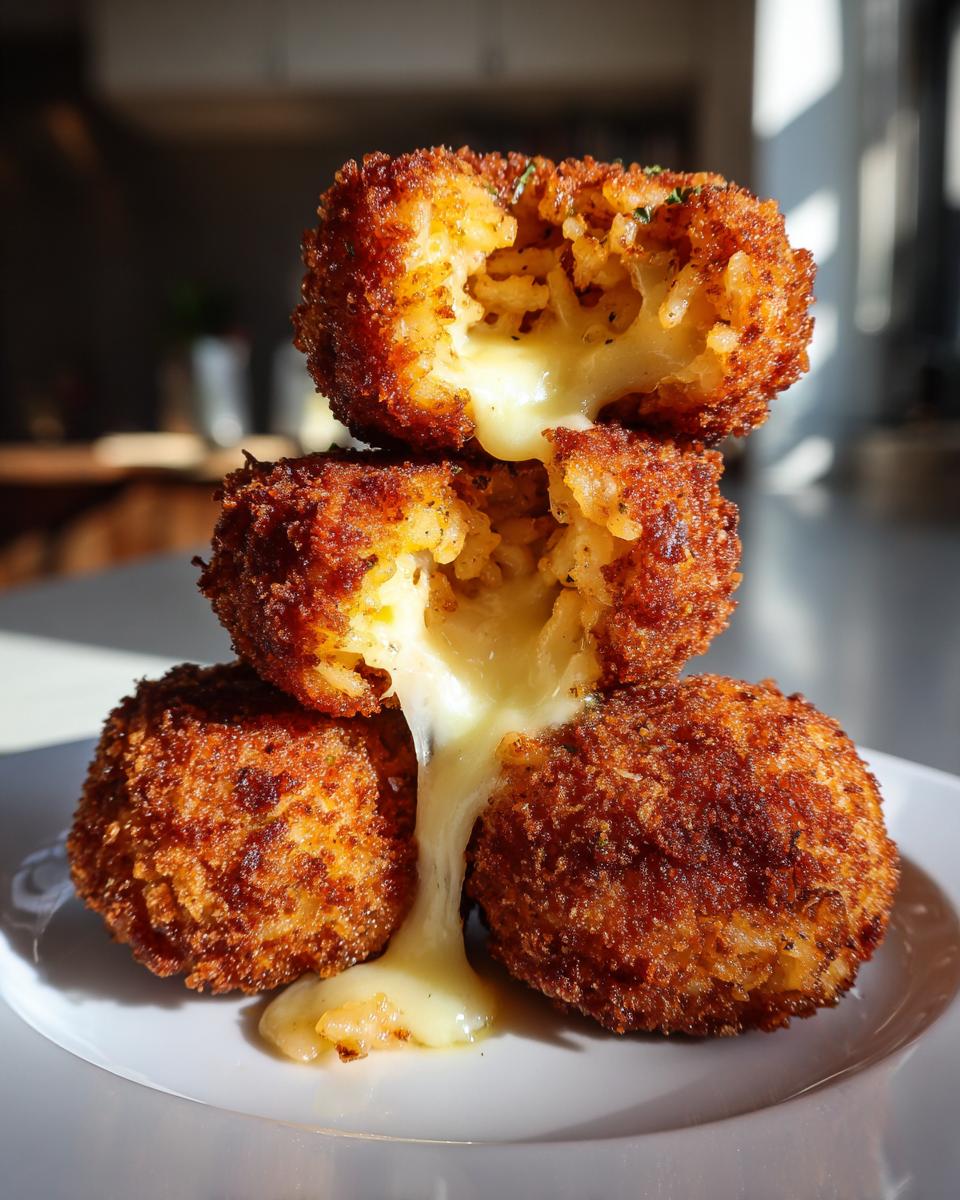
- Gooey Mozzarella Center: This is the payoff! Pulling apart one of these rice balls and watching that cheese stretch is the main event. It’s pure comfort food magic.
- Great for Parties: Since these are sturdy little spheres, they are ideal party appetizer rice balls. They hold up well on a platter and are easy for guests to grab and dip.
- Make-Ahead Friendly: I always prep mine the day before. It saves so much time when hosting! Having the balls pre-formed and chilled means Friday night is mostly just frying, which is the fun part anyway.
- Incredibly Flavorful Base: These aren’t just fried balls of rice; they are packed with Parmesan cheese and savory seasonings mixed right into the risotto base before we even stuff them.
If you’re looking for more fantastic easy starters, you should definitely take a peek at my collection of appetizers and snacks recipes. But really, once you master these Arancini, they might just take over the top spot!
Essential Ingredients for Perfect Mozzarella Stuffed Rice Balls
When we talk about making something spectacular like these Italian rice balls, the quality of what goes in really matters. This isn’t the time to be shy about your cheese, either! I’ve tested every combination imaginable, and this specific list gives you that perfect creamy interior and crispy shell. Remember, reliability is my whole style here at Kings Cook, and it starts with good ingredients.
Ingredients List
- 2 cups cooked risotto (It absolutely must be cooled, ideally overnight!)
- 1 cup shredded mozzarella cheese (Get the good low-moisture stuff for the best melt.)
- 1/2 cup grated Parmesan cheese
- 1 large egg, beaten (for the risotto only)
- 1/4 cup all-purpose flour
- 1 cup breadcrumbs (I insist on Panko; they are far superior for that light, crispy Italian rice balls texture.)
- 2 large eggs, beaten (for the dredging station)
- 1 cup vegetable oil (for frying—we need enough depth for deep frying)
- Salt and black pepper to taste
- Marinara sauce, warm, for serving
Trust me on the Panko; those flaky Japanese-style crumbs create the most beautiful golden crust you’ve ever seen on a stuffed risotto ball. They crisp up beautifully without getting heavy, which keeps these appetizers fun rather than feeling like a chore to eat!
Homemade Arancini Tutorial: Step-by-Step Guide to Making Rice Balls
This is where the magic happens! Don’t let the word “risotto” scare you off. If this is your first time making these delicious rice balls, just remember the golden rule: the risotto must be cold. Seriously, cold rice sticks together perfectly for rolling. If you don’t have leftovers, just whip up a quick, simple batch and stick it in the fridge for a few hours. I always plan mine for the next day!
Once you have your structure ready, we move on to building those beautiful, crispy exteriors. I’ll walk you through setting up your breading station, forming the balls so they don’t explode in the hot oil, and getting that deep golden color we’re aiming for. We want these to look fantastic before they even hit the table!
Preparing the Risotto Base and Mixing the Filling
First things first: Step 1 is all about patience. If your risotto is warm, your mozzarella will melt right out of the ball before it even hits the oil, and that’s just sad. Cool your 2 cups of cooked risotto completely down in the fridge. Once it’s chilly, move to Step 2: In a sturdy mixing bowl, combine that cold risotto with your shredded mozzarella, the grated Parmesan, that one beaten egg, salt, and pepper. Mix it lightly—you want everything combined, but if you overwork it, you mess up the texture. Stop when it just holds together nicely.
Forming and Breading the Cheesy Arancini Rice Balls
Now we shape them! This is the part where you need a little focus. Take about two tablespoons of that risotto mixture and press it flat in your palm. Then, place a small cube—about half an inch—of that wonderful mozzarella smack in the middle. Now, gently cup your hands around it and roll, rolling it back and forth until you have a tight, smooth sphere. My big tip here, and this is where my experience helps, is to press firmly—these homemade rice balls need to be packed tight so that little cheese core stays locked inside during frying!
Next, the breading station: flour in dish one, the second batch of beaten eggs in dish two, and the Panko breadcrumbs in dish three. Roll your formed ball first in the flour, shake off the excess gently, dip it fully in the egg wash, and then coat it completely in the Panko. Press that coating on gently so you don’t see any bare spots.
Achieving Crispy Italian Rice Balls Through Frying
Get your deep pot ready with about two inches of vegetable oil. You absolutely must use a thermometer here; we are aiming for a steady 350°F (175°C). If the oil is too cool, the coating gets greasy; if it’s too hot, the outside burns before the cheese melts. Carefully drop your breaded balls into the oil, but don’t crowd them! Work in small batches—maybe three or four at a time. Let them fry for about 3 to 4 minutes, turning them gently until they are a gorgeous, deep golden brown. Once they look perfect, lift them out with a slotted spoon and place them right onto paper towels on a wire rack immediately. Sprinkle them with a tiny bit of salt right away while they are hot—that’s chef-level seasoning! If you want to know more about perfect frying techniques, I cover deep-frying basics over in my Bruschetta recipe post, as the principles are the same.
Tips for Success When Making Fried Rice Balls
I want every batch of your rice balls to turn out like they came straight from a street vendor in Sicily! A quick, high-heat fry is essential, so try to keep that oil temperature steady around 350°F. If you see even one ball start to look dark too quickly, pull the heat back a little immediately. That temperature control is the secret to that beautiful, non-greasy crunch we are after.
Another little trick I swear by—and it’s something my cousin Maria taught me—is to use cold oil when frying from frozen! If you’re using those make-ahead balls, drop them into cooler oil and then bring the heat up slowly. This allows the center to thaw and heat through before the coating burns. And please, please, season them the second they hit that paper towel. Once you’ve mastered this, you’ll be ready to tackle my amazing Jalapeño Poppers recipe next!
Variations: Beyond Classic Mozzarella Stuffed Rice Balls
While I am absolutely obsessed with this classic mozzarella-stuffed version—it’s my favorite comfort food—I know we all like to mix things up sometimes! You can get so creative with savory rice ball fillings, and it’s fun to see how other cuisines handle this concept. Think about it: you have the Italian Arancini, and then over in Japan, they have Onigiri and Yaki Onigiri. They are similar concepts but use very different seasoning bases.
For Italian style, feel free to treat the base risotto like a blank canvas! You can easily add finely chopped cooked sausage, ground beef, or even crumbled ham into the risotto mixture before forming the balls. That makes for a truly hearty, dinner-worthy experience. I also see people getting creative with different cheeses inside, like switching mozzarella for smoked provolone. It’s all about playing with the flavors you love most!
Before we move on, I wanted to show you how we can get that crispy texture without pulling out the deep fryer for every batch. Sometimes you just want a lighter snack, right?
Baking vs. Frying: Making Baked Rice Balls
I know deep frying is what gives us that signature sound and crunch, but what if you’re short on time or just trying to keep things a little lighter? Baking is a fantastic alternative for these rice balls, and I’ve tested it thoroughly to make sure they still come out delicious. It’s a great option if you’re making a huge batch for meal prep and don’t want to manage deep oil.
If you want to skip the oil—and this is exactly what the notes mention—preheat your oven to a nice hot 400°F (200°C). Make sure you give those breaded balls a good, light spray with cooking oil—don’t skip the spray; it helps them brown! Then, you bake them for about 18 to 20 minutes total, but you must roll them over halfway through baking. This ensures all sides get that desirable golden color. They won’t be quite a crunchy as the fried ones, but they are wonderfully crisp and much less messy. It’s easy to see why people look for baked rice balls vs fried; everyone has a preference!
If you keep exploring different appetizers, I highly recommend checking out my recipe for stuffed mushrooms next. They use a similar breading technique and are always a crowd-pleaser!
Storage and Make Ahead Rice Balls Instructions
Listen, I know life gets busy, and sometimes you just wish you could press pause on dinner prep. The good news is that these make ahead rice balls are fantastic for planning ahead! You can absolutely form them completely—breading and all—and lay them out on a parchment-lined tray. Pop that tray into the freezer until they are rock solid. Once they are frozen cubes, just toss them into a zip-top bag. That way, you have a batch of frozen Arancini ready to go whenever the craving hits!
When you are ready to cook them straight from the freezer, just follow the instructions in the frying section, but know you’ll need to add an extra minute or two to the cooking time to ensure they are heated all the way through. This little hack saves so much time on busy nights, making these a true hero in my weeknight dinner rotation. They reheat beautifully!
Serving Suggestions for Your Italian Rice Balls
Okay, so you’ve pulled these gorgeous, golden rice balls out of the oil, they are perfectly crispy, and the mozzarella is waiting inside to make an appearance. Now for the grand finale: what do you serve them with? The absolute king of pairings, the classic mate for Arancini, has to be a really vibrant, warm marinara sauce. I always make sure mine is seasoned well—don’t just open a jar; warm it up and maybe simmer it with an extra clove of garlic and a pinch of dried oregano. That little bit of freshness cuts through the richness of the fried coating perfectly.
But we aren’t stopping there! If you’re serving these as a true appetizer spread, variety is key. Since these are rich, starchy, and cheesy, something bright and acidic really snaps those flavors back into focus. I often set out a small bowl of lemon wedges—a quick squeeze right before eating brings out the flavor of the Parmesan in the rice, too. Seriously, try it!
For a light lunch offering, forget the dips for a minute and think about a side salad. A simple, crisp green salad, maybe dressed very lightly with a sharp vinaigrette, balances everything out. I use a very simple recipe over on my Greek Salad recipe post that would be fantastic because it’s bright and tangy. It keeps our appetizer spread from feeling too heavy, which is always a win in my book!
Honestly, though, if you’re just making a batch for movie night—which I totally do—a bowl of these cheesy rice balls sitting next to a bowl of marinara is all you need. They are honestly delicious all on their own.
Frequently Asked Questions About Arancini Rice Balls
It’s totally normal to have questions when tackling a recipe for the first time, especially when it involves deep frying! These rice balls might seem intimidating, but once you understand the basics—especially the importance of cold risotto—you’ll be a pro. I’ve gathered up the questions I get most often from readers who are trying to perfect their homemade Arancini tutorial below. Don’t see your question? Feel free to reach out on my contact page!
Can I really use leftover, plain white rice instead of risotto?
Oh boy, this is the big one! While you absolutely *can* make easy rice balls with plain, sticky white rice (like the kind used for Japanese Onigiri), the texture just won’t be the same as authentic Italian Arancini. Risotto is cooked slowly with broth until it’s starchy and creamy, which is crucial for binding everything together and giving you that luxurious mouthfeel when cooked. Plain rice tends to stay separate and can result in a dry, crumbly ball. For the best results, make a quick, simple risotto base first!
What is the best, safest oil to use for frying my cheesy rice balls?
Safety first, always! For frying, you want an oil with a high smoke point. My go-to for these crispy Italian rice balls is vegetable oil because it’s neutral in flavor and handles the 350°F temperature perfectly. Canola oil works great too! Just avoid olive oil unless it is specifically labeled as ‘light’ or ‘refined’—regular extra virgin olive oil burns too easily at frying temps. Remember, keep that thermometer handy; stable heat equals perfect color!
If I choose to bake them, will they still count as good party appetizer rice balls?
They will! If you’re looking for that baked rice balls vs fried compromise, baking is totally acceptable. They won’t have that signature deep, thick crush that frying creates, but they will still be golden brown, delicious, and that mozzarella center remains gloriously melted! Just be sure to spray them generously with oil before baking, or they can dry out quickly. They are a fantastic option for someone managing a large snack spread where keeping up with deep frying is too much work.
How long can I store the uncooked, breaded rice balls in the fridge before cooking?
This is a major part of the appeal for busy cooks wanting quick snack rice balls! I find the absolute sweet spot for storing uncooked, breaded balls is up to 24 hours in the refrigerator. Keep them covered tightly on a parchment-lined tray. If you plan to go longer than that, freezing them solid overnight (as mentioned in the notes) is the only way to go. This keeps the coating super crisp when frying and is perfect for when you need a last-minute dinner idea rice balls.
Estimated Nutritional Data for Cheesy Rice Balls
I always like to give a heads-up about what you’re eating, even when it’s pure comfort food like these amazing Arancini! Keep in mind that because we are dealing with fried food, these are estimates, and what you end up with really depends on the type of risotto you used and how much oil your crispy Italian rice balls soak up.
These numbers are based on serving size being 2 balls each. I always say, if you’re eating these incredible, gooey mozzarella stuffed rice balls, you should enjoy them without worrying too much about strict calorie counting, but it’s good to have a general idea!
Here’s what you can generally expect from two of these cheesy bites:
- Calories: Around 350 calories
- Total Fat: About 18 grams (Remember, it’s fried!)
- Carbohydrates: Roughly 35 grams
- Protein: A respectable 14 grams to keep you satisfied
This estimate is just a guideline, of course. If you use my trick for baked rice balls vs fried, those numbers—especially the fat content—will drop considerably! Still, whether baked or fried, these party appetizer rice balls are worth every delicious, golden second.
Share Your Homemade Rice Balls Creations
Well, we did it! We conquered the world of crispy, unbelievably cheesy Italian rice balls. I truly hope you enjoyed making these as much as I love testing them for you here at Kings Cook. Now, this is the part where I get to see the magic you create in your own kitchens!
Please, please, please, leave me a comment below telling me exactly how they turned out. Did you stick with the classic mozzarella, or did you get bold and try a meatier, savory rice ball filling? I absolutely love hearing about everyone’s unique twists on my core recipes—it reminds me that cooking is always a collaboration!
And if you snapped a picture of those gorgeous golden spheres, tag me on social media! Seeing your golden-brown Arancini makes my entire week. It helps me know that these recipes are truly reliable and bringing that sense of accomplishment I strive for with every post. I’m always checking in on those shares, and I promise I read every single comment.
Thank you again for letting me into your kitchen today. I hope these Ultimate Cheesy Italian Rice Balls become a staple at your house, just like they are in mine. Enjoy every crispy, melty bite! Before you go, do take a moment to review the site’s privacy policy—it helps me keep bringing you fantastic, free content every week. Happy Cooking!
PrintUltimate Cheesy Italian Arancini Rice Balls

Make crispy, golden Italian rice balls stuffed with gooey mozzarella. This recipe shows you how to prepare authentic Arancini that are perfect as an appetizer or party snack.
- Prep Time: 30 min
- Cook Time: 15 min
- Total Time: 45 min
- Yield: 12 servings 1x
- Category: Appetizer
- Method: Frying
- Cuisine: Italian
- Diet: Vegetarian
Ingredients
- 2 cups cooked risotto (cooled)
- 1 cup shredded mozzarella cheese
- 1/2 cup grated Parmesan cheese
- 1 large egg, beaten
- 1/4 cup all-purpose flour
- 1 cup breadcrumbs (Panko recommended for extra crispiness)
- 2 large eggs, beaten (for dredging)
- 1 cup vegetable oil (for frying)
- Salt and black pepper to taste
- Marinara sauce, for serving
Instructions
- Prepare the risotto base: If you do not have leftover risotto, cook a batch of simple risotto and allow it to cool completely in the refrigerator, ideally for several hours or overnight.
- In a bowl, mix the cooled risotto with the shredded mozzarella, Parmesan cheese, 1 beaten egg, salt, and pepper until just combined. Do not overmix.
- Set up your breading station: Place the flour in one shallow dish, the 2 beaten eggs in a second dish, and the breadcrumbs in a third dish.
- Form the rice balls: Take about 2 tablespoons of the risotto mixture and flatten it in your palm. Place a small cube (about 1/2 inch) of mozzarella in the center. Carefully fold the risotto around the cheese, rolling it gently between your palms to form a tight, smooth ball about 1.5 inches in diameter.
- Dredge the balls: Roll each rice ball first in the flour, shaking off any excess. Then dip it completely into the beaten eggs, letting excess drip off. Finally, roll it thoroughly in the breadcrumbs, pressing lightly to make sure the coating adheres well.
- Heat the oil: Pour the vegetable oil into a deep, heavy-bottomed pot or Dutch oven until it reaches about 2 inches deep. Heat the oil over medium-high heat until it reaches 350°F (175°C). Use a thermometer to monitor the temperature.
- Fry the arancini: Carefully place 3 or 4 rice balls into the hot oil, ensuring you do not overcrowd the pot. Fry for 3 to 4 minutes, turning occasionally, until they are deep golden brown and crispy.
- Drain: Remove the fried rice balls with a slotted spoon and place them on a wire rack lined with paper towels to drain excess oil. Season lightly with salt immediately.
- Serve hot with warm marinara sauce for dipping.
Notes
- For a make-ahead option, you can form the balls and place them on a baking sheet lined with parchment paper. Freeze them until solid, then transfer them to a freezer bag. Fry directly from frozen, adding 1-2 minutes to the cooking time.
- If you prefer a baked version instead of frying, preheat your oven to 400°F (200°C). Lightly spray the breaded balls with cooking spray and bake for 18-20 minutes, turning halfway, until golden.
- You can add finely chopped cooked meat, like ground beef or ham, to the risotto mixture for a richer flavor profile.
Nutrition
- Serving Size: 2 balls
- Calories: 350
- Sugar: 3
- Sodium: 450
- Fat: 18
- Saturated Fat: 7
- Unsaturated Fat: 11
- Trans Fat: 0.1
- Carbohydrates: 35
- Fiber: 2
- Protein: 14
- Cholesterol: 85