
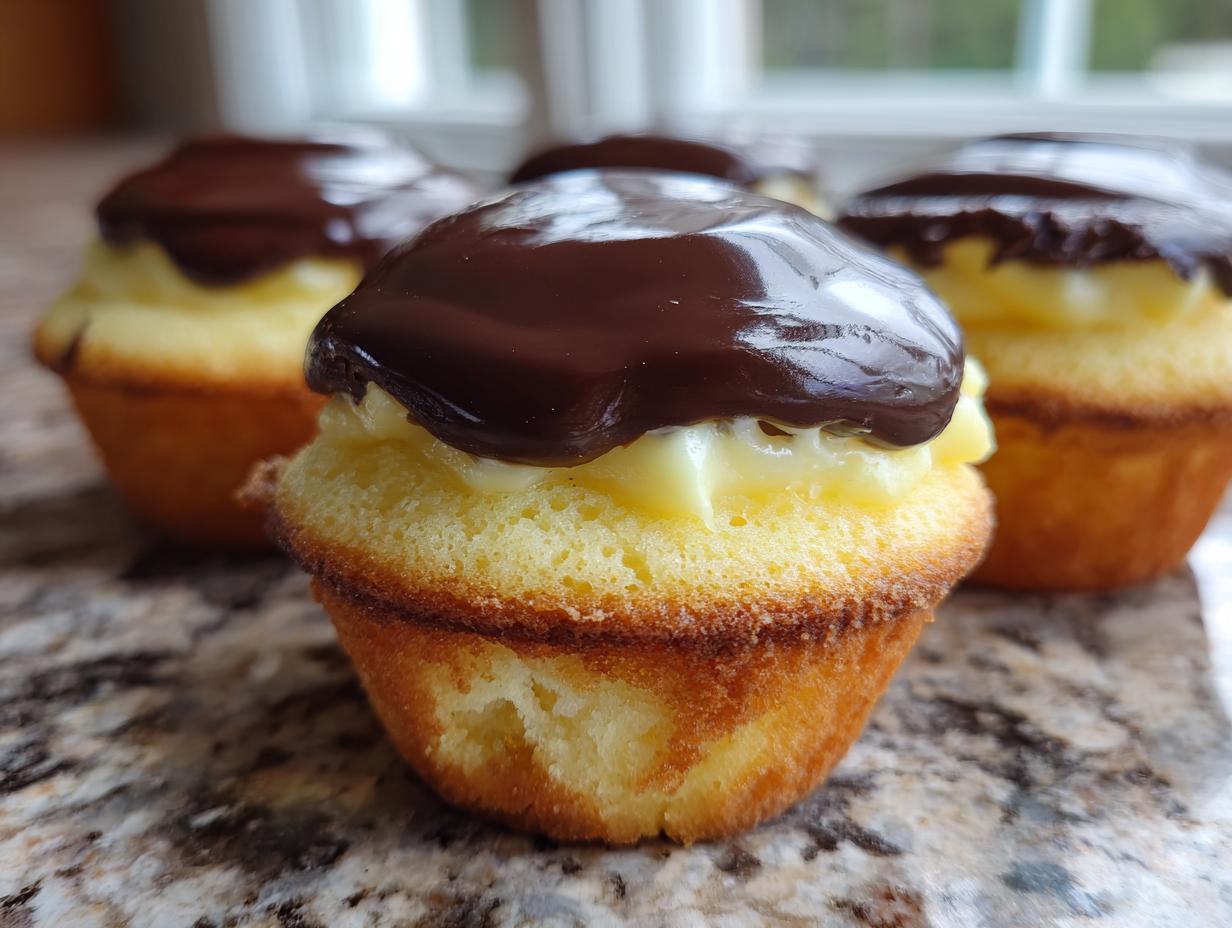
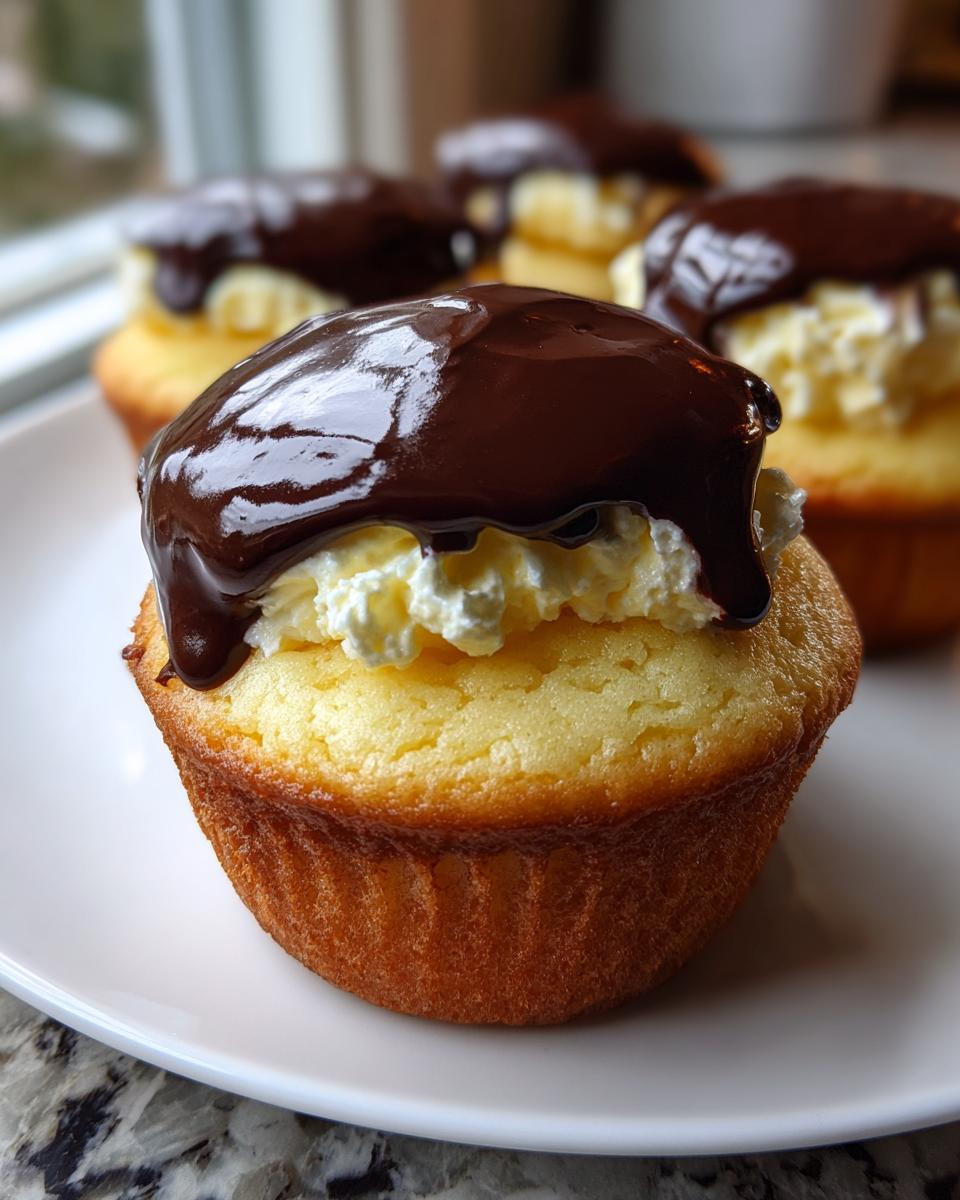
There’s nothing quite like tasting a classic dessert that instantly takes you back home, right? But who has time to cut perfect slices of pie when you’re hosting? That’s why I absolutely adore transforming those deep-dish legends into something perfectly manageable. These boston cream pie cupcakes are my answer to that craving! They capture all that comforting vanilla cake, rich custard filling, and that gorgeous chocolate topping people dream about, all wrapped up neatly. Like everything here at Kings Cook, I’ve tested this recipe until it’s foolproof for any American home cook. Trust me, these little gems deliver bakery-style quality with zero guesswork, making them instantly unforgettable.
- Why You Will Love These Boston Cream Pie Cupcakes
- Ingredients for Perfect Boston Cream Pie Cupcakes
- Step-by-Step Instructions for Boston Cream Pie Cupcakes
- Tips for Success Making Boston Cream Pie Cupcakes
- Ingredient Notes and Substitutions for Yellow Cake Cupcakes Filling
- Storing and Keeping Boston Cream Pie Cupcakes Fresh
- Frequently Asked Questions About Boston Cream Pie Cupcakes Recipe
- Estimated Nutritional Information for Boston Cream Pie Cupcakes
- Share Your Experience Making These Boston Cream Pie Cupcakes
Why You Will Love These Boston Cream Pie Cupcakes
- Pure Nostalgia in a Bite: We capture that incredible, classic Boston Cream Pie flavor—soft vanilla cake, silky cream, and deep chocolate—but in a much more fun, single-serving design. You get all the retro flavor without the pie crust fuss!
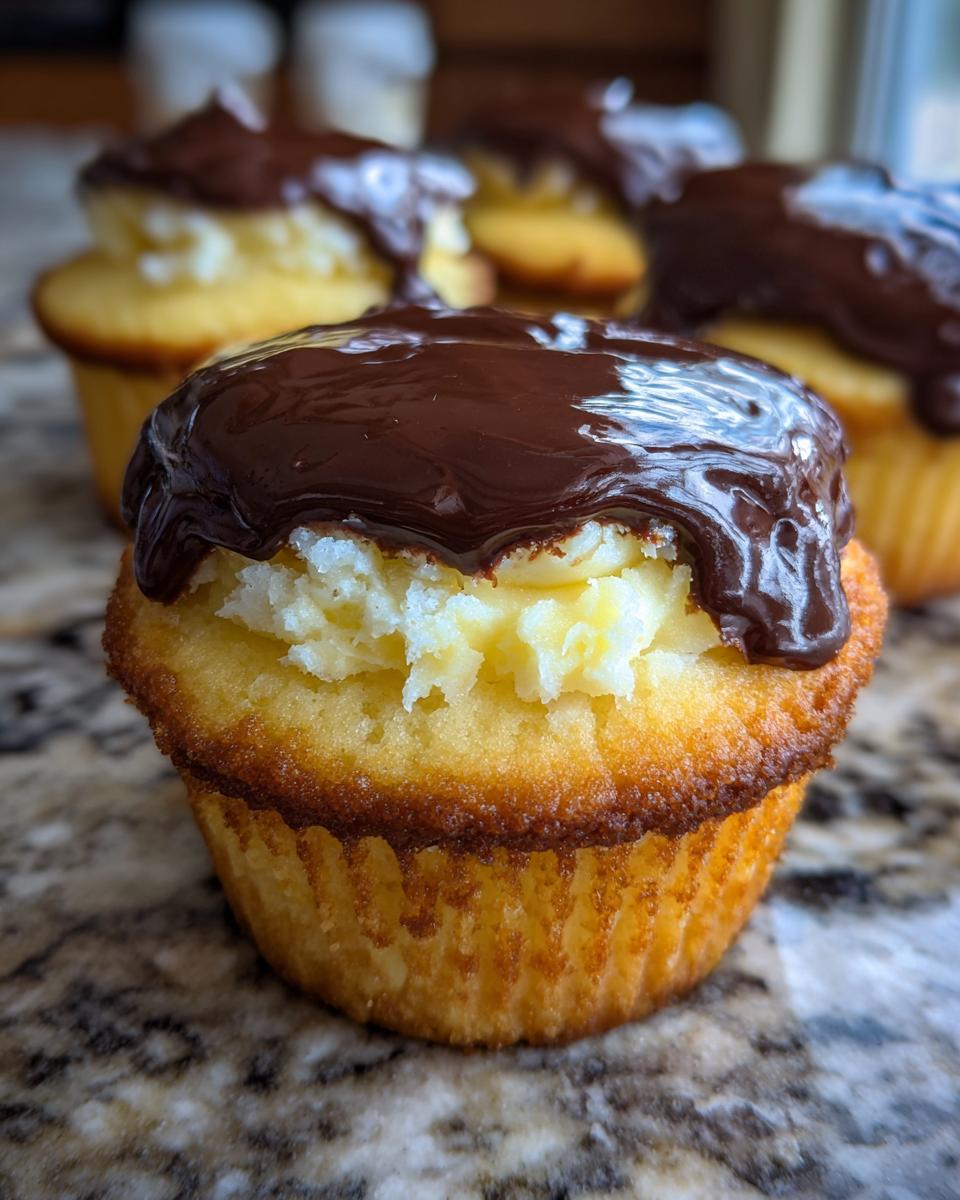
- Seriously Bakery Style Cupcakes: These look like they came straight from a fancy pastry kitchen. The layers of texture and the glossy topping make them perfect for any special event where you want to impress your guests without spending all day in the kitchen.
- Foolproof Pastry Cream: I’ve broken down the custard filling into easy-to-manage steps. Forget runny fillings; this method guarantees a thick, luscious center that holds up beautifully once filled.
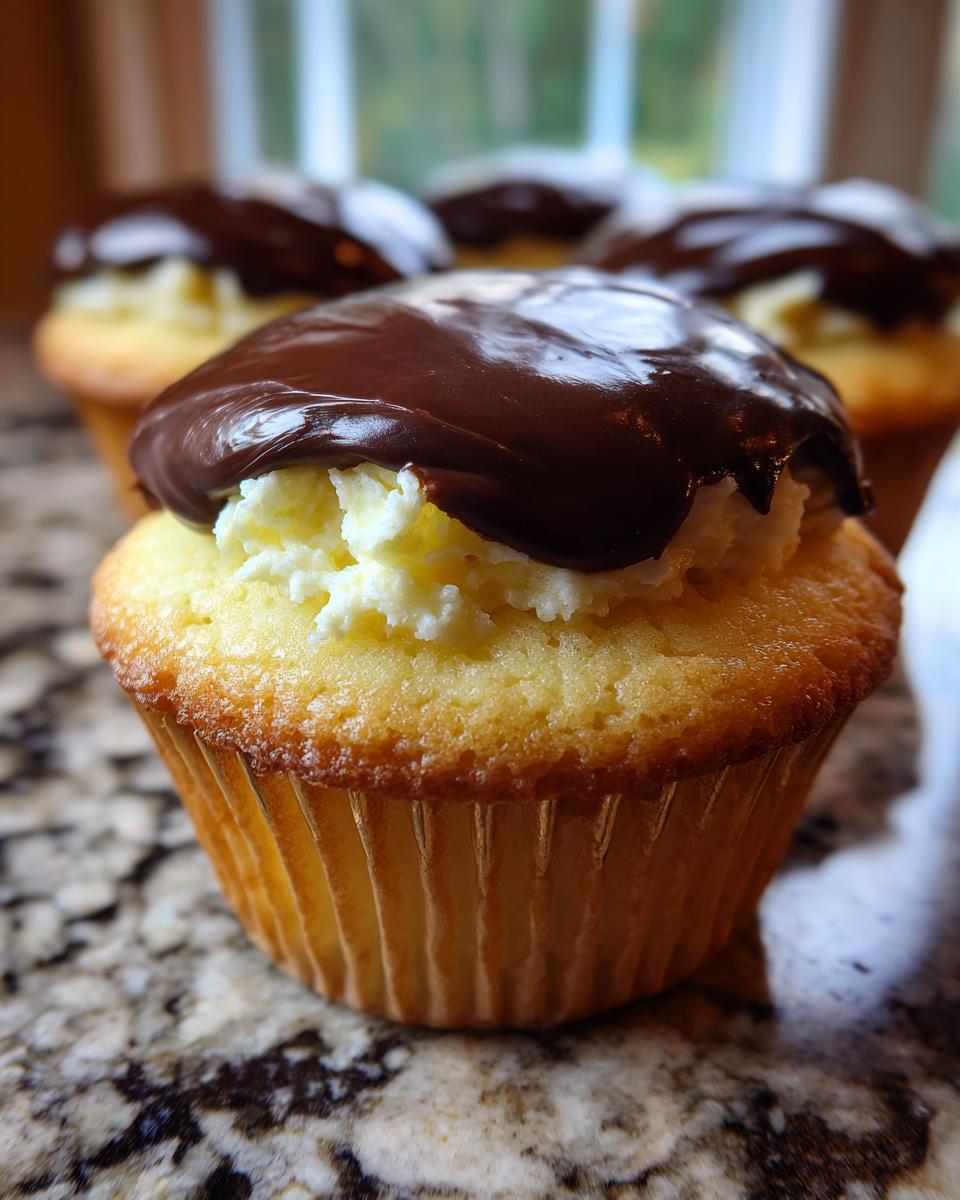
- Ideal for Parties: Forget messy serving spoons! These are the ultimate Party Dessert Cupcakes. They are clean, easy for guests to grab, and so visually appealing on any dessert table.
- Master the Chocolate Ganache Topping: We use a super simple chocolate ganache that sets just right—it shines, it tastes rich, and it won’t slide right off when you pick it up.
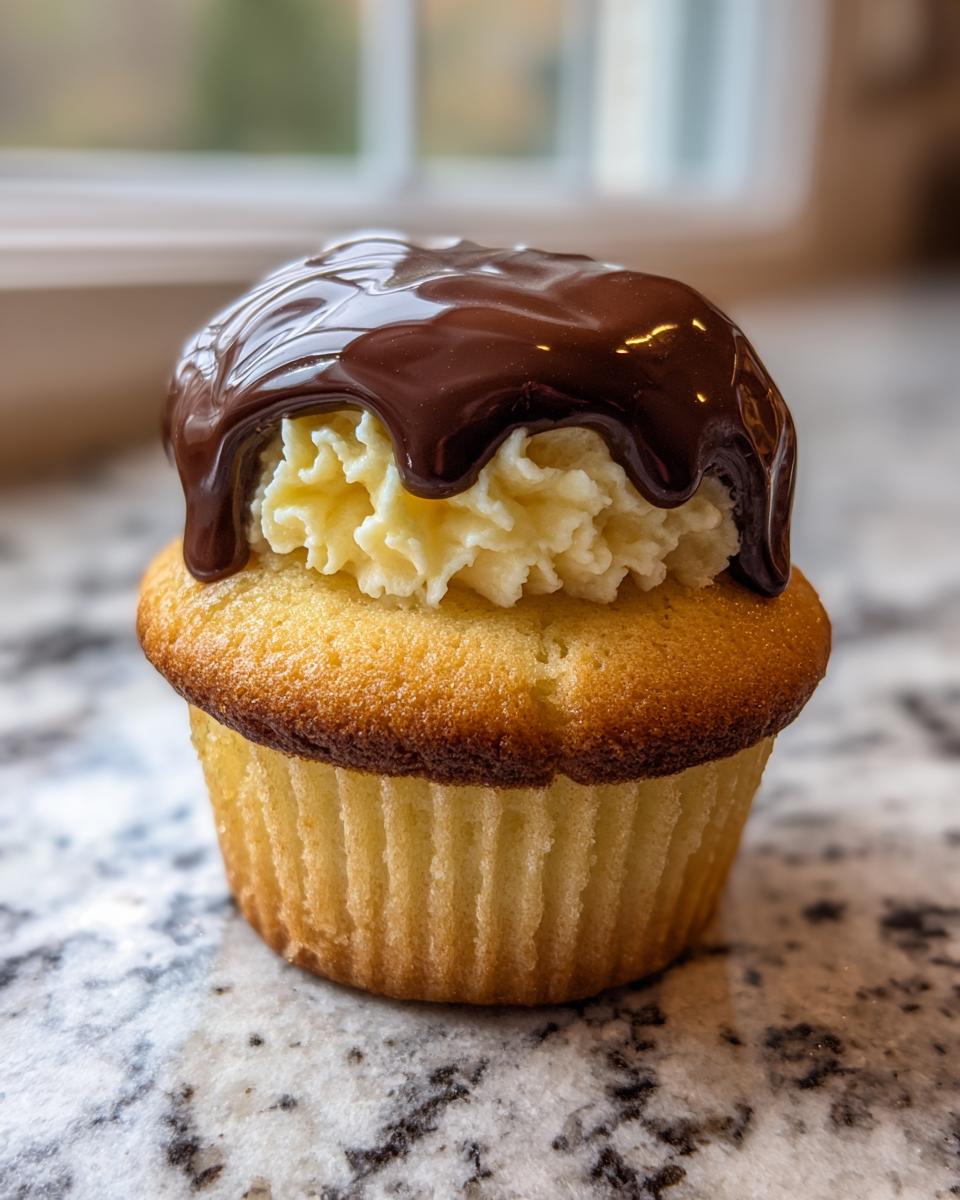
- Perfect Vanilla Base: The fluffy vanilla cake recipe itself is a keeper! It’s tender, moist, and the perfect sturdy vessel for holding all that delicious cream inside.
Honestly, these boston cream pie cupcakes are just pure joy wrapped in chocolate. You’re getting a showstopper dessert that feels totally decadent but is surprisingly straightforward to put together. It’s a winner every single time I make them.
Ingredients for Perfect Boston Cream Pie Cupcakes
Okay, gathering your supplies is the first step where we lock in that amazing flavor! Since we are making three distinct layers here—the cake, the cream, and the chocolate—I’ve broken the list down so nothing gets missed. I always tell people that having your ingredients measured out and waiting is half the battle, especially with baking! When you’re ready to bake the cake base, make sure your butter is softened just right and your eggs aren’t straight from the fridge; room temperature ingredients just blend better for that fluffy texture we are aiming for.
If you are ready to tackle the filling, this is where our fluffy vanilla cake base really gets its upgrade by using real milk and yolks to make an unbelievable filling. You’re going to want everything handy before you start the pastry cream, believe me!
For the Fluffy Vanilla Cupcakes
- 1 1/2 cups all-purpose flour
- 1 1/2 teaspoons baking powder
- 1/4 teaspoon salt
- 1/2 cup unsalted butter, softened (make sure this is soft, but not melted!)
- 1 cup granulated sugar
- 2 large eggs (room temperature is best!)
- 1 teaspoon vanilla extract
- 1/2 cup whole milk (room temperature)
For the Homemade Pastry Cream Recipe
This is the heart of the dessert, so don’t skip the chilling step later! This Homemade Pastry Cream Recipe is worth every second.
- 1 cup whole milk
- 1/2 cup granulated sugar
- 3 large egg yolks (keep the whites aside for something else, maybe meringues?)
- 3 tablespoons cornstarch (this is the magic thickener!)
- 1 teaspoon vanilla extract (for that classic flavor)
For the Chocolate Ganache Topping
For this, skip the basic chocolate chips if you can—using good quality, chopped chocolate really makes that glossy Chocolate Ganache Topping stand out.
- 4 ounces semi-sweet chocolate, chopped finely
- 1/2 cup heavy cream
Once you have all this organized, we can actually start baking! It feels like a lot of steps, but it moves along surprisingly fast, I promise.
Step-by-Step Instructions for Boston Cream Pie Cupcakes
This is where the magic happens! Don’t let the three parts intimidate you; most of the time is just waiting for things to cool down. We move quickly through the active cooking parts, so stay alert. Remember, making these boston cream pie cupcakes is just like building a tiny, perfect cake, so we want everything baked and chilled before we start putting them together. If you’ve ever made my basic pound cake recipe, the first part will feel familiar!
Baking the Fluffy Vanilla Cake Cupcakes
First up, get that oven preheated to 350°F (175°C) and line your muffin tin. In one bowl, you’ll whisk together the flour, baking powder, and salt. In a bigger bowl, cream up that softened butter and the sugar until it looks pale and happy—usually about three minutes with the mixer. Beat in your eggs one by one. Then, gently mix in your dry stuff alternating with the milk, starting and ending with the flour mix. Don’t overdo it here; mix until *just* combined! Scoop the batter about two-thirds full into your liners and bake them for 18 to 20 minutes. Let those fluffy vanilla cake cupcakes cool in the pan for just five minutes before moving them onto a rack to chill completely. They have to be totally cold before we fill them!
Making and Chilling the Custard Filled Cupcakes Cream
This part needs your full attention! Whisk the milk and sugar for the cream in a saucepan until it’s steaming hot, but don’t let it boil over. While that’s happening, whisk your egg yolks, cornstarch, and vanilla in a separate bowl until completely smooth. Here’s the expert tip for perfect pastry cream: slowly, slowly pour about half of that hot milk into your yolk mixture while whisking constantly. This is called tempering—it stops the eggs from scrambling! Once it’s all incorporated, pour that entire yolk mixture back into the saucepan with the rest of the milk. Now, cook it over medium heat, whisking like crazy until it gets thick and bubbly. Let it boil for just one minute while you keep whisking, then pull it off the heat and stir in that last bit of vanilla.
Pour this glorious, thick cream into a clean bowl and immediately press plastic wrap right onto the surface! I mean *directly* touching the cream—this stops that rubbery skin from forming. Pop it in the fridge for at least two hours. These custard filled cupcakes won’t work if the filling is warm, so be patient!
Preparing the Simple Chocolate Glaze For Cupcakes
Okay, this is the easiest part, I promise. Grab your chopped chocolate and put it in a sturdy bowl. Heat your heavy cream until it’s steaming and just starting to simmer around the edges. Pour that hot cream right over the chocolate. Don’t touch it for five minutes! Seriously, walk away, pour yourself a coffee. After five minutes, start whisking slowly from the center outwards until you get this beautiful, glossy brown mixture. This is your perfect chocolate glaze for cupcakes. Let this sit on the counter until it’s thick enough to feel just a little bit sticky when you touch it—not runny, but certainly not hard.
Assembling Your Boston Cream Pie Cupcakes
Time to fill! Use a small knife or an apple corer to carefully cut a plug right out of the top center of each cooled cupcake. Make sure you cut down deep but leave the bottom intact so you create a nice little reservoir. Don’t waste those cake tops! Use a piping bag with a large round tip (that helps keep it clean!) to pipe a generous amount of that chilled pastry cream right into the hole. You want it mounded up nicely.
Once filled, gently place the little cake plug you cut out back on top like a lid. Now you can move to the finishing touch: spoon a lovely dollop of that slightly cooled chocolate ganache over the top of each cupcake so it drizzles down the sides a little bit. Let the chocolate set up a bit on the counter before you serve them. Ta-da! You just made professional-looking boston cream pie cupcakes!
Tips for Success Making Boston Cream Pie Cupcakes
Listen, I know making a triple-layer dessert seems intimidating, but trust me, the devil is in these little details! If you nail these few things, your boston cream pie cupcakes will go from good to absolutely legendary. These are the little secrets I learned back when I was just trying to nail that creamy center without making scrambled eggs!
Never Rush the Chilling Time for the Pastry Cream
This is my number one rule about making any custard filled cupcakes. The pastry cream *must* be ice cold before you even think about scooping it into the cakes. If it’s even slightly warm or just lukewarm, two bad things happen: one, it won’t hold its nice, beautiful shape when you fill the cupcake, and two, it’ll actually start melting the fluffy vanilla cake crumb a little bit. Press that plastic wrap directly onto the surface when chilling—I cannot stress this enough! That direct contact stops that weird, thick skin from forming which is tough to mix back in later.
The Secret to a Shiny, Smooth Chocolate Ganache Topping
Everyone wants that perfect, glossy chocolate glaze, right? The biggest mistake people make with the chocolate ganache topping is stirring it too vigorously or using chocolate that’s too cold. Once you pour that hot heavy cream over your chopped chocolate, just let it sit for those full five minutes. That pause lets the heat evenly melt everything. Then, start stirring slowly from the middle until *just* emulsified. Slow stirring incorporates less air, which means a smoother, higher-shine finish. If it looks a little dull when you start, stir in just half a teaspoon of unsalted butter at the very end—instant shine booster!
Don’t Overmix the Cupcake Batter—Seriously!
We are going for fluffy vanilla cake here, not dense hockey pucks! Once you start alternating the dry ingredients with the milk, your mixer should be on the absolute lowest speed. As soon as you see the last streak of flour disappear, stop the mixer! I’m talking about maybe 10 seconds after you would normally stop. Overmixing develops gluten, and for these light cupcakes, that’s the enemy of moistness. A few tiny lumps left in the batter are totally fine; they’ll relax in the oven and give you much prettier results.
Use an Apple Corer for Perfect Filling Holes
Trying to scoop out the center of the cupcake with a regular knife is messy—it tends to tear the wrapper and compress the cake sides. If you happen to have an apple corer, use it! It removes a perfect little cylinder shape, leaving you with a neat opening for the filling and one perfectly sized cake ‘plug’ to replace it later. If you don’t have one, use the smallest knife you have and be very delicate. Clean assembly makes all the difference when you’re creating these elegant single serving desserts!
Ingredient Notes and Substitutions for Yellow Cake Cupcakes Filling
I always get asked about what happens if you need to swap an ingredient out, especially when it comes to the creamy filling or the chocolate topping. Because these boston cream pie cupcakes rely so much on texture, you have to be a little careful with changes, but I’ve figured out what works best!
For the vanilla cake base, I specified whole milk because the fat content really helps create a rich, tender crumb, which is what you want for a great yellow cake cupcakes filling experience, but if 2% is all you have in a pinch for the cake batter, it’ll probably survive. However, for the pastry cream, you really need that whole milk. Anything less—like skim—and you might find your custard doesn’t set up as luxuriously because you lose some of the necessary fat percentage.
Dealing with the Chocolate for the Ganache
When it comes to the chocolate, I really prefer semi-sweet. It gives you that perfect bittersweet counterpoint to the sweet vanilla cake and the custard. If you prefer something richer, you can absolutely use bittersweet chocolate—just skip adding any extra sugar to the ganache mixture entirely. On the flip side, if someone in your house has a major sweet tooth (like my little cousin Tim!), you can swap in milk chocolate, but you definitely need to watch the cooling time because milk chocolate melts faster and gets softer.
If you are ever making a batch of my chocolate chip cookies and you have leftover high-quality chocolate, this ganache is a fantastic place to use it up!
Why the Cornstarch is Non-Negotiable for the Filling
I know some recipes just rely solely on egg yolks to thicken their custard, but for a recipe that needs to hold up inside a cupcake and sit on the counter for a bit, we need security! The cornstarch is essential for our custard filled cupcakes recipe. It cooks up stable and thick, and it prevents that runny mess that just oozes out when you bite into it. You can substitute cornstarch with arrowroot powder one-for-one, but cornstarch tends to give that classic, slightly silkier mouthfeel that I love in this particular recipe.
Can You Use Heavy Cream Substitutes in the Ganache?
The heavy cream is what gives the final chocolate layer that beautiful, decadent gloss when whisked with the chopped chocolate. If you absolutely must substitute it for the ganache, full-fat canned coconut cream (the thick part only!) works surprisingly well for richness, although you will get a very subtle coconut flavor—which actually isn’t bad with vanilla!
For any other baking inspiration, you can always check out my favorite chocolate chip cookies recipe!
Storing and Keeping Boston Cream Pie Cupcakes Fresh
Since these beautiful boston cream pie cupcakes are packed full of luscious pastry cream, we have to be a little smarter about how we store them compared to, say, a plain chocolate chip cupcake. You cannot leave these babies sitting on the counter overnight, even though I wish you could! The custard filling means refrigeration is absolutely necessary to keep everything safe and tasting fresh.
Here’s the deal: store them in an airtight container in the fridge. Because the cake is so soft, I always worry about it absorbing any weird fridge smells, or worse, getting too damp. If you have a container that fits them snugly, that’s perfect. If not, you can line a regular container with paper towels before placing the cupcakes inside, which helps wick away any excess condensation.
How Long Do They Last?
Honestly, they are *best* enjoyed the day you make them, because that vanilla cake is at its peak fluffiness. But because of that wonderful homemade pastry cream, you should plan on eating them within three days total. After day three, the moisture from the filling starts to soak into the cake a little too much, and the texture starts to change. Keep an eye on the glaze, too—while the chocolate holds up fine, the custard is the weak link here.
Serving Tips: Bringing Them Back to Life
You definitely do not want to serve these cold straight from the fridge! That pastry cream becomes much too firm, and the cake tastes a bit dense when it’s chilled. So, before you plan to serve them—whether it’s for an afternoon tea treat or as a closing dessert after dinner—pull them out of the refrigerator about 45 minutes beforehand. Letting them sit on the counter lets the cake soften up again and brings the creamy filling back to that perfect, melt-in-your-mouth texture we worked so hard to achieve for these custard filled cupcakes.
If you’re in a massive hurry, you can pop just one in the microwave for about 8 to 10 seconds on a microwave-safe plate, but watch it closely! Too long, and that beautiful chocolate ganache topping will slide right off, and we certainly don’t want that!
Frequently Asked Questions About Boston Cream Pie Cupcakes Recipe
It’s funny how making something familiar, like a classic pie, suddenly sparks a million little questions when you shrink it down to a cupcake size! I get asked so much about the filling and the topping, so let’s clear up some of the most common things people wonder about when they’re trying to master these boston cream pie cupcakes recipe.
Can I use store-bought pudding instead of making homemade pastry cream?
Oh, you totally *can*, and I won’t tell anyone if you’re really in a pinch! If you’re looking for super quick Easy Cupcake Filling Ideas, grabbing a box of good quality vanilla instant pudding and preparing it according to package directions is an acceptable shortcut. However, I have to be honest: the flavor and texture just aren’t the same as our homemade pastry cream. The homemade version is richer because it uses egg yolks and fresh milk, giving it that luxurious, almost savory custard flavor you expect from a true Boston Cream Pie. The boxed stuff is fine, but it won’t give you that truly decadent, bakery-style result.
What is the best way to get a smooth, shiny Chocolate Glaze For Cupcakes?
The secret to that super smooth, mirror-like Chocolate Glaze For Cupcakes is twofold: chopping the chocolate really finely and controlling the temperature of the cream. Make sure your chocolate is chopped into tiny pieces—this helps it melt evenly and prevents lumps. As I mentioned in the instructions, let the hot cream sit on the chocolate for a full five minutes before you even touch it with a whisk. Once you do start stirring, do it slowly! Stirring too fast whips in air, which makes the glaze look duller. If you notice it’s looking a little matte after it cools slightly, stir in just about a teaspoon of softened, unsalted butter. That extra fat acts like a brilliant little polish and makes it gleam!
Are these considered Retro Dessert Cupcakes?
Absolutely, yes! I totally see why people tag them this way. Boston Cream Pie itself is such an iconic, comforting American dessert, reminiscent of classic diners and big family celebrations. When you take that established flavor profile and turn it into a handheld treat, it becomes something wonderfully nostalgic, which is why these are perfect Party Dessert Cupcakes. It hits that sweet spot of feeling familiar and comforting, but the format feels modern and fun. They are a real nod to those classic recipes we all grew up loving, just updated for easier serving!
If you check out my recipes for other tried-and-true favorites, I think you’ll see why I love bridging that gap between old-school comfort and modern convenience. For more crowd-pleasing recipes, take a look at my best dessert recipes collection!
Estimated Nutritional Information for Boston Cream Pie Cupcakes
Now, I know you bakers out there love knowing the details, and while I always say that the first bite is for the soul, the second bite is for the numbers! Because these boston cream pie cupcakes have a rich pastry cream filling and a chocolate topping, they definitely land on the decadent side. Please remember these numbers are just estimates based on the ingredients list—the exact brand of chocolate or the size of your eggs can bump things around a tiny bit!
Keep in mind that because the pastry cream requires refrigeration, these are best enjoyed fresh within a couple of days, which affects how you track them nutritionally. You know the drill: enjoy them in moderation because they are undeniably a treat!
- Serving Size: 1 cupcake
- Calories: Approximately 350
- Total Fat: Around 18g
- Carbohydrates: About 45g
- Protein: Roughly 5g
For comparison, that 18g of fat includes about 10g of saturated fat, thanks mostly to that butter in the cake and the cream and chocolate in the filling and topping. They are delicious, but they are certainly a splurge, perfect for those special occasions we talked about!
Share Your Experience Making These Boston Cream Pie Cupcakes
Okay, you’ve made them! I truly hope your kitchen smells like a top-tier bakery right now. I’ve given you all my secrets for getting that perfect vanilla cake, the thick pastry cream, and that amazing chocolate glaze, but the best part of this whole process is hearing from you!
Once you’ve let those beautiful boston cream pie cupcakes cool down a bit and sampled one (or two, no judgment here!), I would absolutely love it if you would come back and leave a rating right here on the recipe card. Five stars means I did my job, but even three or four stars help me know what adjustments might make this classic twist even better for other home bakers!
Were you surprised by how easy the tempering process was? Did you end up adding a tiny sprinkle of sea salt on top of the chocolate, which I think is divine? Let me know!
Show Me Your Creations!
If you Instagrammed your finished batch—and I really hope you did, because who doesn’t want to see layered cupcakes—tag me! I love seeing how these desserts look in kitchens all over the country. It truly makes my day to see your success and helps me feel connected to you, my readers.
And please, if you made any tweaks—maybe you used espresso powder in the ganache or decided to use a different tip for filling—share those notes in the comments below. I love getting inspiration from you all, just like my own culinary journey started by my friends sharing their successful dinners with me years ago. Check out my About Page if you want to read more about how we build confidence in the kitchen together!
If you want to see how other people styled their treats, maybe check out some other great versions online like the one over at Grow Green Yard. But honestly, once you master this recipe, you won’t need to look anywhere else. Happy baking, and thank you for trusting me with your oven!
PrintBoston Cream Pie Cupcakes
Make these Boston Cream Pie Cupcakes featuring moist vanilla cake, creamy pastry cream filling, and a rich chocolate ganache topping. This recipe delivers the classic dessert in a simple, single-serving format.
- Prep Time: 30 min
- Cook Time: 20 min
- Total Time: 270 min
- Yield: 12 servings 1x
- Category: Dessert
- Method: Baking
- Cuisine: American
- Diet: Vegetarian
Ingredients
- 1 1/2 cups all-purpose flour
- 1 1/2 teaspoons baking powder
- 1/4 teaspoon salt
- 1/2 cup unsalted butter, softened
- 1 cup granulated sugar
- 2 large eggs
- 1 teaspoon vanilla extract
- 1/2 cup whole milk
- 1 cup whole milk (for pastry cream)
- 1/2 cup granulated sugar (for pastry cream)
- 3 large egg yolks (for pastry cream)
- 3 tablespoons cornstarch
- 1 teaspoon vanilla extract (for pastry cream)
- 4 ounces semi-sweet chocolate, chopped (for ganache)
- 1/2 cup heavy cream (for ganache)
Instructions
- Preheat your oven to 350°F (175°C). Line a standard 12-cup muffin tin with paper liners.
- Whisk together the flour, baking powder, and salt in a medium bowl. Set aside.
- In a large bowl, cream the softened butter and 1 cup of sugar together until light and fluffy.
- Beat in the eggs one at a time, mixing well after each addition. Stir in 1 teaspoon of vanilla extract.
- Gradually add the flour mixture alternately with the 1/2 cup of milk, beginning and ending with the flour mixture. Mix until just combined. Do not overmix.
- Divide the batter evenly among the 12 cupcake liners, filling each about two-thirds full.
- Bake for 18 to 20 minutes, or until a toothpick inserted into the center comes out clean. Let the cupcakes cool in the pan for 5 minutes, then transfer them to a wire rack to cool completely.
- Prepare the pastry cream: In a saucepan, whisk together 1 cup of milk and 1/2 cup of sugar. Heat over medium heat until steaming, but do not boil.
- In a separate bowl, whisk the 3 egg yolks, cornstarch, and 1 teaspoon of vanilla extract until smooth.
- Slowly temper the egg mixture by whisking in about half of the hot milk mixture. Pour the tempered egg mixture back into the saucepan with the remaining milk.
- Cook over medium heat, whisking constantly, until the cream thickens significantly and comes to a boil. Boil for 1 minute while continuing to whisk. Remove from heat and stir in 1 teaspoon of vanilla extract.
- Transfer the pastry cream to a clean bowl. Press plastic wrap directly onto the surface of the cream to prevent a skin from forming. Chill in the refrigerator for at least 2 hours, or until completely cold.
- Prepare the chocolate ganache: Place the chopped chocolate in a heatproof bowl. Heat the heavy cream in a small saucepan until it just begins to simmer. Pour the hot cream over the chocolate. Let it sit for 5 minutes, then whisk until smooth and glossy. Let the ganache cool slightly until it is thick enough to spread or drizzle.
- Assemble the cupcakes: Use an apple corer or small knife to cut a cone-shaped plug from the center of each cooled cupcake, leaving the bottom intact.
- Fill the hollowed center of each cupcake generously with the chilled pastry cream. Replace the removed cake piece on top.
- Top each filled cupcake with a spoonful of the chocolate ganache. Allow the ganache to set before serving.
Notes
- For best results when filling, make sure the pastry cream is fully chilled; warm cream will make the cupcakes soggy.
- You can use a piping bag fitted with a large round tip to fill the cupcakes after removing the center plug for cleaner results.
- If you want a slightly thinner glaze, add a teaspoon of butter to the ganache while it is still warm.
Nutrition
- Serving Size: 1 cupcake
- Calories: 350
- Sugar: 35g
- Sodium: 150mg
- Fat: 18g
- Saturated Fat: 10g
- Unsaturated Fat: 8g
- Trans Fat: 0.5g
- Carbohydrates: 45g
- Fiber: 1g
- Protein: 5g
- Cholesterol: 90mg