
You know how sometimes you see a gorgeous, classic dessert, like a towering Boston Cream Pie, and you instantly think, “That looks incredible, but there’s no way I have time for that”? Yep, I’ve been there! That whole process of baking a cake, making a meticulous custard, and then dealing with a slippery ganache just isn’t always practical for a Tuesday night. But what if I told you we could take all that amazing flavor—the soft vanilla, the creamy center, the chocolate crown—and shrink it down into the cutest little package? These boston cream pie cookies are the answer! They are my favorite kind of baking project: they look impressive enough for a real celebration, but trust me, the steps are simple and totally manageable for any home cook who wants to feel like royalty at their own table. Get ready for your new favorite handheld pie treat!
- Why You Need These Bakery Style Boston Cream Pie Cookies
- Gathering Ingredients for Perfect Boston Cream Pie Cookies
- Step-by-Step Guide to Making Your Boston Cream Pie Cookies
- Tips for Perfect Boston Cream Pie Cookies Every Time
- Ingredient Notes and Substitutions for Boston Cream Pie Cookies
- Storage and Keeping Your Boston Cream Pie Cookies Fresh
- Frequently Asked Questions About These Custard Filled Cookies
- Estimated Nutritional Information for Boston Cream Pie Cookies
- Share Your Homemade Boston Cream Pie Cookies Creations
- Estimated Nutritional Information for Boston Cream Pie Cookies
- Share Your Homemade Boston Cream Pie Cookies Creations
Why You Need These Bakery Style Boston Cream Pie Cookies
I know you have a list of cookies you adore, but trust me when I say these need to jump to the top. Why? Because they capture that nostalgic, decadent feeling of the pie without any extra fuss. They are perfect for bringing a little bit of bakery magic right into your kitchen.
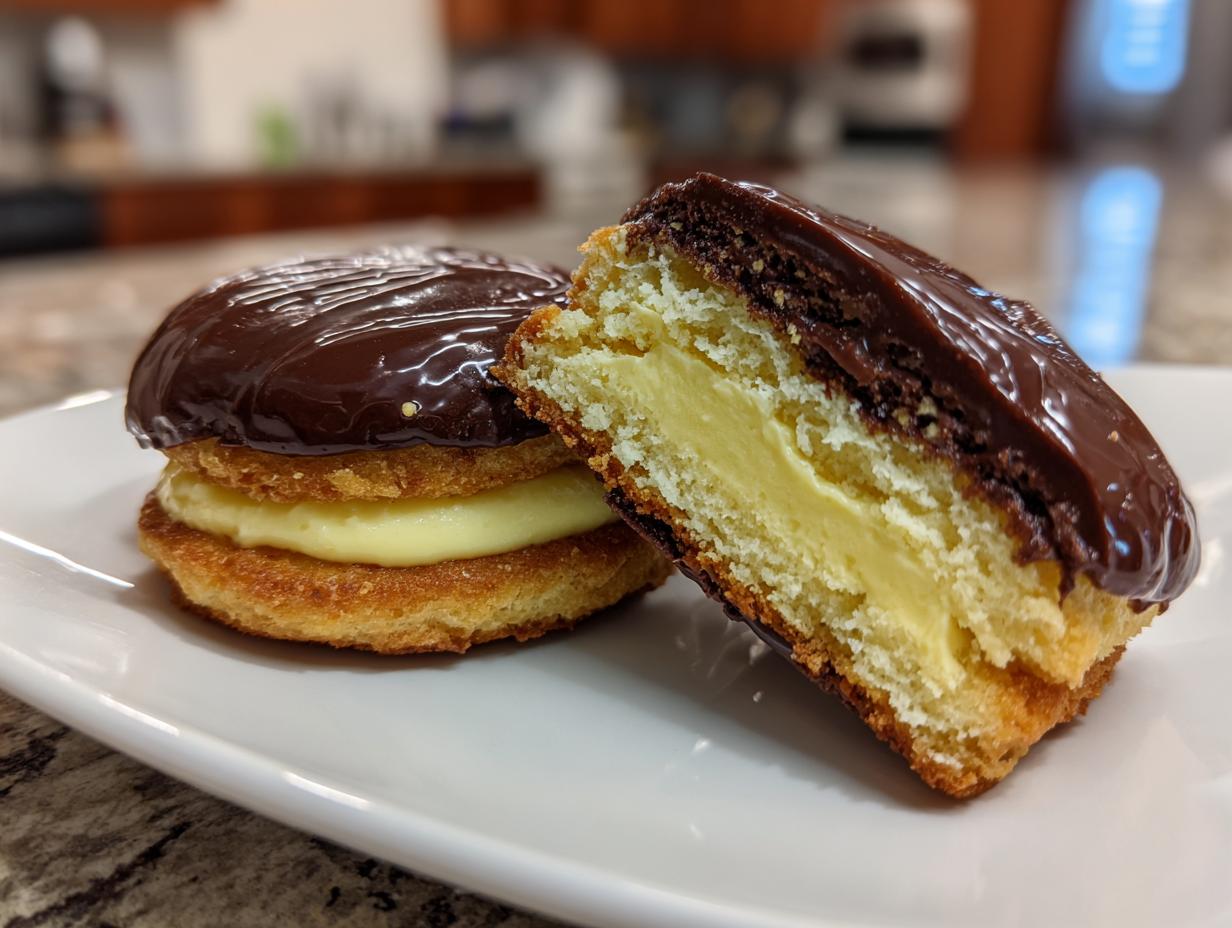
- They are the Ultimate Handheld Pie Treats: Forget trying to slice a perfect piece of pie where the filling might ooze out everywhere. These are self-contained little delights! You get the perfect ratio of soft cookie texture, rich custard, and chocolate glaze in every single bite, making them ideal for parties or just sneak-eating on the couch.
- Incredible Soft and Creamy Cookies Texture: We’re not making crispy snaps here! The vanilla cookie base bakes up tender. When you bite through that firmer chocolate topping and hit that cold, creamy filling, wow—it’s pure bliss. It’s the texture contrast that makes the classic dessert so famous, and we nailed it here.
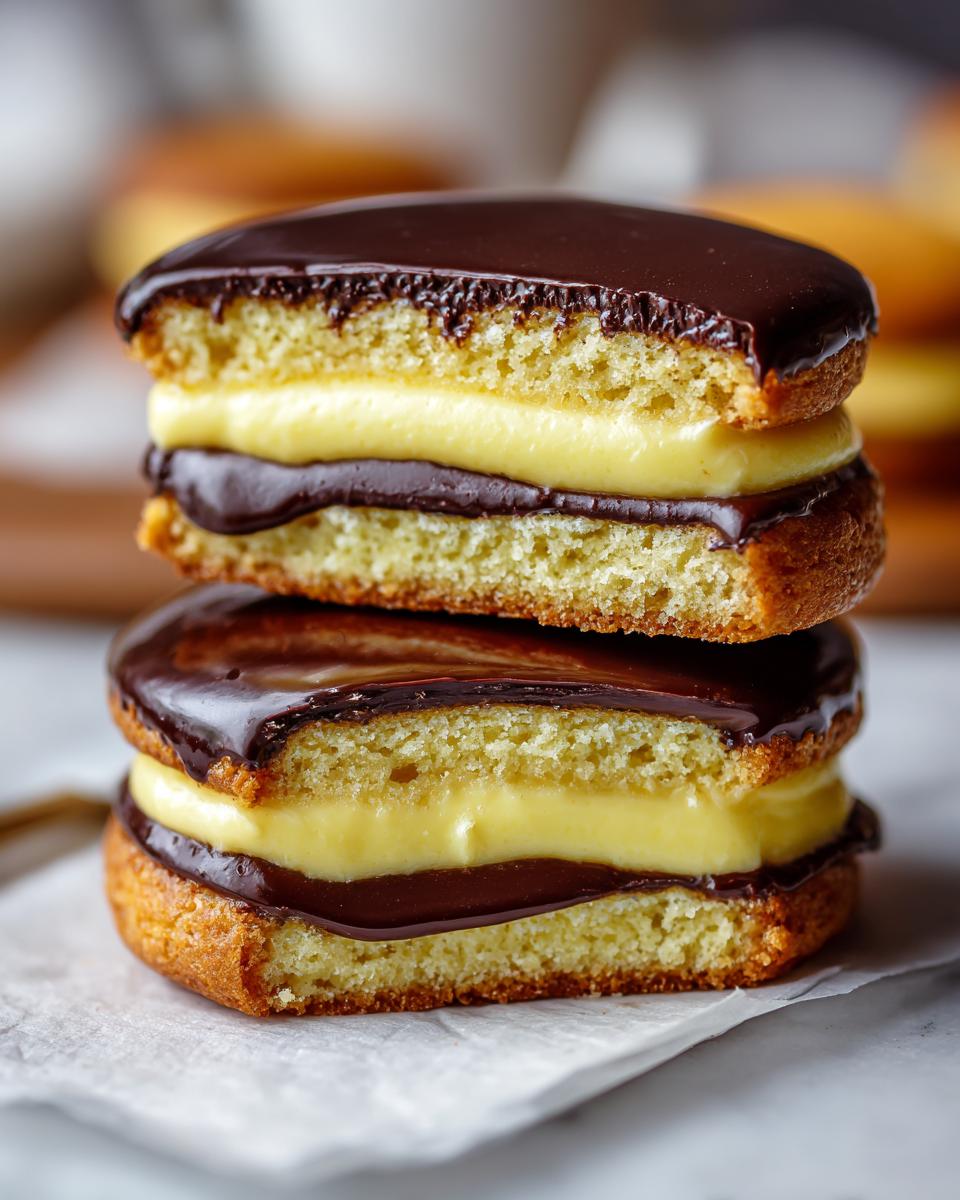
- Impressive Look, Simple Execution: Seriously, when you stack these up, they look professionally made. People will swear you spent all day on them! But because we are simplifying the layers into cookie sandwich form, you bypass complex cake layering techniques. Head over and check out some of my other favorite best cookie recipes for more impressive, yet easy, bakes!
- Perfect Make-Ahead Dessert: Since the filling needs to chill, these are fantastic to assemble a day ahead of time. This means less stress when hosting, which is exactly how baking should be!
Gathering Ingredients for Perfect Boston Cream Pie Cookies
Making something that tastes like a legendary dessert—in cookie form!—hinges entirely on using the right building blocks. Don’t worry, I always keep things accessible here at Kings Cook. You won’t need to visit a specialty store for these; everything here is standard grocery store fare. Just like with my grandma’s recipes, accuracy matters when we’re layering flavors like this, so make sure you measure carefully! Remember, this creation is really three simple recipes rolled into one, so I’ve broken down the list for you below. Following these specific ingredients is how we manage to pull off such incredible flavor in these boston cream pie cookies.
For the Soft Vanilla Cookie Base
This is the foundation, so we need something tender that can hold up to the filling. We’re using standard cookie equipment here!
- 1 cup unsalted butter, softened (make sure this isn’t melted, just nice and soft!)
- 1 cup granulated sugar
- 2 large eggs
- 1 teaspoon vanilla extract
- 2 3/4 cups all-purpose flour
- 1 teaspoon baking soda
- 1/2 teaspoon salt
For the Homemade Cream Pie Filling
This is where we replicate that luxurious, creamy custard! This homemade cream pie filling is worth the tiny bit of extra effort because it tastes heavenly. Take special care when we get to the assembly phase with the egg yolks; success relies on slowing down the heat transfer so you end up with silky custard, not scrambled bits. That’s called tempering, and it’s how we guarantee a smooth center for these custard filled cookies.
- 1 cup whole milk
- 1/2 cup granulated sugar
- 1/4 cup cornstarch
- 2 large egg yolks
- 1 teaspoon vanilla extract
For the Rich Chocolate Glaze Cookies Topping
And finally, the glossy capstone! This rich chocolate glaze sets up beautifully, giving you that satisfying snap when you bite in. We only need two very simple things here:
- 1 cup semi-sweet chocolate chips
- 1/4 cup heavy cream
Step-by-Step Guide to Making Your Boston Cream Pie Cookies
Okay, now for the fun part—bringing this masterpiece together! As promised, we are tackling this in three manageable chunks: the cookies, the creamy filling, and the shiny chocolate top. Remember, clear steps are my specialty, so just follow along. Don’t rush anything, especially when we get to the custard part. We want perfect boston cream pie cookies, not a mess!
Baking the Soft Vanilla Cookies
First things first, let’s get those cookie bottoms baked. Preheat your oven to 350°F (175°C) and line those baking sheets with parchment paper—it saves cleanup, honestly! In a large bowl, you need to cream together that softened butter and the cup of sugar. You’re looking for it to get really light and fluffy; this introduces the air that keeps the cookie from being too heavy. Beat in your eggs one at a time, making sure each one is mixed in nicely before adding the next, followed by your vanilla. In a separate bowl, just do a quick whisk of the flour, baking soda, and salt. Now, gradually add those dry ingredients into your wet mixture, but stop mixing as soon as it comes together for a soft dough. You don’t want to overwork this! Drop rounded spoonfuls onto your pans, leaving a good space between them, and bake them for 9 to 11 minutes until the edges are just starting to turn golden. Critically important: let them cool completely on the sheet because they are very tender when warm. We need zero breakage before filling! If you love a good soft batch, you should also check out my chocolate chip cookies recipe for another go-to.
Creating the Homemade Cream Pie Filling
This is where we channel our inner pastry chef, but I promise it’s easier than it sounds. We’re making a classic custard base, so pay attention here. Start by gently heating the milk paired with the half-cup of sugar in a saucepan until it’s just simmering. While that’s happening, gently whisk your egg yolks and cornstarch together in a bowl until it’s a smooth paste. Now, this next part is key: tempering! Slowly drizzle about half of that hot milk mixture into your egg yolks, whisking rapidly the whole time. This slowly nudges the temperature of the yolks up so they don’t scramble when they hit the heat. Once tempered, pour that thickened egg mixture right back into the saucepan with the rest of the milk. Whisk constantly over medium heat until it gets super thick and starts bubbling heavily; let it bubble for a solid minute, still whisking! Remove it from the heat, stir in your vanilla, and then transfer it to a clean bowl. You must press plastic wrap directly onto the surface to seal out any air, and then chill it in the fridge for at least 2 hours until it’s completely firm. You need that firmness for the best custard filled cookies.
Glazing and Assembling Your Boston Cream Pie Cookies
Once both your cookies and your homemade cream pie filling are thoroughly chilled for assembly, you’re ready for the grand finale! First, let’s make the chocolate top. Heat your heavy cream until it just starts to simmer, then pour that hot cream over your semi-sweet chocolate chips. Let it sit for five minutes—don’t touch it! Then, whisk it until it becomes smooth and glossy. Let this glaze cool down just a bit until it’s thick enough to coat the back of a spoon nicely. Now, take one cooled cookie, generously spread a layer of that chilled pastry cream right on top, and carefully place a second cookie on top to make a sandwich. Hold it gently! Finally, take the top of that sandwich cookie and dip it straight into the shiny chocolate glaze, tilting it slightly so the excess drips off. Place the assembled custard filled cookies onto a wire rack set over parchment paper. The parchment catches all the drips perfectly, and then you just let them sit until that chocolate sets up firm.
Tips for Perfect Boston Cream Pie Cookies Every Time
I always tell everyone that the difference between a good cookie and a *great* cookie is usually one tiny little step that most people skip. Since we’re creating these layered boston cream pie cookies, attention to detail on temperature and firmness is everything. Don’t worry if your first batch isn’t flawless; learning these tricks is how you master the technique!
Here are my favorite tips to ensure your custard filled cookies turn out bakery-quality every single time. Feel free to save these notes for your next bake!
- Pipe the Filling for Precision: While spreading the chilled pastry cream works fine, if you really want that picture-perfect, level layer of filling between your cookies, use a piping bag! Fit it with a large round tip (like a Wilton 1A or anything big), fill it with the cold cream, and pipe a nice ring or swirl onto the bottom cookie before topping it. It makes assembly so much cleaner and looks much more professional.
- The Chill Time on the Pastry Cream is Non-Negotiable: I mentioned it above, but it bears repeating: that filling needs to be super cold and firm before you try to sandwich it. If it’s even slightly soft, it will squish right out when you press the cookies together or dip them in chocolate. Do not try to speed this up too much in the fridge; 2 hours is the bare minimum for proper rigidity.
- Preventing the Chocolate Glaze Sagging: The glaze can be tricky! If you dip your cookie sandwiches and the chocolate immediately runs off thin, your glaze might be too hot. Let it sit on the counter for an extra 5 to 10 minutes (until it has a nice, slow drip consistency) before dipping the tops. Also, make sure the tops of the cookies are completely cool—any residual warmth will melt the chocolate right off.
- A Quick Final Set: Once you’ve dipped them, placing the wire rack directly over a sheet of parchment paper is a lifesaver for clean-up. But the final trick? Pop the whole rack (over the parchment) into the fridge for about 15 minutes after glazing. This hardens the chocolate perfectly and sets the filling slightly, guaranteeing you have a sturdy, beautiful finish. For other decadent chocolate treats, check out my tips for fudgy fudge brownies recipe!
Ingredient Notes and Substitutions for Boston Cream Pie Cookies
I always want everyone to succeed with my recipes, even when life gets busy! Sometimes even I need a little shortcut, especially when I’m trying to sneak these boston cream pie cookies in during a whirlwind week. The beautiful thing about these cookie bites is that every layer is pretty adaptable. Don’t sweat if you’re missing one specific ingredient; we can improvise!
Let’s talk about that creamy center first, as that’s usually where people wonder if they can save some time. Are you craving these easy dessert bites right now but don’t have time to fiddle with tempering eggs and stovetop cooking?
The Instant Pudding Shortcut for Filling: You absolutely can substitute the homemade pastry cream with instant vanilla pudding mix! This is my favorite hack for a quick turnaround. To use the shortcut, plan on preparing about 1.5 times the amount the pudding box recommends using whole milk. Remember, instant pudding sets up faster than cooked pastry cream, but the flavor is slightly different—it’s sweeter and less rich. It still provides that lovely creamy center, though, so if time is your main concern, go for it!
Now, let’s look at the chocolate topping. We called for heavy cream to get that beautiful, thick ganache, but what if you’re out of heavy cream? This happens all the time! You can create a decent substitute by using half-and-half, but here is my tip: if you use half-and-half, you need to add just a teaspoon of **unsalted butter** to the mixture when you heat it up. That extra fat will really help bring back some of the richness the heavy cream provided, resulting in a much glossier finish for your chocolate glaze cookies topping.
Finally, for the cookie base: if you absolutely must avoid eggs (though the eggs provide crucial structure for these vanilla cookies with filling), you can likely substitute them with an egg replacer designed for baking, or use about 1/4 cup of applesauce instead of the two eggs. Keep in mind that substituting the eggs will likely result in a softer, slightly cake-like cookie rather than the tender crumb we see in the test recipe, but they will still taste wonderful!
Storage and Keeping Your Boston Cream Pie Cookies Fresh
This is the part of baking that trips up a lot of people, especially when you have dairy involved, like in our luscious homemade pastry cream! Since these are technically cream filled cookies packing homemade custard, we have to treat them right to keep them safe and tasting their absolute best. We want to maintain that perfect contrast between the firm chocolate top and the creamy interior, and keeping them chilled helps a ton!
Here is my advice for storage so your copycat Boston Cream Pie treats last as long as possible without getting soggy or drying out. Remember, these are absolutely best when served cool!
- They Must Be Refrigerated: Because we used whole milk and egg yolks in that incredible filling, these cookies need to stay in the fridge for food safety. Do *not* leave assembled cookies sitting out on the counter at room temperature for more than two hours, especially if your kitchen is warm.
- Airtight is the Way to Go: When you put them away, make sure they are in a truly airtight container. If air gets to them, the cookie layers will start to absorb moisture from the filling and get sticky, and the chocolate glaze can start to look dull. I prefer shallow containers so I can layer them once, maybe with a little piece of wax paper between the sandwiches if I have a lot, just to be extra safe.
- How Long Do They Last? Honestly, the best texture is right on day one or day two. Because the cookie layer is relatively soft compared to a sturdy cake, it will slowly start to absorb moisture/soften the longer they sit in the fridge. I find they are absolutely fantastic for up to 3 days. After that, they are still edible, but the cookie might start to feel a little too dense for my liking.
- Serving Temperature Secrets: While you store them cold, I rarely serve them straight from the fridge! The chocolate glaze gets too hard, and the filling tightens up too much. My secret is to pull your batch of boston cream pie cookies out of the refrigerator about 20 to 30 minutes before you plan to serve them. This lets the cookie soften up just a tiny bit and makes the pastry cream perfectly creamy for that wonderful mouthfeel we are aiming for!
Frequently Asked Questions About These Custard Filled Cookies
I knew you’d have questions! Whenever you take on a layered bake like this, especially when transforming a classic, there are always going to be a few spots where you might need a little more guidance. I’ve gathered the questions I get most often about these boston cream pie cookies. Don’t be shy; we are mastering this together, so you can be confident serving up these amazing cream filled cookies!
Can I use store-bought pastry cream instead of making it from scratch for the boston cream pie cookies?
Oh, absolutely! I totally get it—sometimes you need a faster route, and that’s why I included that note about instant pudding mix in the substitution section. You can definitely use pre-made vanilla filling or instant pudding. The trade-off is that the flavor of homemade custard is richer, deeper, and less intensely sweet than most store-bought versions. But a quality premade option will still give you that lovely creamy pocket inside your copycat Boston Cream Pie sandwich without any stovetop fuss. It’s a trade-off between convenience and complexity, and both options result in a delicious cookie!
How long do these handheld pie treats last once assembled?
Once you assemble these little beauties, the clock starts ticking a little faster because we have that wonderful, fresh dairy filling tucked inside. I find that these handheld pie treats are at their peak texture (that perfect balance between soft cookie and creamy filling) for the first 24 to 48 hours. You *must* keep them refrigerated, as we discussed. While they are still safe to eat for up to 3 days, the cookies will definitely soften the longer they sit in the fridge absorbing moisture from that custard. If you are planning a big party, the best strategy is to make the cookies, make the filling, and freeze them separately—then assemble them the morning of the event!
What is the best way to get a smooth, shiny chocolate glaze cookies topping?
The secret to that bakery look isn’t just the chocolate chips; it’s the temperature control of the glaze itself! After you whisk together the hot cream and the chips, you need to let that mixture sit for just a few minutes off the heat until it cools down to what I call ‘the perfect dipping consistency.’ If it’s too hot, it will run right off the cookie thin, leaving you with a smear instead of a thick, glossy top. If it’s too cool, it will clump. You want it thick enough to coat the back of a spoon easily but still fluid enough to drip off with a gentle shake. Also, ensure the cookie sandwich tops are completely cold before dipping—no warmth allowed!
If you’re looking for more foolproof recipes that really deliver on flavor and presentation, explore all my options for the best dessert recipes right here on Kings Cook!
Estimated Nutritional Information for Boston Cream Pie Cookies
I’m a huge proponent of knowing what goes into the food we eat, but when you’re dealing with cookies, cream filling, and a chocolate topping, the numbers can change quickly depending on the brand of butter or how heavy-handed you are with the filling! I’ve calculated the estimates below based on the recipe yields, but please treat this as a guideline. A little indulgence is totally deserved, especially when you bake something this spectacular!
- Serving Size: 1 cookie sandwich
- Calories: 350
- Fat: 18g
- Saturated Fat: 10g
- Carbohydrates: 45g
- Sugar: 30g
- Protein: 5g
- Cholesterol: 75mg
Just a quick disclaimer here: these are just estimates since chocolate chips, sugar, and butter sizes can vary wildly at different stores. I always encourage you to plug your specific ingredients into a tracker if you need exact figures!
Share Your Homemade Boston Cream Pie Cookies Creations
That’s it! You’ve made the cookies, mastered the tempering, and assembled your very own batch of incredible boston cream pie cookies. I truly hope they taste like a perfect piece of nostalgia but with that fun, handheld cookie twist. When you try these out, please do me a huge favor: come back here and leave a rating! Five stars if it made you feel like royalty at your table!
I absolutely adore seeing your kitchen wins. If you took a photo of your finished sandwiches, tag me on social media or share a picture in the comments below. Knowing that my recipes help bring that “I can’t believe I made this!” pride to your kitchen is why I started this blog in the first place. If you had a fantastic result, maybe check out what others are saying about the recipe over at Recipe Hub Central too! Happy baking, friends. I can’t wait to hear all about your successes!
For more inspiration on making your everyday meals feel special, don’t forget to read a bit more about my journey or see my other favorite bakes over on my About Page!
PrintLayered Boston Cream Pie Cookies with Homemade Pastry Cream

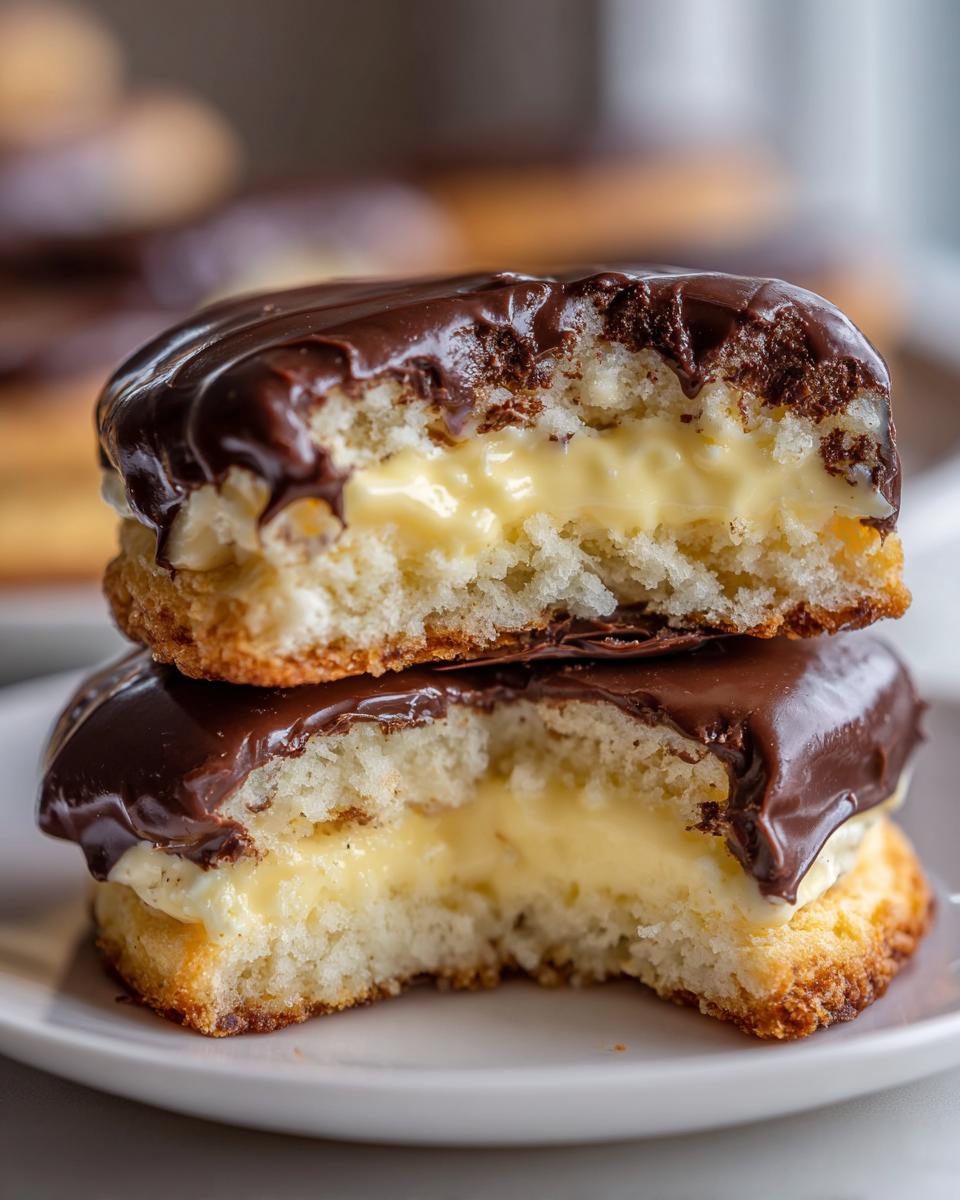
Make these bakery-style Boston Cream Pie Cookies for a handheld treat that captures the classic dessert’s flavor. You get a soft vanilla cookie base, a creamy custard filling, and a rich chocolate glaze topping.
- Prep Time: 45 min
- Cook Time: 15 min
- Total Time: 180 min
- Yield: 18 sandwich cookies 1x
- Category: Dessert
- Method: Baking and Chilling
- Cuisine: American
- Diet: Vegetarian
Ingredients
- 1 cup unsalted butter, softened
- 1 cup granulated sugar
- 2 large eggs
- 1 teaspoon vanilla extract
- 2 3/4 cups all-purpose flour
- 1 teaspoon baking soda
- 1/2 teaspoon salt
- 1 cup whole milk (for pastry cream)
- 1/2 cup granulated sugar (for pastry cream)
- 1/4 cup cornstarch
- 2 large egg yolks (for pastry cream)
- 1 teaspoon vanilla extract (for pastry cream)
- 1 cup semi-sweet chocolate chips (for glaze)
- 1/4 cup heavy cream (for glaze)
Instructions
- Preheat your oven to 350°F (175°C). Line baking sheets with parchment paper.
- In a large bowl, cream together the softened butter and 1 cup of sugar until light and fluffy. Beat in the eggs one at a time, then mix in 1 teaspoon of vanilla extract.
- In a separate bowl, whisk together the flour, baking soda, and salt. Gradually add the dry ingredients to the wet ingredients, mixing until just combined to form a soft cookie dough.
- Drop rounded tablespoons of dough onto the prepared baking sheets, leaving space between them. Bake for 9 to 11 minutes, or until the edges are lightly golden. Let the cookies cool completely on the sheets before moving them.
- Prepare the pastry cream: In a medium saucepan, whisk together the milk and 1/2 cup of sugar. Heat over medium heat until simmering.
- In a separate bowl, whisk the egg yolks and cornstarch until smooth. Slowly pour about half of the hot milk mixture into the egg mixture while whisking constantly to temper the eggs.
- Pour the tempered egg mixture back into the saucepan with the remaining milk. Cook over medium heat, whisking constantly, until the mixture thickens significantly and bubbles for one minute. Remove from heat and stir in 1 teaspoon of vanilla extract.
- Transfer the pastry cream to a clean bowl, press plastic wrap directly onto the surface to prevent a skin from forming, and chill in the refrigerator for at least 2 hours until completely cold and firm.
- Make the chocolate glaze: Place the chocolate chips in a heatproof bowl. Heat the heavy cream in a small saucepan until it just begins to simmer. Pour the hot cream over the chocolate chips and let it sit for 5 minutes. Whisk until smooth and glossy. Let the glaze cool slightly until it is thick enough to coat the back of a spoon.
- Assemble the cookies: Once the cookies and cream are cool, take one cookie and spread a generous layer of chilled pastry cream on top. Place a second cookie on top to create a sandwich.
- Dip the top of each sandwich cookie into the chocolate glaze, allowing excess to drip off. Place the finished cookies on a wire rack set over parchment paper to set the chocolate.
Notes
- For easier assembly, you can pipe the chilled pastry cream onto the bottom cookie layer using a piping bag fitted with a large round tip.
- If you want a quicker filling, substitute the homemade pastry cream with a high-quality vanilla instant pudding mix prepared according to package directions.
- Chill the assembled cookies for 15 minutes before serving to help the filling and glaze set firmly.
Nutrition
- Serving Size: 1 cookie sandwich
- Calories: 350
- Sugar: 30
- Sodium: 150
- Fat: 18
- Saturated Fat: 10
- Unsaturated Fat: 8
- Trans Fat: 0
- Carbohydrates: 45
- Fiber: 1
- Protein: 5
- Cholesterol: 75