

Oh, honey, let’s talk about those sad, crumbly things they try to pass off as scones at the coffee shop. I simply cannot stand a dry baked good! That’s why I’ve spent ages testing and re-testing to bring you what I firmly believe is the absolute *best* recipe. If you’ve been let down before, get ready, because this easy scone recipe guarantees you’ll get those tall, flaky, bakery style scones right here in your own kitchen. We use buttermilk, which is my secret weapon, to lock in incredible moisture. As Kate Connolly always says on Kings Cook, every recipe has to work reliably, and trust me, after countless batches, these genuinely deliver that perfect, tender center.
- Why This Easy Scone Recipe Delivers Bakery Style Scones At Home
- Essential Ingredients for Tender Buttermilk Scones
- Scone Making Tips and Tricks for Tall Flaky Scones
- Step-by-Step Instructions for Perfect Scones
- Flavor Variations for Your Buttermilk Scones
- Serving Suggestions for Afternoon Tea Scones
- Storage and Make Ahead Scone Dough Tips
- Frequently Asked Questions About Making Scones
- Estimated Nutritional Data for Your Scones
- Share Your Best Homemade Scones Experience
Why This Easy Scone Recipe Delivers Bakery Style Scones At Home
I know you want that perfect bite—crispy edges that shatter just a little, followed by a soft, tender middle that melts in your mouth. My goal in creating this easy scone recipe was specifically to solve the biggest headache: dryness! We’ve all been there, right? Wasting ingredients on scones that feel like eating sawdust. Don’t worry about that anymore!
This buttermilk version, rigorously tested until I got it perfect, ensures amazing results every time. Here’s why you’re going to love them:
- They bake up tall! We focus on technique so you skip the flat-flop result.
- We nail the texture, ensuring they are moist and never sad. This is the key to how to make scones not dry.
- It’s incredibly fast! You can have bakery style scones cooling before your morning coffee is even ready.
If you want to see just how much technique matters, check out some great tips on buttermilk scones creation over here: The Best Buttermilk Scones Recipe. It really confirms what works!
Essential Ingredients for Tender Buttermilk Scones
Okay, let’s talk about what goes *into* these dreamy scones because ingredients matter—a lot! When you’re aiming for those tender buttermilk scones that actually taste like they came from a fancy shop, you can’t skimp or substitute willy-nilly. For this recipe, temperature control is your best friend, especially when handling the fat. Keep everything chilled until the absolute last second! The buttermilk isn’t just for flavor; that acidity works magic with the baking powder, giving us that gorgeous lift we crave in our breakfast scones for brunch.
Ingredient List for Classic Scones
- 2 cups all-purpose flour (Nothing fancy required here!)
- 1/4 cup granulated sugar (Just enough sweetness for a classic plain scone)
- 1 tablespoon baking powder (This is our main lift!)
- 1/2 teaspoon salt
- 1/2 cup (1 stick) cold unsalted butter, cut into small cubes (Seriously, keep this frosty!)
- 3/4 cup cold buttermilk (Non-negotiable for the best texture!)
- 1 large egg, lightly beaten (For the wash)
- 1 tablespoon milk or cream (Mixing this with the egg for that golden shine)
- Optional add-ins: You can toss in about 1 cup of fresh blueberries, 1/2 cup white chocolate chips, or 1/2 cup dried cranberries if you want something fruitier!
Scone Making Tips and Tricks for Tall Flaky Scones
Before we even get to tossing things into the bowl, we need to talk about technique! Listen, these scone making tips and tricks are the difference between a quick, flat biscuit and those magnificent, tall flaky scones you see in pictures. My biggest rule? Be quick and be gentle! We want layers, and layers happen when we keep the butter cold and don’t let gluten develop too much. If you play with the dough too much, it gets tough, and that’s the opposite of what a perfect scone should be!
When you’re cutting out the shapes, please, please, *please* do not twist that cutter. That motion seals the edges shut before the oven even gets a chance to work its magic. You need to press straight down, firmly, like you mean it, and then lift straight up. That’s the way to trap those cold butter pockets inside so they burst into steam and create those beautiful flaky layers. For a great deep dive into all the little secrets, I always point people toward detailed guides like the one here: How to Make Perfect Scones. It really reinforces why the cold handling is so important for height!
Step-by-Step Instructions for Perfect Scones
Alright, putting all those secrets into action! This is where we turn those cold ingredients into something truly wonderful. Remember, this whole process moves pretty fast, which is why this is such an easy scone recipe for busy mornings. We want that quick scone baking success!
Preparing the Dough and Cutting the Scones
First thing’s first: crank that oven up to 400°F (200°C) and line a sheet pan with parchment paper—that’s my insurance policy! In your biggest bowl, whisk the flour, sugar, baking powder, and salt together. Now comes the fun, slightly messy part: cutting in the butter. You need to use your fingertips or a pastry blender to work that cold butter into the dry mix until it looks like coarse meal, with some pea-sized chunks of butter still visible. Don’t worry about perfection here; those big butter pieces are vital for flakiness!
If you’re adding blueberries or chocolate chips, toss them in now and give them a quick stir. Then, make a little dip in the middle of your flour mixture and pour in that *icy* cold buttermilk all at once. Mix it gently with a fork until it just comes together. I mean it—just combined! The dough should look shaggy, almost like it doesn’t want to cooperate. Don’t try to smooth it out! Turn that rough dough onto your floured counter and knead it only 3 or 4 times, just enough to get it to hold shape.

Baking and Finishing Your Scones
Pat your dough into a neat circle, about 3/4 inch thick. Now, grab your round cutter, dust it with flour, and press it straight down into the dough. Lift straight up—no twisting! Place your beautiful, cut scones one inch apart on the prepared baking sheet. For that gorgeous golden bakery look, whisk your egg with a splash of milk for an egg wash and brush it lightly over the tops only. Try hard not to drip any wash down the sides, or you’ll ruin those flaky edges we worked so hard for!
Pop them into that hot oven for 14 to 18 minutes. You’ll know they are done when they are beautifully golden brown on top and smell absolutely incredible. Let them rest on the pan for just a few minutes before moving them to a wire rack to cool down slightly. For more great advice on getting all the steps right, including how to work with dough like this, take a peek at this excellent resource: The First Year Blog on Scones. It covers everything!
Flavor Variations for Your Buttermilk Scones
The best part about having a solid base recipe, like these incredibly tender buttermilk scones, is how easy they are to customize! You really can turn these into whatever flavor profile your craving demands that morning. You already saw the mention of add-ins in the ingredient list, but let’s talk about making them shine.
If you’re going for bright and zesty, a handful of fresh blueberries tossed in with some lemon zest makes wonderful blueberry lemon scones. I love using white chocolate chips instead of the berries sometimes—it gives a luxurious, sweet feel that is fantastic with just a drizzle of vanilla glaze. For a cozier vibe, try tossing in dried cranberries and a bit of orange zest to get those fantastic cranberry orange scones copycat flavors we all love!

If you’re feeling autumnal later this year, you can easily switch to cinnamon sugar scones by omitting fruit and adding a teaspoon of cinnamon to the dry mix, rolling the cut wedges in cinnamon sugar before baking. Honestly, once you master this dough, the flavor combinations are endless. For tons of inspiration on seasonal recipes using this base, check out this fantastic collection: Fall Scone Recipes. And remember, if you love a classic sweet scone, make sure to check out how they handle adaptation over at Bonnie Bakery!
Serving Suggestions for Afternoon Tea Scones
Now that you’ve created these masterpiece scones, we have to talk about how to eat them—this is crucial! These definitely shine brightest when served warm, maybe even slightly reheated for just five minutes if they’ve cooled down. For a perfect afternoon tea scone experience, you absolutely need jam and clotted cream, of course. They are also amazing split and served with butter, just like my favorite breakfast scones for brunch.
If you want an extra sweet touch, remember that simple scone glaze recipe? Just whisk a cup of powder sugar with a couple of tablespoons of milk or fresh lemon juice until it’s pourable and drizzle it right over the top. For more fantastic ideas on balancing sweet baked goods with rich flavors, you should definitely check out my brunch recipes over at my breakfast and brunch collection!

Storage and Make Ahead Scone Dough Tips
I know life gets busy, and sometimes you want fresh scones but don’t have time to whip them up right before brunch. Don’t panic! The beauty of this recipe is that you can absolutely utilize the make ahead scone dough capability. Once you’ve cut your beautiful shapes, just lay them on your regular baking sheet, cover the whole thing tightly with plastic wrap, and tuck them into the fridge. They are perfectly happy chilling out for up to 12 hours! That means you prep the night before, and in the morning, all you do is pull them out, brush on the egg wash, and bake.
If you have leftovers—which is rare at my house!—store your baked scones in an airtight container at room temperature. They are best the day they are made, obviously, but if they get a little stiff the next day, don’t throw them out! Just pop them into a 350°F oven for about five minutes. That little blast of heat brings back the original crispy edges and tender softness right away. It’s magic, I tell you!
Frequently Asked Questions About Making Scones
I know you might have a few lingering questions after diving into this recipe. That’s totally normal! Baking is all about practice, and sometimes you just need that little bit of extra reassurance to make your first batch of scones perfect. Here are the things I get asked the most about achieving that wonderful texture.
Can I use regular milk instead of buttermilk in these scones?
That’s a great question, and it gets right to the heart of why the texture is so spectacular! Buttermilk brings essential acidity to the party. That acid reacts strongly with the baking powder, giving us that big, fluffy burst when they hit the heat. If you don’t have buttermilk on hand, you can absolutely cheat! Just measure out the milk you need and stir in one teaspoon of white vinegar or lemon juice—let it sit for about five minutes until it curdles a tiny bit. It mimics the buttermilk perfectly for a tender result.
What is the secret to fluffy scones tutorial success?
If you are looking up any fluffy scones tutorial, here is the main takeaway: Keep it cold and don’t touch it! Seriously, the two biggest secrets are keeping your butter ice-cold and mixing the dough only until it *just* comes together. As soon as you start kneading more than necessary, you warm up that butter, and you start developing gluten where you don’t want it. Warm butter melts too fast in the oven, leading to greasy scones instead of flaky ones. Be quick and gentle!
Can I make savory scones instead of sweet ones?
Oh my gosh, yes, you totally can! The base dough recipe is just crying out for some savory makeovers. You can leave out the sugar entirely (or just drop it to a tablespoon or two) and use the same method. Instead of berries, try folding in some shredded sharp cheddar and a little bit of dried chive or finely chopped rosemary. Imagine those warm, cheesy scones for brunch! They are amazing served alongside soup or chili instead of bread. You’ve got a versatile base here!
Estimated Nutritional Data for Your Scones
Okay, so I wanted to share some general numbers for you all, just so you have a baseline. This data is based on one beautiful, classic plain scone made using this recipe, before adding heavy glazes or tons of butter on top. Remember, homemade is always best, but these nutrition estimates help keep us on track!
- Serving Size: 1 scone
- Calories: Approximately 280
- Fat: 14g
- Carbohydrates: 33g
- Protein: 5g
Keep in mind, if you load these tender buttermilk scones up with brown sugar glaze or add tons of chocolate chips, those numbers are going to jump up! Enjoy them for what they are: a delicious treat for your breakfast or afternoon tea.
Share Your Best Homemade Scones Experience
Wow, we made it! I really hope you’re looking at a baking sheet full of tall, glorious bakery style scones right now. These are truly the best homemade scones I could ever give you, and I put my heart into making sure they work perfectly for you, too. Now, the most important part of my kitchen philosophy is sharing what works, so I really want to hear from you!
Did everything come out flaky and tender? Did you try one of those flavor variations we talked about, maybe making some incredible cranberry orange scones or even going savory? Please take a moment and rate this recipe using the star rating system right below this text. And if you have any lingering questions or just want to share a picture of your success, drop it all in the comments below. I read every single one!
Don’t forget to save this recipe so you can quickly pull it up next time you need easy breakfast scones for brunch or that perfect afternoon tea treat. Nothing beats slicing into a fresh, warm scone. If you need to reach out directly for something specific, you can always use my contact page. Happy baking, everyone!
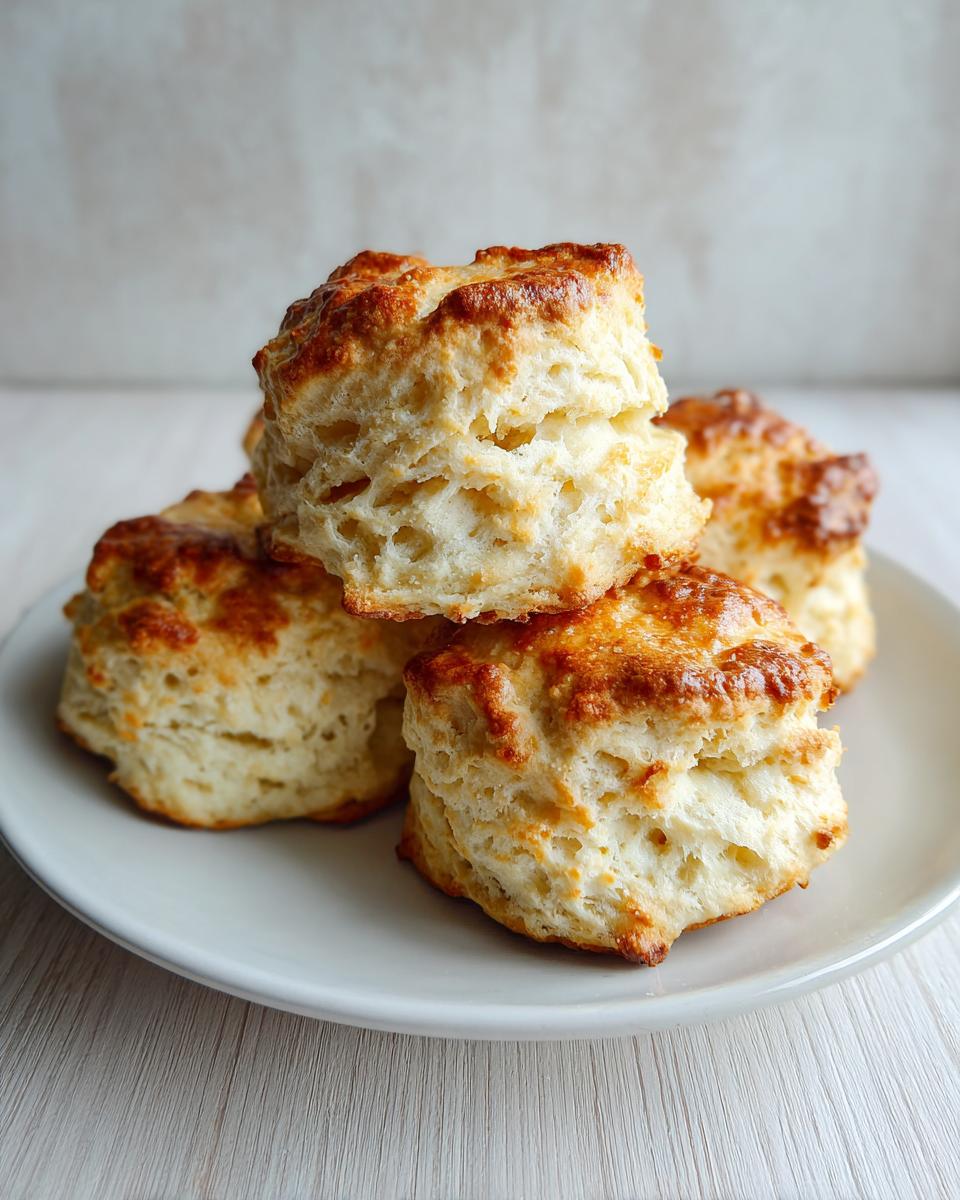
PrintThe Best Flaky Buttermilk Scones Recipe

Make bakery style scones at home that are crispy on the edges and tender inside. This easy scone recipe uses buttermilk for superior moisture and texture.
- Prep Time: 15 min
- Cook Time: 18 min
- Total Time: 33 min
- Yield: 8 scones 1x
- Category: Breakfast
- Method: Baking
- Cuisine: American
- Diet: Vegetarian
Ingredients
- 2 cups all-purpose flour
- 1/4 cup granulated sugar
- 1 tablespoon baking powder
- 1/2 teaspoon salt
- 1/2 cup (1 stick) cold unsalted butter, cut into small cubes
- 3/4 cup cold buttermilk
- 1 large egg, lightly beaten (for egg wash)
- 1 tablespoon milk or cream (for egg wash)
- Optional add-ins: 1 cup blueberries, 1/2 cup white chocolate chips, or 1/2 cup dried cranberries
Instructions
- Preheat your oven to 400°F (200°C). Line a baking sheet with parchment paper.
- In a large bowl, whisk together the flour, sugar, baking powder, and salt.
- Add the cold, cubed butter to the dry ingredients. Use a pastry blender or your fingertips to cut the butter into the flour until the mixture resembles coarse crumbs with some pea-sized pieces of butter remaining. This step is key for flaky scones.
- Stir in your chosen add-ins, if using.
- Make a well in the center of the dry ingredients and pour in the cold buttermilk. Mix gently with a fork until just combined. Do not overmix; the dough will look shaggy.
- Turn the dough out onto a lightly floured surface. Gently knead the dough 3 or 4 times, just enough to bring it together.
- Pat the dough into a circle about 3/4 inch thick. Use a sharp, floured round or triangular cutter to cut out your scones. For tall, flaky scones, press the cutter straight down without twisting.
- Place the cut scones onto the prepared baking sheet, leaving about 1 inch between them.
- In a small bowl, whisk together the egg and milk/cream for the egg wash. Brush the tops of the scones lightly with the wash.
- Bake for 14 to 18 minutes, or until the tops are golden brown.
- Let the scones cool slightly on the baking sheet before transferring them to a wire rack. Serve warm.
Notes
- For the best texture, keep all ingredients, especially the butter and buttermilk, very cold.
- If you want a sweet finish, prepare a simple glaze by whisking 1 cup powdered sugar with 2 tablespoons of milk or lemon juice until smooth, and drizzle over cooled scones.
- If you are making these ahead, you can prepare the dough, cut the shapes, place them on the tray, cover, and chill for up to 12 hours. Brush with egg wash and bake when ready.
- To achieve bakery style scones, avoid twisting the cutter; press straight down to keep the layers separated.
Nutrition
- Serving Size: 1 scone
- Calories: 280
- Sugar: 6
- Sodium: 250
- Fat: 14
- Saturated Fat: 9
- Unsaturated Fat: 5
- Trans Fat: 0
- Carbohydrates: 33
- Fiber: 1
- Protein: 5
- Cholesterol: 55