
Oh, the dreaded dry chicken breast! Seriously, who hasn’t nervously pulled a piece of baked chicken breast out of the oven, only to find it tastes like savory cardboard? If you are stuck in that cycle of disappointing dinners, I totally understand. That’s why I spend so much time perfecting recipes here at Kings Cook—because cooking should make you feel joyful, not stressed!
This recipe is my absolute answer to that common weeknight problem. We are ditching stringy, sad chicken forever. I’ve tested this exact combination of garlic butter and temperature control dozens of times to build a recipe that is truly foolproof. You deserve tender, flavorful chicken every time you turn on your oven. Ready to banish dry poultry for good? You should definitely check out my other favorite quick weeknight dinner recipes while you’re here!
- Why This Is The Best Way To Make Baked Chicken Breast
- Ingredients for Foolproof Baked Chicken Breast
- How to Bake Chicken Breast Without Drying Out: Step-by-Step Instructions
- Tips for Perfect Garlic Butter Baked Chicken Breast
- Serving Suggestions for Your Simple Chicken Breast Dinner
- Storage and Reheating Instructions for Baked Chicken Meal Prep Idea
- Frequently Asked Questions About Baked Chicken Breast
- Estimated Nutritional Data for Seasoned Baked Chicken Breast
- Share Your Foolproof Baked Chicken Success
Why This Is The Best Way To Make Baked Chicken Breast
When you’re looking for baked chicken breast that actually tastes amazing, you need a plan, not just a list of ingredients. This is my go-to formula because it hits every single thing you asked for: it’s nearly impossible to mess up, it tastes incredibly rich thanks to the garlic butter, and clean-up? Forget about it.
For me, this method delivers the absolute best juicy oven chicken breast you can get without hovering over a pan.
Guaranteed Tender Baked Chicken Texture
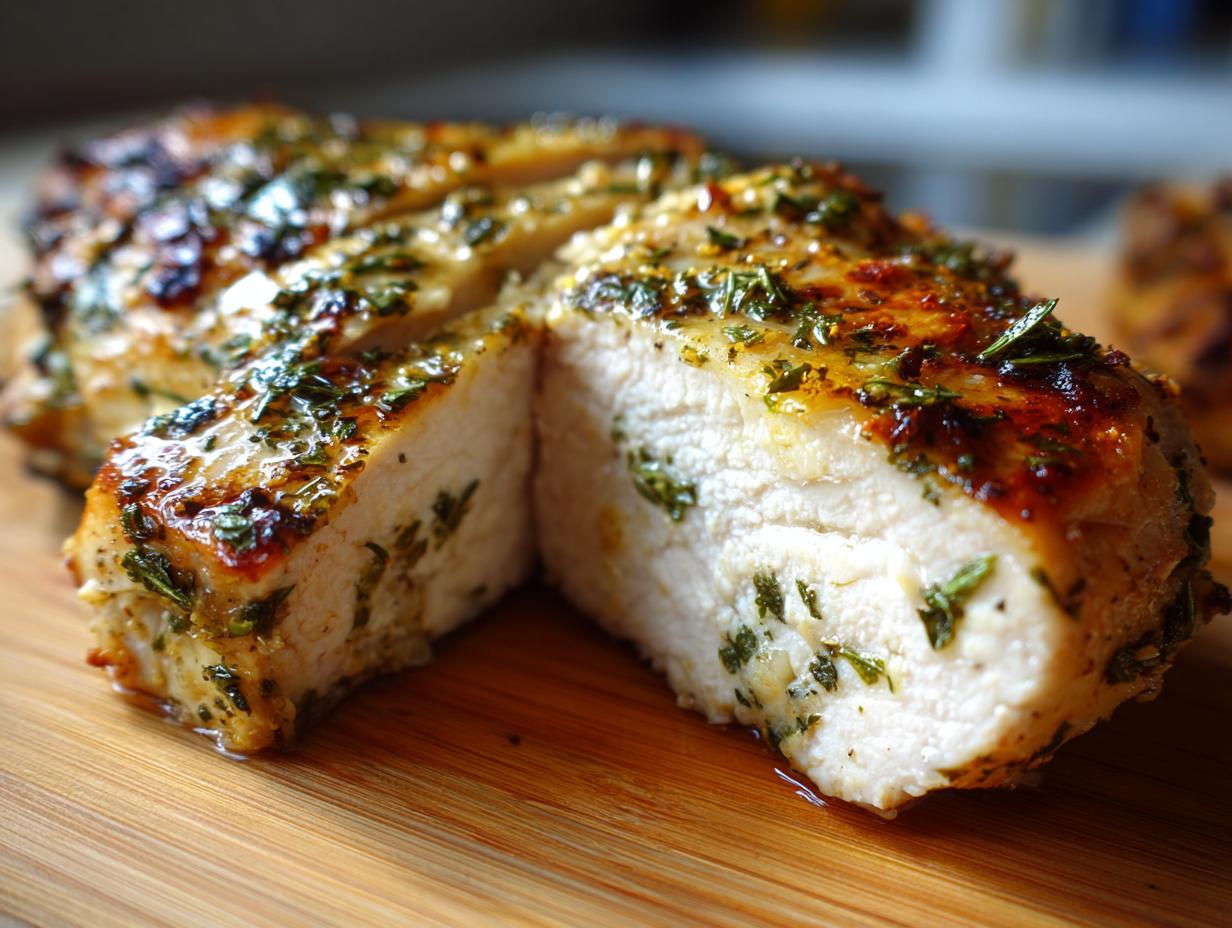
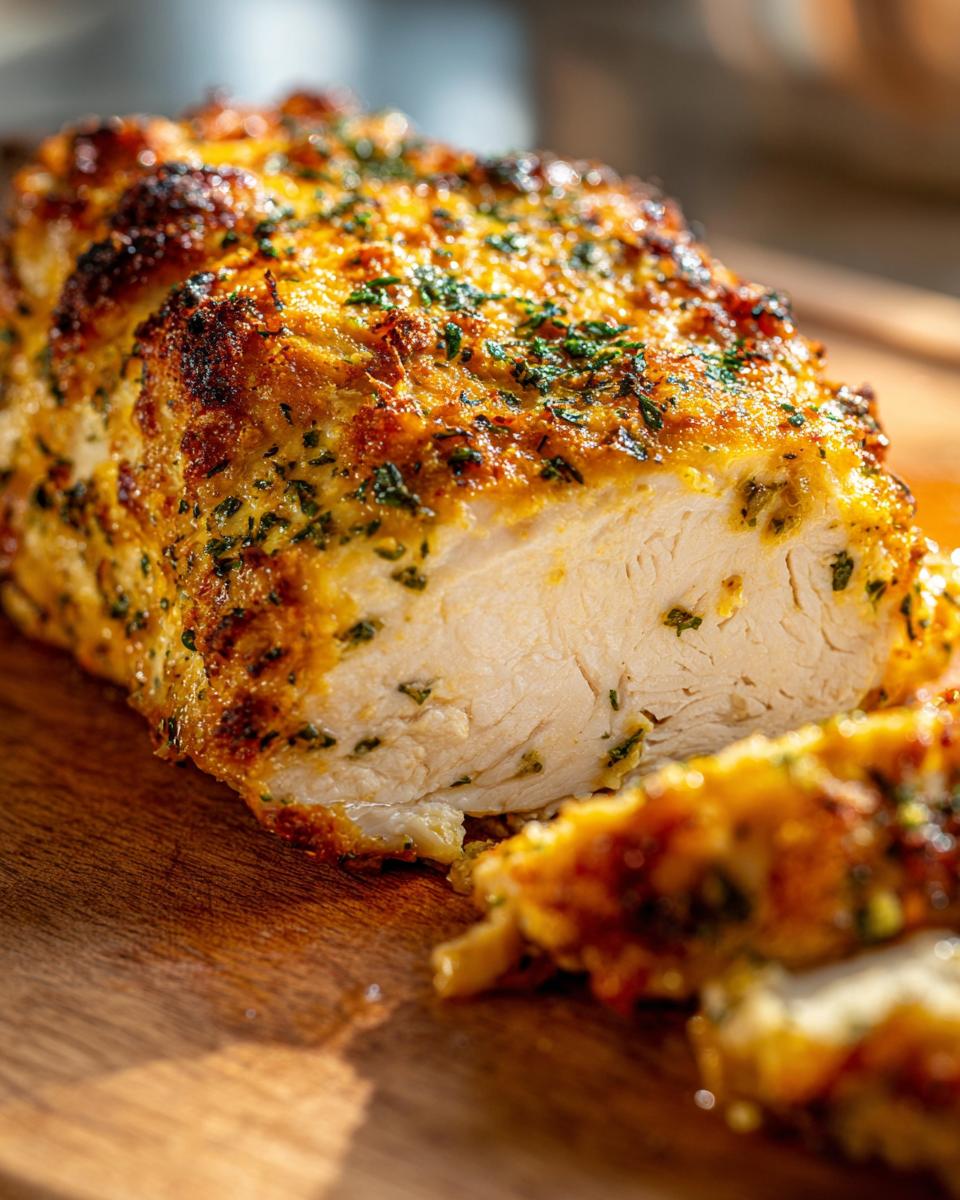
We aren’t relying on magic here; we are relying on science and temperature control! The melted butter locks in the moisture right at the start, and by pulling the chicken immediately when it hits 165°F and letting it rest, we force all those flavorful juices to stay inside the meat where they belong. It’s the difference between rubbery chicken and meat that practically melts.
Simple Ingredients for a Garlic Butter Baked Chicken Breast
You won’t need to run to a specialty shop for this. Seriously, if you have some butter and a couple of spices, you’re golden. That’s why these are among the best easy baked chicken breast recipes out there—they use what you already have to deliver huge flavor.
Ingredients for Foolproof Baked Chicken Breast
Okay, let’s talk about what makes this work. I keep this list short and sweet because I know you’re looking for something quick, but every single ingredient matters for that juicy, tender result we are chasing. Trust me on the ingredient prep!
- 4 boneless, skinless chicken breasts (try to find ones about 6 to 8 ounces each so they cook evenly)
- 2 tablespoons unsalted butter, melted—make sure it’s fully liquid!
- 2 cloves garlic, minced very fine—nobody wants a huge chunk of raw garlic hiding somewhere.
- 1 teaspoon dried Italian seasoning
- 1/2 teaspoon salt
- 1/4 teaspoon black pepper
- 1/4 teaspoon paprika (I use sweet paprika here, not smoked, just for color!)
- 1 tablespoon fresh parsley, chopped (This is purely for looking pretty at the end, but it tastes lovely!)
How to Bake Chicken Breast Without Drying Out: Step-by-Step Instructions
This is where we save the day! Following these instructions precisely is the secret to making incredibly moist baked chicken breast that tastes like it came from a fancy restaurant, even though it flies through as a fast weeknight chicken oven savior. Don’t rush the prep, and trust the thermometer!
Preparing the Garlic Butter Seasoned Baked Chicken Breast
First things first, make sure your oven is hot! Preheat it to 400°F. I always line my baking dish with parchment paper these days because scrubbing off baked-on dairy and spices is just not my idea of fun. Now, grab those chicken breasts and pat them down ruthlessly with paper towels. I mean bone dry! This is important because moisture prevents that lovely seasoning crust from sticking.
While that’s heating, whisk together your melted butter, all that glorious minced garlic, and your seasonings in a small bowl. Easy peasy. Then, just pop the dry chicken into your prepared dish and spoon that rich garlic butter mix right on top, making sure every square inch is coated nicely. Wow, it already smells amazing, right?
Baking and Resting Your Tender Baked Chicken
Pop the dish into that hot oven and set a timer for 20 minutes. Here’s the non-negotiable part: you absolutely must use a meat thermometer. We need to pull it out when the thickest part hits exactly 165°F. Anything less is risky; anything more is dry. Once it hits that magic number, take it out of the oven immediately, even if the timer hasn’t dinged yet. You can check out this helpful guide on garlic butter chicken for visuals if you like.
But wait! Do not touch that chicken! You have to let it rest for five minutes right there in the dish. If you slice into it now, all the moisture just runs out onto the plate. Resting lets the juices redistribute throughout the meat, sealing in that tenderness. After resting, toss on your fresh parsley and it’s ready. If you want another great recipe idea for crispy food, check out my chicken fried steak recipe!
Tips for Perfect Garlic Butter Baked Chicken Breast
Now that you know the basic steps for baking this fantastic chicken, let’s talk pro moves. These little tweaks are what elevate your baked chicken breast from ‘good’ to the ‘melt-in-your-mouth’ experience everyone is desperate for. These extra steps are what my culinary education taught me so you don’t have to spend years testing!
Achieving Even Thickness for Uniform Baked Chicken Breast
This is HUGE for ensuring your dinner cooks evenly! If your chicken breasts look like giant pyramids—thick on one end and thin on the other—the thin part is going to be dry before the thick part even hits temperature. Take a piece of plastic wrap and place it over the thickest part of the breast. Use a meat mallet or even the bottom of a heavy sauce pan to gently pound it down until the whole thing is roughly the same thickness all over. It really helps guarantee that tender baked chicken texture end-to-end.
Making This a Creamy Baked Chicken Variation
If you want to lean into that rich, comforting side of things, this garlic butter base is easily adapted. Instead of just using the melted butter, try mixing in about 1/4 cup of standard cream cheese before you add the garlic and spices. It melts right into the butter, creating a luscious, thick sauce that clings to the meat. It’s delicious drizzled over some rice or pasta later, if you have any leftover! For more comforting ideas, be sure to browse my chicken fried rice recipe.
Remember, the best results come from learning how your oven works and trusting your thermometer. Check out this great resource on how to bake chicken breasts for even more insight into oven mechanics!
Serving Suggestions for Your Simple Chicken Breast Dinner
The beauty of this garlic butter seasoned chicken breast is that it plays so nicely with almost anything. Since the chicken itself is the star and carries so much flavor, you don’t need complicated sides to make a full plate. This keeps things quick, which is perfect when you need a simple chicken breast dinner on the table fast!
When I’m serving this on a busy Tuesday night, I usually aim for something green and something starchy, but light. You can always find more inspiration for easy pairings on my dedicated delicious side dishes page, but here are my top three winners for this specific meal:
- Roasted Asparagus with Lemon: Asparagus roasts right alongside the chicken if you toss it in a little olive oil and salt. The bright, tart lemon cuts through the richness of the garlic butter so beautifully. It feels fancy but it’s zero extra work.
- Quick Quinoa or Brown Rice: If you need something to soak up any leftover juices (and trust me, you will want to soak up those juices!), a simple batch of quinoa or brown rice works wonders. I often use the rice cooker so it’s ready the second the chicken rests.
- Steamed Green Beans with Slivered Almonds: This adds a nice crunch that contrasts well with the tender poultry. A quick toss with toasted almonds and a drizzle of olive oil is all they need. It’s incredibly healthy, too!
See? A complete, delicious, healthy meal ready in under 40 minutes. That’s the power of good fundamentals in the kitchen!
Storage and Reheating Instructions for Baked Chicken Meal Prep Idea
This recipe is honestly my favorite for meal prepping because who doesn’t want perfectly cooked protein ready for lunch during the week? If you are making a big batch of this baked chicken breast for your baked chicken meal prep idea, storage is super important to keep that tenderness.
Once the chicken has cooled completely (don’t ever store hot food!), pop it into an airtight container. It will keep beautifully in the fridge for about three to four days. Keep it simple; don’t slice it up yet—leaving it whole helps retain moisture!
When it’s time to reheat, skip the microwave if you can! While fast, it often dries chicken out. The best way to bring your juicy oven chicken back to life is low and slow. Add a tiny splash of broth or water to the container, cover it tightly, and warm it gently in a 300°F oven for about 10 minutes. Alternately, the microwave on half-power works in a pinch if you add that liquid splash too. That little bit of steam keeps our hard-earned moisture locked in!
Frequently Asked Questions About Baked Chicken Breast
I know you might have a few questions swirling around after seeing how simple this method is. Honestly, I used to run through these same checks myself when I was first learning! If you’re wondering about temperatures, swaps, or how to keep this healthy, I’ve got you covered right here. Feel free to reach out if your specific question isn’t answered below!
What is the safest internal temperature for baked chicken breast?
Safety first, always! For any poultry, including our incredibly tender baked chicken, the USDA recommends an internal temperature of 165°F (that’s 74°C) when measured in the thickest part of the meat. This is non-negotiable for food safety. What makes THIS recipe different is that we hit that target, and then we stop cooking! Resting it gently afterward ensures it stays juicy instead of cooking itself dry on the cutting board. That 165°F is your magic number!
Can I use a marinade instead of the rub for this easy baked chicken breast recipe?
Absolutely, you can! Marinades are fantastic for adding loads of flavor deep into the meat fibers, making for a truly delicious experience. If you opt for a marinade—maybe something using lemon and herbs—just remember one thing: Pat the chicken dry before placing it in the marinade, and then pat it *lightly* dry again before you put it in the oven. If you use a very wet marinade, you might need to cut that cooking time down by about 3 to 5 minutes, so keep that meat thermometer handy!
How can I make this a healthy chicken dinner idea?
I love that you’re thinking about keeping things light! The great news is that this recipe is naturally very high in protein and low in carbs, so it fits right into Keto or general low-carb eating plans. To emphasize the ‘healthy’ aspect, just pair it with steamed or roasted non-starchy vegetables, like the sides I mentioned earlier! This is one of my top picks for healthy chicken dinner ideas because it cuts out heavy sauces and focuses on quality fats from the butter and the clean flavor of the chicken itself.
Estimated Nutritional Data for Seasoned Baked Chicken Breast
When you’re focusing on simple, whole ingredients like we are here, understanding the nutrition profile is pretty straightforward. I’ve put together the estimated numbers for one serving based on the recipe card, but please take these with a grain of salt—literally, because everyone seasons differently!
These figures below are estimations based on the ingredients listed—specifically one 6-8 oz chicken breast prepared exactly as directed with the garlic butter rub. Your mileage might vary slightly depending on the exact size of the chicken you use, or if you use a different cut, but this gives you a great baseline for meal planning.
Here is the quick look at what you’re eating:
- Serving Size: 1 breast
- Calories: 250
- Protein: 38g
- Fat: 10g
- Saturated Fat: 5g
- Carbohydrates: 2g
- Sugar: 1g
- Sodium: 350mg
- Cholesterol: 110mg
As you can see, this is a fantastic, high-protein option that keeps fats moderate and carbs low thanks to our simple seasoning approach. It’s one of my favorite ways to keep dinner delicious without loading up on unnecessary fillers.
Share Your Foolproof Baked Chicken Success
Well, that’s it! You have everything you need to achieve the most incredibly juicy, perfectly seasoned baked chicken breast you’ve ever made at home. I truly believe that once you try this garlic butter method, you’ll never go back to baking chicken any other way.
I desperately want to know how it turns out for you! Did you keep that thermometer steady? Did you avoid the temptation to peek while it rested? Please leave a rating below—a five-star review lets other home cooks know they can trust this recipe to deliver tender results every single time.
If you have any lingering questions about the temperature or maybe want to share what you paired it with, drop a comment down below. I read every single one, and I love hearing about your kitchen wins! While you’re planning your next meal, don’t forget to look at my collection of appetizers and snacks for something to nibble on while this delicious chicken bakes!
PrintFoolproof Garlic Butter Baked Chicken Breast for Juicy Results
This recipe guarantees tender, juicy baked chicken breast every time using a simple garlic butter rub. It is easy to prepare for quick weeknight dinners and results in minimal cleanup.
- Prep Time: 10 min
- Cook Time: 25 min
- Total Time: 35 min
- Yield: 4 servings 1x
- Category: Dinner
- Method: Baking
- Cuisine: American
- Diet: Low Fat
Ingredients
- 4 boneless, skinless chicken breasts (about 6–8 oz each)
- 2 tablespoons unsalted butter, melted
- 2 cloves garlic, minced
- 1 teaspoon dried Italian seasoning
- 1/2 teaspoon salt
- 1/4 teaspoon black pepper
- 1/4 teaspoon paprika
- 1 tablespoon fresh parsley, chopped (for garnish)
Instructions
- Preheat your oven to 400 degrees Fahrenheit (200 degrees Celsius). Lightly grease a baking dish or line it with parchment paper for easy cleanup.
- Pat the chicken breasts completely dry using paper towels. This step helps the seasoning adhere better.
- In a small bowl, combine the melted butter, minced garlic, Italian seasoning, salt, pepper, and paprika. Mix well to create the garlic butter rub.
- Place the dried chicken breasts in the prepared baking dish.
- Spoon the garlic butter mixture evenly over the top of each chicken breast, spreading it to coat the surface.
- Bake for 20 to 25 minutes, or until the internal temperature of the chicken reaches 165 degrees Fahrenheit (74 degrees Celsius) when checked with a meat thermometer in the thickest part.
- Remove the chicken from the oven. Let it rest in the dish for 5 minutes before serving. Resting keeps the juices inside the meat.
- Garnish with fresh chopped parsley before you serve your tender baked chicken.
Notes
- For extra juicy oven chicken breast, you can lightly pound the thickest part of the breast to an even thickness before seasoning.
- This recipe is naturally Keto and Whole30 compliant if you use compliant seasonings.
- To make this a creamy baked chicken dish, stir 1/4 cup of cream cheese into the butter mixture before applying.
Nutrition
- Serving Size: 1 breast
- Calories: 250
- Sugar: 1
- Sodium: 350
- Fat: 10
- Saturated Fat: 5
- Unsaturated Fat: 5
- Trans Fat: 0
- Carbohydrates: 2
- Fiber: 0
- Protein: 38
- Cholesterol: 110