
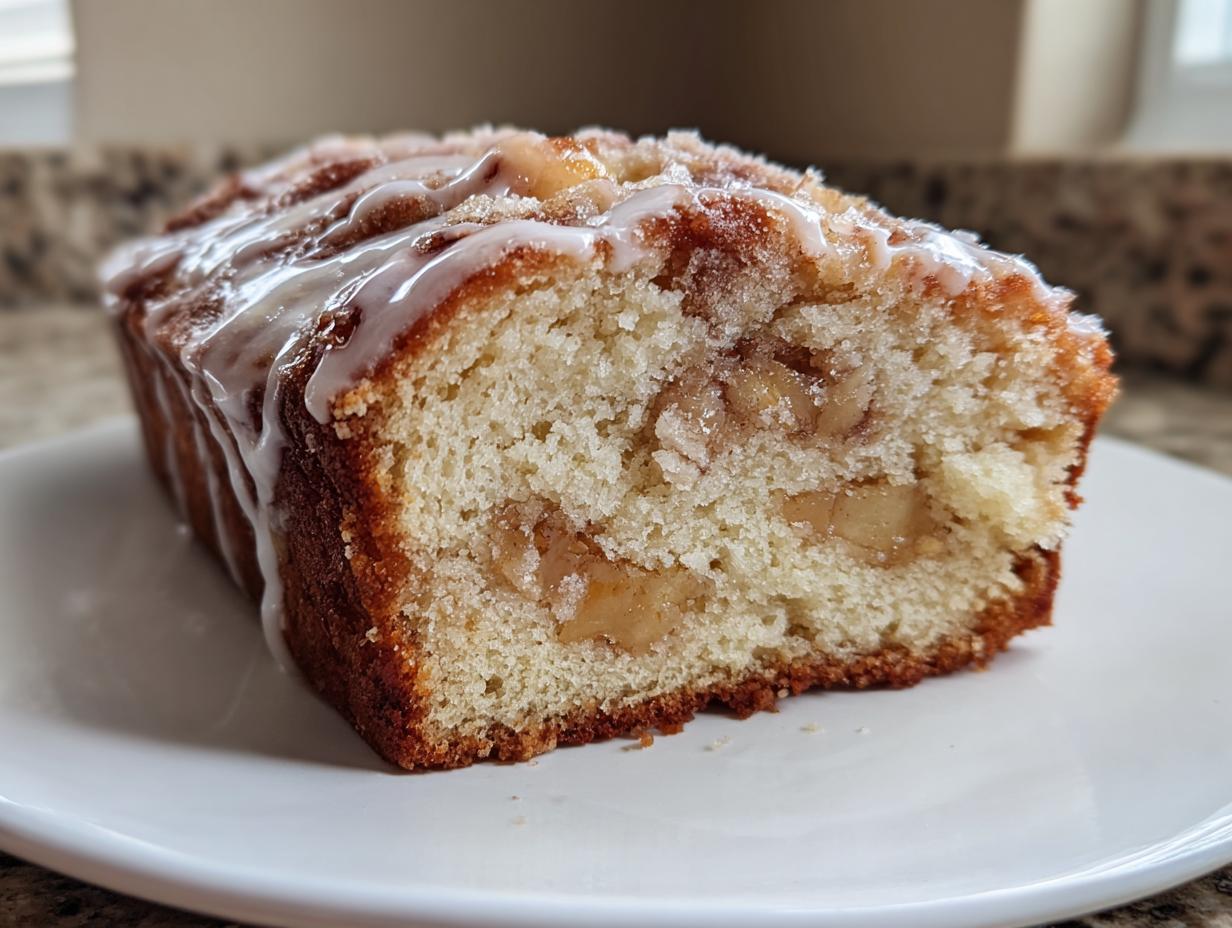
There’s just something about the scent of cinnamon and baked apples that signals true comfort, isn’t there? If you’ve ever looked at a big, glorious apple fritter and thought, “I wish I could have that for breakfast without the whole deep-frying fiasco,” then boy, have I got the recipe for you. This apple fritter bread brings all that wonderful flavor—that perfect moist texture, the hidden cinnamon swirl, and that sticky sweet glaze—right into one easy loaf pan. My whole goal here at Kings Cook is to give us home cooks reliable recipes that just work, and this one delivers that bakery-style magic every single time. You’re going to love this! For more cozy fall baking inspiration, be sure to check out my recipe for easy pumpkin bread while you’re here.
- Why This Amish Apple Fritter Bread Recipe Works (Expert Tips)
- Gathering Ingredients for Your Apple Fritter Bread
- Step-by-Step Instructions for Perfect Apple Fritter Bread
- Tips for Success with Your Homemade Bakery Style Loaf
- Storage and Reheating Instructions for Tender Apple Cake Loaf
- Variations on the Classic Apple Fritter Bread
- Serving Suggestions for Your Sweet Apple Breakfast Loaf
- Frequently Asked Questions About Apple Fritter Bread
- Nutritional Estimates for This Apple Fritter Bread
- Share Your Comfort Food Baking Recipes Experience
Why This Amish Apple Fritter Bread Recipe Works (Expert Tips)
The “Amish” label on this recipe isn’t just for show; it signifies a dedication to deep flavor and, most importantly, incredible moisture. Forget those quick breads that turn dry the second they cool down! This version is designed to be an unbelievably moist apple bread. I tested batches for weeks trying to nail that perfect texture, and I finally figured out that using Honeycrisp apples gave a better ‘bite’ than the softer Reds I first tried—that little bit of tartness cuts right through the sweetness.
When you make this, you’re really getting the best of both worlds: the ease of a quick bread paired with the richness of a true fritter.
Achieving the Perfect Moist Apple Bread Texture
It all starts with creaming! You have to spend a good minute or two beating that soft butter and sugar until it’s genuinely light and fluffy. That’s where we trap the air that keeps our bread tender and prevents that dense, heavy result. Also, and this is huge for a tender apple cake loaf, mix those dry ingredients in slowly, alternating with the milk. Stop mixing the second you don’t see flour streaks. Overmixing is the number one enemy of a moist bake!
The Secret to the Cinnamon Apple Swirl Bread Flavor
We don’t just use cinnamon once; we celebrate it! We put a nice teaspoon of cinnamon right into the main flour mixture for background warmth. But the real flavor punch, the one that makes this a true cinnamon apple swirl bread, comes from tossing the apples separately with brown sugar and another full teaspoon of cinnamon. When that mixture folds in, those little pockets of spiced apples create bursts of flavor throughout the whole loaf. It’s what sets it apart from just plain apple bread. You simply must try this method!
If you love these apple and cinnamon combinations, you should definitely check out my recipe for apple cinnamon muffins next time you’re grabbing your spice blends!
Gathering Ingredients for Your Apple Fritter Bread
Okay, gathering ingredients is where we set the stage for success, right? Since this apple fritter bread is meant to be easy, I focused on keeping the list accessible—nothing you can’t grab at your regular grocery store. Organization is key here, so I always separate everything into three little piles before I even think about turning the oven on. It keeps me calm and stops me from forgetting the baking soda, which would be a disaster!
If you want to see how I handle another great quick bread, take a peek at my zucchini bread recipe sometime!
For the Tender Apple Fritter Loaf Batter
This is the main structure! Make sure your butter is truly softened, not melted. And remember those apples? They need to be peeled and finely chopped—we want them tender, not chunky.
- 2 cups all-purpose flour (the backbone!)
- 1 teaspoon baking soda
- 1/2 teaspoon salt
- 1 teaspoon ground cinnamon (the base seasoning)
- 1/2 cup unsalted butter, softened (don’t skip the softening!)
- 1 cup granulated sugar (for sweetness)
- 2 large eggs (at room temperature is best, if you remember!)
- 1 teaspoon vanilla extract
- 1/2 cup milk (whole milk works wonders here)
- 2 cups peeled and finely chopped apples (Granny Smith or Honeycrisp recommended)
For the Cinnamon Apple Swirl Filling
This little mix is the flavor bomb that makes this an apple coffee cake dream! We use brown sugar here for that deeper molasses note.
- 1/2 cup brown sugar, packed
- 1 teaspoon ground cinnamon (the second dose!)
For the Sweet Glazed Apple Quick Bread Topping
Don’t skimp on the glaze; it seals the deal! You just need two things to make that perfect drizzle.
- 1/2 cup powdered sugar (sifted if you have lumps)
- 2 tablespoons milk or water (just enough to get it pourable)
Step-by-Step Instructions for Perfect Apple Fritter Bread
This is the part where the magic happens, and trust me, this is where sticking to the steps ensures you get that lovely, high-rising apple fritter bread loaf. We are keeping this simple, which is perfect for anyone new to easy quick bread baking. Just follow along, and you’ll have a magnificent, moist loaf ready for that sweet glaze in no time!
Preparation and Dry Ingredient Mixing
First things first, we need the oven ready to go. Preheat that baby to 350°F (175°C). While it’s warming up, grab your 9×5 inch loaf pan, grease it well, and dust it with flour—don’t skip that, or we’ll have sticking issues later! Now, in a medium bowl, whisk together all your dry components: the flour, baking soda, salt, and that first teaspoon of cinnamon. Whisking them ensures the leavening is evenly distributed. Set that aside, and let’s move on to the wet part.
Creating the Batter Base for Your Apple Fritter Bread
Grab your big mixing bowl! We need to cream the softened butter and the granulated sugar until the mixture looks pale, almost fluffy, which takes about three glorious minutes. Then, we add those eggs, one at a time, beating well after each addition to make sure they fully incorporate. Stir in the vanilla extract now.
Here comes the crucial balancing act! You are going to gradually add those dry ingredients back into the wet mix. But listen closely: alternate them with the milk. Start and end with the dry ingredients. Mix only until you see everything *just* combined. I mean it—stop stirring when you still see tiny streaks of flour! If you overmix, we lose the tenderness we worked so hard for.
Incorporating Apples and Layering the Cinnamon Apple Swirl
Now for the apples! In a smaller bowl, toss those finely chopped, peeled apples with the brown sugar and the second teaspoon of cinnamon. Make sure every single apple piece is coated in that lovely brown sugar spice mix. This is our filling!
Gently fold that entire apple mixture into your main batter. Once it’s mixed in, pour half of the batter into your prepared loaf pan. If you want an extra dramatic swirl, sprinkle half of any leftover cinnamon-sugar mixture you might have sitting around right on top of that first layer. Then, gently spoon the rest of the batter on top to cap it off.
Baking and Cooling the Glazed Apple Quick Bread
Pop that loaf into the preheated oven. It needs about 50 to 60 minutes to bake completely. How do you know it’s done? Stick a wooden skewer right near the center—if it comes out clean, with just a few moist crumbs clinging to it, you’re golden! If it’s wet batter, give it five more minutes and check again.
This next part is tough but necessary: let the loaf cool in the pan for a full 10 minutes. This firms it up before you try to turn it out onto a wire rack to cool completely. You cannot glaze a warm bread; the glaze will just melt right into a sad puddle. Seriously, wait until it’s nearly cool before you move to the glaze step!
Finishing with the Sweet Vanilla Glaze
While we wait for it to cool down, we whip up the sweet topping! This is so easy; just whisk together the powdered sugar and about two tablespoons of milk or water until it’s smooth and drippy. If it looks thick like icing rather than glaze, add liquid a half-teaspoon at a time until it drizzles nicely. Once your Glazed Apple Quick Bread is cool to the touch—and I mean *cool*—drizzle that glorious vanilla glaze all over the top. Slice it up, and enjoy this easy baked treat!

If you want to see another amazing recipe that proves baking doesn’t have to be hard, check out my super moist banana bread recipe next week!
Tips for Success with Your Homemade Bakery Style Loaf
Since we are aiming for that incredible, high-end homemade bakery style loaf look and taste, I wanted to share a few little secrets that take this from “good” to “absolutely unforgettable.” These little tweaks—things I learned peeling apples for my grandmother years ago—really ramp up the quality when you’re making this homestyle apple dessert.
Choosing the Best Apples for Apple Fritter Bread
Listen, you can use whatever apples you have, but if you want that perfect, slightly acidic counterpoint to all this sweet cinnamon goodness, you need a sturdy apple. Granny Smith is my go-to because they hold their shape beautifully during baking; they don’t turn into total mush. Honeycrisp is another winner! If you use a very soft apple, like Red Delicious, you risk it completely dissolving into the batter, leaving you with just paste instead of those lovely, recognizable fruit chunks. Always choose a firm apple that resists a little when you slice it.
Presentation Tips for a Beautiful Apple Fritter Bread
Presentation really matters, even if this is just for us at home! If you want that professional, slightly crunchy top that bakeries achieve, try this: before the loaf goes into the oven, whisk up a tablespoon of extra granulated sugar with just a tiny pinch of cinnamon. Sprinkle that mixture evenly over the top batter layer. As it bakes, that sugar melts slightly and then crisps up, giving you a stunning, textural crunch that is divine against the soft bread and the smooth glaze later. It’s such a simple addition that makes a huge visual difference!
If you’re looking to make more impressive bakes, you should look at how I handle the texture in my apple coffee cake recipe sometime; it uses a similar textural trick!
And if you ever want to compare notes on apple prep, hop over and see how they handle their famous recipe over at Janet’s site—she’s great with apples too!
Storage and Reheating Instructions for Tender Apple Cake Loaf
One of the best parts about a truly great quick bread, like this tender apple cake loaf, is that it always tastes better the next day! That extra time lets all those spices soak in and the moisture settle just right. Since we worked so hard to keep this recipe from drying out, we need to store it correctly so it stays soft and wonderful for days, whether you’re looking for a quick breakfast grab or a late-night snack.
If you’re planning on eating the whole loaf within two days, keeping it on the counter is totally fine. Just make sure you wrap it tightly! I usually use plastic wrap first, pressing it gently right against the cut sides if there are any exposed, and then wrapping the whole thing loosely in foil, or popping the whole loaf (un-glazed!) into an airtight container. This keeps the air out, which is vital for freshness.
If you need it to last longer than that, refrigeration is the way to go. However, cold temperatures can sometimes stiffen up quick breads, making them seem a little drier. My trick for this? Before you chill it, let the bread cool *completely*, then wrap it very well, maybe even double-wrapping in plastic wrap. If you are already a fan of moister recipes, you’ll see similar storage tips work perfectly for my moist carrot cake recipe, too!
When you’re ready to enjoy a slice that’s been chilled, take it out about 30 minutes before serving to let it come closer to room temperature. If you’re in a rush, you can microwave a single slice—just 10 to 15 seconds—and it really loosens up that crumb again. If you find yourself with leftovers that have gone past the three-day mark, you can actually freeze slices baked without the glaze, and they keep beautifully for up to three months! Remember to check out what Ella does with hers, but trust me, a tight wrap is your best defense against staleness!
Variations on the Classic Apple Fritter Bread
While I absolutely love this recipe exactly as written—it’s my gold standard for apple fritter bread—baking should always be fun and adaptable! Once you master the technique for getting that perfect moist loaf, you can play around with the flavors a little bit. It’s so forgiving, which is why I adore quick breads.
Spice and Nut Additions to Apple Fritter Bread
To give an extra depth to the swirl filling, I sometimes like to add nuts. About 1/2 cup of coarsely chopped pecans or walnuts folded in with the brown sugar and cinnamon makes this feel much fancier, but keeps it just as easy. They toast up slightly in the oven, offering a wonderful crunch against the soft apple pieces.
If you want to lean even harder into that cozy fall feeling, try adding just a tiny pinch—maybe 1/4 teaspoon—of ground nutmeg or a tiny dash of allspice right into the main batter mix when you add the first portion of cinnamon. It pairs unbelievably well with cinnamon and apples, giving it a deeper, warmer profile that’s just heavenly on a chilly morning. When you get a chance, I think you’ll love the spice component in my apple crisp recipe too; it uses a similar warming blend!
Glaze Substitutions for Your Apple Fritter Bread
The vanilla glaze is classic, but we can certainly spice things up there too! If you want something brighter to cut through the sweetness of the bread, swap out that vanilla extract for a teaspoon of fresh lemon juice in your glaze mixture. That hint of citrus wakes up the whole loaf—I know I do this when I serve it for brunch.
Alternatively, if you want to lean into a maple flavor, which is just divine with apples, use maple extract instead of vanilla. You’ll need less liquid in the glaze because maple extract can be a bit thinner. Just go slow with that milk or water addition until you get the right consistency. Either way, the glaze is the final flourish that makes this look and taste like something special!
Serving Suggestions for Your Sweet Apple Breakfast Loaf
So you’ve baked this gorgeous, fragrant loaf—congratulations! Now, how do we serve it up? Because this apple fritter bread is so rich and sweet, it truly walks the line between a decadent dessert—which I fully endorse, especially warmed up with a dollop of vanilla ice cream—and a fantastic centerpiece for your weekend brunch spread. It’s so satisfying to have a sweet apple breakfast loaf ready to go for family!
For a classic fall brunch vibe, think about what goes well with cinnamon and baked fruit. A simple slice, maybe warmed up for just 15 seconds in the microwave to soften that glaze slightly, is perfect on its own. But if you’re feeling playful, spreading just a touch of softened salted butter over a warm slice is heavenly—the butter melts right into the crumb!
If you’re serving this for a bigger event or as part of a full spread, I always love pairing it with something creamy or tangy to balance the sweetness. A small bowl of plain, full-fat Greek yogurt mixed with a tiny splash of vanilla makes a perfect, slightly sharp side dip for the bread. It’s almost like having a homemade version of that creamy filling you find in a real fritter!
And let’s not forget the drinks! This pairs beautifully with a strong, hot cup of coffee, of course, but it’s also fantastic alongside a warm spiced cider. If you’re looking for other great ways to start a weekend morning, you have to look at my simple recipe for classic French toast! It’s another crowd-pleaser for those autumn brunch ideas.
Frequently Asked Questions About Apple Fritter Bread
I know you might have a few little questions rolling around after reading through all those steps—that’s totally normal when baking something new! I always get asked the same things when people try making this apple fritter bread for the first time, especially concerning apples and moisture. Don’t worry; I’ve got the answers right here to ensure your loaf turns out perfectly every time. When you’re done here, feel free to browse my whole collection of breakfast and brunch recipes!
Can I use pre-chopped apples in this apple fritter bread recipe?
Oh, I really, really advise against that, honey. Store-bought pre-chopped or canned apples just don’t have the integrity we need for this bake. Canned apples are usually cooked down and already mushy, and dried apples will soak up all the moisture from your precious batter before it even gets into the oven! We need fresh, firm apples—Granny Smith or Honeycrisp are my favorites—because they hold up to the heat and give you those lovely, defined chunks of fruit that you expect in a great loaf. Fresh is best for that satisfying texture!
How do I ensure my apple fritter loaf stays moist?
This is the single most important question for any quick bread! There are two big secrets here. First, you absolutely cannot overmix the batter once the flour goes in. Mixing too much develops gluten, and gluten means tough, dry bread. Mix just until combined, even if you see a few little flour streaks—they’ll disappear during baking. Secondly, proper storage is key. Always wrap that cooled loaf tightly, like I mentioned before, to trap that built-in moisture inside. If you follow those two things, you’ll have a wonderfully soft loaf!
Can this be made without yeast, like a No Yeast Apple Bread?
Yes, absolutely! This is a true quick bread, which means we are relying on chemical leaveners, not yeast. You’ll see we use baking soda in the ingredient list, and that’s what gives the loaf its lift and airy structure as it bakes in the heat of the oven. You won’t need to worry about kneading, rising times, or finding yeast packets at all! It’s truly a simple, set-it-and-forget-it kind of baking experience.
If you want another amazing yeast-free bake where we rely on baking soda, you should really check out the tips on Amy’s Country Apple Fritter Bread sometime—she has some great simple approaches, too!
Nutritional Estimates for This Apple Fritter Bread
Now, I know some of you are watching your macros, and some of you just want to know what you’re getting into when you decide to have a slice of this wonderful apple fritter bread. Since we are using butter, brown sugar, and that sweet glaze, it absolutely falls into the “treat” category! But knowledge is power, right?
Please remember that these numbers are just estimates, and they can shift quite a bit depending on what kind of apples you choose or exactly how thick you make that drizzle of glaze. I calculated these based on dividing the whole recipe into 10 generous slices.
- Serving Size: 1 slice (about 1/10th of the loaf)
- Calories: Roughly 350 per slice – enough energy for a nice afternoon coffee break!
- Sugar: We’re looking at about 35g here. That’s where the fritter magic comes from, so enjoy it!
- Fat: Around 16g total, with about 9g being saturated fat from that lovely butter we used.
- Carbohydrates: About 50g, thanks to the flour and the fruit.
- Protein: A modest 4g. This isn’t a protein bar, folks, it’s comfort food!
We are keeping the fiber pretty low at just 2g, but that’s okay, every once in a while we deserve a bake that’s purely for joy and nostalgia!
Share Your Comfort Food Baking Recipes Experience
Well, that’s it! You’ve made the ultimate apple fritter bread. I genuinely hope you love how moist and flavorful it turned out, especially with that sticky glaze on top. If you made this, please come back and leave me a rating—I read every single comment!
Let me know if you tried the lemon glaze swap or if you added nuts! If you need more inspiration for easy, reliable baking, check out my full collection of best dessert recipes. Happy baking, my friends, and enjoy that slice of cozy perfection!
If you tried Amelia’s version for comparison, I’d love to hear your thoughts over at her cinnamon swirl recipe too!
PrintEasy Amish Apple Fritter Bread with Cinnamon Swirl
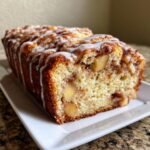
Bake this moist apple fritter bread featuring a cinnamon swirl and topped with a sweet vanilla glaze. It delivers the comforting flavor of a classic apple fritter in an easy loaf format, perfect for breakfast or dessert.
- Prep Time: 20 min
- Cook Time: 60 min
- Total Time: 80 min
- Yield: 1 loaf (about 10 servings) 1x
- Category: Quick Bread
- Method: Baking
- Cuisine: American
- Diet: Vegetarian
Ingredients
- 2 cups all-purpose flour
- 1 teaspoon baking soda
- 1/2 teaspoon salt
- 1 teaspoon ground cinnamon
- 1/2 cup unsalted butter, softened
- 1 cup granulated sugar
- 2 large eggs
- 1 teaspoon vanilla extract
- 1/2 cup milk
- 2 cups peeled and finely chopped apples (like Granny Smith or Honeycrisp)
- 1/2 cup brown sugar, packed
- 1 teaspoon ground cinnamon (for swirl)
- 1/2 cup powdered sugar (for glaze)
- 2 tablespoons milk or water (for glaze)
Instructions
- Preheat your oven to 350°F (175°C). Grease and flour a 9×5 inch loaf pan.
- In a medium bowl, whisk together the flour, baking soda, salt, and 1 teaspoon of cinnamon. Set aside.
- In a large bowl, cream together the softened butter and granulated sugar until light and fluffy.
- Beat in the eggs one at a time, then mix in the vanilla extract.
- Gradually add the dry ingredients to the wet ingredients, alternating with the milk, mixing just until combined. Do not overmix.
- In a separate small bowl, toss the chopped apples with the brown sugar and the second teaspoon of cinnamon until coated.
- Gently fold the cinnamon-apple mixture into the batter.
- Pour half of the batter into the prepared loaf pan. Sprinkle half of any remaining cinnamon-sugar mixture over the batter, if desired for an extra swirl.
- Spoon the remaining batter over the top.
- Bake for 50 to 60 minutes, or until a wooden skewer inserted into the center comes out clean.
- Let the bread cool in the pan for 10 minutes before turning it out onto a wire rack to cool completely.
- While the bread cools, prepare the glaze: Whisk together the powdered sugar and 2 tablespoons of milk or water until smooth. Add more liquid, a teaspoon at a time, if the glaze is too thick.
- Drizzle the vanilla glaze over the cooled bread before slicing and serving.
Notes
- Use firm, slightly tart apples for the best texture and flavor contrast against the sweet bread.
- For a bakery-style look, sprinkle a little coarse sugar on top before baking.
- This bread stays moist for several days when stored tightly wrapped at room temperature.
Nutrition
- Serving Size: 1 slice
- Calories: 350
- Sugar: 35g
- Sodium: 250mg
- Fat: 16g
- Saturated Fat: 9g
- Unsaturated Fat: 7g
- Trans Fat: 0g
- Carbohydrates: 50g
- Fiber: 2g
- Protein: 4g
- Cholesterol: 60mg