
The scent of warm cinnamon, sweet berries, and tart garden goodness is officially in the air! When spring hits and that beautiful, bright pink rhubarb floods the farmers’ markets, you absolutely have to make a crisp. Forget those fussy pies; I’m here to share what I wholeheartedly believe is the Best Rhubarb Crisp Recipe you will ever make. This one, which often includes my favorite partner-in-crime, sweet strawberries, is specifically designed to be foolproof. I’ve tested this rhubarb crisp dozens of times to ensure that even if you’re just dipping your toes into baking, you’ll get that perfect balance: jammy filling and a perfectly crunchy topping every single time.
- Why This Easy Rhubarb Crisp Recipe Works for Everyone
- Gathering Ingredients for Your Rhubarb Crisp Recipe
- Step-by-Step Instructions for the Best Rhubarb Crisp
- Baking Time and Temperature for Your Rhubarb Crisp
- Tips for Success with Your Homemade Rhubarb Dessert
- Serving Suggestions for Strawberry Rhubarb Crisp
- Storage and Reheating Instructions for Rhubarb Crisp
- Frequently Asked Questions About This Easy Rhubarb Crisp
- Rate and Share Your Rhubarb Crisp Experience
Why This Easy Rhubarb Crisp Recipe Works for Everyone
I get it—baking can feel intimidating! That’s why I designed this recipe to deliver huge comfort food payoff with minimal stress. Seriously, this recipe is all about user experience, and I wouldn’t share it if I hadn’t re-tested it until it was absolutely rock solid. You’re going to find that achieving incredible flavor and texture in a rhubarb crisp doesn’t require fancy equipment or complicated techniques.
- Beginner-Proof Texture: We nail the filling-to-topping ratio so you don’t end up with soup or cement.
- Reliable Results: I’ve tweaked the sugar and flour amounts until the filling sets beautifully—no more watery messes!
- Simple Customization: It works perfectly with just rhubarb, but throwing in those sweet summer strawberries is non-negotiable for me.
Achieving the Perfect Tart Rhubarb Filling
The balance in this rhubarb crisp is everything. Rhubarb screams PUCKERY, right? That’s why we use just the right amount of granulated sugar—enough to counteract that incredible tartness without making things sickly sweet. The gentle toss with a couple of tablespoons of flour is crucial. That little bit of flour absorbs the juices as they cook down, thickening them into that gorgeous, jammy base you want. Adding strawberries just softens the edge a little, creating a delightful sweet-tart symphony!
The Secret to a Crunchy Oat Topping Recipe
If you hate soggy topping, you are in the right place! The absolute key to a satisfying, golden, and crunchy experience is keeping that butter COLD. I mean, take it straight from the fridge and cube it right before it hits the flour and oats. When you cut that cold butter into the dry ingredients, you create little pockets. During baking, these pockets turn into crispy, buttery flakes instead of melting away into a greasy puddle. This methodical approach is what makes our Crunchy Oat Topping Recipe stay crisp, even the next day!
Gathering Ingredients for Your Rhubarb Crisp Recipe
Okay, let’s get our pantry organized! Before we even think about preheating the oven, we need to lay out everything exactly as listed. I’ve made sure this ingredient list is straightforward—no wild dashes to an obscure specialty store, I promise! Accuracy here is how we ensure that trademark Kate-approved texture. When you measure things this precisely for your rhubarb crisp recipe, you eliminate 90% of baking guesswork.
For the fruit filling, make sure your rhubarb is cut into consistent one-inch pieces—this helps them cook evenly! And remember, those strawberries should be hulled and halved, not chopped teeny-tiny. Then we move to the topping, where the butter must be very cold. If you use room temperature butter, you’ll end up with a paste, not a crisp topping. Trust me on that one; cold, cubed butter is non-negotiable for the texture we are aiming for here!
Ingredient Notes and Substitutions for a Classic Rhubarb Crisp
When it comes to creating the Classic Rhubarb Crisp, sometimes the produce isn’t perfect. If you can’t find fresh rhubarb, don’t stress! Frozen works beautifully, but you should add a few extra minutes to your bake time, and don’t thaw it first. Just toss it straight from the freezer into the bowl with the sugar. Another little trick I love for special occasions? That note about using browned butter in the topping instead of cold butter. It gives the whole thing this incredible nutty depth. It’s an extra tiny step, but wow, does it elevate the flavor profile here!
Step-by-Step Instructions for the Best Rhubarb Crisp
Since we’ve got our ingredients ready to go, let’s put this whole beautiful rhubarb crisp together. Remember that first step is always getting the oven ready! Preheat it to 375°F right away. Then, grab your 9-inch pie plate or square dish, give it a tiny grease job, and we are ready to mix. Don’t rush this part; method is what guarantees we get that amazing dessert we are craving.
Mixing the Tart Rhubarb Filling
In your biggest bowl—we want room to toss without spilling!—gently combine the cut rhubarb, your strawberries, the granulated sugar for the filling, the 2 tablespoons of flour, vanilla, and that little bit of cinnamon. You just want to toss this gently until everything looks evenly coated. Now, pour it into your prepared dish. Spread it out nice and flat so it bakes evenly. We aren’t building a cake here, just giving the fruit a good, even home!
Creating the Perfect Crunchy Oat Topping Recipe
This is where the magic happens for the texture. In a separate bowl, whisk together your topping dry goods first: the flour, oats, brown sugar, cinnamon, and salt. Now, add those cold cubes of butter we prepped earlier. You need to work that butter in! Use your fingertips—they are the best tool here—and quickly pinch and rub the butter into the dry mix. Stop the second it looks like coarse crumbs, maybe with a few bits the size of little peas. Please, please don’t overmix this! Overmixing turns your beautiful rhubarb crisp topping into dough, and we want crunchy freedom, not cakey disappointment!
Baking Time and Temperature for Your Rhubarb Crisp
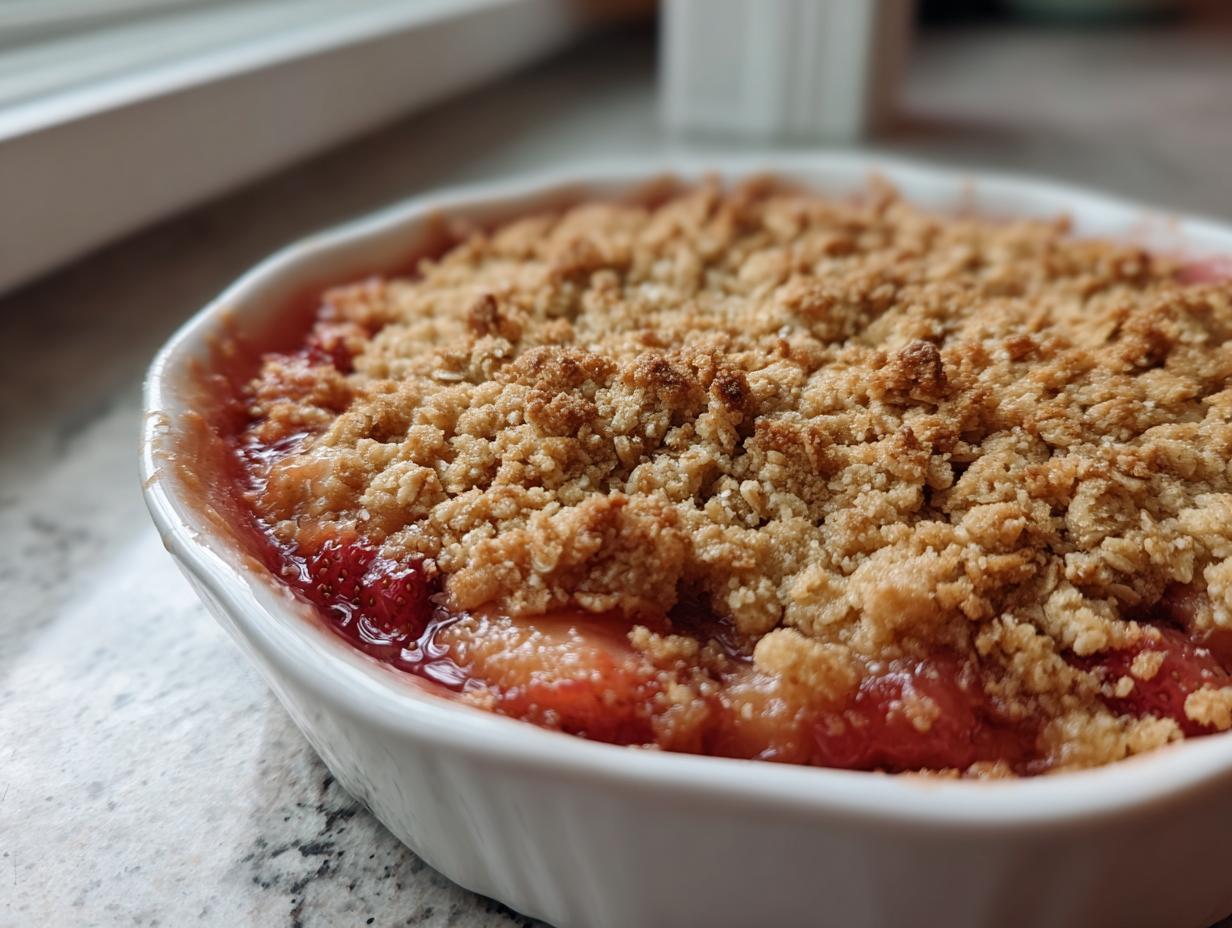
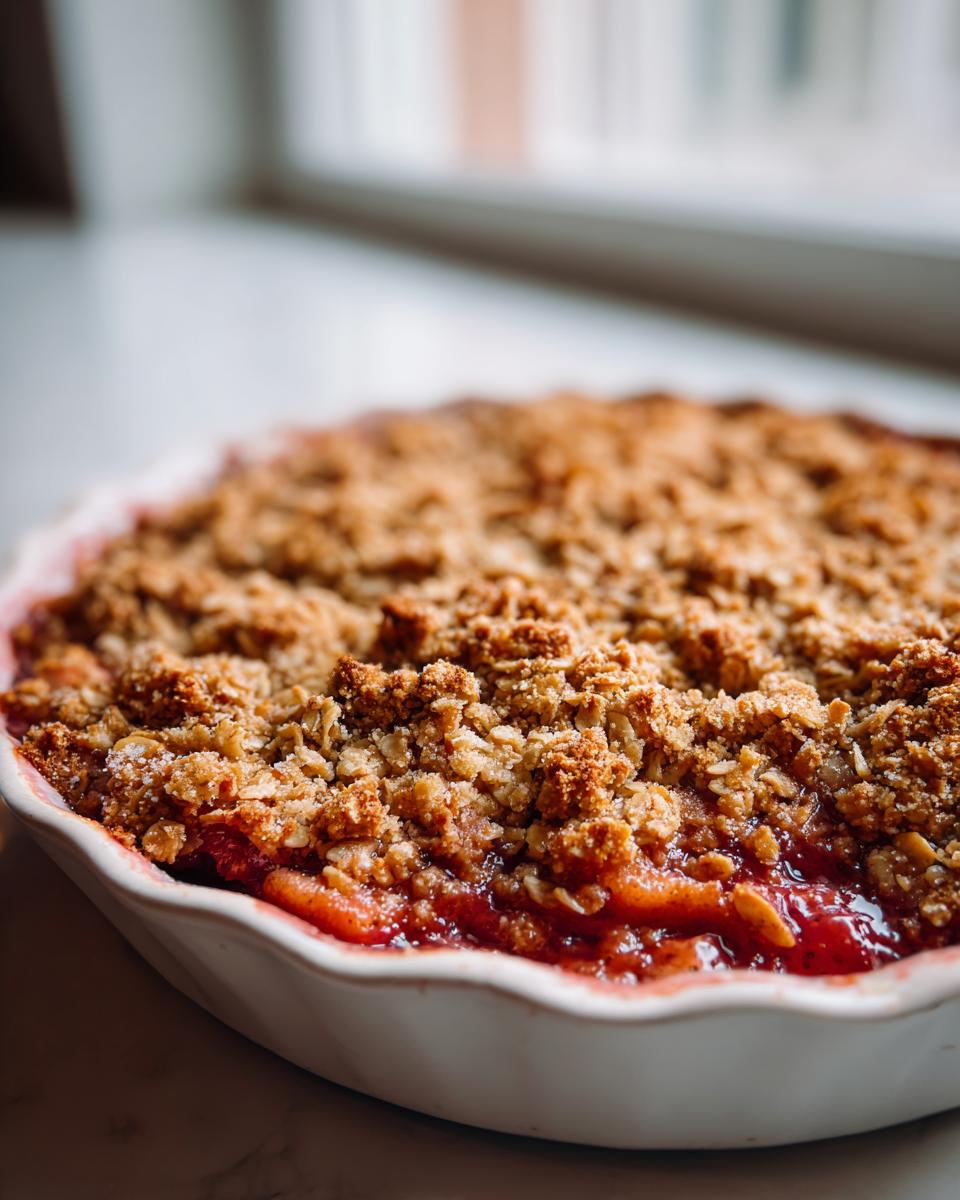
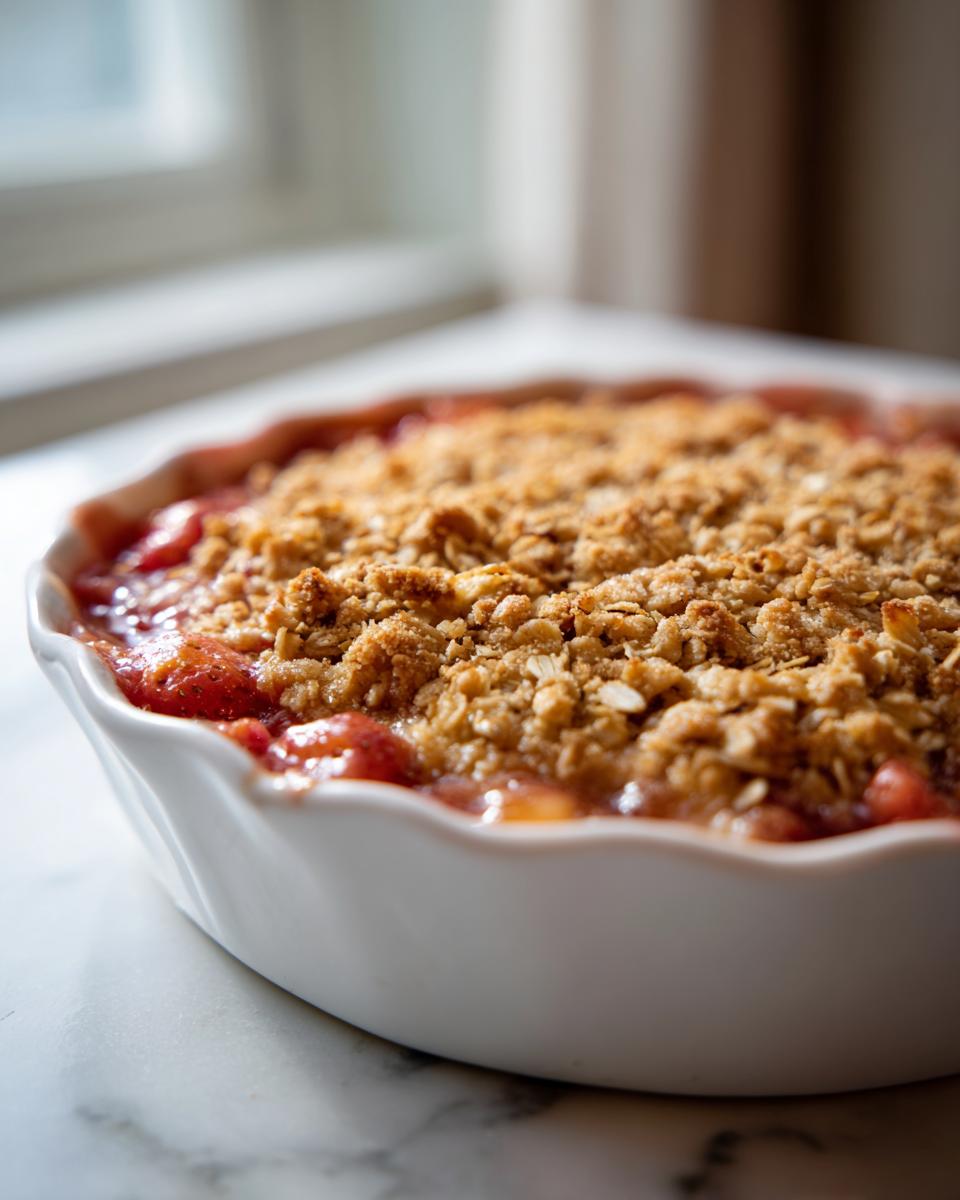
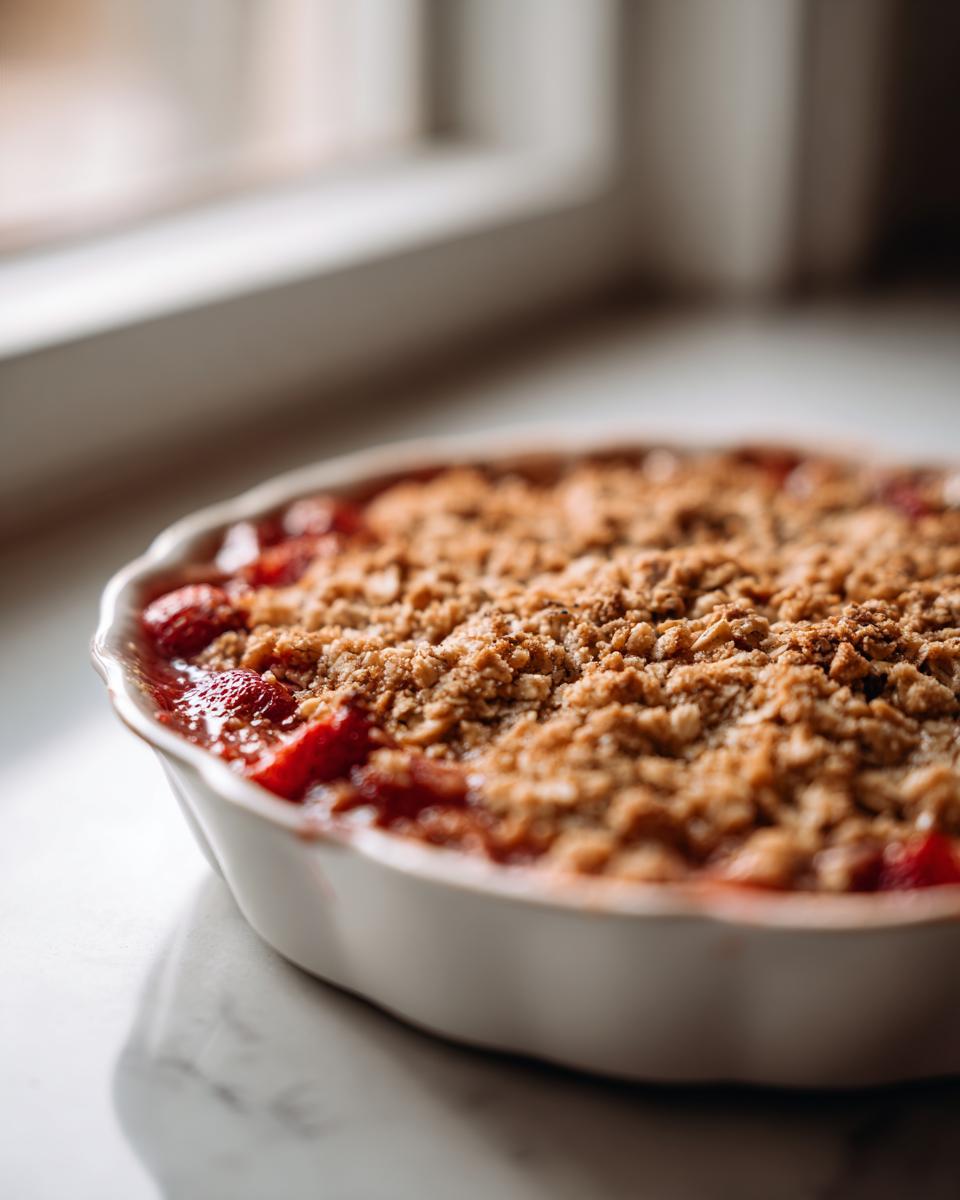
Now for the best part—watching it transform! We keep the oven steady at 375°F. Pop your dish onto a baking sheet first; this is a crucial move, especially with fruit desserts, because if the filling bubbles over (and it probably will!), it won’t make a horrible mess on the bottom of your oven. I bake this for about 40 to 50 minutes for a standard 9-inch dish.
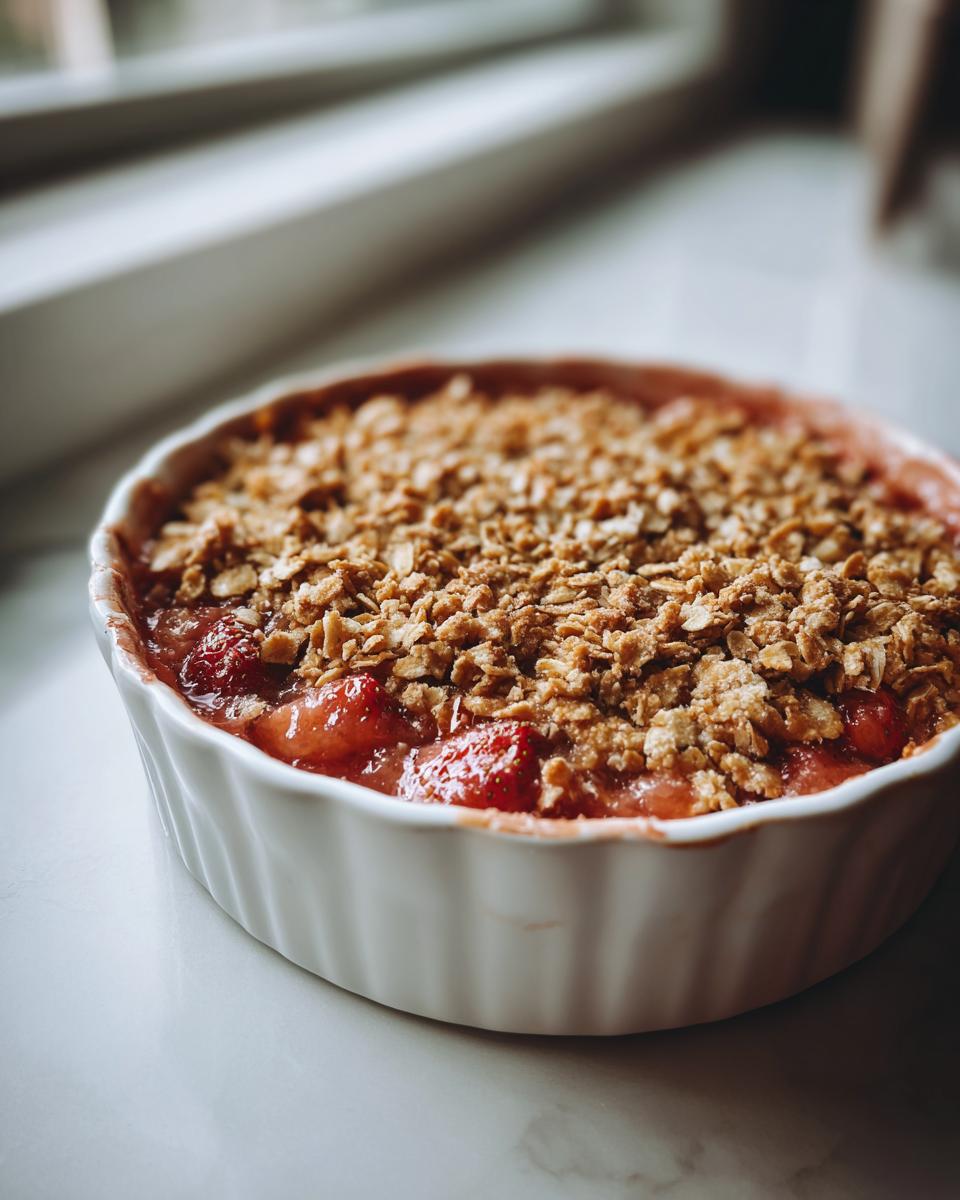
You’ll know your rhubarb crisp is done when that oat topping is beautifully golden brown—think toasted hazelnuts—and you can see the fruit filling bubbling up thick and luscious around the edges. If it looks dry, it’s underdone! We’re looking for happy, heavy bubbling. Let it rest for 20 minutes when it comes out; trust me, that time lets the filling set up just right so it doesn’t run everywhere when you scoop it.
Tips for Success with Your Homemade Rhubarb Dessert
Even though this is such an easy recipe, a couple of little pro-tips can really elevate your final product from “good” to “I need the recipe immediately!” moment. My main goal for you is to feel that huge surge of pride when you serve this. Since we are working with tart fruit, managing the sweetness is key to making the absolute best rhubarb crisp.
- For an extra layer of nutty, deep flavor, try melting your butter for the topping first, letting it cool until it’s just barely lukewarm, and then cutting it into the dry mix. That brown butter aroma is divine!
- If you use frozen fruit instead of fresh for your Homemade Rhubarb Dessert, skip thawing it first. Just toss it in frozen, which helps keep the filling from getting too watery.
- Don’t be shy about the cooling period! That mandatory 20 minutes on the counter before serving is non-negotiable. It’s the secret to a thick filling, rather than a runny sauce.
Serving Suggestions for Strawberry Rhubarb Crisp
You’ve done the hard work, now comes the best part: eating! The way you serve this crisp makes all the difference. My number one rule? It must be served warm. The contrast between that bubbling, slightly tart filling and a cold, melting topping is pure heaven. That’s why I always have a carton of good vanilla ice cream ready to go. If you made the full Strawberry Rhubarb Crisp, don’t forget a little sprinkle of cinnamon on top of the ice cream!
If you want something a bit lighter than ice cream, a big dollop of fresh, unsweetened whipped cream cuts through the sweetness perfectly. Honestly, sometimes I just eat leftovers straight from the fridge the next morning with a spoon. Don’t judge! It’s excellent that way too, though perhaps less decadent than eating it warm with a scoop of my famous chocolate chip cookies crumbled on top!
Storage and Reheating Instructions for Rhubarb Crisp
Okay, this rhubarb crisp is so good you might have leftovers—and that’s a wonderful problem to have! First rule: you absolutely must let it cool completely on the counter after baking. This lets that filling finish setting up, which keeps it from getting messy later. Once cooled, cover your dish tightly with foil or plastic wrap and pop it into the fridge. It stays perfectly delicious for about three or four days.
When you go to reheat it? Skip the microwave! Microwaving is the enemy of crispness, trust me. Pop your portion right back into a 350°F oven or toaster oven for about 10 minutes. That gives the topping the chance to re-crisp beautifully. If you like it extra gooey, serve it warm with a scoop of ice cream—it’s the ultimate late-night snack!
Frequently Asked Questions About This Easy Rhubarb Crisp
I know you might have a few last-minute questions before you dive in, especially if this is your first time making a rhubarb crisp! That’s totally normal. I want you to feel completely equipped to tackle this delightful Beginner Baking Dessert and make it your own signature Summer Crisp Recipe.
Can I make this Strawberry Rhubarb Crisp ahead of time?
Yes, you absolutely can! For the best results with that golden topping, I always recommend assembling the crisp—filling in the dish, topping sprinkled on top—wrapping it tightly, and refrigerating it for up to 24 hours. When you are ready to bake it, just add 5 to 10 minutes to the bake time since the ingredients start cold. Don’t bake it ahead and try to reheat it later; the topping will get soggy! We are aiming for maximum crunch!
What is the best way to cut rhubarb for a crisp?
Keep those pieces uniform! You want the rhubarb to cook down into that beautiful, tender, jammy texture without turning into complete mush. I always aim for pieces that are about one inch long. If they are too small, they disintegrate too fast; too large, and you get awkward, undercooked chunks. Snapping them into roughly one-inch pieces ensures every scoop has that perfect texture!
I only have rhubarb and no strawberries. Will this still be good?
Oh, certainly! This is why it’s so great—it works perfectly with just rhubarb for that intense tart flavor that defines a Classic Rhubarb Crisp. If you do only use rhubarb, I find it helps to increase the filling sugar slightly, maybe by an extra tablespoon or two, just to balance out the extra sourness you’ll get. It’s still going to be a phenomenal Comfort Food Crisp.
Rate and Share Your Rhubarb Crisp Experience
Now that you have spent some quality time making this incredible, easy rhubarb crisp, I desperately want to hear about it! My whole mission here at Kings Cook is to help folks like you feel successful and joyful in the kitchen, and seeing your results really makes my day.
If this recipe brought a little sunshine to your table this spring or summer, please take two seconds to click those stars right down below and leave a rating. Those reviews are gold! They show other nervous bakers that they absolutely can tackle this delightful homemade rhubarb dessert and win. I read every single one, and they help me keep refining my techniques for you all!
And if you happened to take a gorgeous photo of that bubbling filling peeking out under that crunchy oat topping, tag me on social media! I absolutely love seeing the delicious outcomes from my readers. Tagging me lets me see how you served it—maybe with ice cream, maybe with whipped cream, or maybe you’re already planning what to serve with your next batch. Can’t wait to see your crisp creations!
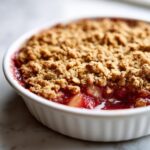
PrintEasy Strawberry Rhubarb Crisp with Crunchy Oat Topping
This recipe delivers a perfect blend of sweet strawberries and tart rhubarb under a buttery, crunchy oat topping. It is a reliable, easy-to-follow dessert ideal for beginners and a great way to use fresh spring fruit.
- Prep Time: 15 min
- Cook Time: 50 min
- Total Time: 65 min
- Yield: 6 servings 1x
- Category: Dessert
- Method: Baking
- Cuisine: American
- Diet: Vegetarian
Ingredients
- 4 cups fresh rhubarb, cut into 1-inch pieces
- 2 cups fresh strawberries, hulled and halved
- 3/4 cup granulated sugar (for filling)
- 2 tablespoons all-purpose flour
- 1 teaspoon vanilla extract
- 1/2 teaspoon ground cinnamon (for filling)
- 1 cup all-purpose flour (for topping)
- 1 cup rolled oats
- 3/4 cup packed light brown sugar (for topping)
- 1/2 teaspoon ground cinnamon (for topping)
- 1/4 teaspoon salt
- 1/2 cup (1 stick) cold unsalted butter, cut into small pieces
Instructions
- Preheat your oven to 375 degrees Fahrenheit. Lightly grease a 9-inch pie dish or an 8×8 inch baking pan.
- Prepare the filling: In a large bowl, gently combine the cut rhubarb, strawberries, 3/4 cup granulated sugar, 2 tablespoons flour, vanilla extract, and 1/2 teaspoon cinnamon. Mix until the fruit is evenly coated. Pour this mixture into your prepared baking dish and spread it into an even layer.
- Prepare the topping: In a separate medium bowl, whisk together the 1 cup flour, rolled oats, 3/4 cup brown sugar, 1/2 teaspoon cinnamon, and salt.
- Cut in the butter: Add the cold, cubed butter to the dry topping mixture. Use your fingertips or a pastry blender to cut the butter into the dry ingredients until the mixture resembles coarse crumbs with some pea-sized pieces remaining. Do not overmix.
- Assemble the crisp: Sprinkle the oat topping evenly over the fruit filling in the baking dish. Press down lightly.
- Bake the crisp: Place the dish on a baking sheet (to catch any potential drips) and bake for 40 to 50 minutes. The topping should be golden brown, and the fruit filling should be bubbling thickly around the edges.
- Cool: Remove the crisp from the oven and let it cool on a wire rack for at least 20 minutes before serving. This allows the filling to set properly.
Notes
- For an elevated flavor, substitute the cold butter in the topping with browned butter. Cool the browned butter slightly before cutting it into the dry ingredients.
- Serve this warm rhubarb crisp with a scoop of vanilla ice cream or a dollop of fresh whipped cream for the best experience.
- If your rhubarb is very tart, you may increase the filling sugar to 1 cup.
Nutrition
- Serving Size: 1 serving
- Calories: 380
- Sugar: 35g
- Sodium: 120mg
- Fat: 18g
- Saturated Fat: 11g
- Unsaturated Fat: 7g
- Trans Fat: 0g
- Carbohydrates: 55g
- Fiber: 5g
- Protein: 5g
- Cholesterol: 45mg