
When the air gets crisp outside and you just want to curl up with something truly soul-warming, you know it’s time for some serious cozy autumn baking. I always look for that one dessert that screams ‘holiday season’ without being fussy, and trust me, friends, I’ve finally nailed it. We’re taking everything we adore about spicy gingerbread—that punch of ginger and cinnamon—and marrying it perfectly with the rich, dark depth of a strong coffee.
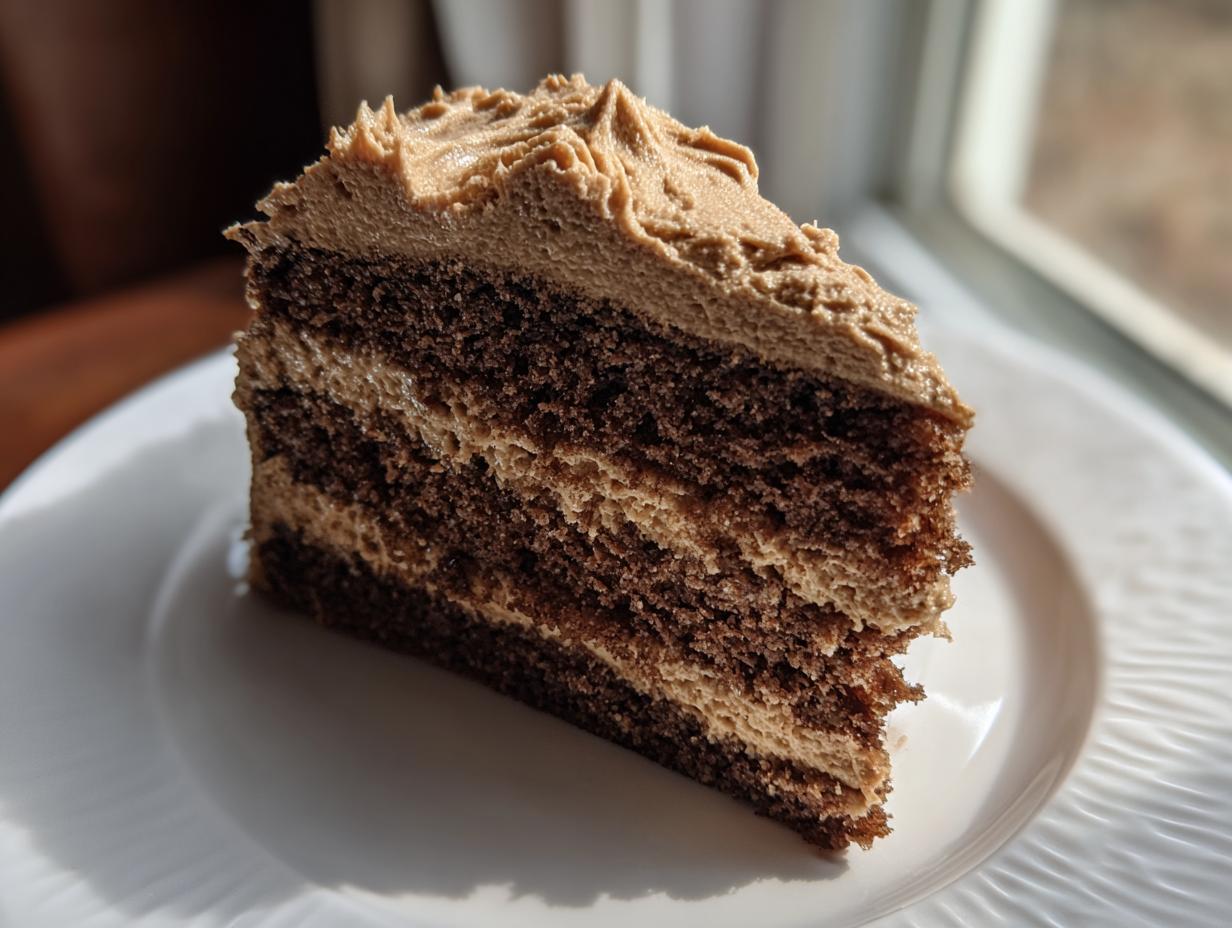
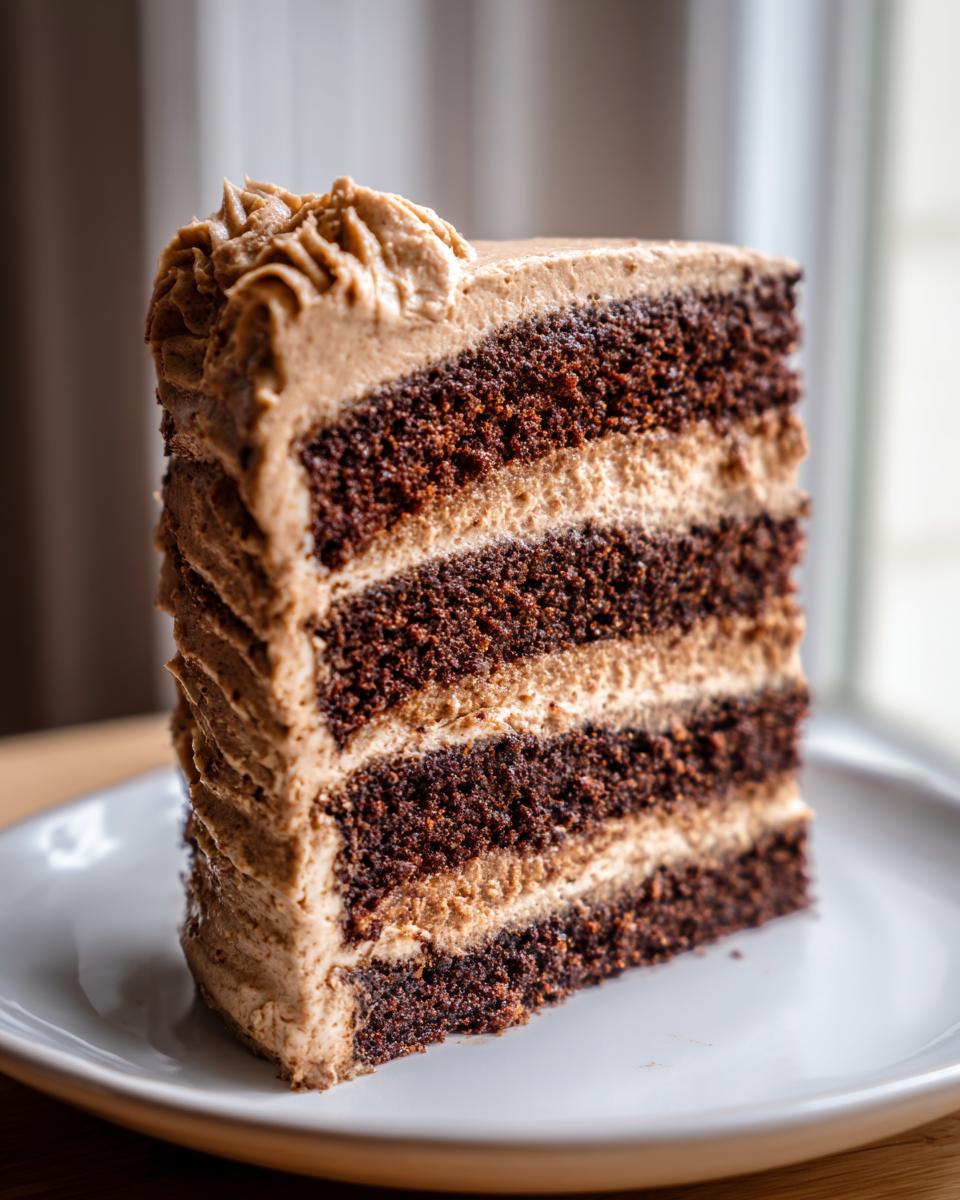
What you get is the ultimate festive fusion: the gingerbread latte cake. This isn’t just another pretty cake; it’s a showstopper holiday dessert that actually tastes as good as it looks. When I first tasted the combination of molasses-rich cake and bright espresso buttercream, I knew this recipe was going straight to the top of my ‘must-bake-every-year’ list. It’s comforting, it’s exciting, and it’s guaranteed to make your kitchen smell incredible.
I really believe that the holiday season is when we all deserve to feel like royalty in our own kitchens, and this cake is going to make you feel exactly that way. Let’s get started on this incredible festive coffee dessert!
- Why This Gingerbread Latte Cake is Your New Favorite Holiday Baking Idea
- Essential Ingredients for Your Gingerbread Latte Cake
- Step-by-Step Instructions for the Gingerbread Latte Cake
- Expert Tips for a Perfect Gingerbread with Espresso
- Variations on the Classic Gingerbread Latte Cake
- Storage and Serving Suggestions for Your Gingerbread Latte Cake
- Frequently Asked Questions About the Gingerbread Latte Cake Recipe
- Nutritional Estimates for This Festive Coffee Dessert
- Share Your Showstopper Holiday Dessert Creation
Why This Gingerbread Latte Cake is Your New Favorite Holiday Baking Idea
Listen, I’ve tested so many spiced cakes, and this one is hands-down the winner. Why? Because it manages that impossible balancing act: it’s intensely flavorful from the ginger and coffee, but somehow stays incredibly moist. This isn’t some dry crumbly mess you need three cups of coffee to swallow—it’s a true Moist Gingerbread Recipe.
It looks like a million bucks on the table, making it the perfect Showstopper Holiday Dessert for any gathering, but the process itself is totally manageable using simple pantry staples. If you’re looking for a new Christmas coffee treat that wow’s people, this is it. If you love this kind of cozy baking, make sure you check out my full list of best dessert recipes!
Achieving the Perfect Moist Gingerbread Recipe Texture
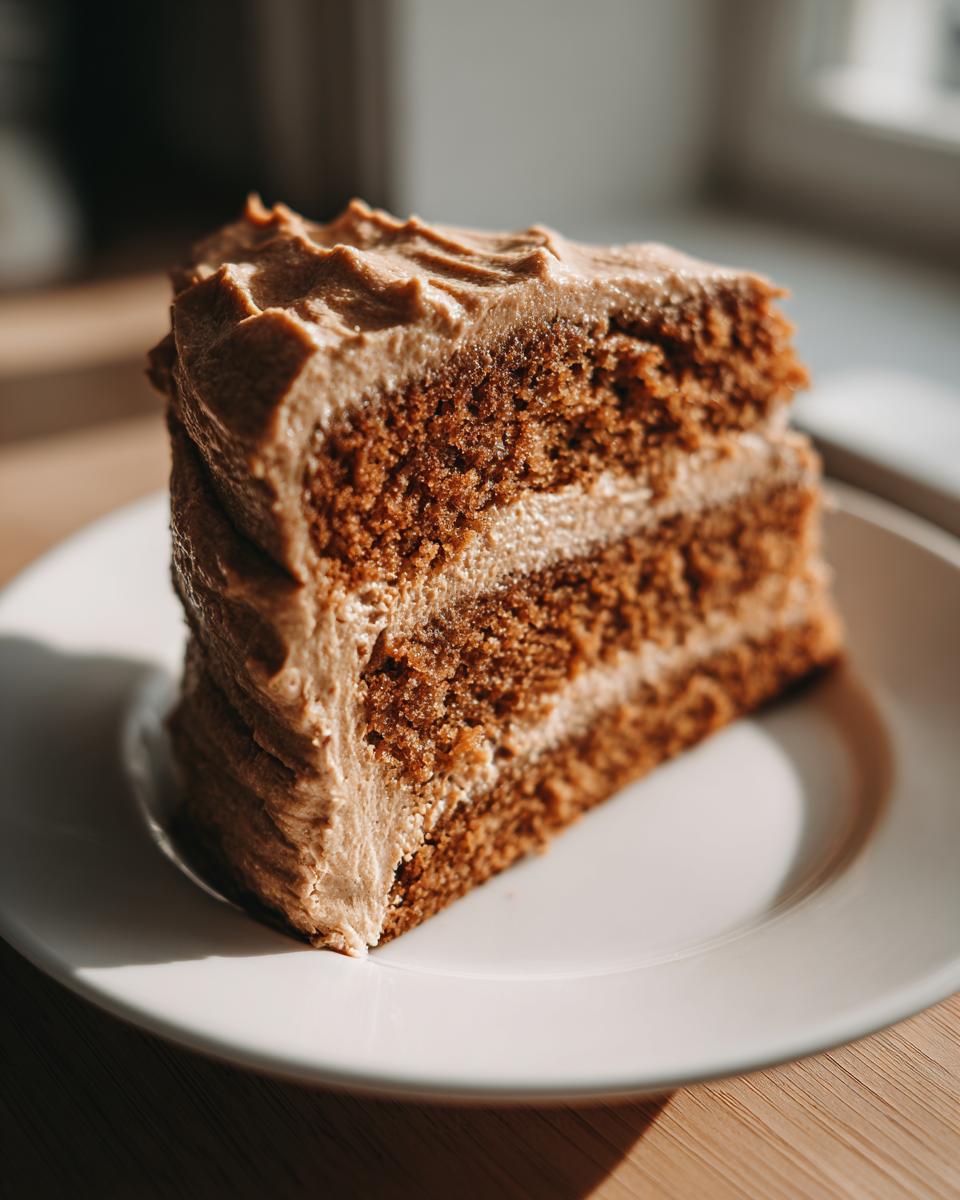
If you ask me, the secret to this amazing texture isn’t just the molasses, even though that adds a fantastic depth of flavor and tenderness. It’s also about the buttermilk and the strong brewed coffee we use in the batter! I spent weeks tweaking ratios to make sure the cake layers bake up plush and soft, not heavy.
I’ve rigorously tested this specific combination of wet ingredients against simpler versions, and I can promise you, the slight tang from the buttermilk reacts beautifully with the brown sugar and molasses. It keeps your gingerbread layers so soft you almost don’t need frosting—but trust me, you definitely want the frosting!
Essential Ingredients for Your Gingerbread Latte Cake
Alright, let’s talk about what goes into making this incredible cake. Great baking always starts with quality ingredients, and for this spiced winter baking masterpiece, you want to make sure you have everything measured out before you even turn on the mixer. Having your espresso strong and your molasses handy makes all the difference!
For the Spiced Gingerbread Cake Layers
These ingredients yield two gorgeous, spice-filled layers. Don’t let the list scare you; it’s just your usual suspects for baking, plus that dark brown sugar which is key for flavor depth.
- 1 3/4 cups all-purpose flour
- 1 3/4 teaspoons baking soda
- 1 teaspoon ground ginger
- 1 teaspoon ground cinnamon
- 1/2 teaspoon ground nutmeg
- 1/2 teaspoon salt
- 1/2 cup (1 stick) unsalted butter, softened
- 3/4 cup packed dark brown sugar
- 1/2 cup granulated sugar
- 2 large eggs
- 1/2 cup unsulfured molasses
- 1/2 cup buttermilk
- 1/4 cup strong brewed coffee, cooled
- 1 teaspoon vanilla extract
- 1 cup powdered sugar (for coffee soak)
- 2 tablespoons strong brewed coffee, hot (for coffee soak)
For the Espresso Buttercream Frosting
This buttercream is what really takes the cake over the top, giving you that lovely latte flavor profile! Make sure your butter is soft—not melted, just ready to go—and that your espresso is fully cooled so it doesn’t melt all your hard work when you mix it in.
- 1 1/2 cups (3 sticks) unsalted butter, softened
- 4 cups powdered sugar, sifted
- 1/4 cup strong brewed espresso or coffee, cooled
- 1 teaspoon vanilla extract
- Pinch of salt
Step-by-Step Instructions for the Gingerbread Latte Cake
Okay, taking this showstopper holiday dessert from grocery list to glorious centerpiece requires a little bit of focus, but I promise you it’s worth every minute. Remember, we aren’t just throwing things in a bowl here; we’re building flavor layer by layer! If you ever need a refresher on simple mixing techniques for other bakes, check out my guide to apple cinnamon muffins for some tips on creaming.
Preparing the Cake Batter and Baking the Gingerbread Latte Cake
First things first: set your oven to 350°F (175°C) and get those 8-inch cake pans greased and floured. We need them ready to go!
In a medium bowl, you’re going to whisk together all your dry ingredients: the flour, baking soda, ginger, cinnamon, and salt. Give that a good mix and set it aside so it’s ready for its partnership with the wet stuff.
Now for the big bowl! Beat your softened butter, dark brown sugar, and granulated sugar together until they look light and fluffy—you want that air incorporated, so don’t rush this part! Then, add your two eggs, one at a time, incorporating each fully before adding the next. Stir in the molasses; it’s going to look thick, that’s perfect.
In a smaller bowl, whisk your buttermilk, the cooled coffee, and vanilla extract together. This cooled coffee step is non-negotiable, trust me, hot coffee will mess with the batter structure!
Here is where you need to pay attention! Start adding your dry mixture to the wet mixture in stages, alternating with your buttermilk mixture. The rule is always start and end with the dry stuff. Mix slowly—just until everything is *just* combined. If you see a few little streaks of flour, seriously, stop mixing! Overmixing this batter is how you end up with tough cake, and we want soft gingerbread.
Divide that beautiful batter evenly between your two prepared pans and pop them into the oven for about 30 to 35 minutes. Always test with a wooden pick inserted in the center; when it comes out clean, they are done!
Creating the Coffee Soak and Cooling
This step is one of the reasons people rave about how moist the final product is. While those warm cakes are cooling in the pans for about ten minutes, you need to whip up the soak.
In a small bowl, whisk that cup of powdered sugar with the two tablespoons of piping hot coffee until it’s totally smooth. It’s a very intense, sugary syrup. As soon as the cakes have cooled slightly in the pan, flip them out onto a wire rack. Using a skewer or an old fork, poke holes all over the tops of both warm layers. Then, take a pastry brush and gently brush that entire coffee soak over both cakes. Let them cool completely before you even think about frosting them! Patience pays off here.
Assembling the Espresso Buttercream for Your Gingerbread Latte Cake
While the layers are cooling—and this is where you can whip this up ahead of time—let’s make that amazing espresso buttercream. Beat your softened butter until it’s nice and creamy. Now, slowly start adding the sifted powdered sugar. This is messy, so I usually start on the lowest setting until it’s incorporated.
Once the sugar is mixed in, it’s time for the coffee magic! Beat in your cooled espresso or coffee, vanilla, and that tiny pinch of salt. Keep mixing until the frosting gets lovely and fluffy. If you feel like it’s too soft—maybe your kitchen is a bit warm—just whisk in a tiny bit more sifted powdered sugar until you get a consistency that holds a nice stiff peak. I promise you, this espresso buttercream is what clinches the whole gingerbread latte cake experience!
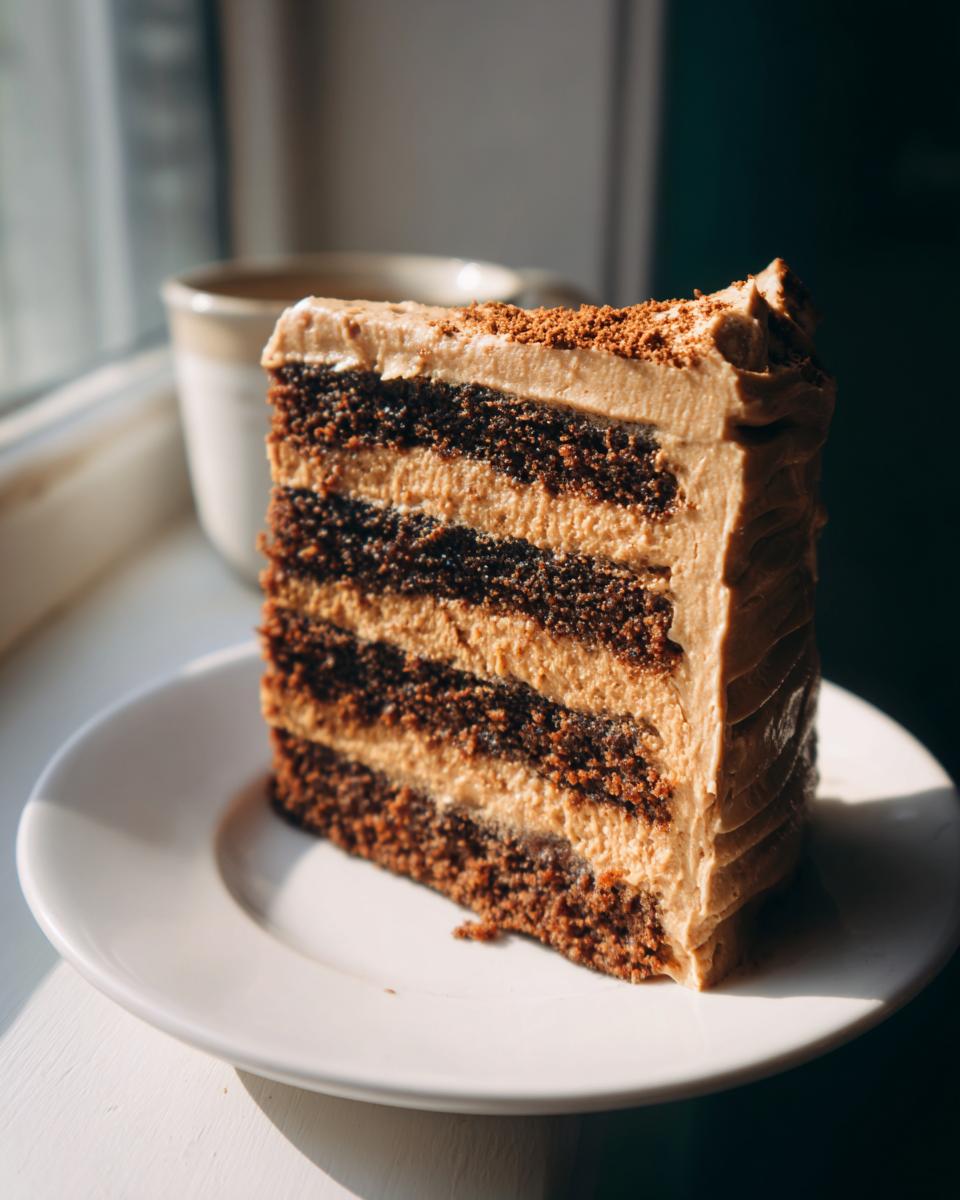
Finally, layer them up! Put one cake down, use about a third of the frosting on top, place the second layer on, and then cover the rest of the cake—top and sides—with the remaining frosting. Don’t forget to chill it for at least 30 minutes before slicing for those clean, beautiful edges. You can find more insider tips for making layered cakes look professional at places like this reference.
Expert Tips for a Perfect Gingerbread with Espresso
Now that you have the core recipe down, I want to share a few things I’ve learned over testing batches of this cake that really elevate it from “great” to “call-your-mother-and-tell-her-to-come-over” status. Getting the flavors right is crucial, especially when combining something as bold as gingerbread spice with dark coffee. These little details are what make this recipe special for your Festive Coffee Desserts.
Selecting the Best Coffee for Your Latte Flavored Dessert
When it comes to the coffee element, please, please, use the strongest brew you possibly can. We aren’t just adding a little background note here; we want that robust flavor to stand up to all that ginger and molasses! If you have an espresso machine, use that freshly pulled shot. If not, I suggest using a French press or even just making a highly concentrated drip brew. You really want that intense coffee flavor to shine through in both the cake soak and the buttercream.
Remember the difference between the hot and cooled coffee in the recipe? That matters! The hot coffee is used specifically in the soak (mixed with powdered sugar) because heat helps that sugar dissolve instantly into a thin glaze. But for the cake batter and the frosting, the coffee *must* be cooled down. If you pour hot coffee into your blended batter or your butter-and-sugar frosting, you’ll essentially be cooking the structure right out of it, and nobody wants a soupy mess! This balance between hot and cool coffee liquids is key when making Gingerbread with Espresso.
To get even more consistent results, you might want to check out my tips for making perfect cinnamon rolls—a lot of the timing and temperature control principles carry over when you’re dealing with sticky spice doughs and buttercreams.
Tips for Layer Cake Assembly and Frosting Application
The final step, the assembly, is where you transform the baked layers into that gorgeous centerpiece. My biggest piece of advice here relates directly back to Step 14 of the recipe: always chill the finished, frosted cake for a solid 30 minutes before you try slicing into it.
Why? Because the espresso buttercream is richly buttery. If you cut it warm or at room temperature, all that fluffy butter is soft, and the layers will slide around like they’re having a skating party! Chilling firms up the frosting just enough so you can get those picture-perfect, clean slices you want for your holiday guests. If your layers baked slightly domed, don’t stress! Just use a long serrated knife to gently slice off the dome tops once they are completely cool. Leveling them ensures that tower of spiced goodness stands straight and true!
For more inspiration on achieving that professional look, I always point people toward resources like this article which has some great decorating ideas for festive bakes.
Variations on the Classic Gingerbread Latte Cake
I love that this recipe is so foundational, it begs for little tweaks based on what you might have ingredients-wise, or just what flavor profile you are craving that day! While the espresso buttercream is fantastic—rich and coffee-forward—sometimes you just want the spices to dominate, or maybe you prefer a little tang with your sweetness. This is where we get into some fun Winter Warm Drinks Inspired Baking adaptations!
When I’m making this for an office party versus a quiet weekend retreat, I change the frosting. Both result in a phenomenal Homemade Spiced Cake, but they offer completely different vibes. Don’t be afraid to play around once you’ve mastered the base cake recipe; it’s super forgiving!
Making a Cream Cheese Frosting Cakes Version of the Gingerbread Latte Cake
If you’re anything like me and love a little bit of tang to cut through the richness of molasses and sugar, then I highly recommend swapping out that espresso buttercream for a classic cream cheese frosting. It works so beautifully with the warm gingerbread spices!
The notes section in the recipe gives you the hint: you can substitute half of the butter required for the frosting with 8 ounces of softened cream cheese. That gives you a beautiful, slightly tangy finish that pairs incredibly well with the spiced cake layers. It’s less intensely coffee-flavored, letting the ginger and cinnamon shout a little louder, but it still keeps that lovely creamy texture we want!
If you want a super easy transition, you can use the exact same technique we used for the buttercream; just swap the butter portion with cream cheese. You might need to add a touch more sifted powdered sugar, or maybe even a extra tablespoon of cooled coffee if you still want a whisper of espresso in your gingerbread latte cake frosting. Honestly, both versions are winners, but the cream cheese one feels extra comforting!
For more inspiration on adapting classic spice cakes, you should take a look at my tips for my super moist carrot cake—the ingredient swaps I use there can often translate well into spice cake variations, too! And if you want to see how another baker approached this flavor profile, check out this reference here.
Storage and Serving Suggestions for Your Gingerbread Latte Cake
Once you manage to cut that first perfect slice of your gingerbread latte cake, you’ll want to make sure leftovers last long enough for seconds the next day! Generally speaking, an unfrosted layer cake lasts longer, but since this beauty is covered in that luscious espresso buttercream, we need to treat it right.
If you’re not serving it all up right away, keep the whole cake stored tightly covered at cool room temperature for up to two days. If your kitchen tends to run warm, or if it’s more than two days, it’s safer to pop it in the fridge. Buttercream-frosted cakes do great in the fridge, but make sure you allow it to rest on the counter for about 30 to 45 minutes before serving. You want that butter to soften up just a bit so the cake isn’t too firm!
If you happen to have leftover layers that aren’t frosted yet, wrap each cooled layer individually and tightly in plastic wrap, maybe even tucking them into a resealable bag, and they will hang out on the counter for a day or stay perfectly good in the fridge for nearly a week. Then you can assemble these wonderful Holiday Layer Cakes whenever you feel like having a slice!
When serving this rich, spiced delight, I find that simple pairings work best. It’s already got coffee built right in, so usually a glass of cold milk works just fine for the kids. For an adult pairing, you can’t beat serving a slice alongside a mug of hot apple cider or just a simple, plain black cup of coffee—let the cake be the star of the show!
If you’re looking for other comforting, classic desserts to round out your holiday spread, be sure to check out my recipe for the best apple pie. It’s another tried-and-true favorite around my house!
Frequently Asked Questions About the Gingerbread Latte Cake Recipe
It’s totally normal to have questions when you’re tackling a new big centerpiece dessert like this! I get so many questions about timing and ingredient swaps, so I pulled the best ones here for you. If you’ve looked around the site and still have questions about my baking philosophy, feel free to check out my About Page!
Can I make the Gingerbread Latte Cake ahead of time?
Yes, you absolutely can prep ahead, which is a lifesaver during the holidays, right? The cake layers themselves are fantastic for this. Once they are completely cool (especially after soaking up that coffee glaze!), just wrap each layer super tightly in plastic wrap and keep them at room temperature for a day, or even in the fridge for up to three days. If they’re going into the fridge, wrap them in foil too!
However, here’s the key: I strongly recommend you frost and assemble the entire gingerbread latte cake on the day you plan to serve it. The espresso buttercream is quite soft, and assembling too far ahead can make the sides look a little clumsy or start to soak strangely into the cake. Don’t worry, though! A quick 30-minute chill after frosting is all you need for those clean cutting lines.
What is the best substitute for buttermilk in this cake?
Buttermilk is great because it tenderizes the cake, but I know it’s not always in everyone’s fridge. Don’t panic! You can easily make your own substitute just using regular milk. For the amount called for in this recipe (1/2 cup), just take 1/2 cup of regular milk—whole milk works best—and stir in about a half tablespoon of white vinegar or fresh lemon juice. Give it a quick stir, let it sit on the counter for about five to ten minutes until it looks slightly curdled, and it’s ready to use just like true buttermilk! It gives you that necessary acidic kick to interact with the baking soda.
How do I ensure my Espresso Coffee Cake layers are perfectly level?
I mentioned this briefly in the tips section, but it’s worth repeating because presentation matters for a showstopper! The best way to prevent doming is by using specialized cake strips—those padded strips you wrap around your pan and moisten. They insulate the outside of the pan so the batter bakes more evenly from edge to center. If you don’t have those, I always recommend leveling immediately after the cakes have cooled completely on the rack.
Use a long, sharp serrated knife (like a bread knife) held *absolutely* parallel to your counter. Gently saw off any domes until the top is flat. You can save those little trimmed-off cake bits for a snack while cleaning up! For more guidance on professional assembly and leveling, you can check out this helpful resource.
Nutritional Estimates for This Festive Coffee Dessert
Now, I know most of us aren’t reaching for a dessert recipe based on its numbers, especially during the holidays when we should just be enjoying ourselves! But for those of you who like to keep track, I’ve put together the general nutritional estimate based on the ingredients we used.
Just remember, this is a showstopper cake, meaning it’s rich in butter, sugar, and molasses, so these estimates are definitely for a slice enjoyed as a treat, not an everyday snack. Also, flavor matters most to me, so these are just ballpark figures; your actual numbers might vary based on the exact brands of butter or sugar you use. Don’t forget to try my classic apple pie next time if you want something equally comforting!
- Serving Size: 1 slice
- Calories: 450
- Sugar: 65g
- Sodium: 300mg
- Fat: 20g
- Saturated Fat: 12g
- Trans Fat: 0.5g
- Carbohydrates: 68g
- Fiber: 1g
- Protein: 4g
- Cholesterol: 75mg
See? Definitely a treat for your festive coffee dessert spread. If you want to lighten it up, you could definitely use a lighter butter substitute in the frosting, but honestly, I find the full-fat butter gives the best texture. Enjoy it with a clear conscience, because you absolutely deserve this cozy slice!
Share Your Showstopper Holiday Dessert Creation
And there you have it! We’ve gone from simple spices and coffee grounds to creating one of the most stunning and satisfying holiday bakes out there. I truly hope this gingerbread latte cake becomes a staple in your kitchen for years to come.
Now that you’ve pulled off this incredible feat, I want to know all about it! Cooking is fun, but showing off your hard work is the best part, right? If you loved how moist and flavorful this cake turned out, please head back up and give the recipe a solid 5-star rating. It helps other home cooks feel confident giving it a try!
I absolutely live to see what you all create, so please snap a few pictures of your finished beautiful cake—whether you kept the espresso buttercream or used that tangy cream cheese frosting—and tag me on social media.
If you have any last-minute questions while you’re putting the finishing touches on your masterpiece, don’t hesitate to reach out via my contact page. I’m always here to help you master your kitchen!
Happy baking, and enjoy every single cozy, coffee-spiced bite!
PrintGingerbread Latte Layer Cake with Espresso Buttercream Frosting
You will make a moist Gingerbread Latte Layer Cake featuring warm holiday spices and rich coffee flavor, topped with a smooth espresso buttercream. This showstopper holiday dessert combines the best of gingerbread and your favorite latte.
- Prep Time: 30 min
- Cook Time: 35 min
- Total Time: 65 min
- Yield: 10 servings 1x
- Category: Dessert
- Method: Baking
- Cuisine: American
- Diet: Vegetarian
Ingredients
- 1 3/4 cups all-purpose flour
- 1 3/4 teaspoons baking soda
- 1 teaspoon ground ginger
- 1 teaspoon ground cinnamon
- 1/2 teaspoon ground nutmeg
- 1/2 teaspoon salt
- 1/2 cup (1 stick) unsalted butter, softened
- 3/4 cup packed dark brown sugar
- 1/2 cup granulated sugar
- 2 large eggs
- 1/2 cup unsulfured molasses
- 1/2 cup buttermilk
- 1/4 cup strong brewed coffee, cooled
- 1 teaspoon vanilla extract
- 1 cup powdered sugar (for coffee soak)
- 2 tablespoons strong brewed coffee, hot (for coffee soak)
- 1 1/2 cups (3 sticks) unsalted butter, softened (for frosting)
- 4 cups powdered sugar, sifted (for frosting)
- 1/4 cup strong brewed espresso or coffee, cooled (for frosting)
- 1 teaspoon vanilla extract (for frosting)
- Pinch of salt (for frosting)
Instructions
- Preheat your oven to 350°F (175°C). Grease and flour two 8-inch round cake pans.
- In a medium bowl, whisk together the flour, baking soda, ginger, cinnamon, nutmeg, and salt. Set this dry mixture aside.
- In a large bowl, beat the softened butter, brown sugar, and granulated sugar with an electric mixer until light and fluffy, about 3 minutes.
- Beat in the eggs one at a time, mixing well after each addition. Stir in the molasses.
- In a separate small bowl, whisk together the buttermilk, cooled coffee, and vanilla extract.
- Gradually add the dry ingredients to the wet ingredients, alternating with the buttermilk mixture, beginning and ending with the dry ingredients. Mix until just combined; do not overmix.
- Divide the batter evenly between the prepared cake pans. Bake for 30 to 35 minutes, or until a wooden pick inserted into the center comes out clean.
- While the cakes cool slightly in the pans for 10 minutes, prepare the coffee soak: Whisk the powdered sugar and hot coffee together until smooth.
- Remove the cakes from the pans and place them on a wire rack. Poke holes all over the tops of the warm cakes using a skewer or fork. Brush the hot coffee soak evenly over both cake layers. Let the cakes cool completely on the rack.
- To make the espresso buttercream, beat the softened butter until creamy. Gradually add the sifted powdered sugar, beating until smooth.
- Beat in the cooled espresso, vanilla extract, and salt until the frosting is light and fluffy. Add more powdered sugar if you need a stiffer consistency.
- Place one cooled cake layer on your serving plate. Spread about one-third of the frosting evenly over the top. Place the second layer on top.
- Frost the top and sides of the entire cake with the remaining espresso buttercream.
- Chill the cake for at least 30 minutes before slicing for the cleanest cuts.
Notes
- For an extra coffee kick in the cake layers, replace the 1/4 cup cooled coffee in the batter with 1/4 cup of strongly brewed espresso.
- If you want a cream cheese element, substitute half of the butter in the frosting with 8 ounces of softened cream cheese for a tangier finish.
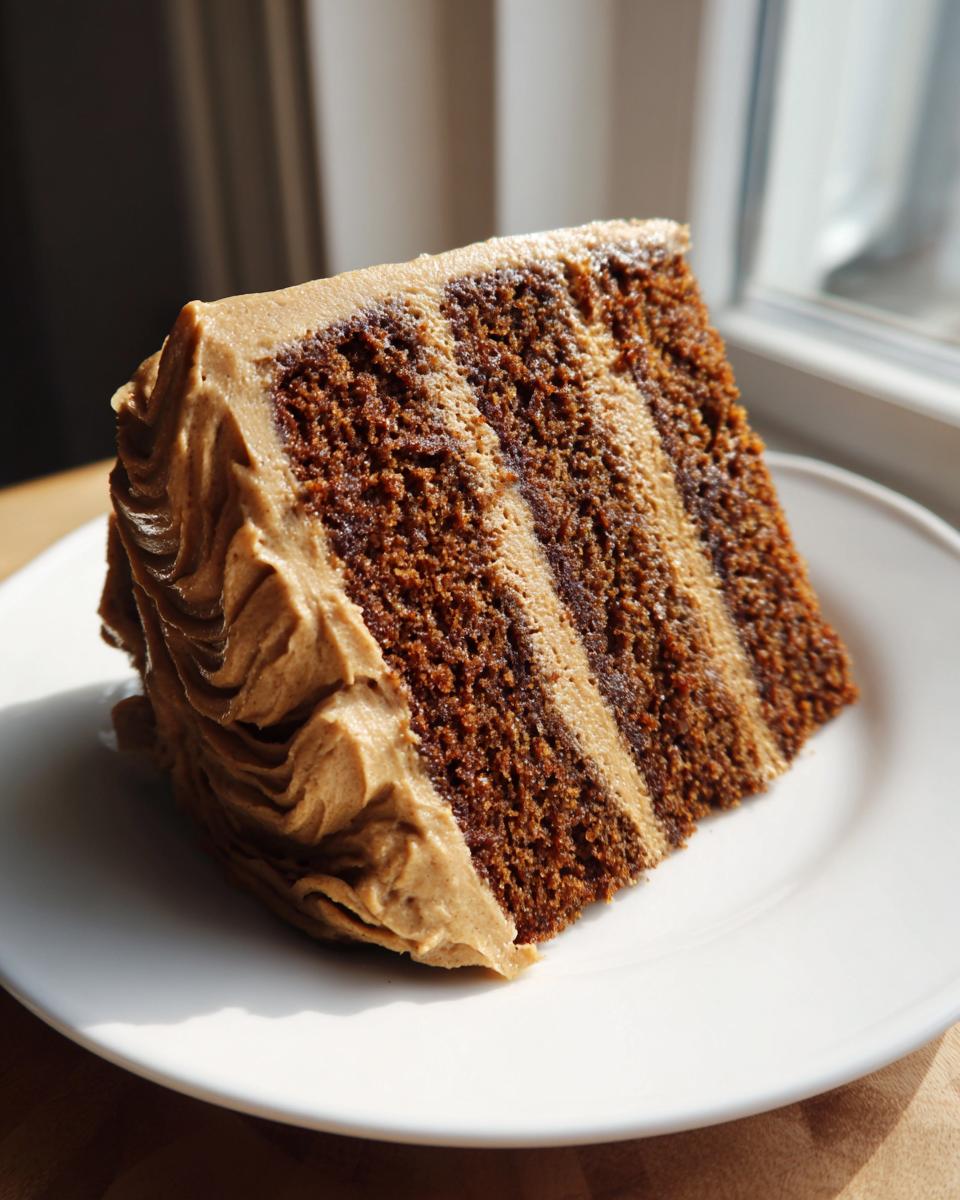
- You can decorate the top with a light dusting of cocoa powder or finely ground espresso beans for visual appeal.
Nutrition
- Serving Size: 1 slice
- Calories: 450
- Sugar: 65g
- Sodium: 300mg
- Fat: 20g
- Saturated Fat: 12g
- Unsaturated Fat: 8g
- Trans Fat: 0.5g
- Carbohydrates: 68g
- Fiber: 1g
- Protein: 4g
- Cholesterol: 75mg