
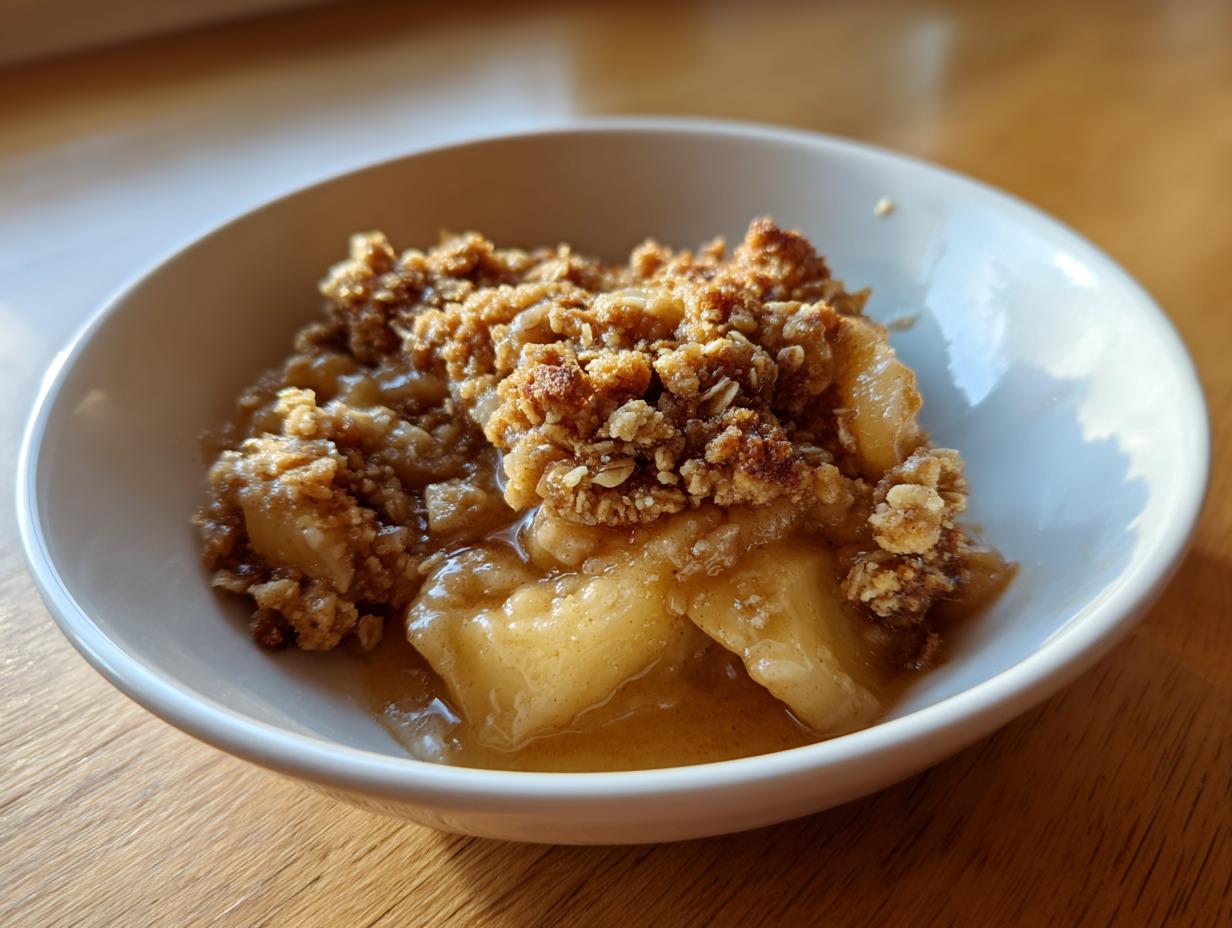
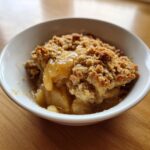
Oh, my friends, can you smell that? That wonderful, warm hug of cinnamon and melting butter? As soon as the leaves start to turn, my kitchen turns into the coziest bakery in town, and that means it is time for the ultimate comfort dessert. If you’ve ever felt intimidated by tricky pie crusts, toss them aside! Today, we are making what I firmly believe is the **BEST EVER easy Apple Crumble** recipe you will ever try. This isn’t fussy baking; this is pure, simple joy. We are talking tender, spiced apples swimming in juice, completely covered by that gorgeous, buttery oat topping. Trust me when I say this classic apple crumble will be ready to serve in under an hour, and it tastes exactly like autumn feels.
- Why This Easy Apple Crumble Recipe Is Your New Go-To
- Ingredients for the Best Apple Crumble
- Mastering the Quick Apple Crumble Dessert Instructions
- Ingredient Notes and Substitutions for Your Apple Crumble
- Tips for Success with Any Apple Crumble
- Serving Suggestions: Dessert to Serve with Ice Cream
- Storage and Reheating Your Homemade Apple Crumble
- Frequently Asked Questions About Apple Crumble
- Share Your Apple Crumble Creations!
Why This Easy Apple Crumble Recipe Is Your New Go-To
I’ve made this apple crumble countless times for family gatherings, and the call for the recipe is immediate every single time. That’s how I know it works! I promise you, this recipe eliminates all the guesswork. It’s sturdy enough for holidays and quick enough for a last-minute Tuesday night treat. You get that perfect balance that we all crave.
- It’s exceptionally quick—prep takes barely 15 minutes, and you’ll be eating it in under an hour start to finish.
- The filling is sweet, jammy, and packed with warm, autumnal spices.
- That topping? It’s crunchy, buttery, and stays that way too!
The Perfect Ratio for a Classic Apple Crumble
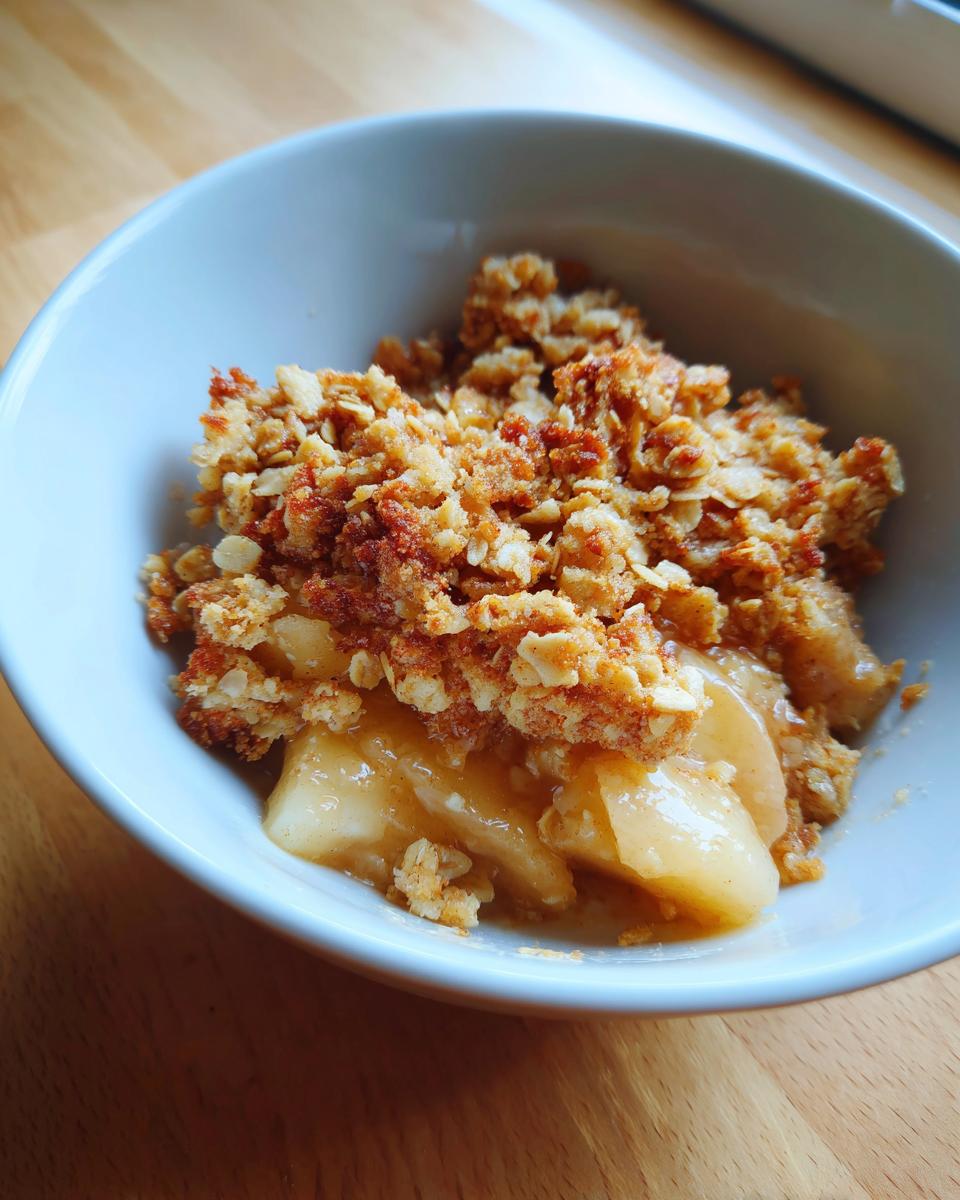
The star here is the texture contrast. If your crumble topping turns out soggy, you’ve lost the battle! The secret is in the ratio of flour, oats, and brown sugar mixed with those cold cubes of butter. We use rolled oats because they give you genuine bite. This specific combination ensures you get that beautifully crisp, buttery oat topping recipe instead of a heavy, cake-like lid on your delicious spiced baked apples. That’s the magic behind a truly great apple crumble.
Ingredients for the Best Apple Crumble
When you’re aiming for the absolute best result, you can’t cut corners on quality, even if the recipe is easy! Having everything measured out and ready before you start mixing makes this process a breeze. I always lay out my bowls for the filling and the topping separately. It keeps things organized, and organizational skills are half the battle when you want a quick bake!
I found some wonderful tips over at Love & Lemons about different apple types, which really inspired how I finalized this filling ratio. Having the right apples makes all the difference!
For the Caramelized Apple Filling
This is where we build that juicy, spiced base. Remember, structure matters! We aren’t looking for mushy apples here, so pick a firm variety.
- 6 medium baking apples (I love Granny Smith or Honeycrisp for the best structure)
- 1/4 cup granulated sugar
- 1 tablespoon all-purpose flour
- 1 teaspoon ground cinnamon
- 1/4 teaspoon ground nutmeg
- 1 tablespoon lemon juice
For the Buttery Oat Topping Recipe
This topping is what dreams are made of—it gets golden, crunchy, and perfectly rich. The absolute key here is the butter. It has to be cold, seriously cold, and already cut into small cubes before you even start mixing it in. Don’t even think about using room-temperature butter!
- 1/2 cup all-purpose flour
- 1/2 cup rolled oats (make sure these aren’t the instant kind; we need texture!)
- 1/2 cup packed light brown sugar
- 1/4 teaspoon salt
- 1/2 cup (1 stick) cold unsalted butter, cut into small cubes
Mastering the Quick Apple Crumble Dessert Instructions
Okay, the ingredients are ready—now for the fun part! Cooking should feel intuitive, not like you’re taking a chemistry final. This whole process for your **apple crumble** is designed to be fast and foolproof. We’re going to move quickly through the filling and then focus just a tiny bit of attention on getting that topping perfect. Remember how I talked about avoiding a soggy bottom? These steps are exactly how we guarantee a crunchy top and jammy insides, every single time. For more quick recipe inspiration, check out my tips on apple cinnamon muffins while you wait for the oven to heat up!
Step 1: Preparing the Apple Base
First things first, get your oven fired up to 375°F (190°C). While it heats, grab an 8×8 inch dish—or a 9-inch pie plate works great too—and give it a light brushing of butter. Now, grab your biggest bowl! Toss those beautifully sliced apples with the granulated sugar, 1 tablespoon of flour, your cinnamon, nutmeg, and that splash of lemon juice. You just want to toss it gently, making sure every single slice gets coated in that sweet spice mix. Pour that mixture straight into your prepared dish and spread it around so it’s an even layer. That’s the base done!
Step 2: Creating the Simple Apple Crumble Topping
Time for the crunchy gold! In a separate bowl, whisk together the topping flour, oats, brown sugar, and salt. Now comes the crucial texture work: the butter. You need to “cut in” those cold cubes. I usually use a pastry blender because it’s fast, but two knives work just fine if you work quickly before the butter melts. You are aiming for coarse crumbs, like little pebbles or peas. Stop mixing when you see those bits! If you blend it until it’s sandy, the topping will just melt into the apples while baking. We want texture, so don’t overmix this part!
Step 3: Baking and Resting the Apple Crumble
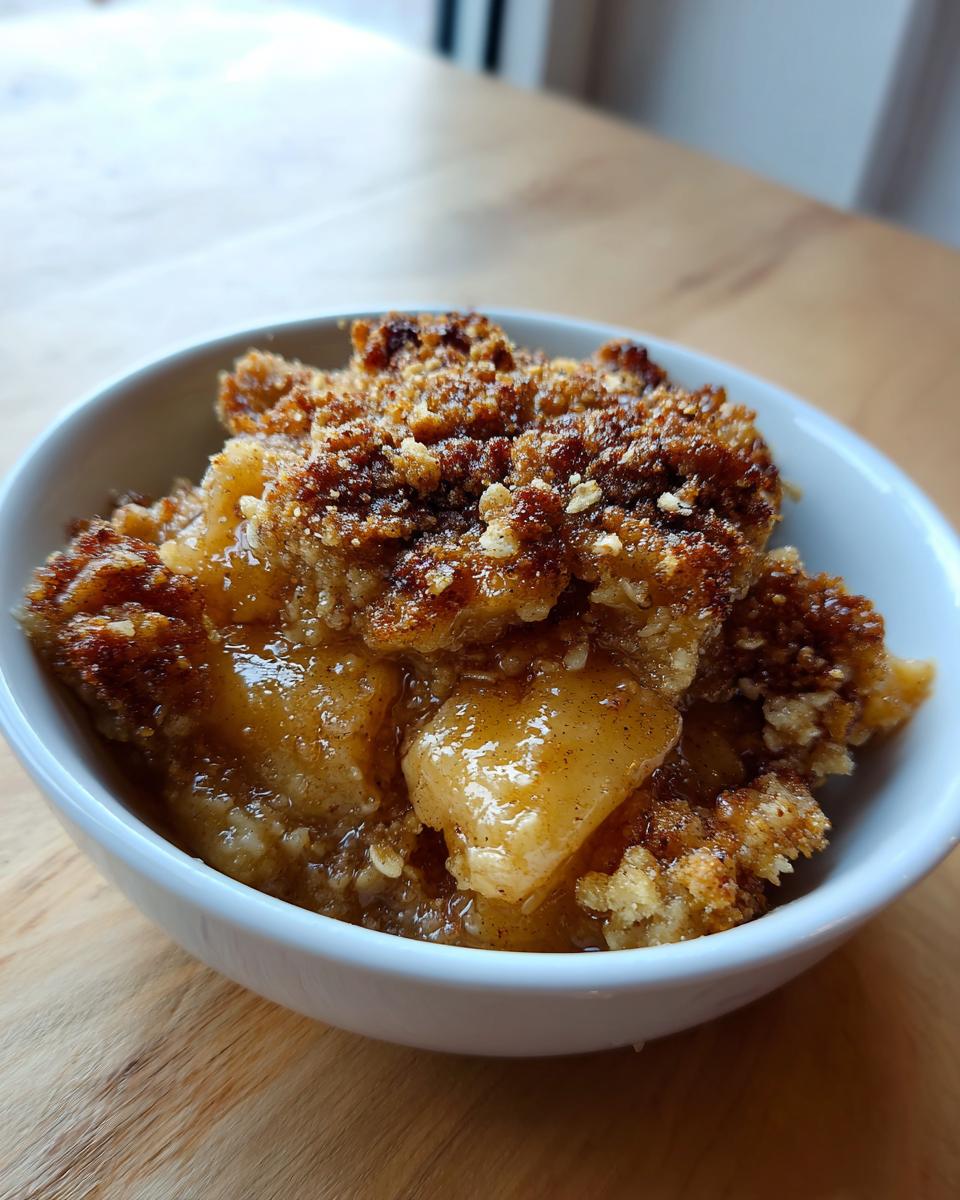
Sprinkle that glorious topping evenly over those apples. Pop the dish into the preheated oven and let it go for about 35 to 45 minutes. You’ll know it’s done when the topping is deeply golden brown and you can see the apple filling underneath bubbling thick and happy around the edges. This is important: Don’t rush the cooling! Take it out and let your dessert rest on a cooling rack for at least 15 minutes. If you cut into it immediately, the filling will run everywhere. That rest time lets it set into that thick, luscious sauce we promised. If you want the real secret to making this a phenomenal quick apple crumble dessert experience, make sure you have vanilla ice cream ready!
Ingredient Notes and Substitutions for Your Apple Crumble
I get so many questions about ingredient swapping, and honestly, tweaking recipes is part of the fun, but for a recipe this perfect (and yes, I’ll brag a little about my apple pie recipe friends), sticking close to the original structure yields the best results. But I want you to succeed, so let’s talk about the key players here. Knowing why we use certain ingredients really helps when you’re making an **apple crumble** for company!
Apple Selection for the Best Texture
If there’s one thing you should take away from this section, it’s this: don’t use soft apples! Apples like Red Delicious just break down completely and turn into applesauce when they bake. We need structure so that you get that lovely resistance in every bite against the soft crumble topping. I always recommend using firm, tart/sweet mixes like Granny Smith—they hold their shape beautifully—or Honeycrisp. If you can only find softer ones, you have to use more flour in the filling to absorb that extra liquid they release, or you’ll end up with soup at the bottom of your dish.
Making a Gluten Free Apple Crumble
I totally understand the need to adapt for dietary preferences! Good news: making this recipe gluten free apple crumble is super easy because the structure relies mostly on the butter and the oats in the topping anyway. When you are mixing your topping dry ingredients, simply swap out the 1/2 cup of all-purpose flour for a high-quality 1:1 gluten-free baking blend. That’s it! It works like a charm. I’ve tested this, and the texture remains perfectly crisp and golden. You don’t even need to change the filling ingredients!
Tips for Success with Any Apple Crumble
Even with the best recipe, tiny tweaks can elevate your dessert from “good” to “I need the recipe right now!” The biggest threat to any baked apple dessert is the dreaded soggy bottom, so we need to fight that condensation battle head-on. For starters, make sure your spices are fresh! Old cinnamon just tastes like dust, and you want that bright, warm flavor popping through.
To fight sogginess, I actually toss my apples with the flour *before* adding the sugar sometimes—it coats them better. I also have a trick for the topping: after you sprinkle it on, I like to drizzle just a tiny bit more melted butter right over the top of the crumbs. It really encourages that gorgeous golden crispness you see in the best photos! If you want to hear about another amazing crisp variation, check out my tips for a great apple crisp recipe.
When you’re ready to see how the pros keep things quick and flavorful, this piece from Delish gives some great inspiration on simplifying the process: here.
Serving Suggestions: Dessert to Serve with Ice Cream
Listen, I know we all promise ourselves we’ll wait for this to cool down, but let’s be real. An apple crumble fresh from the oven—still steaming, the edges bubbling—demands immediate attention! And what is the absolute best partner for that warm, spiced, buttery goodness? A giant, ice-cold scoop of vanilla ice cream. It creates the most wonderful temperature contrast, doesn’t it?

The slight melt of the ice cream blends right into the hot, thickened apple juice at the bottom of the dish. That perfect combination of hot and cold, soft and crunchy, is why this is the ultimate **comfort food dessert**. I actually prefer making a double batch just to ensure I have leftovers for the next night, served exactly the same way: warm crumble, cold ice cream.
If you are serving a crowd, you can certainly set up a topping bar! Beyond the essential ice cream, I always offer a simple dollop of freshly whipped cream—it’s much lighter than the ice cream. A dusting of cinnamon on top of the cream looks beautiful, too. For something richer, a drizzle of high-quality caramel sauce is divine. It works especially well if you used slightly tarter apples because the caramel just enhances that sweet-tart dance.

These are the desserts that bring people together. They aren’t fancy, but they are honest, warm, and immensely satisfying. If you are looking for other simple yet stunning recipes built for sharing, you have to check out my collection of best dessert recipes for inspiration. Happy scooping!
Storage and Reheating Your Homemade Apple Crumble
Oh, absolutely, you will have leftovers! This is one of those **fall dessert recipes** that somehow tastes even better the next day, which is kind of miraculous considering how crunchy the topping is when it first comes out. Storing it correctly is the key to making sure that second serving tastes almost as good as the first!
Once the crumble has cooled completely—and I mean completely, otherwise you create condensation, which is the enemy of crispness—you can cover the baking dish tightly with plastic wrap or foil. If you do this right away while it’s still slightly warm, you’re basically sealing in steam, and that turns the topping soft overnight. So, patience is required!
How to Store Your Apple Crumble
You can actually keep this on the counter at room temperature for a day if it’s sealed tightly, especially if your kitchen isn’t too warm. But honestly, for the best texture retention over several days, I always stash mine in the refrigerator. It’ll keep beautifully refrigerated for up to four days. Just keep it well covered.
Reheating to Restore That Crunch Factory
This is the most important part! If you try to reheat this in the microwave, you’re going to get a warm, soggy disaster. We worked too hard for that **buttery oat topping recipe** to be ruined with steam! To bring it back to life, you absolutely must use the oven or an air fryer.
Reheat individual servings on a baking sheet at 350°F (175°C) for about 8 to 10 minutes. If you are reheating the entire dish, cover the top loosely with foil first—this prevents the topping from burning before the center gets warm—and bake it for about 15 to 20 minutes until it’s piping hot all the way through. If you want extra credit, take the foil off for the last five minutes to really dry out and crisp up that topping again. Serve it immediately with a fresh, cold scoop of ice cream!
Frequently Asked Questions About Apple Crumble
I know you’re going to love this recipe, but I totally get that questions pop up once you start gathering ingredients. I tried to make this recipe the perfect go-to for all your **fall dessert recipes** needs, but baking is always better when you feel totally confident! Here are a few things I hear most often when people are planning their first attempt at my classic **apple crumble**.
What is the difference between apple crisp and apple crumble?
This is one of those debates that bakers love to have! Traditionally, they are very similar comfort food desserts built on baked fruit. The main technical difference is that a crumble topping usually consists of just butter, flour, and sugar rubbed together. A crisp, however, always includes oats or nuts in the topping, which is what gives it that “crisp” texture. Since my recipe uses rolled oats in the topping, technically mine fits the bill for an **apple crisp**, but I’ll always call it an apple crumble because, well, that’s what my family calls it! No matter the name, it’s delicious!
Can I make this apple crumble recipe ahead of time?
Yes, you absolutely can, which is fantastic for hosting! If you want to prepare this ahead of time, I strongly recommend keeping the components separate until you are ready to bake. Mix your apple filling and put it in the dish; cover it and keep it in the fridge. Then, make your topping completely separately in an airtight container. Keep the topping in the fridge, too. When you are ready to bake, just sprinkle the cold topping over the cold apples and add about 10 minutes to your baking time, since everything is starting cold. This ensures you still get that nice textural contrast!
How long does this classic apple crumble take to bake?
One of the best parts about this recipe is just how fast it comes together, living up to its promise of being a **quick apple crumble dessert**! Once you have your apples coated and your topping mixed, the oven time is only about 35 to 45 minutes maximum. Including the 15 minutes of prep time, you can have this bubbling hot and ready for ice cream in just about an hour total. It’s such a fast turnaround for such a comforting, impressive-looking dessert!
If you want to see how other incredible bakers approach the crisp method specifically, check out the great tips on Cooking Classy. Happy to share the love for autumn baking with everyone!
Share Your Apple Crumble Creations!
I truly hope this recipe brings as much warmth and comfort to your kitchen as it does to mine. I’ve poured my best testing secrets into these instructions so you can feel completely confident pulling this amazing dessert out of the oven.
But the journey doesn’t end here! I absolutely live for seeing your baking successes. Have you made this **apple crumble**? Did you use Honeycrisp or Granny Smith apples? Tell me about your experience in the comments below. I read every single one, and your feedback helps me refine these recipes even further!
If you snapped a picture of your golden-brown perfection—especially if you managed to capture that moment right before the vanilla ice cream melts everything into pure bliss—please share it! Tag me on social media so I can celebrate with you. Seeing your creations makes me want to get back in the kitchen and whip up another batch right now!
If you want to learn more about my philosophy here at Kings Cook—why I believe every home cook deserves confidence—please feel free to check out my About page. Thanks again for baking with me today. Now go enjoy that crumble!
PrintThe BEST Ever Easy Apple Crumble Recipe
Make this quick and easy Apple Crumble for a delicious fall dessert. It features sweet, juicy apples beneath a crunchy, buttery oat topping. This recipe is ready in under an hour and is pure comfort food.
- Prep Time: 15 min
- Cook Time: 40 min
- Total Time: 55 min
- Yield: 6 servings 1x
- Category: Dessert
- Method: Baking
- Cuisine: American
- Diet: Vegetarian
Ingredients
- 6 medium baking apples (like Granny Smith or Honeycrisp), peeled, cored, and sliced
- 1/4 cup granulated sugar
- 1 tablespoon all-purpose flour
- 1 teaspoon ground cinnamon
- 1/4 teaspoon ground nutmeg
- 1 tablespoon lemon juice
- 1/2 cup all-purpose flour (for topping)
- 1/2 cup rolled oats (not instant)
- 1/2 cup packed light brown sugar
- 1/4 teaspoon salt
- 1/2 cup (1 stick) cold unsalted butter, cut into small cubes
Instructions
- Preheat your oven to 375°F (190°C). Lightly butter an 8×8 inch baking dish or a 9-inch pie plate.
- Prepare the apple filling: In a large bowl, combine the sliced apples, granulated sugar, 1 tablespoon flour, cinnamon, nutmeg, and lemon juice. Toss gently until the apples are evenly coated.
- Transfer the apple mixture to your prepared baking dish and spread it into an even layer.
- Prepare the buttery oat topping: In a separate medium bowl, whisk together the 1/2 cup flour, rolled oats, brown sugar, and salt.
- Cut in the cold butter using a pastry blender, two knives, or your fingertips. Work the butter into the dry ingredients until the mixture resembles coarse crumbs with some pea-sized pieces remaining. Do not overmix; you want texture.
- Sprinkle the crumble topping evenly over the apple filling.
- Bake for 35 to 45 minutes, or until the topping is golden brown and the apple filling is bubbling thickly around the edges.
- Let the apple crumble cool on a wire rack for at least 15 minutes before serving. This allows the filling to set slightly.
- Serve warm with a scoop of vanilla ice cream or whipped cream.
Notes
- For the best texture contrast, use firm apples that hold their shape when baked.
- If you prefer a crisp topping, increase the oats to 3/4 cup and add 1/4 cup of chopped pecans or walnuts.
- To achieve caramelized apple filling, you can add 1 tablespoon of maple syrup to the apple mixture.
Nutrition
- Serving Size: 1 serving
- Calories: 380
- Sugar: 35g
- Sodium: 150mg
- Fat: 18g
- Saturated Fat: 11g
- Unsaturated Fat: 7g
- Trans Fat: 0.5g
- Carbohydrates: 55g
- Fiber: 5g
- Protein: 4g
- Cholesterol: 45mg