
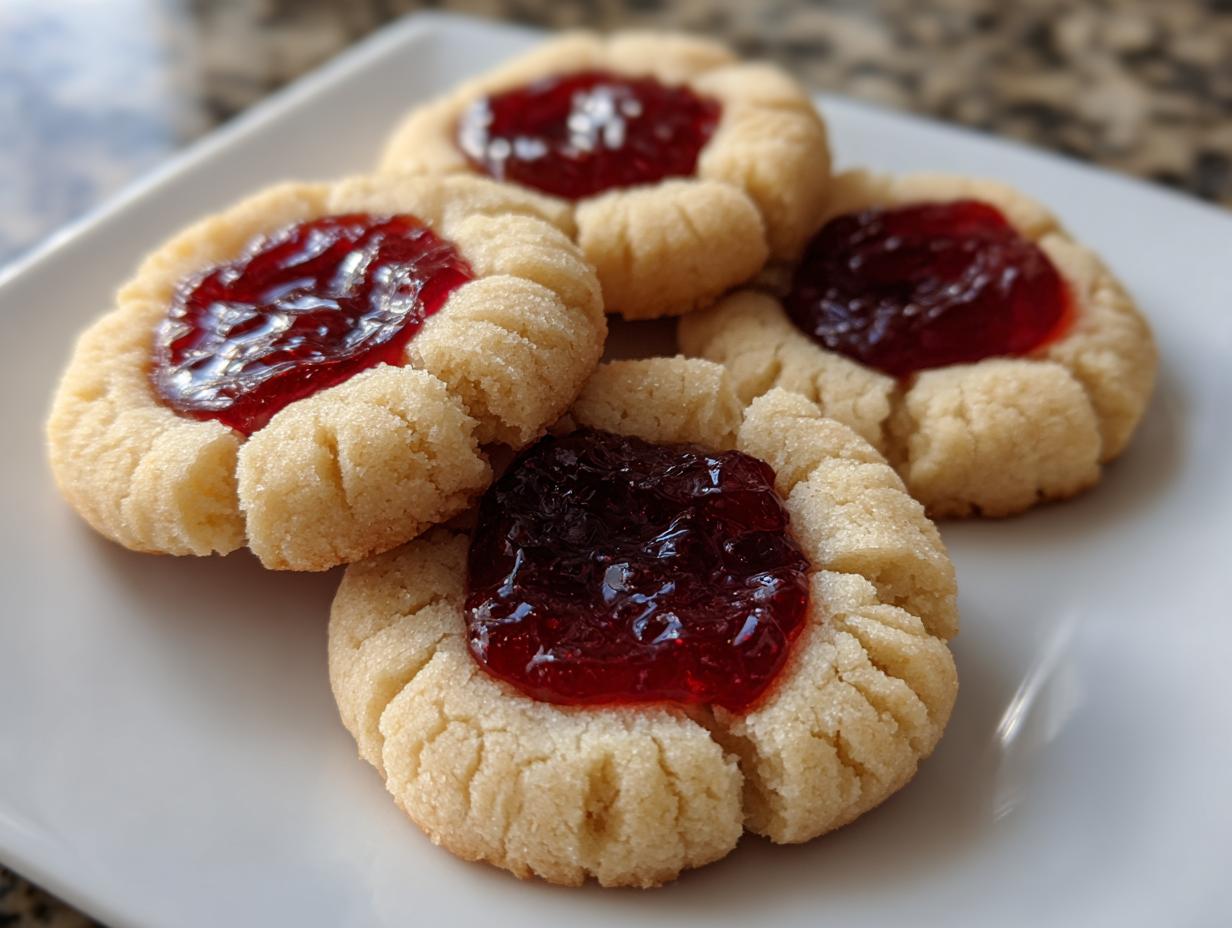
There’s nothing quite like the comforting, sweet nostalgia of pulling a tray of fresh cookies out of the oven, right? If you’re looking for a recipe that just *works* every single time—no fussy ingredients, no weird techniques—then you’ve found your new favorite. I’m sharing my secret for the absolute best raspberry thumbprint cookies. These babies use a rich, buttery shortbread cookie base that truly melts in your mouth. Growing up in my grandma’s kitchen, reliability was key, and that’s what these are: dependable, delicious, and totally irresistible. Trust me, by the time we are done, I’ll have shown you exactly how to press that perfect little well so your jam stays put!
- Why These raspberry thumbprint cookies Are a Must-Bake Classic
- Essential Ingredients for Perfect raspberry thumbprint cookies
- Mastering the Shortbread Cookie Dough: Tips for raspberry thumbprint cookies
- Step-by-Step Instructions for Easy Thumbprint Cookies
- Ingredient Notes and Substitutions for raspberry thumbprint cookies
- Creating raspberry thumbprint cookies Variations
- Storage and Make-Ahead Tips for Holiday Cookie Baking
- Frequently Asked Questions About raspberry thumbprint cookies
- Estimated Nutritional Snapshot for These Classic Cookie Recipes
Why These raspberry thumbprint cookies Are a Must-Bake Classic
When I bring these to any get-together, they disappear first. Seriously, they are that good!
- They have that gorgeous, crumbly texture that earns them the name Melt in Your Mouth Cookies.
- The basic shortbread dough is so simple, making them my go-to for batch baking.
- They look fancy sitting on a platter, but they are truly Easy Thumbprint Cookies.
- Because they are smaller, they are absolutely perfect for Cookie Swap Treats or holiday trays.
If you want a reliable recipe that honors the tradition of Classic Cookie Recipes, this is the one. You can see the original inspiration over at this wonderful site if you want to take a look too!
Essential Ingredients for Perfect raspberry thumbprint cookies
Wow, looking at this list makes me excited because it’s so simple—you probably have half this stuff already! Having quality ingredients makes all the difference in turning out those perfect, melt-in-your-mouth results. Trust me on the butter; it has to be softened just right for that shortbread structure!
Dough Components for Buttery Shortbread Cookies
We are sticking to a classic base here. Remember, the butter needs to be softened so it creams up nicely and gives you those tender Buttery Shortbread Cookies. Don’t try using cold sticks or melted goo!
- 1 cup unsalted butter, softened
- 1/2 cup granulated sugar
- 1 large egg yolk
- 1 teaspoon vanilla extract
- 2 cups all-purpose flour
- 1/4 teaspoon salt
The Raspberry Jam Filling for Your raspberry thumbprint cookies
This is where the flavor pops! Since the filling is the star, I always snag the nicest raspberry jam I can find. Good quality jam makes these Jam Filled Cookies so much better. If yours is super thick, just warm it up a tiny bit!
- 1/2 cup raspberry jam
- 1 tablespoon milk (for brushing, optional)
- 1/4 cup powdered sugar (for dusting, optional)
Mastering the Shortbread Cookie Dough: Tips for raspberry thumbprint cookies
Okay, now we get into the nitty-gritty for making these perfect raspberry thumbprint cookies! The first few steps are everything because we are creating a Shortbread Cookie Dough that shouldn’t spread out like a puddle in the oven. That’s the secret to keeping those beautiful little pockets for the jam!
First, we cream that softened butter and sugar. See how light and fluffy it gets? That’s air! Those tiny air pockets are what keeps our cookies tender, not hard bricks. After the yolk and vanilla go in, we slowly add the flour and salt. Stop mixing the second you see the flour disappear. Overmixing develops gluten, and we absolutely do not want tough cookies here!
Then comes the most important part for structure: chilling! Wrap that dough up tight and stick it in the fridge for at least 30 minutes. This stiffens the all-important butter back up. If you skip that chill step, your cookies will flatten out before they even hit the two-minute mark in the oven. You can check out my tips on sugar cookies for decorating if you want to see how chilling dough works across the board. And if you need more inspiration on great cookie bases, check out this great little recipe!
Step-by-Step Instructions for Easy Thumbprint Cookies
Now that our lovely Shortbread Cookie Dough is chilled and firm—yay!—it’s time to assemble these gorgeous raspberry thumbprint cookies. Remember, we’re aiming for quick and easy, so the assembly moves fast. Preheat your oven right now to 350°F (175°C) and get those baking sheets lined with parchment paper. This makes cleanup a breeze, trust me!
I scoop the dough out into little balls, aiming for about 1 inch across—think slightly smaller than a golf ball. You want to roll them lightly between your palms just to smooth them out a touch before placing them about two inches apart on your prepared trays. They don’t spread a ton, but they do like their personal space in the oven!
The Trick to Getting the Perfect Indentation
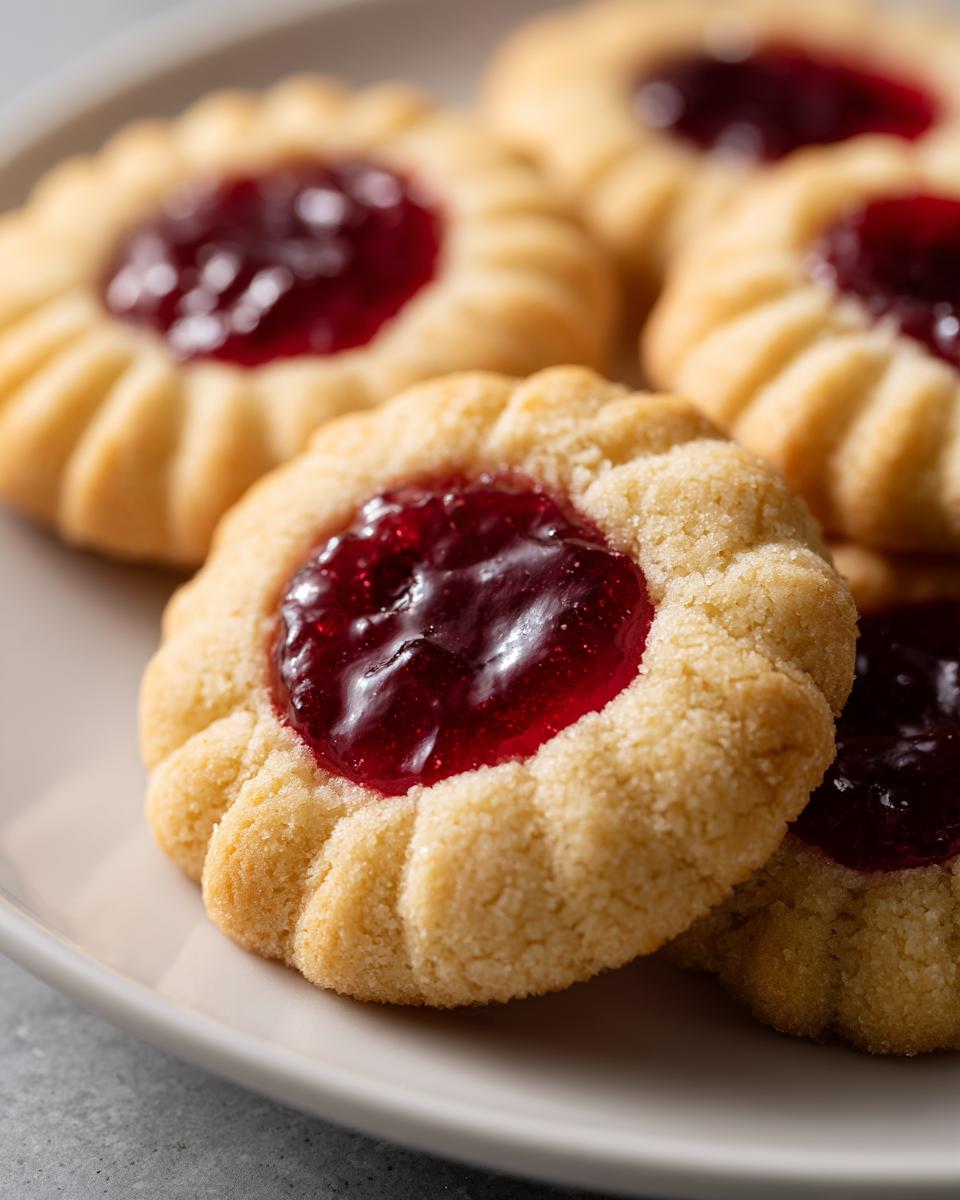
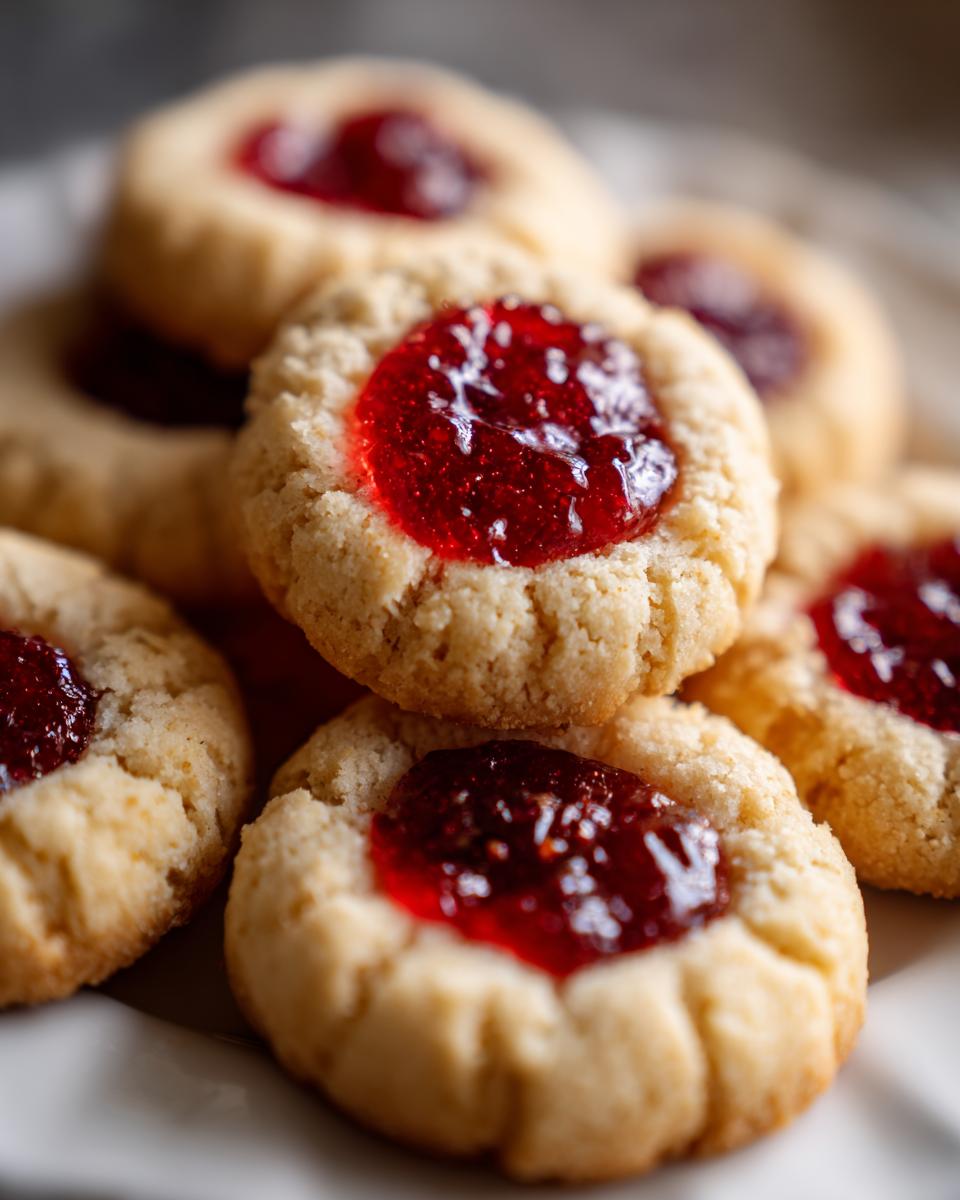
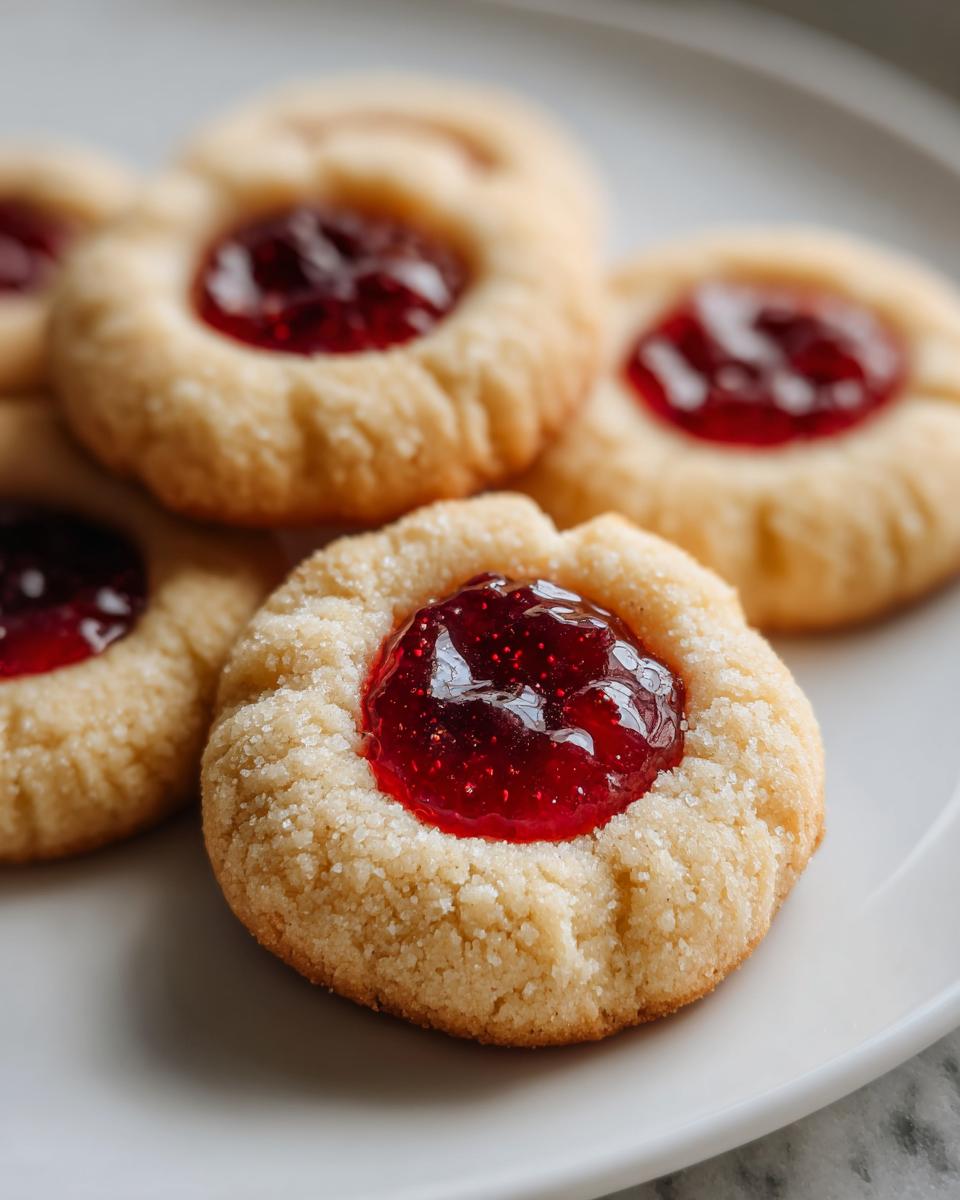
This is the part everyone asks Kate about! You need that perfect little nest for the jam, but you do *not* want to squish right through to the bottom of the cookie. That just creates a sad, thin base and your warm jam leaks everywhere. Ouch! I use my own thumb, lightly floured, or the back of a tiny measuring spoon, like a half teaspoon measure.
Press gently right into the center of the dough ball. Give it a little twist as you pull up. You’re just creating a depression—a small well—not trying to make a hole all the way through the cookie. Just a nice dip! Then, carefully spoon about a half teaspoon of your raspberry jam right into that indentation. Don’t overfill it, or it’ll bubble over while baking.
Baking and Cooling Your raspberry thumbprint cookies
If you want a slightly prettier, golden edge, you can quickly dab the cookie rims with a drop of milk before they pop in the oven. Bake them for about 12 to 15 minutes. Here’s the visual cue: the edges should just barely start looking lightly golden brown, but the very center of the cookie—the shortbread part you didn’t fill—should still look pale. That means they are done! Leave them on the hot pan for five whole minutes to firm up before carefully moving them to a wire rack to finish cooling.
Ingredient Notes and Substitutions for raspberry thumbprint cookies
Okay, let’s talk about making smart choices with the ingredients for these raspberry thumbprint cookies! I always get questions about butter consistency, and my note to myself was clear: make sure your butter is truly softened, not melted, okay? That’s the difference between a melt-in-your-mouth texture and a sad cracker. Also, if the dough gets too soft again while you’re rolling those little balls, don’t panic! Just pop the bowl back in the fridge for 10 minutes. That chilling time really pays off.
If you want to branch out from the classic raspberry center, definitely play around! I noted that you could mix about a quarter teaspoon of almond extract right into the main dough. Then, once they cool, you can swap that powdered sugar dusting for a simple almond glaze—that takes you straight into Almond Glazed Thumbprints territory! For more ideas on how to adapt simple doughs, check out my guide on peanut butter cookies patterns. And for a different take on this buttery base, see what the folks at Best Christmas Desserts are doing!
Creating raspberry thumbprint cookies Variations
I love that this base dough for our raspberry thumbprint cookies is so reliable, because it lets us get really creative! Think of it as your launchpad for all kinds of amazing Thumbprint Cookie Variations. You don’t always have to stick to classic jam, even though raspberry is my favorite for that sweet-tart punch.
If you’re feeling fancy, let’s talk about those higher-end flavors. We already mentioned doing an almond extract boost to the dough and topping it with a sweet glaze for easy Almond Glazed Thumbprints. But what about cream cheese? Those Cheesecake Thumbprint Cookies are to die for!
For that cheesecake version, you can usually swap out some of the butter in the dough for 4 ounces of softened cream cheese (or just add it in addition to the butter, making sure to use slightly less flour). Then, you’d mix a spoonful of jam with a dollop of sweetened cream cheese for the filling instead of straight jam. It works beautifully! It’s so fun customizing this Simple Cookie Recipe for different holidays or moods.
If you want to see how I adapt my base recipes for something totally different, you can check out my guide on chocolate chip cookies and see my similar approach to dough customization. And for a fun look at how others handle the cheesecake variation, take a peek at this recipe for Cheesecake Thumbprint Cookies—it gives you a great idea of how that filling takes shape!
Storage and Make-Ahead Tips for Holiday Cookie Baking
I make these things ahead of time mostly because they are perfect Bite Sized Desserts and the whole family wants to sneak them before the actual party! The good news is, these raspberry thumbprint cookies freeze like a dream, which is exactly what you want when faced with big batches for Holiday Cookie Baking.
For freezing the unbaked dough balls—which I highly recommend—roll them out, make the dents, but leave the jam out. Just place them on a baking sheet and freeze them solid. Once frozen, toss them in a sturdy freezer bag. When you decide to bake them, add about three extra minutes to the bake time, and put the jam in right before they go into the oven.
Once baked and completely cool, you can store the finished cookies in an airtight container at room temperature for almost a week, though frankly, ours never last that long! They stay wonderfully tender. If you want to see how I handle making big batches of dough ahead of time for things like my cinnamon rolls, the principle is the same!
Frequently Asked Questions About raspberry thumbprint cookies
I always get emails about these cookies, so I figured it’s smart to gather a few of those trickiest questions right here! Dealing with cookies spreading or getting that perfect look can sometimes feel like a mystery, but it’s totally simple once you know the rules for this Shortbread Cookie Dough.
Why do my raspberry thumbprint cookies spread too much?
Ugh, spreading is the worst! This almost always comes down to the butter temperature or not chilling the dough long enough. If your butter is too soft when you mix it, or if you skip that 30-minute chill time, the butter melts too fast in the oven before the structure of the cookie sets. Make sure your dough feels firm before you roll those balls! For more depth on dough handling, I break down dough chilling for oatmeal raisin cookies, which is the same idea.
What is the best kind of jam to use for these Jam Filled Cookies?
Honestly, any good quality raspberry jam works! But if your jam is too runny, it tends to seep out into the butter while baking, which makes the cookie oil out and get greasy. If your jarred jam looks thinner than you’d like, I recommend microwaving just the amount you need for about 10 seconds—just enough to warm it up so it stirs easily. This helps it settle nicely into the well without being too runny. This makes them much prettier when we’re going for that professional look!
Should I dust them with powdered sugar before or after baking?
Always dust them *after* they have completely cooled down. If you dust them before baking, that powdered sugar melts right into the dough, and you just lose the pretty white finish we are going for. We want that light dusting of powdered sugar to sit right on top for presentation, especially if you’re piling them on a tray for Cookie Swap Treats. See how gorgeous they look after a light sprinkle? Check out Pies by Paula for another look at a beautiful finished product!
Can I make the dough ahead of time using this Buttery Shortbread Cookie recipe?
Yes, you absolutely can! This dough keeps wonderfully. You can store it wrapped tightly in the fridge for up to three days. If you let it get rock hard, just let it sit on the counter for about 15 minutes before you try to scoop it, or it will be too crumbly to form those perfect little balls we need for our Easy Thumbprint Cookies.
Estimated Nutritional Snapshot for These Classic Cookie Recipes
When we talk about feeding our families, I always believe in knowing what’s going into our food—even when it’s something fun like these delicious raspberry thumbprint cookies! While I’ve tried to be scrupulous with my measurements, please know that the actual values can wiggle around a bit depending on the brand of butter you use or exactly how much jam you lovingly heap into the center.
This chart is based on a standard serving size of one cookie, using the ingredients listed in the recipe above. Think of this as a handy guide for those tracking things closely!
- Serving Size: 1 cookie
- Calories: 120
- Sugar: 9g
- Sodium: 45mg
- Fat: 7g
- Saturated Fat: 4g
- Carbohydrates: 14g
- Protein: 1g
Because these are homemade and rely on fresh butter, the numbers can shift slightly compared to commercially made items. These Classic Cookie Recipes are meant to be enjoyed responsibly, but they are definitely made with wholesome ingredients you recognize!
PrintClassic Buttery Raspberry Thumbprint Cookies with Perfect Indentation Guide

Bake these buttery, tender raspberry thumbprint cookies filled with sweet jam. This simple shortbread recipe is easy to follow and results in melt in your mouth cookies perfect for holidays or everyday treats.
- Prep Time: 20 min
- Cook Time: 15 min
- Total Time: 65 min
- Yield: 24 cookies 1x
- Category: Dessert
- Method: Baking
- Cuisine: American
- Diet: Vegetarian
Ingredients
- 1 cup unsalted butter, softened
- 1/2 cup granulated sugar
- 1 large egg yolk
- 1 teaspoon vanilla extract
- 2 cups all-purpose flour
- 1/4 teaspoon salt
- 1/2 cup raspberry jam
- 1 tablespoon milk (for brushing, optional)
- 1/4 cup powdered sugar (for dusting, optional)
Instructions
- In a large bowl, cream together the softened butter and granulated sugar until light and fluffy.
- Beat in the egg yolk and vanilla extract until just combined.
- In a separate bowl, whisk together the flour and salt. Gradually add the dry ingredients to the wet ingredients, mixing on low speed until a soft dough forms. Do not overmix.
- Wrap the dough in plastic wrap and chill in the refrigerator for at least 30 minutes. This step helps prevent spreading.
- Preheat your oven to 350°F (175°C). Line baking sheets with parchment paper.
- Scoop the dough into small balls, about 1 inch in diameter. Roll the balls lightly between your palms.
- Place the dough balls on the prepared baking sheets, leaving about 2 inches between them.
- Make the indentation: Use your thumb or the back of a small measuring spoon (like a 1/2 teaspoon) to gently press a well into the center of each dough ball. Do not press all the way to the bottom. This is the trick to getting the perfect indentation.
- Fill each indentation with about 1/2 teaspoon of raspberry jam. If the jam is very thick, you can warm it slightly to make it easier to spoon.
- If desired, lightly brush the edges of the cookies with milk for a slightly golden finish.
- Bake for 12 to 15 minutes, or until the edges are lightly golden brown. The centers should remain pale.
- Remove the cookies from the oven and let them cool on the baking sheet for 5 minutes before transferring them to a wire rack to cool completely.
- Once cooled, dust lightly with powdered sugar if you prefer a sweeter finish.
Notes
- For the best texture, make sure your butter is truly softened, not melted.
- If the dough becomes too soft while rolling, chill it again for 10 minutes.
- For a variation, mix 1/4 teaspoon almond extract into the dough and top with an almond glaze after baking.
- These are excellent for cookie swap treats.
Nutrition
- Serving Size: 1 cookie
- Calories: 120
- Sugar: 9g
- Sodium: 45mg
- Fat: 7g
- Saturated Fat: 4g
- Unsaturated Fat: 3g
- Trans Fat: 0g
- Carbohydrates: 14g
- Fiber: 0g
- Protein: 1g
- Cholesterol: 25mg