
Okay, confession time: I used to be terrified of making cheesecake. Absolutely terrified! Every single time I tried to make a proper, tall, creamy bake, it cracked like the desert floor the second it hit room temperature. I thought the only way to get that **cheesecake recipe** perfection, the kind you get at a real New York deli, was to babysit a hot water bath for hours. Nope! Not anymore. After *so* many failed attempts (and trust me, I’ve baked enough test batches to qualify as a professional cheesecake scientist!), I finally cracked the code. This is, honestly, the Best Easy New York Style Cheesecake Recipe you’ll ever use because it requires absolutely NO water bath. Seriously! We’ve rigorously tested this technique until it was foolproof, giving you that rich, velvety filling every time, guaranteed gorgeous.
- Why This Cheesecake Recipe Guarantees Creamy Perfection (No Water Bath Needed)
- Ingredients for the Best Homemade Cheesecake Recipe
- Step-by-Step New York Cheesecake Tutorial: Simple Cheesecake Baking
- Tips for Success with Your Classic Cheesecake Recipe
- Serving Suggestions for Your Indulgent Dessert Ideas
- Storage and Reheating Instructions for Cheesecake
- Frequently Asked Questions About This Cheesecake Recipe
- Estimated Nutritional Data for This Cheesecake Recipe
- Share Your Restaurant Quality Cheesecake at Home Experience
Why This Cheesecake Recipe Guarantees Creamy Perfection (No Water Bath Needed)
Listen, I know the fear. Water baths are messy, they always drip water into my springform pan, and frankly, they feel like something only a pastry chef should handle. That’s why I worked tirelessly to develop this specific method, focusing purely on technique to achieve the most incredible **Perfect Cheesecake Texture** possible without that messy setup. The science behind this **No Water Bath Cheesecake** is all about managing expansion and contraction.
We skip the water bath because we control the oven temperature and, most importantly, the cooling process. Many great bakers, like those over at Natasha’s Kitchen (check out their amazing video!), know that consistent, slow cooling is paramount. We achieve that by turning the oven off and letting the cake sit inside while it slowly adjusts to room temperature. This gentleness prevents that sudden temperature shock that pulls the center down and causes those awful surface cracks.
Achieving That Tall Cheesecake Recipe Look
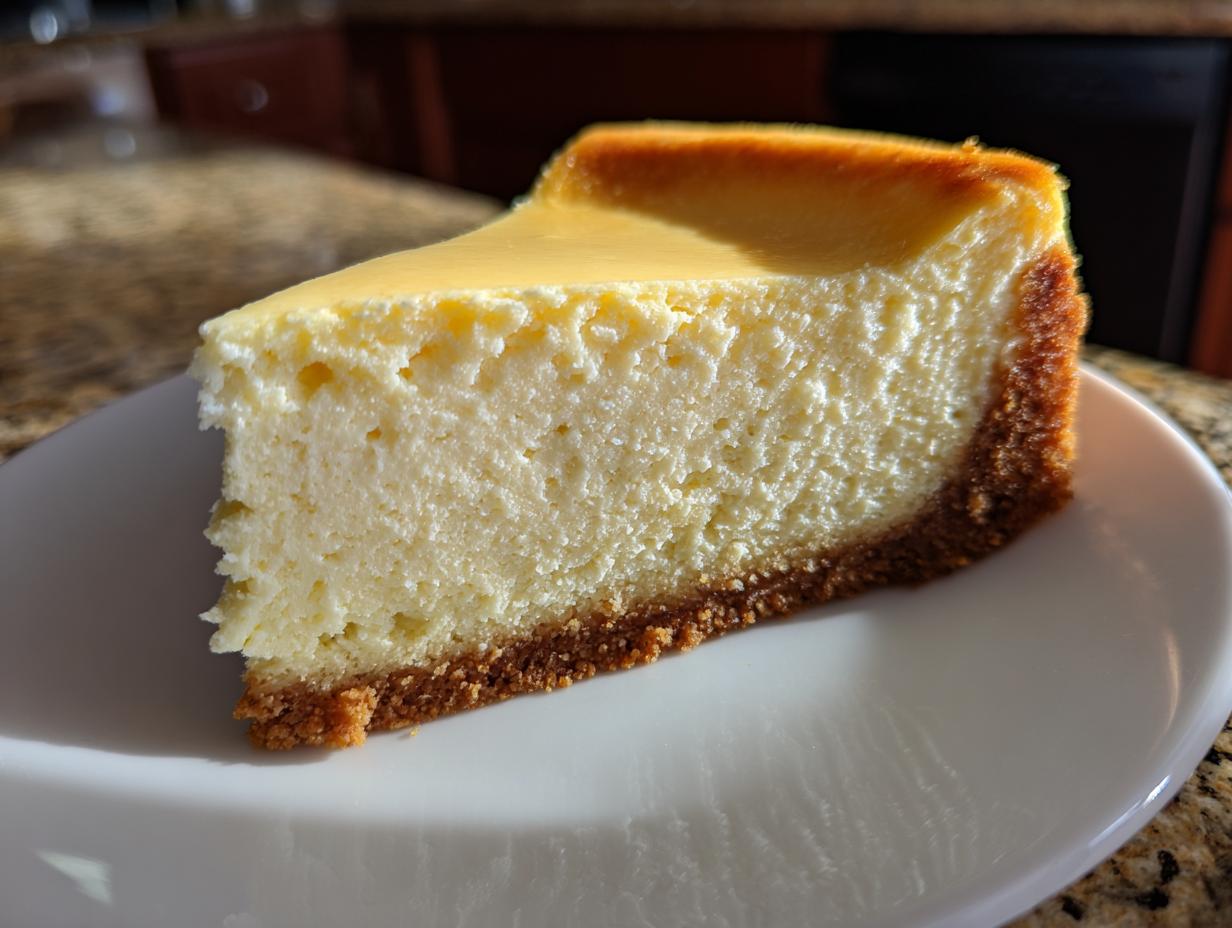
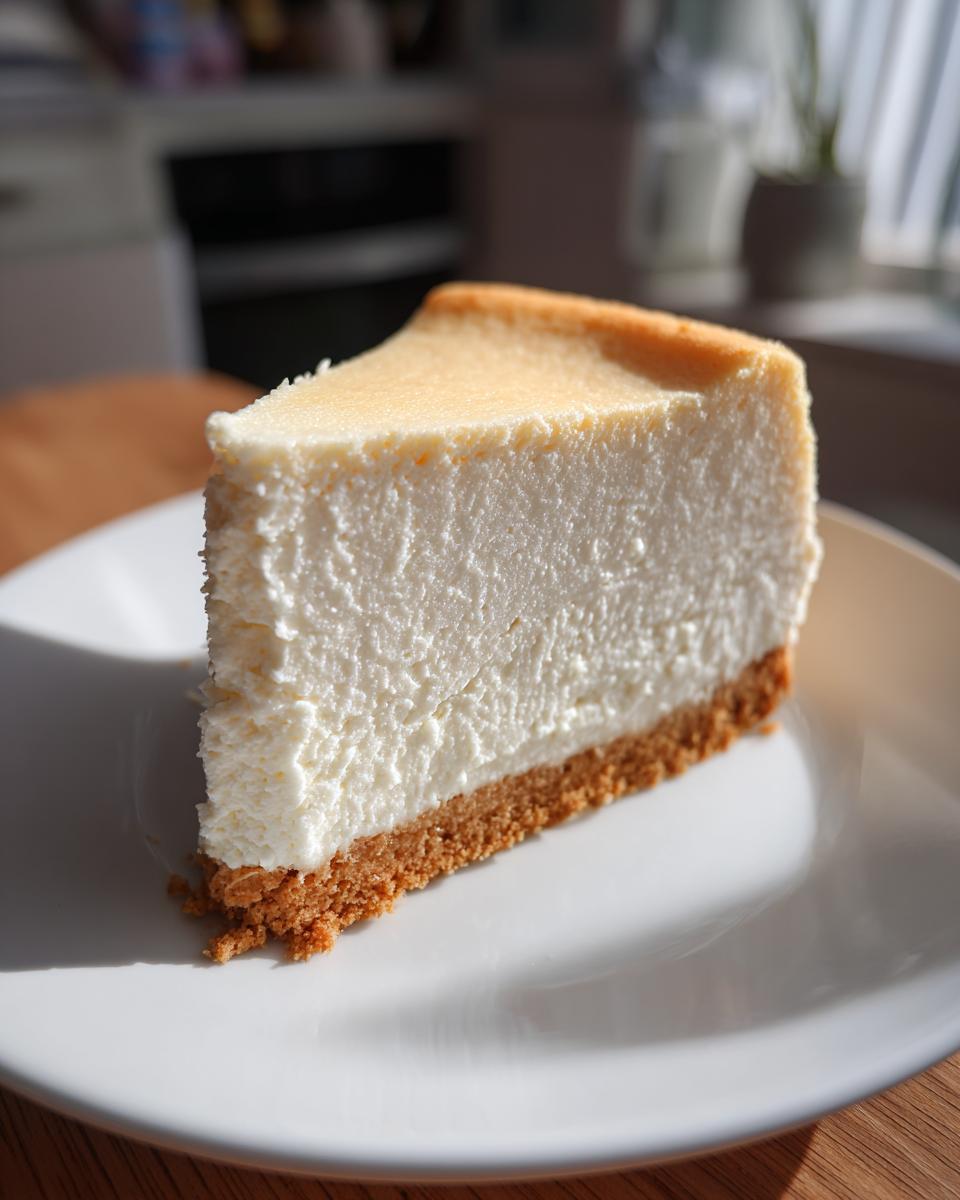
You still get that beautiful, tall look you expect from a real New York style bake! It comes down to two things we focus on: quality ingredients at room temperature (more on that later!) and adding no extra air during mixing. We use full-fat cream cheese and the right amount of flour because those ingredients provide structure. Since we aren’t steaming the oven with water, the batter bakes evenly from the edges toward the center, resulting in that impressive height without crumbling.
Ingredients for the Best Homemade Cheesecake Recipe
Okay, this is super important, so pay attention! For this **Best Homemade Cheesecake Recipe** to work its magic—especially the no-crack part—you absolutely need to respect the ingredients and their temperatures. I’ve split everything below into the crust and the filling. When I tell you the cream cheese and eggs need to be at room temperature, I mean it! Cold dairy leads to lumps, and lumps mean you overmix trying to smooth them out. We are trying to avoid lumps *and* air!
For the Graham Cracker Crust Recipe
This crust is simple and sturdy enough to hold up that beautiful **Creamy Cheesecake** layer. Everything gets pressed right into your 9-inch springform pan.
- 1 1/2 cups graham cracker crumbs (Make sure they are fine!)
- 1/4 cup granulated sugar (for the crust, not the filling!)
- 6 tablespoons unsalted butter, melted (We need melted butter here to bind it tight.)
For the Velvety Cheesecake Filling
This is where the richness comes from. Having the cream cheese and eggs at true room temperature is non-negotiable if you want that smooth, **Velvety Cheesecake Filling** without getting the mixer out for what feels like an hour.
- 4 (8 ounce) packages full-fat cream cheese, softened to room temperature (No light cream cheese, please!)
- 1 1/2 cups granulated sugar (for the main filling)
- 1/4 cup all-purpose flour (This helps stabilize it without the water bath!)
- 1 teaspoon vanilla extract
- 1/4 teaspoon salt
- 4 large eggs, room temperature (Remember: one at a time!)
Step-by-Step New York Cheesecake Tutorial: Simple Cheesecake Baking
Alright, let’s get into the main event! This part is what separates a floppy, sad cheesecake from that gorgeous, thick slice of **cheesecake recipe** perfection you’ve been dreaming about. Remember, we’re keeping things straightforward here—no complicated equipment needed, just your electric mixer and a little patience. If you’re used to baking something like pound cake—you can check out my tips on that over here—you’ll notice the mixing is a bit different because we are fighting air every step of the way! I finally found a way to get that **Perfect Cheesecake Texture** without resorting to a water bath!
Preparing and Chilling the Crust
First things first, that base has to be solid! Grab a bowl and mix those graham cracker crumbs, the crust sugar, and the melted butter until it looks like wet sand. That’s the perfect consistency. Press that mixture firmly into the bottom of your 9-inch springform pan. Don’t be shy; use the bottom of a flat cup or measuring cup to really compact it down. A loose crust will crumble when you cut it later. Once it’s packed tight, pop that pan into the fridge for at least 15 minutes while we switch gears to the filling. Now, go preheat your oven to 325°F (160°C) and remember: we are NOT using a water bath for this recipe, which I learned about from other great bakers like those at A Latte Food!
Mixing the Creamy Cheesecake Filling (The No-Air Method)
This is the most crucial phase for achieving that **Creamy Cheesecake** and avoiding those dreaded splits. Start by beating your perfectly room-temperature cream cheese on its own until it is totally, utterly smooth. Scrape those sides down—get every last bit! Next, gently mix in the sugar, flour, vanilla, and salt until just barely combined. Remember how I said we don’t want air? Flour goes in now because it helps absorb any accidental air bubbles without needing heavy mixing.
Now for the eggs. Add them *one at a time*. I mean it! You mix until you see that first egg just disappear into the batter, then you add the next one. Stop mixing the second the last speck of yolk vanishes. If you keep running the mixer now, you’re just whipping air into the batter, and air creates cracks. Seriously, this step is the secret to **How To Make Cheesecake Without Cracks**!
Baking and Slow Cooling for a Perfect Cheesecake Texture
Pour that smooth, lovely batter over your chilled crust. Gently tap the entire pan on the counter a couple of times—this knocks out any stubborn air pockets that snuck in. Bake it for 60 to 75 minutes. How do you know it’s done? When you give the pan a gentle nudge, the edges should be set firm, but the very center, maybe two inches across, should still have a tiny, almost jiggly wobble, like Jell-O that’s almost set. If it’s fully firm, it’s already overdone!
The real secret to success happens next. Turn your oven OFF. Seriously! You need to prop that door open by sticking a wooden spoon or a rolled-up towel in the gap. Let the cheesecake just hang out in that slowly cooling environment for a full hour. This gradual descent in temperature is what keeps the structure happy and crack-free. After that hour, take it out, let it cool completely on the wire rack at room temperature, and then *then* it’s chill time in the fridge for at least 6 hours—overnight is best if you can manage it. This total chill time is what makes it set up perfectly!
Tips for Success with Your Classic Cheesecake Recipe
I’ve poured my heart into testing this **Classic Cheesecake Recipe**, and honestly, the difference between a good one and a *great* one comes down to respecting a few little details. You’ve heard me hammer this point home already, but I’ll say it again: ingredient temperature is EVERYTHING when you’re aiming for that **Perfect Cheesecake Texture**. If your cream cheese is cold, you end up with lumps, and lumps force you to mix too long, and too much mixing equals cracks. Just plan ahead and pull those four blocks of cream cheese and the eggs out on the counter early!
Also, don’t skip the slow cooling! That hour in the slightly open oven is non-negotiable for a **Restaurant Quality Cheesecake at Home**. Give it the time it needs to settle down before you introduce it to the cool kitchen air.
Finally, when it comes time to serve this gorgeous creation, wait until it’s fully chilled overnight. To guarantee those clean, sharp edges for your guests—which really makes it look professional—run the thinnest knife you own around the edge of the pan before you even pop the springform side off. After chilling, a quick dip of the knife in hot water and wiping it dry between cuts will give you the cleanest slices imaginable. It’s a trick I learned when trying to serve my first perfect bake without messing up the sides; you can see some visual inspiration over at Pretty. Simple. Sweet!
Serving Suggestions for Your Indulgent Dessert Ideas
Now that you’ve made this magnificent, crack-free beauty, the big question is: what goes on top? Because this **cheesecake recipe** is so rich and perfectly balanced, honestly, it stands wonderfully on its own. Serving it plain is the ultimate sign of respect for the classic New York style!
But if you’re feeling extra fancy, or if you’re preparing this for a big gathering where it becomes the star **Cheesecake Party Dessert**, you need toppings that enhance, not overshadow, that creamy texture. My go-to is always something tangy or tart to cut through the richness. Fresh raspberries or a simple sour cream topping—just sour cream mixed with a little vanilla and sugar—is divine. It adds a layer of complexity that feels really gourmet without being complicated at all.
For the holidays, when everyone wants something warm and comforting, I pair a slice with my homemade salted caramel sauce—you can find the recipe for that right here! The combination of cold, dense cheesecake and warm, gooey caramel? Absolute heaven. This makes it such a fantastic **Holiday Cheesecake Favorite**; every family member fights over the last slice.
Remember, since this is such a showstopper on its own, keep those toppings minimal. We worked so hard for that **Simple Creamy Desserts** texture; let that be the star!
Storage and Reheating Instructions for Cheesecake
Okay, we’ve done the hard work, and that glorious, tall cheesecake is finally ready! The reward is worth the wait, but now you need to know how to keep it perfect. Since this recipe relies on that intense chilling time of at least six hours—and I always say overnight is the magic number—wrapping it correctly is key to maintaining that **cream cheese recipe** quality.
Once that cheesecake is fully chilled, you need to protect it from drying out and absorbing any fridge smells, which can totally ruin that pure vanilla finish. Cover the springform pan loosely with plastic wrap, but make sure the wrap isn’t actually touching the surface of the cheesecake itself. If you’re storing it for more than a day, I sometimes stick the plastic wrap to the *sides* of the pan underneath the top lip. This prevents any condensation from dripping onto the pristine top layer.
It keeps beautifully this way in the refrigerator! Honestly, it tastes even better on Day Two because the flavors have melded. It should stay fresh and gorgeous for five to seven days if kept covered and cold. I tend to cut it into individual slices before freezing if I know we won’t finish it quickly. When freezing, wrap each slice tightly in plastic wrap first, then pop those wrapped slices into a freezer-safe, airtight container. They thaw perfectly overnight in the fridge, giving you an **Easy Cheesecake Recipe** ready to go whenever a craving hits!
Frequently Asked Questions About This Cheesecake Recipe
I get so many messages after people bake this, so I thought I’d pop in here and answer the most common sticking points right away! It’s so exciting seeing everyone achieve that **Easy Cheesecake Recipe** success. If you’re looking for more fun ideas, you can peek at my **best dessert recipes** collection here!
Can I use sour cream instead of flour in this cheesecake recipe?
That’s a really interesting thought! Many recipes use sour cream for tang, but for this specific technique, we absolutely need the flour. Remember, we are skipping the water bath, which acts like a little oven steam bath to set the proteins gently. That quarter cup of flour is what helps stabilize the structure in the dry heat of the oven, giving us that reliable, **Simple Creamy Desserts** texture without boiling the sides. Trust me on this one—the flour is essential for the no-crack success!
What is the best way to tell if my baked cheesecake is done?
This is probably the most common question I get, and it’s because overbaking is the nemesis of a **Creamy Cheesecake**! When you gently nudge the pan (be careful!), the edges should look solid and set firm all the way around. However, the absolute key—the tell-tale sign—is the center. You are looking for a slight wobble in the center 2 inches of the cake. It shouldn’t be soupy, but it should move just a tiny bit, like firm Jell-O. If that center isn’t moving, it’s already starting to overcook, and you’ll end up with a denser cheesecake than we want!
Are there options for a No Bake Cheesecake Recipes variation?
I know **No Bake Cheesecake Recipes** are super popular, especially when it’s too hot to turn on the oven! And look, I totally get the appeal. But I have to be honest: this recipe is specifically calibrated for baking. We use the slow heat and the specific ratios of eggs and flour to achieve that signature tall, dense New York style texture. If you try to make this filling without baking, it won’t set correctly. For the truly authentic, rich, baked experience this recipe promises, you really need to follow the oven steps!
Estimated Nutritional Data for This Cheesecake Recipe
Now, I know some of you are tracking things, and some of you just want to embrace the indulgence! Either way, I always like to give you a headcount on what’s in a slice of this incredible **cheesecake recipe**. Remember, because this is a rich, full-fat New York style bake, it’s meant to be a treat, not an everyday dessert. Because we focused on the most decadent ingredients—full-fat cream cheese and real butter in the crust—these numbers reflect that luxurious texture we achieved.
Please keep in mind that these are educated estimates based on the exact ingredients I listed above. If you swap the sugar for a substitute or use a different crust base, the exact counts will change! This information is provided just to give you a general idea of what you’re enjoying when you sit down with a slice of this **Restaurant Quality Cheesecake at Home**.
- Serving Size: 1 slice
- Calories: 450
- Total Fat: 30g (You can see that saturated fat is up there, that’s the creaminess talking!)
- Total Carbohydrates: 38g
- Protein: 9g
- Sugar: 32g
- Cholesterol: 120mg
See? It’s decadent, just like it should be! Don’t let the numbers scare you too much, though; this is a **dessert recipe** meant to be savored. Everything in moderation, right? Enjoy every single bite of this **Simple Creamy Dessert**!
Share Your Restaurant Quality Cheesecake at Home Experience
Now that you’ve successfully navigated the process and baked this towering, crack-free marvel, I really, *really* want to see what you created! Seriously, seeing your baked goods is the best part of my day. I built this site because I wanted people to feel that burst of pride when they realize they managed something they thought was impossible, and this **cheesecake recipe** is the perfect example of that.
Did it come out smooth and tall? Did you manage to avoid any cracks, making it look exactly like a **Restaurant Quality Cheesecake at Home**? Please tell me about it in the comments below! Leaving a star rating and a note about how your bake went helps other beginners feel confident trying this recipe next time. It’s how we build trust here at Kings Cook!
If you ran into a snag or have a burning question that I didn’t cover in the FAQ, don’t hesitate to reach out! You can always send me a note through the Contact Page. I love hearing from you and helping troubleshoot if something didn’t quite go as planned. But honestly, after all the testing we did, I have a good feeling you’re going to absolutely nail this **Classic Cheesecake Recipe** on the first try. Happy eating!
PrintThe Best Easy New York Style Cheesecake Recipe (No Cracks, No Water Bath)
Follow this simple, reliable recipe to make a tall, creamy New York style cheesecake with a graham cracker crust. You will achieve a perfect, velvety texture without needing a water bath or worrying about cracks.
- Prep Time: 20 min
- Cook Time: 75 min
- Total Time: 8 hours 35 min
- Yield: 12 servings 1x
- Category: Dessert
- Method: Baking
- Cuisine: American
- Diet: Vegetarian
Ingredients
- 1 1/2 cups graham cracker crumbs
- 1/4 cup granulated sugar (for crust)
- 6 tablespoons unsalted butter, melted
- 4 (8 ounce) packages full-fat cream cheese, softened to room temperature
- 1 1/2 cups granulated sugar (for filling)
- 1/4 cup all-purpose flour
- 1 teaspoon vanilla extract
- 1/4 teaspoon salt
- 4 large eggs, room temperature
Instructions
- Prepare the crust: Combine graham cracker crumbs, 1/4 cup sugar, and melted butter in a bowl. Press the mixture firmly into the bottom of a 9-inch springform pan. Chill the crust for 15 minutes while you prepare the filling.
- Preheat your oven to 325°F (160°C). Do not use a water bath for this recipe.
- Make the filling: In a large bowl, use an electric mixer to beat the softened cream cheese until completely smooth, about 3 minutes. Scrape down the sides of the bowl often.
- Add 1 1/2 cups sugar, flour, vanilla extract, and salt to the cream cheese. Beat on medium speed until just combined and smooth. Do not overmix.
- Add the eggs one at a time, beating only until each egg is incorporated. Stop mixing as soon as the last egg disappears into the batter. Overmixing adds air, which causes cracks.
- Pour the filling over the chilled crust in the springform pan. Gently tap the pan on the counter a few times to release any large air bubbles.
- Bake for 60 to 75 minutes. The edges should look set, but the center 2 inches should still have a slight wobble when gently nudged.
- Turn off the oven, prop the door open slightly (about 2 inches), and let the cheesecake cool inside the oven for 1 hour. This slow cooling prevents cracking.
- Remove the cheesecake from the oven and let it cool completely on a wire rack at room temperature.
- Once cool, cover the pan loosely with plastic wrap and refrigerate for at least 6 hours, or preferably overnight, before serving.
Notes
- Ensure all dairy ingredients, especially the cream cheese and eggs, are at true room temperature for the smoothest batter.
- For easy removal, run a thin knife around the edge of the cheesecake before releasing the springform side after chilling.
- This recipe yields a tall, restaurant-quality cheesecake texture.
Nutrition
- Serving Size: 1 slice
- Calories: 450
- Sugar: 32
- Sodium: 300
- Fat: 30
- Saturated Fat: 18
- Unsaturated Fat: 12
- Trans Fat: 0.5
- Carbohydrates: 38
- Fiber: 1
- Protein: 9
- Cholesterol: 120