
There’s just something about homemade candy, isn’t there? It feels like a little secret luxury you’ve created just for yourself (and maybe a few lucky friends!). Forget those waxy, store-bought bars; when you’re craving true indulgence, nothing beats sinking your teeth into a rich, chewy slice of homemade goodness. That’s why I’ve landed on what I truly believe is The Ultimate Easy and Creamy Salted Caramel Fudge (Perfect for Gifting). It’s decadent, it’s ridiculously flavorful, and honestly, it’s so much simpler than you think. This salted caramel fudge recipe brings that perfect sweet and salty hit we all crave, and trust me, it’s become my absolute required contribution to every holiday gathering we attend.
- Why This Salted Caramel Fudge Recipe is Your New Go-To Sweet Treat
- Ingredients for the Best Homemade Fudge
- Step-by-Step Instructions for Salted Caramel Fudge
- Fudge Making Tips and Tricks for Perfect Salted Caramel Fudge
- Variations on Your Salted Caramel Fudge
- Serving Suggestions for This Sweet and Salty Dessert
- Storage and Reheating Instructions for Salted Caramel Fudge
- Frequently Asked Questions About Making Salted Caramel Fudge
- Estimated Nutritional Data for This Decadent Caramel Confection
Why This Salted Caramel Fudge Recipe is Your New Go-To Sweet Treat
I’ve been asked countless times if I have a secret for making fudge that doesn’t turn out grainy or crumbly. Well, this is it! This recipe for salted caramel fudge is my absolute champion. I’ve made this batch dozens of times, tweaking timings and temperatures, so I can promise you it delivers that perfect, melt-in-your-mouth experience every single time. It’s the ideal sweet and salty dessert that satisfies that deep craving.
The balance here is incredible. You get the rich, buttery base, a strong hit of salty goodness, and just enough chocolate to make it truly decadent. Because it sets up so beautifully, it’s fantastic for making ahead. If you are looking for amazing homemade fudge for gifts, wrap these cubes in wax paper and pop them into little decorative tins. They look professional, but only you know how easy they were!
Achieving That Perfect Creamy Caramel Candy Texture
Texture is everything when you are working with fudge, right? We aren’t aiming for taffy here; we are aiming for that soft, decadent bite. The trick, the absolute non-negotiable key to getting this reliable, creamy caramel candy finish, is sticking strictly to the temperature listed on the thermometer. Seriously, don’t eyeball it!
Once we hit that 238-degree mark and pour, the chemical magic happens, locking in moisture and creating that perfect structure. If you want to see more reliable sweet recipes, check out my collection of my best dessert recipes.
Ingredients for the Best Homemade Fudge
When we talk about the best homemade fudge, we are talking about using high-quality, dependable ingredients. There are no fancy substitutions or shortcuts that I trust here; this recipe demands accuracy, which is why I’ve personally tested and relied on these exact measurements for my rich buttery fudge.
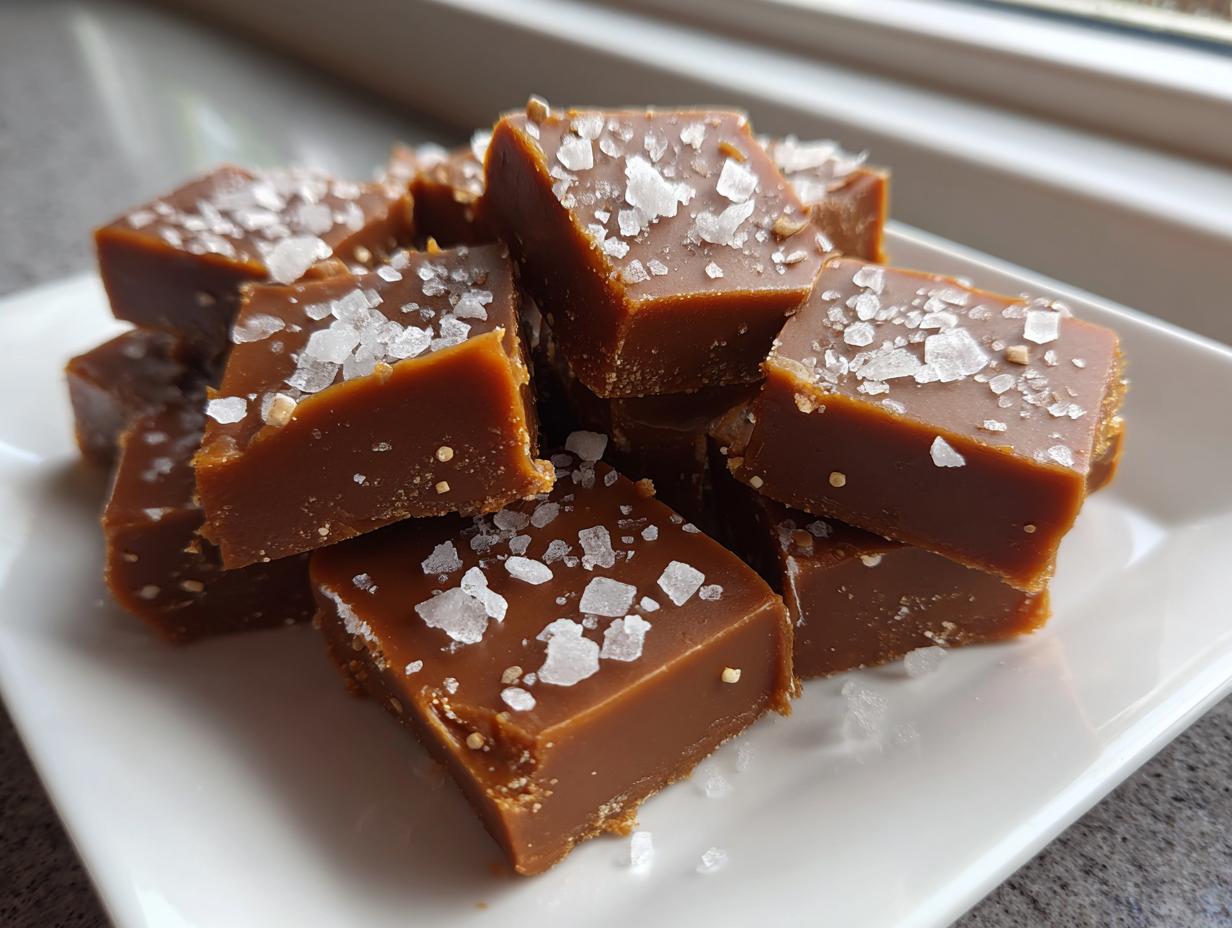
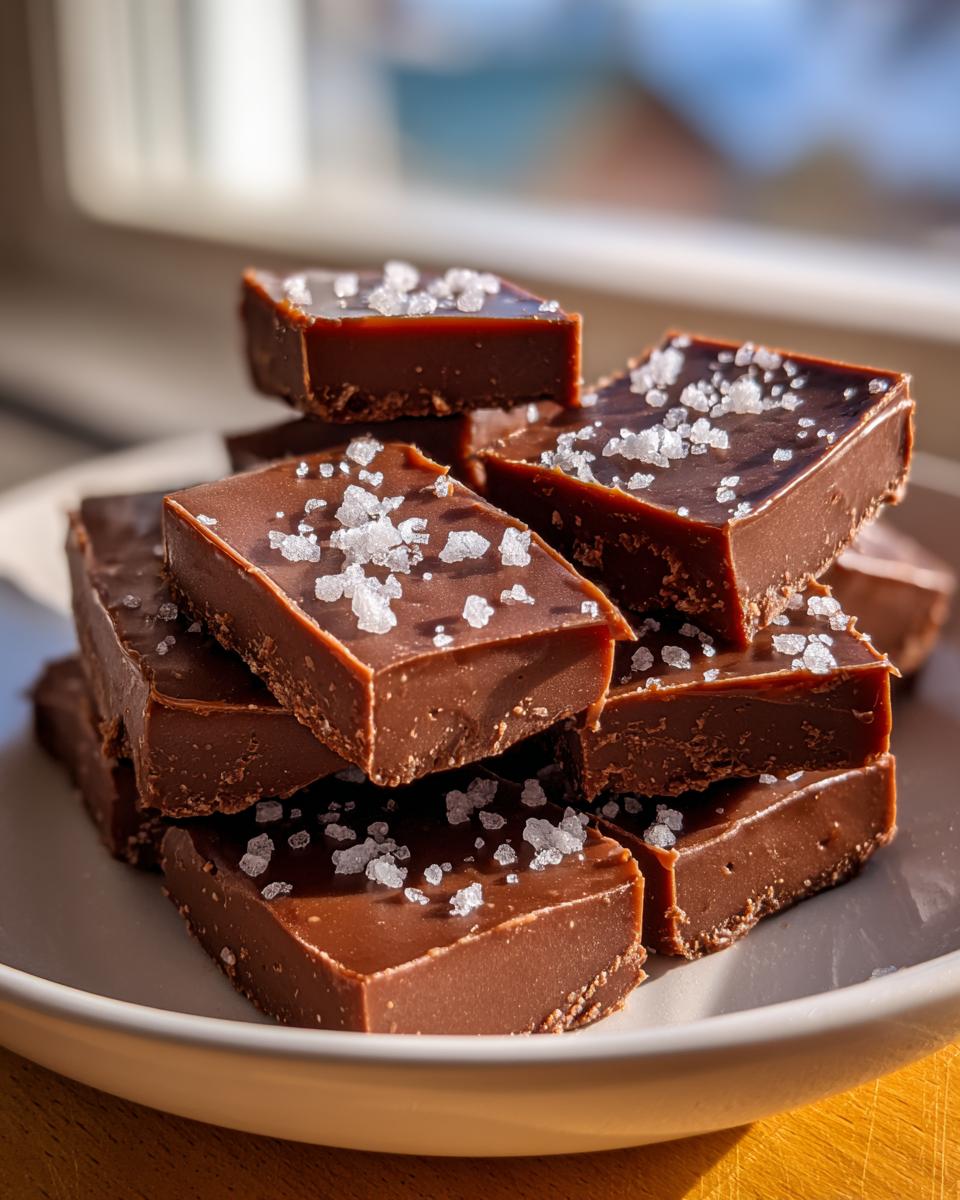
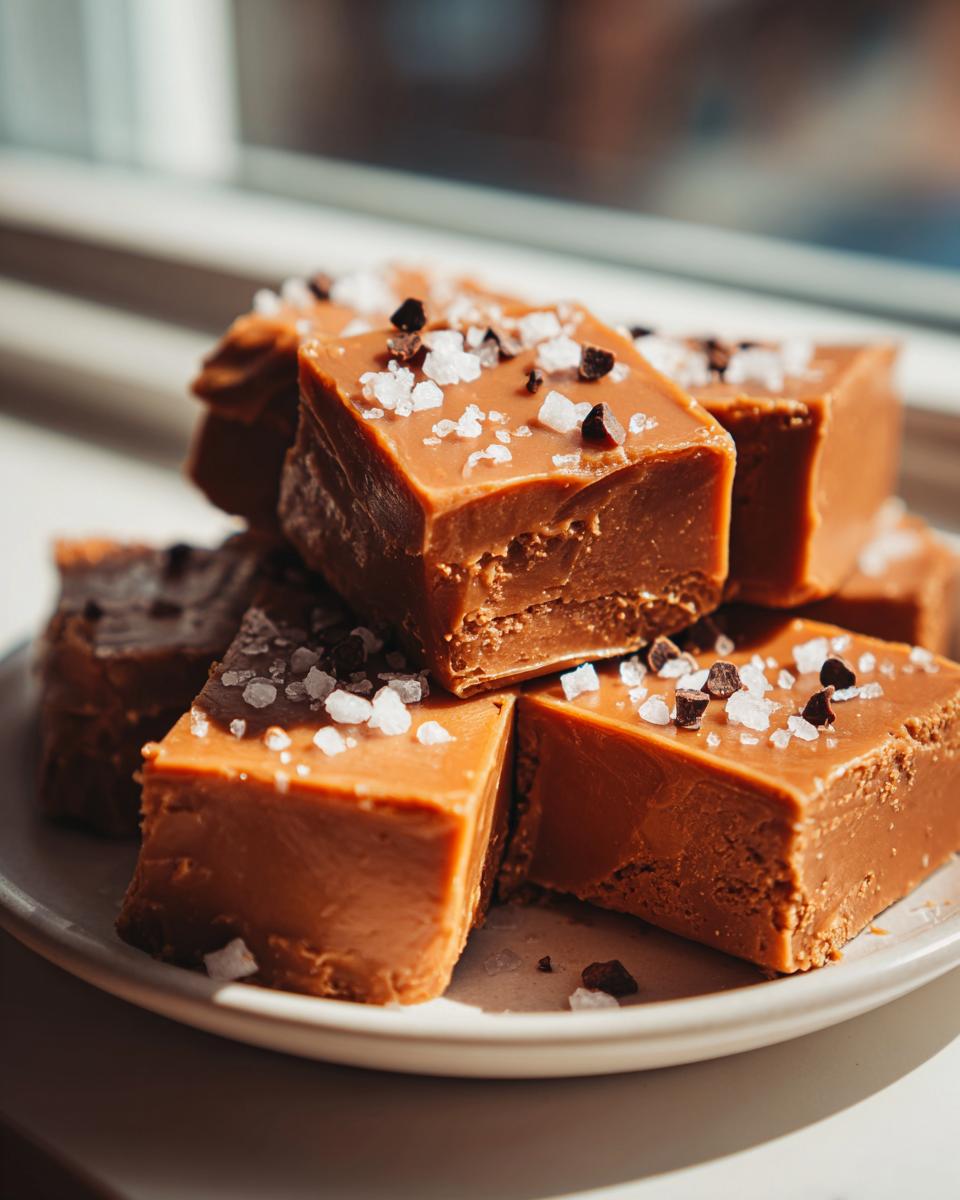
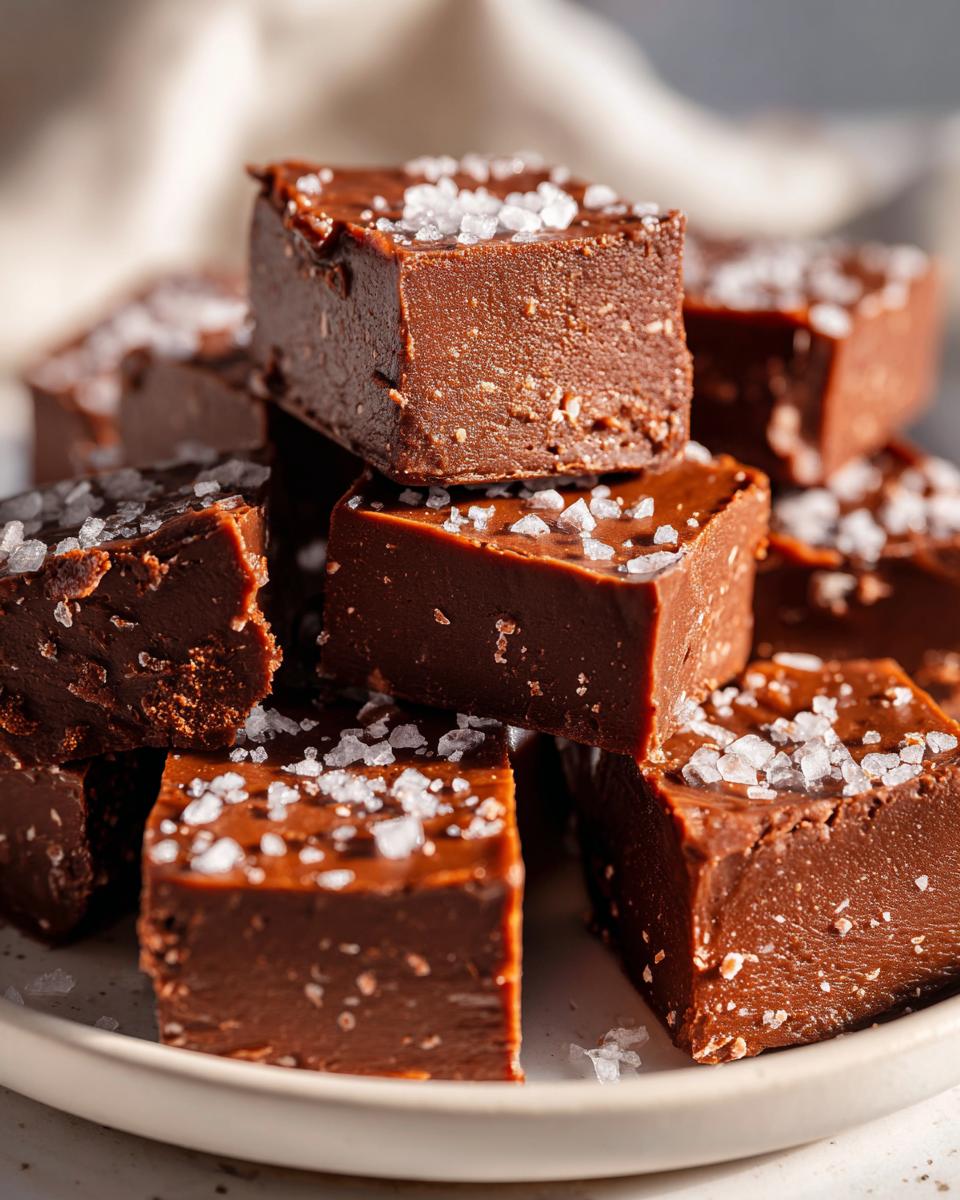
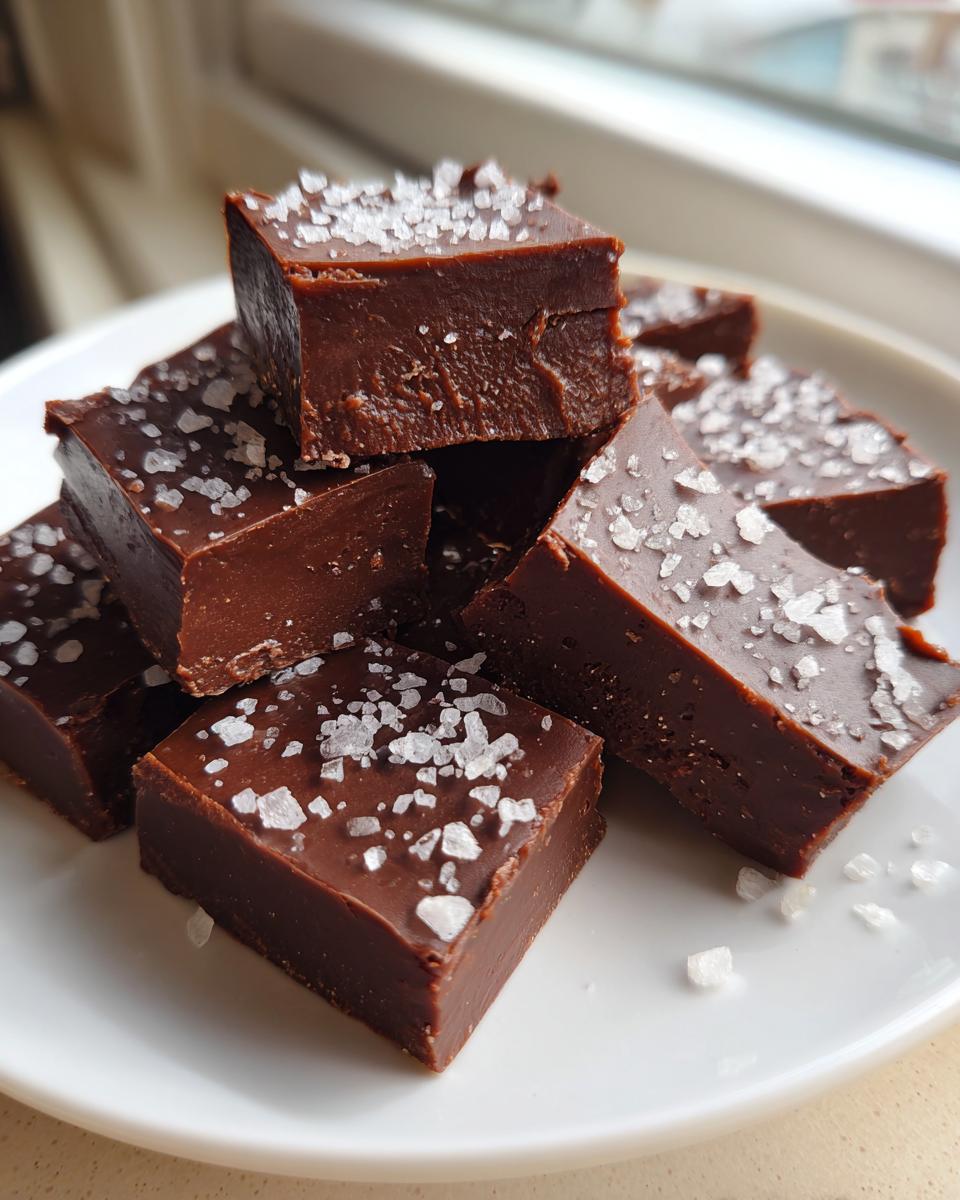
When preparing this, make sure you have all of your components laid out, especially that salt! You’ll notice we use it twice, and the coarse sea salt for the topping really makes a huge visual and flavor difference against the soft fudge base. Trust me on the salt—it’s the professional touch on this confection.
Essential Components for Rich Buttery Fudge
You will need one 14 ounce can of sweetened condensed milk, two cups of granulated sugar, one cup (which is two sticks) of unsalted butter, one cup of light corn syrup, one teaspoon of vanilla extract, a half teaspoon of coarse sea salt specifically for mixing into the batch, one 12 ounce bag of semi-sweet chocolate chips, and then extra coarse sea salt reserved just for sprinkling on top before it sets. Gather everything up now and let’s get that heavy-bottomed pot ready!
Step-by-Step Instructions for Salted Caramel Fudge
I know looking at that long list of steps might look intimidating, but trust me, this process moves quickly once things get hot! We are aiming for a no fail fudge recipe here, which means sticking close to the thermometer readings we established in the ingredient prep. Don’t turn away while this is cooking; you need to pay attention to build that perfect structure for this simple fudge making process.
Preparing the Pan and Cooking the Caramel Base
First order of business: get your pan ready! Line that 8×8 inch pan with parchment paper, making sure you leave an overhang on the sides—this is like homemade handles for when we need to lift this beautiful candy out later. Give that paper a quick little grease too, just to be safe. Now, grab your biggest, heaviest-bottomed saucepan. I learned the hard way that thinner pots scorch the milk solids, which ruins that rich, buttery flavor we are aiming for!
Into that heavy pot go your condensed milk, sugar, butter (all two sticks!), and the light corn syrup. Put it over medium heat and stir constantly until everything melts together and the sugar dissolves. This is crucial! Once it looks dissolved, attach your candy thermometer, making absolutely sure the tip isn’t touching the bottom of the pan. Now, just keep stirring occasionally so nothing burns on the bottom, and watch that temperature climb until it hits exactly 238 degrees Fahrenheit. That’s the magic Firm Ball stage right there!
Finishing the Salted Caramel Fudge Making
The second you hit 238°F, take that pot right off the heat—seriously, move it to a cold burner immediately! Stir in the vanilla and that half teaspoon of coarse sea salt until they vanish into the hot mixture. Now, here’s where the chocolate gets invited in. Place your semi-sweet chocolate chips in a separate, heat-safe bowl. Pour that blazing hot caramel mixture right over the chips. Don’t touch it! Let it sit completely undisturbed for a full five minutes. This steams the chocolate perfectly.
After those five minutes are up, gently stir everything together until it’s glossy and perfectly smooth. Remember, you want to stir just enough to combine; overmixing after the chocolate goes in can mess up the texture! Scrape the beautiful, glossy fudge into your prepared pan, smooth the top quickly, and sprinkle that extra coarse sea salt over everything. Here’s my biggest rule: do not refrigerate this! Let it cool completely on the counter for at least four hours until firm. That slow cooling is what gives you the chewiness and keeps it creamy. Check out my guide on making soft, chewy caramels if you want another candy challenge!
Fudge Making Tips and Tricks for Perfect Salted Caramel Fudge
You’ve nailed the cooking part, but now we get into the nitty-gritty fudge making tips and tricks that separate a good batch from a truly show-stopping one. I learned these little secrets the hard way, so you don’t have to fuss! Remember, making this rich buttery fudge is all about respecting the process.
When you’re finished, don’t forget to check out my other indulgent chocolate treat, the ultimate fudge brownies recipe. And if you want to compare notes on texture, take a peek at this other reliable source for salted caramel fudge recipe inspiration!
Ingredient Notes and Substitutions for Chewy Salted Caramel
Let’s talk about texture again, specifically maintaining that beautiful chewy salted caramel quality. The light corn syrup here isn’t just for sweetness; it actually works to prevent your sugar from crystallizing, which is what gives you that horrible gritty mouthfeel. Don’t try swapping that out for honey or maple syrup, or you risk losing that signature chew!
Also, that sweetened condensed milk? It does a lot of heavy lifting! It provides the body and the base that keeps the fudge stable. For the topping, I really insist on using genuine coarse sea salt flakes. They don’t dissolve completely, so when you bite in, you get that sharp, clean pop of salinity that perfectly cuts through all that buttery goodness. It’s essential for achieving that sweet and salty dessert contrast.
Variations on Your Salted Caramel Fudge
Okay, once you’ve mastered the base recipe—which, by the way, is a triumph in itself—you might want to jazz things up a bit for different holidays or just because you can’t stop baking! This simple base is the perfect platform for tons of flavor additions. I love finding new ways to serve up this incredible caramel confection.
If you’re looking for other amazing flavor combinations perfect for gifting, you absolutely have to check out my guide to salted caramel brownies—they fly off the plate! And for more festive ideas, see what they are up to with caramel fudge over at this link.
Here are three super easy twists you can try right on top of the hot fudge before it sets:
- Toasted Pecans: Fold in about a half cup of lightly toasted and chopped pecans right before you pour it into the pan. It adds the best crunch against that smooth texture.
- Dark Chocolate Swap: Instead of the semi-sweet chips, use high-quality dark chocolate (around 60-70% cacao). It deepens the flavor immensely and makes this treat even more sophisticated.
- Marshmallow Swirl: This is pure indulgence! Place dollops of soft marshmallow creme all over the surface after pouring the fudge into the pan, then use a knife to gently swirl it in before the final salt sprinkle. It adds a lovely gooey layer.
Serving Suggestions for This Sweet and Salty Dessert
Now we have this gorgeous, rich slab of salted caramel fudge, the question is—how do we serve it? Honestly, you could just stand over the pan and eat it with a spoon, but trust me, presenting it properly makes it feel even more special, especially if you’re making it as homemade fudge for gifts!
The first thing I always do, as soon as it’s firm enough to cut without making a huge mess, is slice it into small, generous squares. These are super rich, so bite-size portions are perfect. If you are planning to travel with them or give them away, you have to wrap them. I love using squares of wax paper—just wrap each piece individually. It keeps them from sticking together, and it has such a classic, nostalgic candy shop look. Then, tuck those paper-wrapped beauties into a cute little tin or a small cellophane bag tied with a nice ribbon. People absolutely adore receiving these!
For pairing at home, this is a serious coffee companion. The bitterness of a good strong brew cuts right through the sweetness beautifully, making for a perfect afternoon indulgence. Or, if you’re prepping for the holidays, this pairs fantastically alongside other classic goodies, like my Christmas fudge recipes. Think about serving it alongside some simple shortbread or even just a really nice glass of bourbon or spiced tea. For cocktail pairings, I always reference my list of go-to drinks over at my favorite cocktails and drinks!
Seriously, once you see how stunning these look wrapped up, you’ll realize this isn’t just dessert; it’s edible holiday cheer!
Storage and Reheating Instructions for Salted Caramel Fudge
Because we worked so hard to get that perfect, chewy texture by letting this fudge set up on the counter, we absolutely need to honor that by storing it correctly! For the best, melt-in-your-mouth experience, keep your cut squares sealed airtight at room temperature. They hold up wonderfully for a good week, sometimes even longer, because of all that sugar and butter acting as natural preservatives.
I really advise against sticking this in the fridge if you can help it. Chilling can make the fudge harden up a bit too much, and you lose that beautiful soft give. If you absolutely must store it longer, wrap each piece tightly in plastic wrap first, then place it in an airtight container. If it gets too cold, just let the squares sit out on the counter for about 30 minutes before serving, and they’ll be perfect again!
Frequently Asked Questions About Making Salted Caramel Fudge
I always get so many questions when people first try making this candy, which tells me you all are serious about getting this right! It’s totally normal to have questions when dealing with candy making because temperature is so important. Here are some of the things I hear most often about achieving that perfect, decadent slice every time.
Can I make this easy caramel fudge without a candy thermometer?
Look, I know thermometers can seem fussy, and some of you might be looking for a super quick fix, maybe even a microwave salted caramel fudge method. While those methods are fast, for this specific recipe—because we want that high-quality, buttery, chewy texture—I strongly, strongly recommend the candy thermometer. The difference between 235°F and 240°F is the difference between creamy fudge and hard caramel candies. My passion here at Kings Cook is giving you success, and the thermometer is your key to getting that amazing, reliable result. It’s the only way to guarantee the perfection of this sweet treats recipes!
Why is my salted caramel fudge grainy instead of melt in your mouth fudge?
Oh, the dreaded grainy batch! This is almost always due to sugar crystallization. It happens when the sugar comes out of solution during cooking, which means you either stirred it too vigorously while it was coming *up* to temperature, or maybe you scraped down the sides of the pot too often. Once the sugar dissolves, you only want to gently stir the base as it heats. If you see tiny sugar crystals forming on the sides of your pot or lid, wipe them gently away with a wet pastry brush—that keeps the crystals from seeding the whole batch and turning your beautiful, smooth fudge into something gritty. We want that melt in your mouth fudge texture, not sand!
If you’re having trouble getting the hang of the temperature, you might want to look at my post on soft, chewy caramels, as understanding that firmness level is crucial for all kinds of candy work!
Estimated Nutritional Data for This Decadent Caramel Confection
I always think it’s helpful to have a general idea of what’s in our favorite indulgences, though let’s be real—this decadent caramel confection is meant to be enjoyed! This information is based on the full recipe divided into 36 small squares, but please remember these are just estimates. The exact numbers can change depending on the brand of chips or butter you use.
If you are looking for a lighter-feeling sweet treat, remember that the serving size is small, and these squares are truly rich. That’s part of their charm!
- Serving Size: 1 square
- Calories: 185
- Fat: 9g
- Saturated Fat: 5g
- Trans Fat: 0g
- Cholesterol: 15mg
- Sodium: 75mg
- Carbohydrates: 26g
- Sugar: 25g
- Fiber: 0g
- Protein: 2g
As you can see, there’s a good bit of sugar and fat here—because that’s what makes caramel fudge so wonderfully delicious! Don’t stress too much about the numbers; just know that every bite of this homemade goodness is packed with flavor. Enjoy every single piece!
PrintThe Ultimate Easy and Creamy Salted Caramel Fudge (Perfect for Gifting)
Make rich, chewy salted caramel fudge with this simple recipe. Achieve the perfect sweet and salty balance for a decadent homemade treat ideal for holidays or gifts.
- Prep Time: 15 min
- Cook Time: 15 min
- Total Time: 4 hours 30 min
- Yield: 36 servings 1x
- Category: Dessert
- Method: Stovetop Cooking
- Cuisine: American
- Diet: Vegetarian
Ingredients
- 1 (14 ounce) can sweetened condensed milk
- 2 cups granulated sugar
- 1 cup (2 sticks) unsalted butter
- 1 cup light corn syrup
- 1 teaspoon vanilla extract
- 1/2 teaspoon coarse sea salt, plus more for topping
- 1 (12 ounce) bag semi-sweet chocolate chips
Instructions
- Line an 8×8 inch baking pan with parchment paper, leaving an overhang on the sides for easy removal. Lightly grease the paper.
- In a large, heavy-bottomed saucepan, combine the sweetened condensed milk, sugar, butter, and light corn syrup.
- Stir the mixture constantly over medium heat until the butter melts and the sugar dissolves.
- Attach a candy thermometer to the side of the pan, making sure the tip does not touch the bottom.
- Continue to cook, stirring occasionally to prevent scorching, until the mixture reaches 238 degrees Fahrenheit (Firm Ball stage). This usually takes about 10 to 15 minutes.
- Immediately remove the saucepan from the heat.
- Stir in the vanilla extract and the 1/2 teaspoon of coarse sea salt until combined.
- Pour the hot caramel mixture over the chocolate chips placed in a separate, heat-safe bowl. Let it sit undisturbed for 5 minutes to allow the chocolate to melt.
- Stir the chocolate and caramel mixture gently until it is completely smooth and glossy. Do not overmix.
- Pour the fudge into the prepared baking pan and spread it evenly.
- Sprinkle the top lightly with additional coarse sea salt.
- Let the fudge cool completely at room temperature for at least 4 hours, or until firm. Do not refrigerate, as this can affect the texture.
- Use the parchment paper overhang to lift the fudge from the pan. Cut into small squares.
Notes
- For the best, chewiest texture, use a heavy-bottomed pan to distribute heat evenly and prevent scorching the milk solids.
- Use high-quality sea salt for the topping; the flakes provide a better visual and flavor contrast than fine table salt.
- If you want a quicker set time, you can chill the fudge for 1 hour, but allow it to come back to room temperature before cutting for the creamiest result.
- This rich buttery fudge makes excellent homemade fudge for gifts when wrapped individually in wax paper.
Nutrition
- Serving Size: 1 square
- Calories: 185
- Sugar: 25
- Sodium: 75
- Fat: 9
- Saturated Fat: 5
- Unsaturated Fat: 4
- Trans Fat: 0
- Carbohydrates: 26
- Fiber: 0
- Protein: 2
- Cholesterol: 15