

Tired of watery chocolate syrup that tastes more like colored sugar water than actual chocolate? I do not blame you! For years, I felt like I was constantly disappointed by the generic stuff on the shelves. That’s why I dedicated time to developing what I call the ultimate homemade chocolate syrup recipe. It comes together faster than you can drive to the store, taking barely five minutes on the stovetop. Trust me when I say this version is intensely rich, decadent, and gets that perfect thick texture you crave. As always here at Kings Cook, this recipe uses simple pantry staples to deliver reliably delicious results you can feel great about!
- Why This Homemade Chocolate Syrup Recipe Beats Store-Bought
- Ingredients for the Best Chocolate Topping
- How to Make Chocolate Syrup From Scratch in 5 Minutes
- Mastering Your Homemade Chocolate Syrup: Ingredient Notes and Swaps
- 10 Ways to Use Your Rich Chocolate Drizzle
- Storage and Shelf Life for Homemade Chocolate Syrup
- Frequently Asked Questions About Chocolate Syrup
- Making Chocolate Syrup: A Perfect Homemade Gift Idea
- Estimated Nutritional Data for This Recipe
- Share Your Kitchen Successes
Why This Homemade Chocolate Syrup Recipe Beats Store-Bought
Look, I’m not trying to bash store brands, but honestly, once you try this, you’ll never look back. This recipe is genuinely better than Hershey’s syrup—it has a depth of flavor you just can’t match with additives and stabilizers. My favorite part is knowing exactly what’s going into it. We skip the high-fructose corn syrup entirely, which I think is a huge win when you’re eating something sweet!
The difference isn’t just the ingredients list; it’s the intensity. Because we use high-quality unsweetened cocoa powder and let it simmer gently, you unlock all those deep, rich chocolate notes. That five-minute cooking time makes all the difference, transforming basic pantry items into an unbelievably silky smooth chocolate sauce.
I tested this recipe dozens of times until the texture was perfect. I even included a link to a fantastic resource about making great chocolate sauce if you want more inspiration because texture is everything for a topping!
The Secret to Rich Chocolate Drizzle Texture
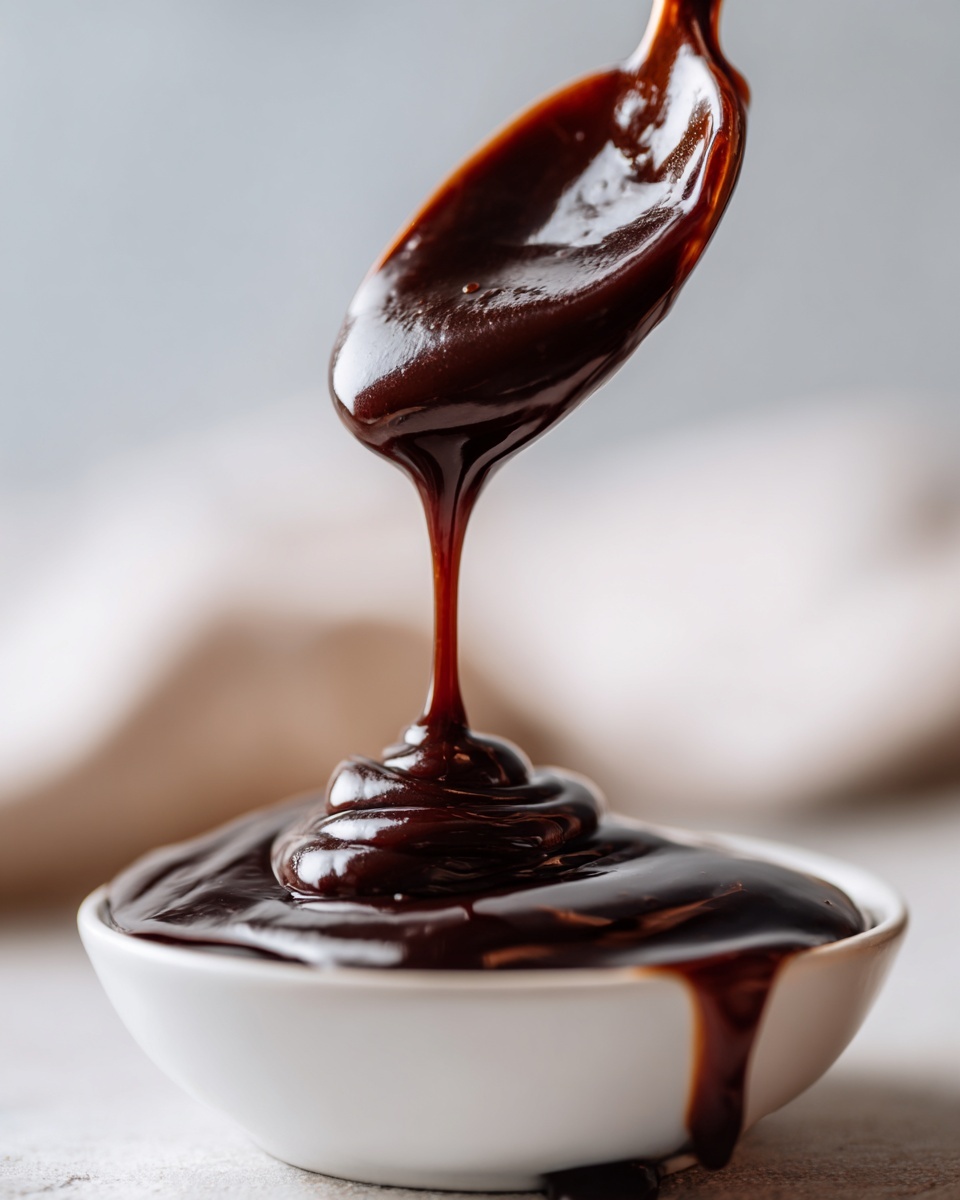
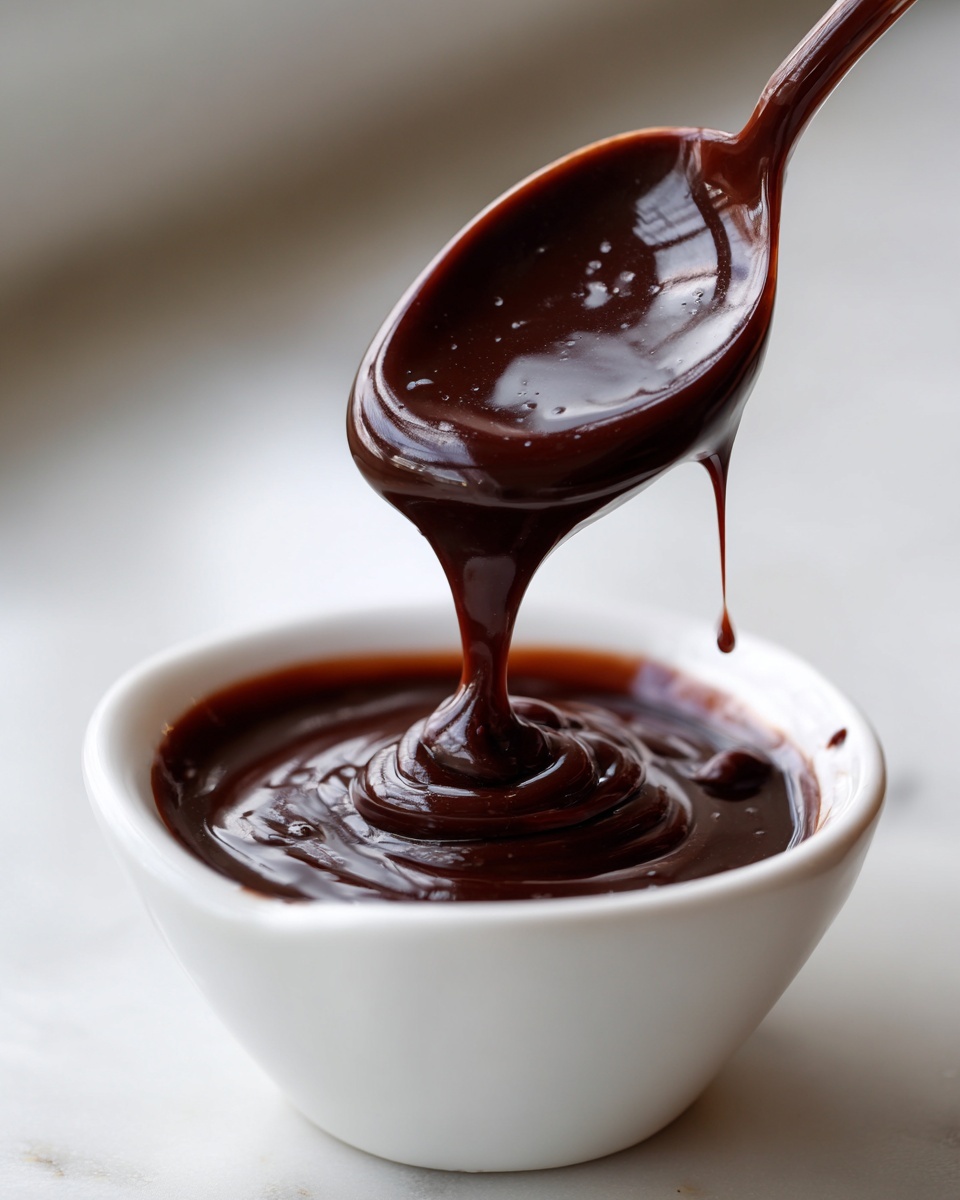
So, why is this a rich chocolate drizzle and not liquid water? It all comes down to chemistry, which sounds fancy, but it’s simple! We use equal parts sugar and liquid. When you cook the sugar crystals with the cocoa powder and water, you create a stable emulsion. That light simmer for three minutes is just enough time for the mixture to reduce slightly and for the sugar to fully incorporate without burning. That’s what locks in that velvety structure!
Ingredients for the Best Chocolate Topping
You’ll be shocked by how simple this list is. Seriously, check your pantry right now! You don’t need fancy stabilizers or weird stuff you can’t pronounce. For the best chocolate topping, we are keeping it real and traditional here. Everything you need is listed below, and you’ll notice we are using standard granulated sugar—no complicated substitutes needed for this classic version.
- 1 cup granulated sugar
- 1 cup unsweetened cocoa powder (make sure it’s unsweetened!)
- 1 cup water
- 1 teaspoon vanilla extract
- Pinch of salt
That’s it! See? Easy pantry recipes are the best. These five simple items are the foundation for the most amazing homemade chocolate sauce you’ll ever make.
How to Make Chocolate Syrup From Scratch in 5 Minutes
Trust me, this process is so fast; you can whip up a batch of this fantastic cocoa powder syrup while your coffee brews! We need medium heat to get things moving, but don’t get distracted because we have to watch it closely. Combine the sugar, cocoa powder, and water right in your saucepan over medium heat. Whisk constantly—and I mean constantly—until everything is dissolved and you just see the tiniest little bubbles starting to form around the edges. This means it’s just starting to simmer, which is exactly what we want for our quick dessert sauce.
Once it hits that simmer, dial the heat way down to low. You only need about three minutes of gentle cooking, just stirring every so often. This ensures that rich flavor develops without scorching. Then, pull it right off the heat. Stir in your vanilla and that tiny pinch of salt—the salt is crucial, it really makes the chocolate pop!
Now for the most important part: cooling! I learned this the hard way. The first time I made this, I couldn’t wait and poured it straight into a jar while it was still piping hot, hoping to use it on pancakes that night. Ugh, it was basically chocolate water! It didn’t thicken properly until the next morning. Remember, this syrup gets its velvety body as it cools down, so be patient!
Once cool, store it to use as the chocolate milk ingredient you deserve. If you need thinner syrup right away, you can always follow my little tip over on my pancake recipe for a quick fix, or check out this great tutorial on simple homemade chocolate syrup!
Crucial Tip for Silky Smooth Chocolate Sauce Consistency
Patience during cooling is non-negotiable for that silky smooth chocolate sauce. Once it’s cooled to room temperature, it should coat the back of a spoon beautifully. If you absolutely must use it warm, resist the microwave! Heat it very gently in short 10-second bursts on the lowest power setting, stirring in between each blast. Never bring it back to a boil.

Mastering Your Homemade Chocolate Syrup: Ingredient Notes and Swaps
Even though this recipe is so simple, I always get questions about substitutions, and that’s fair! We are aiming for the no corn syrup chocolate sauce experience here, and the basic ingredients deliver that perfectly. However, if you have specific needs, we can totally adjust. Since this recipe is naturally vegetarian, making it fit into other diets is usually quite straightforward, though quality matters!
The one thing I always emphasize is that if you are trying to make dietary swaps, spend your money on the cocoa powder. A rich, dark cocoa powder makes this homemade chocolate syrup sing, ensuring the flavor is deep and not just sweet water. If you’re ever curious about going truly sugar-free, I’ve seen some great ideas over at this resource, although this recipe relies on real sugar for that classic texture!
Making Vegan Chocolate Syrup
If you are looking to make a completely vegan chocolate syrup, that’s easy peasy! The main thing to check that many folks miss when moving to vegan baking is the sugar itself. Depending on your specific standards, you’ll want to make sure your granulated sugar hasn’t been processed using bone char. If that’s a concern for you, source cane sugar that is certified vegan. Outside of that, this recipe is ready to go!
10 Ways to Use Your Rich Chocolate Drizzle
Now that you have this incredibly rich, luxurious topping ready, the real fun begins! Honestly, I’ve caught my kids sneaking spoonfuls straight from the jar, which is why I sometimes have to warn them this intense flavor is best served over something else! This is your new go-to for elevating everything from simple breakfasts to late-night coffee fixes.
Of course, it shines as an ice cream topping recipe. Drizzle it thickly over vanilla, mint chip, or even strawberry ice cream. Another classic? Using it as a chocolate milk ingredient. Just stir two big spoonfuls into a cold glass of milk—no whisking necessary because it dissolves so nicely.
But don’t stop there! This rich chocolate drizzle is a powerhouse in beverages. It makes the best mocha hands down. If you’re making iced coffee, stir some in before adding your milk and sweetener. You should totally check out my espresso martini recipe sometime; this syrup makes an amazing addition to those cocktails for a deep chocolate flavor!
And for breakfast? Drizzle it over my fluffy homemade French toast or use it as a decadent filling when making crepes. It’s so versatile, and because it’s so rich, a little goes a long way!

Storage and Shelf Life for Homemade Chocolate Syrup
Okay, since we skipped all those scary commercial preservatives, we do need to put this beautiful batch away properly. Store your finished chocolate syrup in a clean, airtight container—a mason jar works great! You absolutely must keep it in the refrigerator. Because we didn’t use artificial stabilizers, it will only stay fresh and safe for about two weeks in there.
Keeping it cold ensures that velvety quality stays locked in. If you try to leave it out on the counter, it might spoil faster, and nobody wants that! Two weeks flies by, though, especially once you start using it in your coffee!
Frequently Asked Questions About Chocolate Syrup
I always get so many fantastic questions once people start making their own homemade chocolate syrup! It’s wonderful that you want to make sure you’re getting the very best from this easy chocolate sauce. Here are some of the things I hear most often when folks are first trying out this recipe.
Can I make this chocolate syrup recipe without water?
Oh, I wouldn’t advise that! Water is actually a key player here, even though we rely on sugar and cocoa for flavor. If you tried to skip the water, you wouldn’t be able to properly dissolve that cup of sugar and cocoa powder over the heat. You’d end up with a gritty, burnt mess rather than that beautiful, smooth texture we are aiming for. Think of the water as the vehicle that carries the sugar and cocoa evenly before it thickens up!
How do I get my chocolate syrup to be thick like the store-bought kind?
This is my favorite question because the answer is so simple: cooling time! Remember how I mentioned rushing it once and ending up with thin goo? That’s because the thickening happens as it cools down and settles. You need to let it simmer gently on low heat for those three crucial minutes, but after you remove it from the stove, be patient! Let it cool completely on the counter before sealing it up tight and putting it in the fridge. That slow cooling process is what results in that perfect, spoon-coating consistency that works so well over my fudge brownies!
Making Chocolate Syrup: A Perfect Homemade Gift Idea
You know, this recipe is so good and looks so luxurious, it just begs to be given away! If you’re looking for an easy food gift for neighbors or teachers—especially around the holidays—you’ve found it. This homemade chocolate syrup is charming when bottled up nicely. Grab some small, clean glass jars, tie a piece of ribbon around the lid, and maybe even tape on a little tag that says, “Better than the bottle store stuff!”
It pairs wonderfully with homemade baked goods, too. Imagine gifting a jar alongside a batch of my vanilla buttercream frosting! It feels so personal, and it’s basically free advertising for your baking skills. For more ideas on presentation, some folks have great tips over at this site on turning simple recipes into thoughtful gifts.
Estimated Nutritional Data for This Recipe
I want to be super clear: since we are making this fresh, these numbers are just my best estimates based on using standard granulated sugar and regular cocoa powder for a two tablespoon serving size. Nutritional information can always shift based on brands! But for a quick reference point when you are enjoying your new rich chocolate drizzle, here is what I figure:
- Calories: About 100
- Fat: 1 gram
- Protein: 1 gram
- Carbohydrates: 25 grams
- Sugar: 18 grams
It’s a treat, for sure, but it’s loaded with real chocolate flavor every time!
Share Your Kitchen Successes
Now that you’ve mastered making your own incredible chocolate syrup, I absolutely need to know how you used it! Did you jazz up your morning coffee? Did it become the star topping on a skillet cookie? Head down to the comments right now and give this recipe a solid 5 stars if it worked its magic for you. I love seeing your kitchen successes—it truly helps me on my mission to help you Master Your Kitchen, Together! You can also read more about my culinary journey over on my About Page if you haven’t yet!
PrintThe Ultimate 5-Minute Homemade Chocolate Syrup (Richer Than Store-Bought)

Make rich, silky homemade chocolate syrup in just five minutes using simple pantry ingredients. This recipe avoids corn syrup and produces a decadent chocolate topping superior to anything you buy in a store.
- Prep Time: 5 min
- Cook Time: 5 min
- Total Time: 10 min
- Yield: About 1.5 cups 1x
- Category: Dessert Topping
- Method: Stovetop Cooking
- Cuisine: American
- Diet: Vegetarian
Ingredients
- 1 cup granulated sugar
- 1 cup unsweetened cocoa powder
- 1 cup water
- 1 teaspoon vanilla extract
- Pinch of salt
Instructions
- Combine the sugar, cocoa powder, and water in a small saucepan over medium heat.
- Whisk the mixture constantly until the sugar dissolves completely and the mixture begins to simmer. Do not let it boil rapidly.
- Reduce the heat to low and cook, stirring occasionally, for about 3 minutes until the syrup thickens slightly.
- Remove the saucepan from the heat. Stir in the vanilla extract and salt.
- Allow the chocolate syrup to cool completely. It will thicken more as it cools to achieve that perfect, velvety texture.
- Pour the cooled syrup into an airtight container for storage.
Notes
- For a vegan chocolate syrup, confirm your sugar source is bone-char free if that is a concern for your diet.
- This recipe makes a fantastic ice cream topping recipe or a base for homemade chocolate milk ingredient.
- Store this rich chocolate drizzle in the refrigerator for up to two weeks.
Nutrition
- Serving Size: 2 tablespoons
- Calories: 100
- Sugar: 18
- Sodium: 5
- Fat: 1
- Saturated Fat: 0.5
- Unsaturated Fat: 0.5
- Trans Fat: 0
- Carbohydrates: 25
- Fiber: 1
- Protein: 1
- Cholesterol: 0