
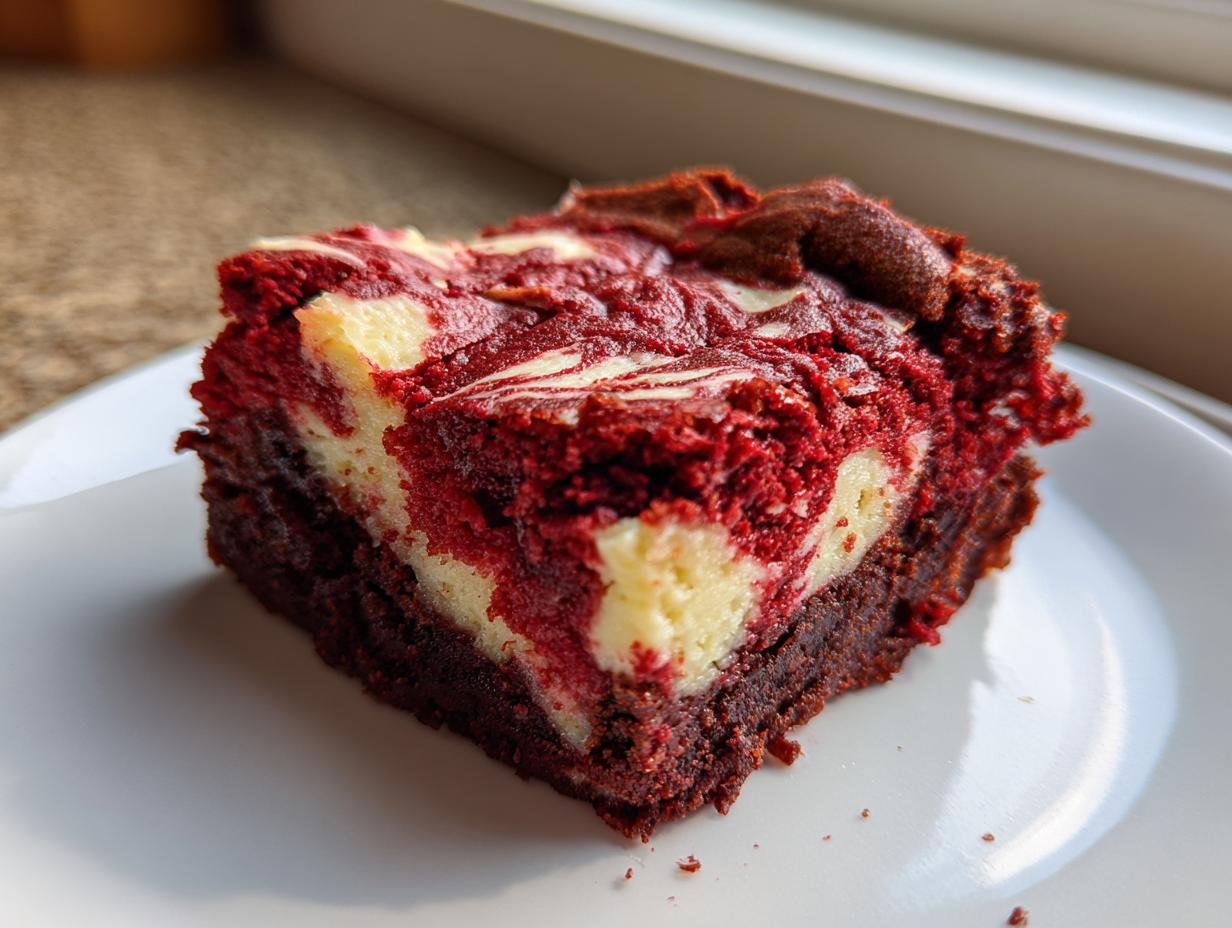
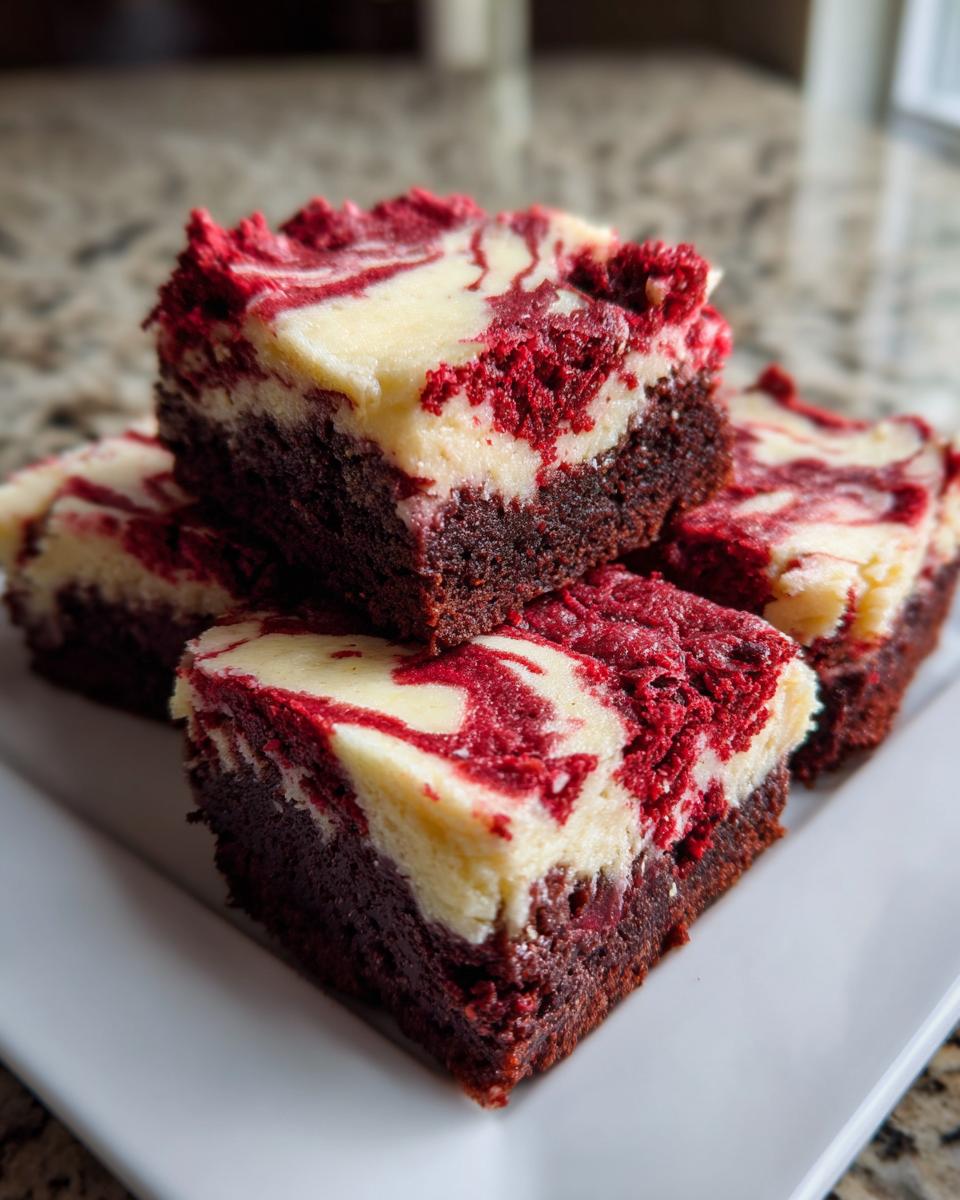
Are you ready to meet your new favorite obsession? Some desserts are nice, but every now and then, you need something truly decadent that hits every single craving possible. That’s why I spent weeks testing and tweaking to bring you what I genuinely believe is the best version of red velvet cheesecake brownies you will ever bake! We’re talking about the perfect marriage here: that rich, slightly tangy depth of red velvet cake combined with a thick, shockingly creamy cheesecake swirl nestled right into the fudgiest brownie base you can imagine. Seriously, these squares look impressive, but I promise they are so straightforward to assemble that you’ll wonder why you didn’t try them sooner. If you are looking for unforgettable, visually stunning, and truly gourmet brownie recipes, stop scrolling—this is it!
- Why You Will Master These Red Velvet Cheesecake Brownies
- Essential Ingredients for Perfect Red Velvet Cheesecake Brownies
- Simple Steps to Prepare Your Red Velvet Cheesecake Brownies
- Tips for Success When Making Red Velvet Cheesecake Brownies
- Variations for Your Cream Cheese Brownie Recipe
- Serving Suggestions for Decadent Dessert Bars
- Storage and Reheating Instructions for Red Velvet Cheesecake Brownies
- Frequently Asked Questions About Red Velvet Cheesecake Brownies
- Share Your Ultimate Fudgy Red Velvet Bars
Why You Will Master These Red Velvet Cheesecake Brownies
Listen, I know some desserts look complicated, but I promise you this recipe is foolproof. I’ve broken down every step to make sure you get those bakery-quality results without any of the stress. You don’t need to be a pastry chef to pull off these gorgeous red velvet cheesecake brownies. They truly taste like five-star gourmet treats, but they use simple mixing methods!
Here is what you get when you stick with my tried-and-true method:
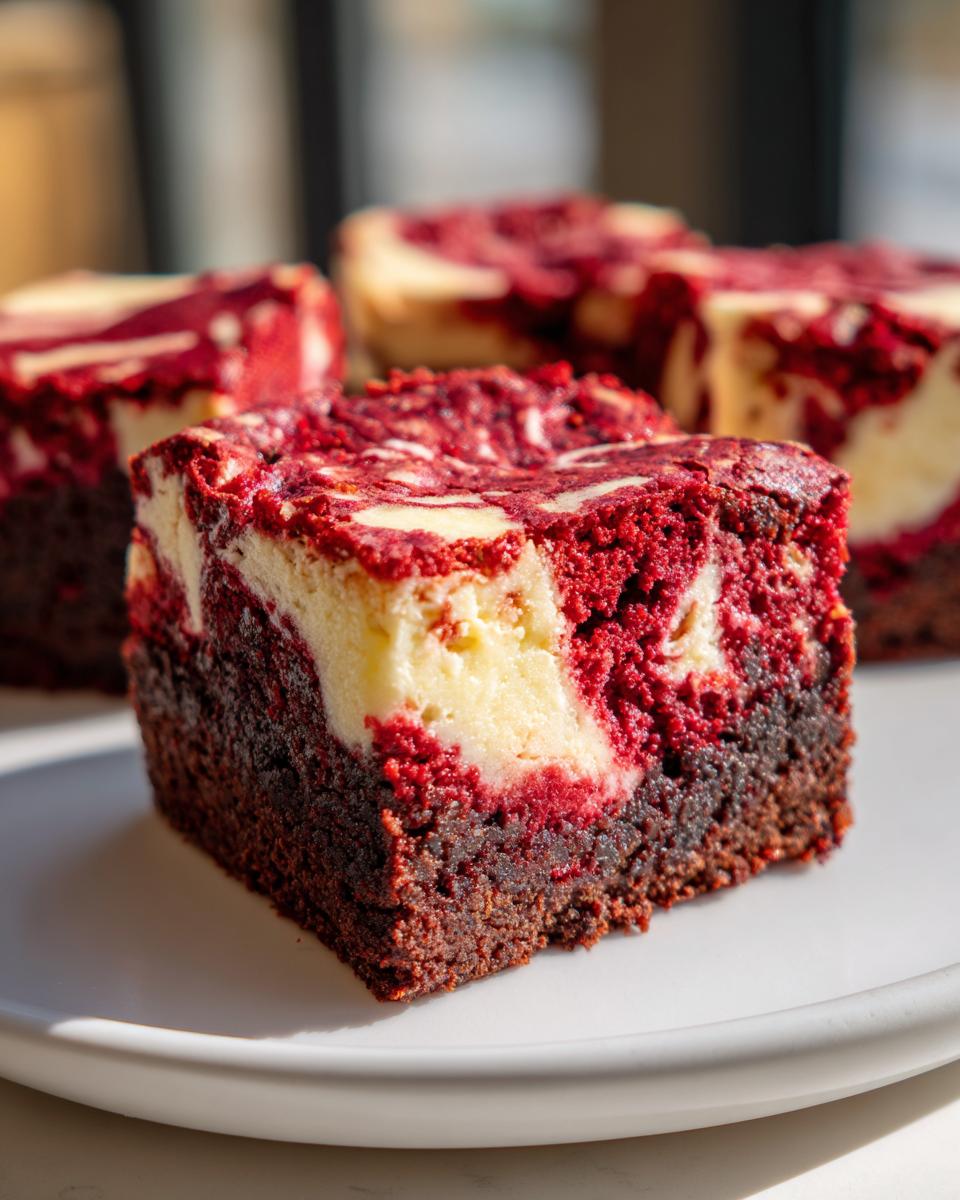
- The most glorious texture contrast: perfectly fudgy red velvet bars meeting a bright, creamy cheesecake layer.
- Seriously stunning looks! You get a gorgeous marbled red velvet dessert without needing any fancy tools.
- Easy assembly that moves fast—we can get this in the oven in well under 20 minutes, making them fantastic holiday brownie ideas.
If you’re ready to bake something that looks incredibly impressive but is secretly simple, check out why getting the ingredients just right on this one helps. You can see some other great inspiration over here: Red Velvet Brownies Recipe.
Essential Ingredients for Perfect Red Velvet Cheesecake Brownies
Okay, let’s talk about the components of these amazing red velvet cheesecake brownies. Because we are dealing with two distinct textures—fudgy velvet and creamy tang—we need to be a little specific about what goes into the bowl. Don’t panic; these are all things you can easily grab at your local grocery store. Getting these ratios right is what keeps them from turning into cakey disasters!
Here is exactly what you need:
- 1/2 cup unsalted butter, melted
- 1 cup granulated sugar
- 2 large eggs, room temperature
- 1 1/2 teaspoons red food coloring
- 2 teaspoons vanilla extract
- 1/2 teaspoon salt
- 3/4 cup all-purpose flour
- 3 Tablespoons Dutch process cocoa powder
- 8 ounces cream cheese, room temperature
- 1 large egg, room temperature (for cheesecake layer)
- 1/3 cup granulated sugar (for cheesecake layer)
- 1/4 teaspoon vanilla extract (for cheesecake layer)
When you are gathering your supplies, pay close attention to timing. My reputation rests on these things coming out perfectly, and temperature control is a big part of that!
Tips for Room Temperature Components in Your Cream Cheese Brownie Recipe
This is non-negotiable, folks, seriously! If your cream cheese is straight from the fridge, it will fight with the sugar and leave you with little lumpy bits in your swirl. We want silky smooth deliciousness in our Cream Cheese Brownie Recipe. The same goes for those two eggs in the brownie layer and the single egg whisked into the cheesecake layer. Room temperature eggs mix in thoroughly and help create a lovely, unified texture. Give yourself a head start and pull those dairy items and eggs out about 45 minutes before you plan to start mixing.
Choosing Cocoa for Rich Fudgy Red Velvet Bars
You’ll notice I specified Dutch process cocoa powder for the brownie batter, and there’s a reason for that! Dutch process cocoa has been treated to be less acidic, which gives you a much deeper, darker, almost chocolatey-but-not-too-sweet background flavor. This is what separates a decent bar from true Gourmet Brownie Recipes. It enhances that beautiful red color, too! It makes sure your Fudgy Red Velvet Bars have that intense richness we are chasing.
Simple Steps to Prepare Your Red Velvet Cheesecake Brownies
Alright, let’s roll up those sleeves! While these red velvet cheesecake brownies look like they took hours to assemble, I promise you they are incredibly straightforward. We are building this deliciousness in three main parts: the brownie base, the creamy top layer, and the magic swirl that brings it all together. I’ve tested this countless times—check out this other version too—to make sure the steps are rock solid. First things first, get your 8×8 inch pan lined with parchment paper. That overhang on both sides? That’s your handle for lifting these beauties out later. Trust me; you’ll thank me when it’s time to slice!
Start with the brownie batter. We mix the wet items first—melted butter and sugar, then those room-temperature eggs—followed by that vibrant red coloring and vanilla. I mix just until everything is incorporated. When you add the dry flour and cocoa mixture, be brave and mix only until you see no more white streaks. Overmixing is the enemy of fudgy bars, so stop as soon as it comes together! Divide that beautiful, velvety batter evenly between your prepped pan.
Next up is the cheesecake layer. I beat the 8 ounces of softened cream cheese until it’s perfectly smooth—no lumps allowed! Then, mix in the sugar and egg until it’s light and creamy. Dollop this mixture evenly over the first layer of red batter. Now, for the fun part, which is crucial for achieving that stunning look you want for your dreamy dessert.
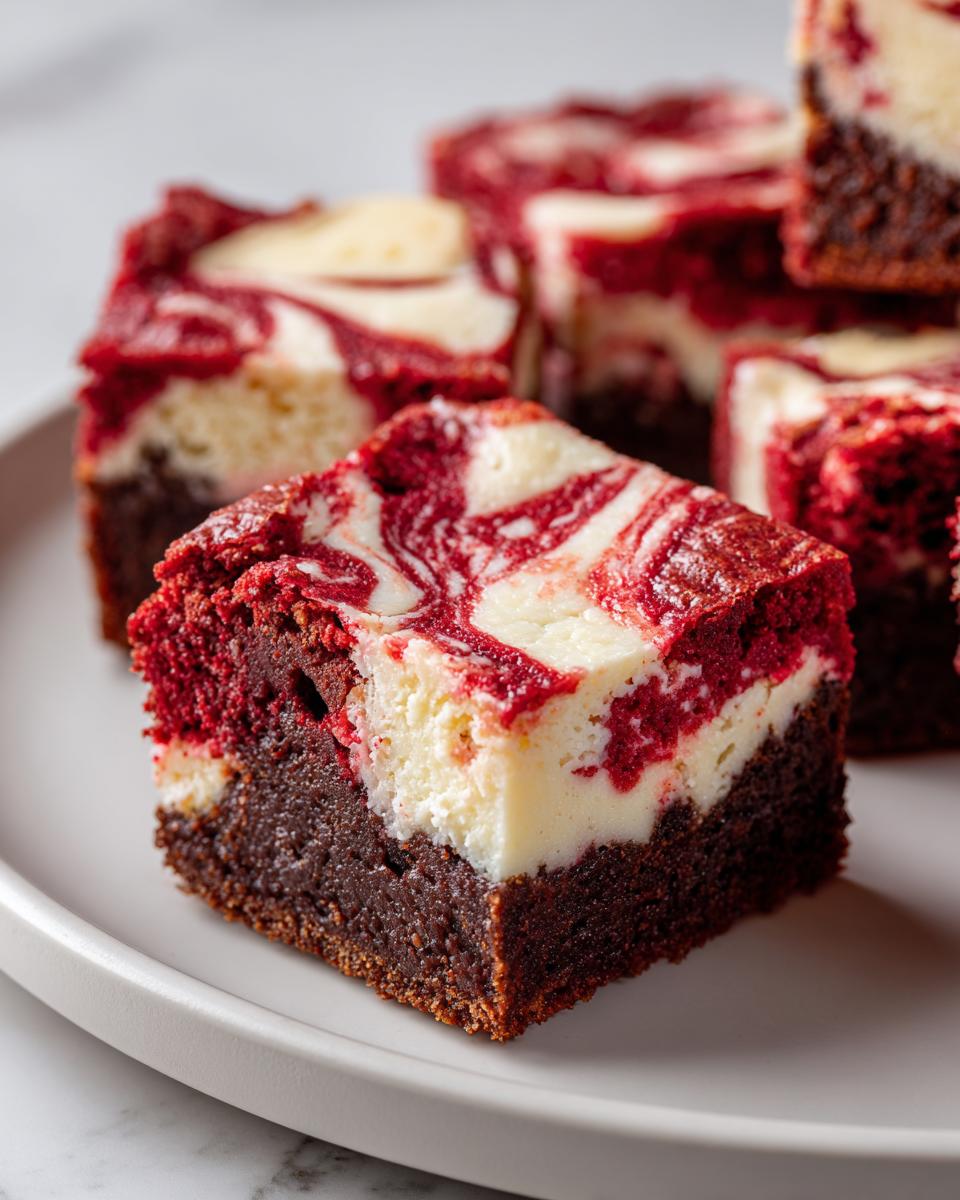
Creating the Perfect Marbled Red Velvet Dessert
This is where we turn batter into art! Instead of pouring the leftover red velvet batter on top, drop it in random spoonfuls over the cheesecake layer. Don’t try to perfectly cover it; we need distinct zones of color and texture. Now, grab a thin butter knife or a skewer. Gently cut an S-shape through both layers, and then lift the knife out cleanly before starting the next pass. You want distinct ribbons running through, not one giant muddy mess! This gentle, minimal swirling is what gives you that beautiful marbled square that screams ‘gourmet’ without asking for any difficult techniques. Less is truly more here!
Baking and Cooling Your Cheesecake Swirl Brownies
Bake these beauties at 350°F for about 30 to 35 minutes. How do you know when they are ready? Forget fussy thermometers! Stick a toothpick near the center. If you see moist, soft crumbs attached, but absolutely *no* wet batter clinging to it, you’re done. The cheesecake part should look set—it shouldn’t wobble when you gently nudge the pan. This balance is key for your Cheesecake Swirl Brownies. Then comes the hardest part of the whole recipe: cooling. You must, and I mean must, let these cool completely in the pan. Seriously, wait at least two hours before you even think about lifting them out. If you cut them warm, the fudgy bottom will crumble, and the cheesecake layer will melt right out. Patience equals perfect squares!
Tips for Success When Making Red Velvet Cheesecake Brownies
I have baked batches of red velvet cheesecake brownies until the sun came up trying to perfect this recipe for you! Trust me when I say that paying attention to just a couple of tiny things can elevate these from ‘good’ to absolutely heavenly. Since this recipe involves two very different batters—the dense red velvet and the rich cheesecake—we have to respect both during the process.
Remember what I mentioned about the swirl? Don’t go overboard! The absolute single best tip I can give you for getting those stunning ribbons is to stop swirling the knife once you see distinct colors mingling. If you keep mixing, the red food coloring bleeds too much into the cream cheese and you lose that beautiful definition. You want ribbons, not marble dust! Also, I always rely on the parchment paper sling; pulling those warm bars right out of the pan onto a cooling rack is so much cleaner than trying to scoop them out.
If you want a guaranteed crackly top on that brownie layer—though the cheesecake will soften it a bit—make sure you mix in those sugars with the butter until they are light and fluffy, almost like you are whipping them. That aeration helps build the structure. For even more tips on getting that ultimate fudgy texture, you can check out my guide to achieving a perfect fudgy top, but remember we are aiming for fudgy and creamy here!
Finally, if you are making these for a party, remember that chilling them overnight totally intensifies that creamy tang of the cheesecake layer. They look stunning when sliced cold, too! For general inspiration on making impressive layered treats, take a look here: A look at why these decadent dessert bars are so popular.
Variations for Your Cream Cheese Brownie Recipe
So you’ve mastered the classic red velvet cheesecake brownies, but maybe you want to tweak them just a little bit the next time you bake? I absolutely love experimenting, and this is such a stable base that it handles little additions beautifully without messing up the structure. The goal here is to keep that incredible fudgy-meets-creamy texture while adding a little flavor punch.
Try this: Toss about a half cup of white chocolate chips right into the brownie batter before you add the cream cheese swirl. The white chocolate melts just slightly, giving those rich red velvet bars an extra sweet counterpoint that is just divine. Or, if you want to boost the tang in the cheesecake layer, skip a tiny bit of the vanilla extract and substitute it with a half teaspoon of pure almond extract. Almond and cream cheese are best friends, and it really wakes up that cheesecake flavor. For even more ideas on riffs on this classic, check out my thoughts on other cream cheese brownie recipes. It’s all about making the recipe your own!
Serving Suggestions for Decadent Dessert Bars
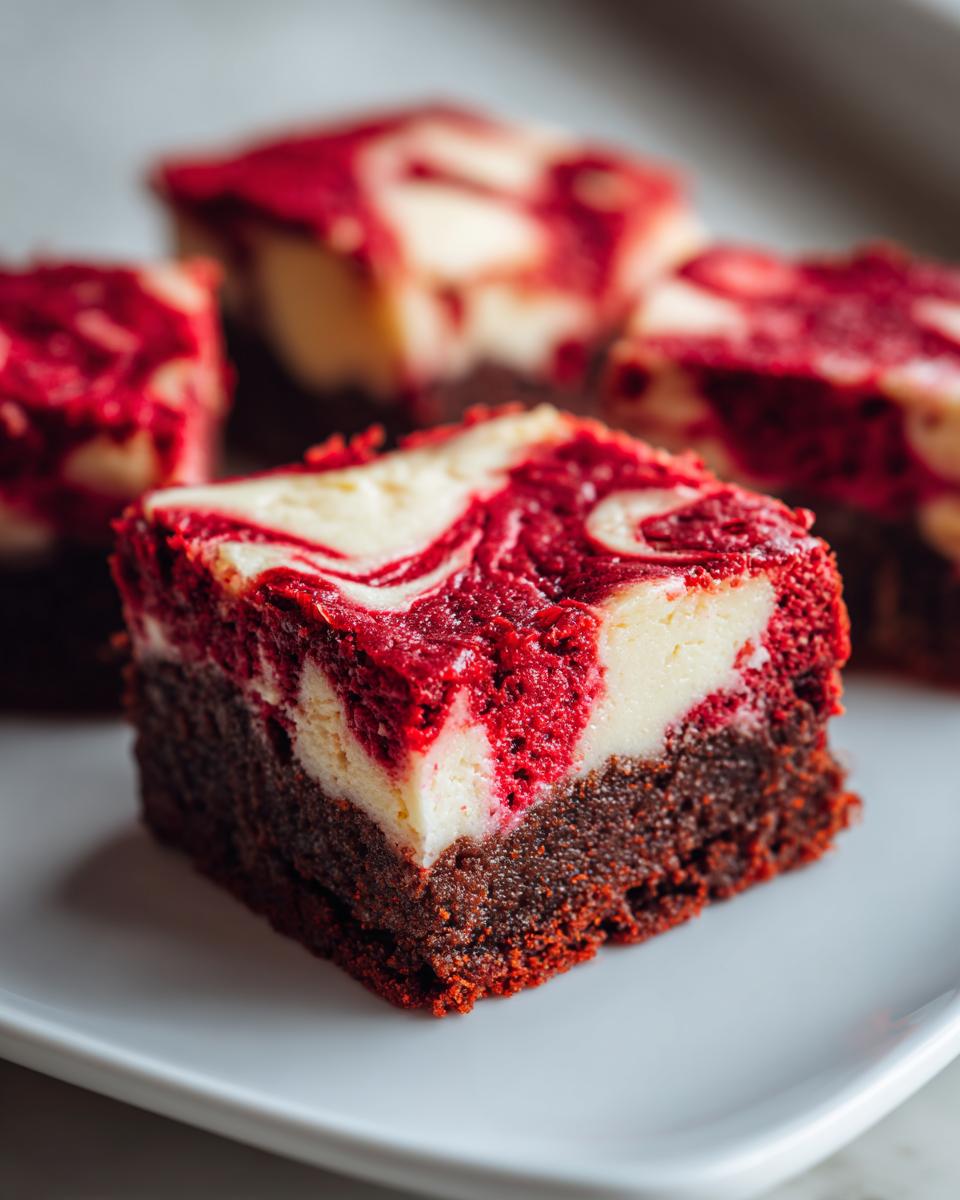
You’ve done the hard part—baking the ultimate red velvet cheesecake brownies! Now, let’s make them look like they belong on the cover of a magazine. These already look like Impressive Party Desserts all on their own, but a little garnish goes a long way. I always reach for just a light dusting of powdered sugar right before serving; the white contrast against the deep red is gorgeous! If you are making these for a crowd, putting them on a simple white platter really makes the colors pop. Check out some inspiration for other amazing sweets right here: my favorite dessert recipes.
If you want to lean into the richness, you can’t beat a single, perfect fresh raspberry placed right on top of each square. Or, for an extra level of indulgence, serve one of these beautiful, rich dessert squares slightly warm with a small scoop of vanilla bean ice cream melting right alongside it. It’s decadent, but hey, that’s why we bake them, right? For more ideas on serving gorgeous treats like these, take a peek at this inspiring post: how to make your desserts look amazing.
Storage and Reheating Instructions for Red Velvet Cheesecake Brownies
Now that you’ve created these amazing swirled dessert bars, you definitely need to know how to keep them perfect! The good news is that these red velvet cheesecake brownies keep really well. If you plan to eat them within a day or two, just keep them airtight on the counter. The sugar content helps preserve them nicely.
For longer storage, maybe up to five days, pop them into an airtight container in the fridge. The cheesecake layer firms up a bit more when cold, which some people actually prefer! If you decide they taste best served at room temperature (I sometimes do!), let them sit out for about 30 minutes before digging in.
Please, please, please go easy if you decide to reheat them. A quick zap of 5 to 10 seconds in the microwave is plenty. Too much heat and that beautiful, creamy cheesecake swirl will melt right into the fudgy base, and we don’t want that disaster on our hands!
Frequently Asked Questions About Red Velvet Cheesecake Brownies
I know when I switch up a classic recipe, I always have a few burning questions pop into my head. It’s smart to ask before you start, so I pulled together the most common ones I get about these red velvet cheesecake brownies. Don’t worry, answering these keeps us on the path to those perfect fudgy red velvet bars!
Can I make these red velvet cheesecake brownies without food coloring?
Oh, absolutely you can! If you look closely, the flavor profile for red velvet isn’t heavily dependent on the red dye—it comes mostly from the cocoa powder reacting with the vinegar and buttermilk (though we keep ours simple here!). If you skip the food coloring, you’ll end up with these *amazing* deep chocolate swirl brownies instead. They will still taste spectacular, but let’s be real, part of the fun of red velvet cheesecake brownies is that stunning visual pop! You just lose that signature ‘velvet’ look, but the flavor is still rich and wonderful.
How do I prevent my cheesecake swirl from sinking into the brownie batter?
This is such a common worry with any baking with cream cheese swirl recipe! The secret lies in two places. First, make sure your bottom red velvet batter isn’t too thin. Since we are aiming for fudgy, our batter should be quite thick. Second, when you add the cheesecake layer, don’t pour it. You need to dollop it—think small spoonfuls scattered all over the top layer of the red batter. Then, when you swirl gently, those little heaps of cheesecake batter are locked in place more effectively, ensuring you get that beautiful, distinct ribbon effect for your Marbled Red Velvet Dessert instead of a murky mess.
If you want to see how another great baker handles their swirls, you can check out their tips here: Red Velvet Cheesecake Swirl Brownies.
Share Your Ultimate Fudgy Red Velvet Bars
My absolute favorite part of being in the kitchen is hearing from you! I put my heart into perfecting these red velvet cheesecake brownies, and now it’s your turn to bring them to life in your home. I truly want to see how gorgeous your fudgy red velvet bars turned out!
Did you manage to get that perfect ribbon swirl? Were they an instant hit at your weekend gathering? Please don’t be shy! I encourage you to leave a rating below on a scale of 1 to 5 stars—your feedback helps me know I’m giving you the best recipes possible, like these other amazing dessert recipes I love.
If you share a picture on social media, tag me! Seeing your creations brightens my whole week. You can tell me all about your experience making these decadent dessert bars in the comments section. For more inspiration on beautiful bakes, have a look at this gorgeous post: Red Velvet Cheesecake Brownies Recipe. Happy baking, and I can’t wait to read what you think!
PrintUltimate Fudgy Red Velvet Cheesecake Brownies with Perfect Cream Cheese Swirl
Make these rich, fudgy Red Velvet Cheesecake Brownies. This recipe combines a decadent red velvet brownie base with a creamy, tangy cheesecake swirl for an impressive, marbled dessert square.
- Prep Time: 15 min
- Cook Time: 35 min
- Total Time: 50 min
- Yield: 16 servings 1x
- Category: Dessert
- Method: Baking
- Cuisine: American
- Diet: Vegetarian
Ingredients
- 1/2 cup unsalted butter, melted
- 1 cup granulated sugar
- 2 large eggs, room temperature
- 1 1/2 teaspoons red food coloring
- 2 teaspoons vanilla extract
- 1/2 teaspoon salt
- 3/4 cup all-purpose flour
- 3 Tablespoons Dutch process cocoa powder
- 8 ounces cream cheese, room temperature
- 1 large egg, room temperature (for cheesecake layer)
- 1/3 cup granulated sugar (for cheesecake layer)
- 1/4 teaspoon vanilla extract (for cheesecake layer)
Instructions
- Preheat your oven to 350°F (175°C). Line an 8×8 inch baking pan with parchment paper, leaving an overhang for easy removal.
- Prepare the brownie batter: In a medium bowl, whisk together the melted butter and 1 cup of sugar until combined.
- Beat in the 2 room temperature eggs one at a time. Mix in the red food coloring and 2 teaspoons of vanilla extract until the color is uniform.
- In a separate small bowl, whisk together the flour, salt, and cocoa powder. Gradually add the dry ingredients to the wet ingredients, mixing only until just combined. Do not overmix.
- Prepare the cream cheese swirl: In another bowl, use an electric mixer to beat the 8 ounces of cream cheese until smooth. Add the 1/3 cup of sugar and 1/4 teaspoon of vanilla extract, beating until creamy. Beat in the remaining 1 room temperature egg until the mixture is smooth.
- Spread half of the red velvet brownie batter evenly into the prepared pan.
- Dollop the cream cheese mixture over the brownie batter. Drop the remaining brownie batter in spoonfuls over the cream cheese layer.
- Take a knife or skewer and gently swirl the two batters together to create a marbled effect. Do not over-swirl; you want distinct ribbons of color and texture.
- Bake for 30 to 35 minutes, or until a toothpick inserted near the center comes out with moist crumbs attached, but not wet batter. The cheesecake portion should look set.
- Let the Red Velvet Cheesecake Brownies cool completely in the pan on a wire rack before lifting them out using the parchment overhang.
- Cut into 16 squares and serve your decadent dessert bars.
Notes
- For the best marbled look, use a butter knife to make S-shapes through the batter layers, lifting the knife out between each pass.
- Ensure your cream cheese and eggs for the cheesecake layer are at room temperature; this prevents lumps in your swirl.
- If you prefer a fudgier texture, slightly underbake by 2-3 minutes.
Nutrition
- Serving Size: 1 square
- Calories: 280
- Sugar: 25g
- Sodium: 150mg
- Fat: 16g
- Saturated Fat: 9g
- Unsaturated Fat: 7g
- Trans Fat: 0g
- Carbohydrates: 30g
- Fiber: 1g
- Protein: 4g
- Cholesterol: 65mg