
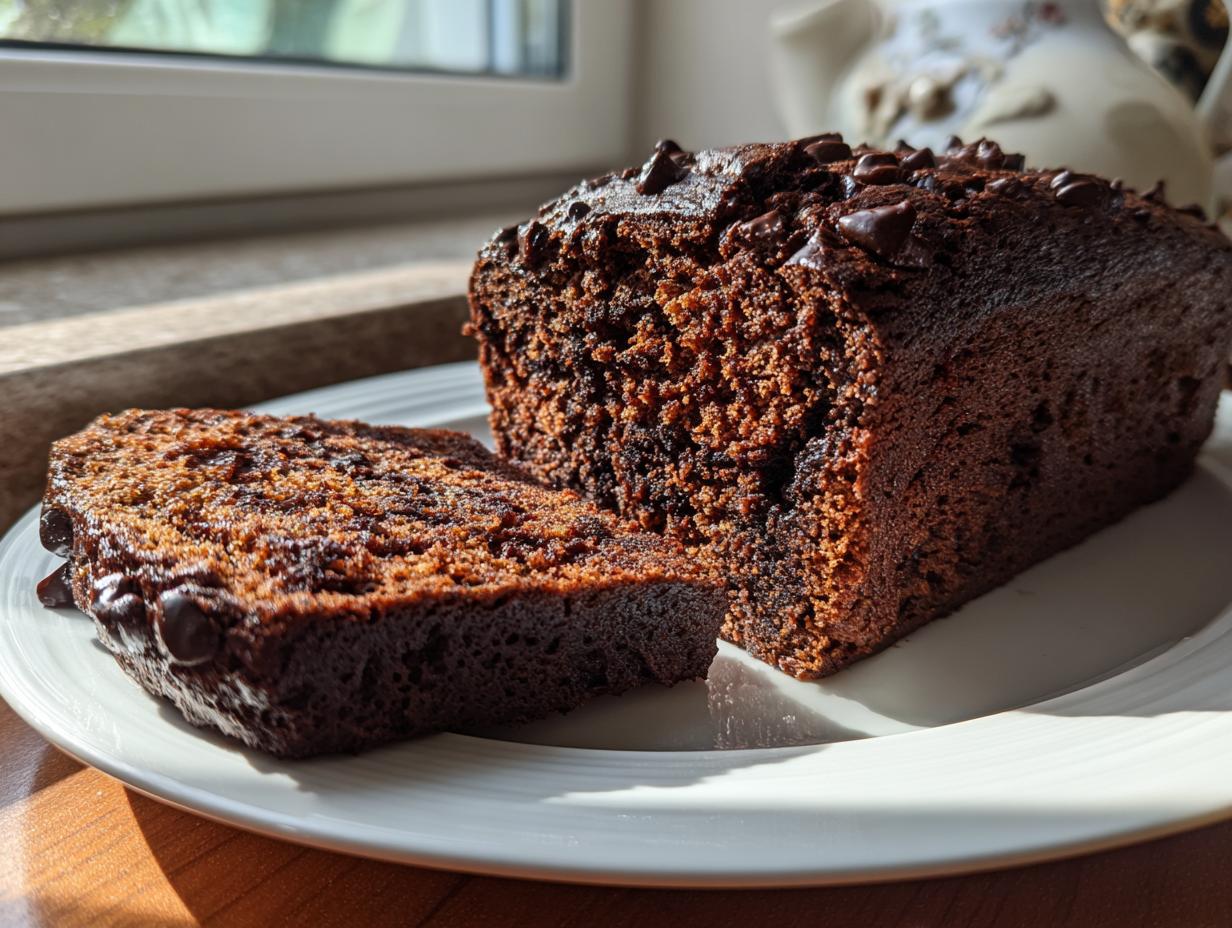
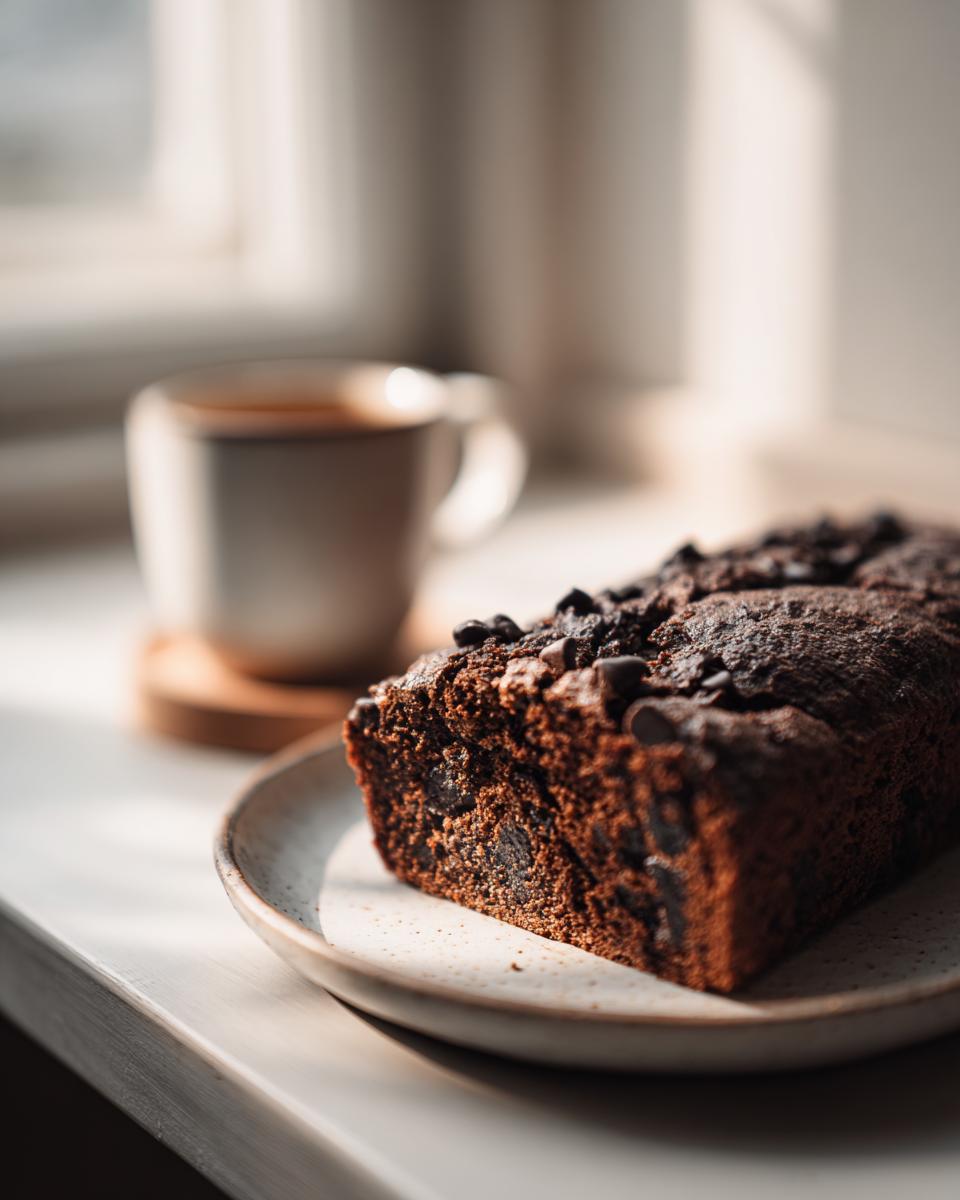
I know why you’re here. You want a truly decadent, rich slice of chocolate bread that doesn’t feel like you just dug a hockey puck out of the oven. We’ve all been there—that dry, crumbly loaf that promises deliciousness but delivers disappointment. Well, stop searching! My promise to you, as the baker behind Kings Cook, is that this Ultra-Moist, One-Bowl Chocolate Bread recipe is going to be your new absolute favorite. I spent weeks testing batches until I nailed the perfect balance, making sure this loaf delivered that impossibly velvety, fudgy texture you dream about. And the best part? I did it all in just one bowl. That means maximum flavor with minimal cleanup, which is exactly how I believe home baking should be! If you want to know more about my mission to bring confidence back to your kitchen, you can always check out my About Page.
- Why This Ultra-Moist Chocolate Bread Recipe Works (Expert Tips)
- Ingredients for Your Decadent Chocolate Bread
- How to Prepare Your Simple Chocolate Bread
- Tips for the Best Homemade Chocolate Bread
- Variations on This Rich Chocolate Loaf
- Storage and Reheating Instructions for Chocolate Bread
- Serving Suggestions for Your Chocolate Bread
- Frequently Asked Questions About Making Chocolate Bread
- Rate This Ultra-Moist Chocolate Bread Recipe
Why This Ultra-Moist Chocolate Bread Recipe Works (Expert Tips)
When I set out to create the ultimate Moist Chocolate Bread Recipe, I wasn’t messing around. I needed something that stayed tender for days, but I also wanted it to be weeknight-friendly. Trust me, I baked so many sad, dry loaves during testing! Every failure taught me something valuable about how the fats and liquids interact with the cocoa powder. This recipe nails that rich, bakery-quality depth. If you love this intense chocolate profile, you have to check out my amazing fudgy brownie recipe too!
The secret to making this the Best Homemade Chocolate Bread isn’t one ingredient; it’s the combination of steps designed to keep everything happy and hydrated.
Achieving Velvety Chocolate Bread Texture
The key to that dreamy, smooth texture is a triple threat of moisture. We rely on oil instead of all butter for deeper moisture retention, buttermilk adds a beautiful slight tang, and then—this is crucial—we pour in hot liquid right at the end. That hot water or coffee blooms the cocoa powder, making the chocolate flavor so much more intense. This is what gives you that incredible Velvety Chocolate Bread finish.
The Simplicity of One Bowl Chocolate Bread
Because we are using the ‘dump and whisk’ method, cleanup is a breeze. There’s no creaming butter and sugar, no complicated folding stages for the main batter. This truly is a One Bowl Chocolate Bread situation before the liquids go in, which means you get decadent results without ruining every utensil you own. It’s perfect for when that chocolate craving hits fast!
Ingredients for Your Decadent Chocolate Bread
Gathering your ingredients is the fun, relaxing part! Because this is such a straightforward chocolate bread recipe, the quality matters, but you won’t need to run to a specialty store. Everything here is grab-and-go from your regular grocery run. We’re focusing on the dry goods first, then adding the liquids that make this loaf so famous for its moistness. Remember, the hot coffee is totally optional, but I strongly recommend it for bringing out that deep cocoa note. Keep everything measured out, and you’ll be pouring that thin batter into the pan before you know it!
Here is what you need for one glorious loaf:
We start with one and three-quarters cups of all-purpose flour and three-quarters of a cup of good quality unsweetened cocoa powder. For lift, grab one and a half teaspoons of baking soda along with one teaspoon of baking powder, and don’t forget one teaspoon of salt to balance all that chocolate goodness. Next, you’ll need one and three-quarters cups of granulated sugar. For the wet components, measure out two large eggs, one cup of buttermilk, half a cup of vegetable oil, and one teaspoon of vanilla extract. Finally, for the magic step, have one cup of hot water or, my favorite, one cup of hot brewed coffee ready to go. If you want those little pockets of meltiness, toss in half a cup of semi-sweet chocolate chips, too.
Ingredient Substitutions for Chocolate Bread
Life happens, and sometimes you’re missing one thing, but that doesn’t mean your baking has to stop! If you’ve run out of buttermilk for your Rich Chocolate Loaf, don’t panic. Just take one cup of regular milk and stir in one tablespoon of white vinegar or lemon juice. Let that sit on the counter for about five minutes until it curdles a bit—that’s your homemade buttermilk replacement! If you’re totally out of coffee and don’t want to heat up water, you can use hot water, but seriously, try to use the coffee at least once; it truly changes the depth of flavor.
For the vegetable oil, you can swap it one-for-one with melted coconut oil if you prefer that flavor profile, or even melted unsalted butter, although butter will make the final loaf slightly less moist than the oil does. You know I love my tried-and-true methods, but these little swaps allow you to adapt this Simple Chocolate Bread to whatever you have on hand!
How to Prepare Your Simple Chocolate Bread
Now for the fun part—putting it all together! Because this is such a great Simple Chocolate Bread recipe, you don’t need fancy equipment, just a good whisk and a large bowl. Remember I told you we were keeping cleanup minimal? This method proves it! Before your whisk even touches the ingredients, make sure your oven is warming up. We want to get this gorgeous batter into the heat right away to lock in all that moisture we are aiming for.
We’re aiming for a temperature of 350°F (175°C). Make sure you’ve prepared your 9×5 inch loaf pan by greasing it well and giving it a light flour dusting. If you’re worried about sticking, a spritz of baking release spray works wonders here too!
Mixing the Chocolate Bread Batter Correctly
First things first: in that big bowl, whisk together all your dry stuff—the flour, cocoa powder, baking soda, baking powder, and salt. Get everything evenly distributed before you move on. Then, add the sugar right on top and whisk it again. Now, add the eggs, buttermilk, oil, and vanilla extract. Mix this on low speed, or just gently whisk until everything is *just* combined. Don’t get aggressive here, or you risk developing too much gluten! The batter will look thick at this stage. This is your cue to pause before the real moisture magic happens. If you want to see my tips on making another moist baked good, check out my notes on moist chocolate cake.
Baking Times for Perfect Chocolate Bread
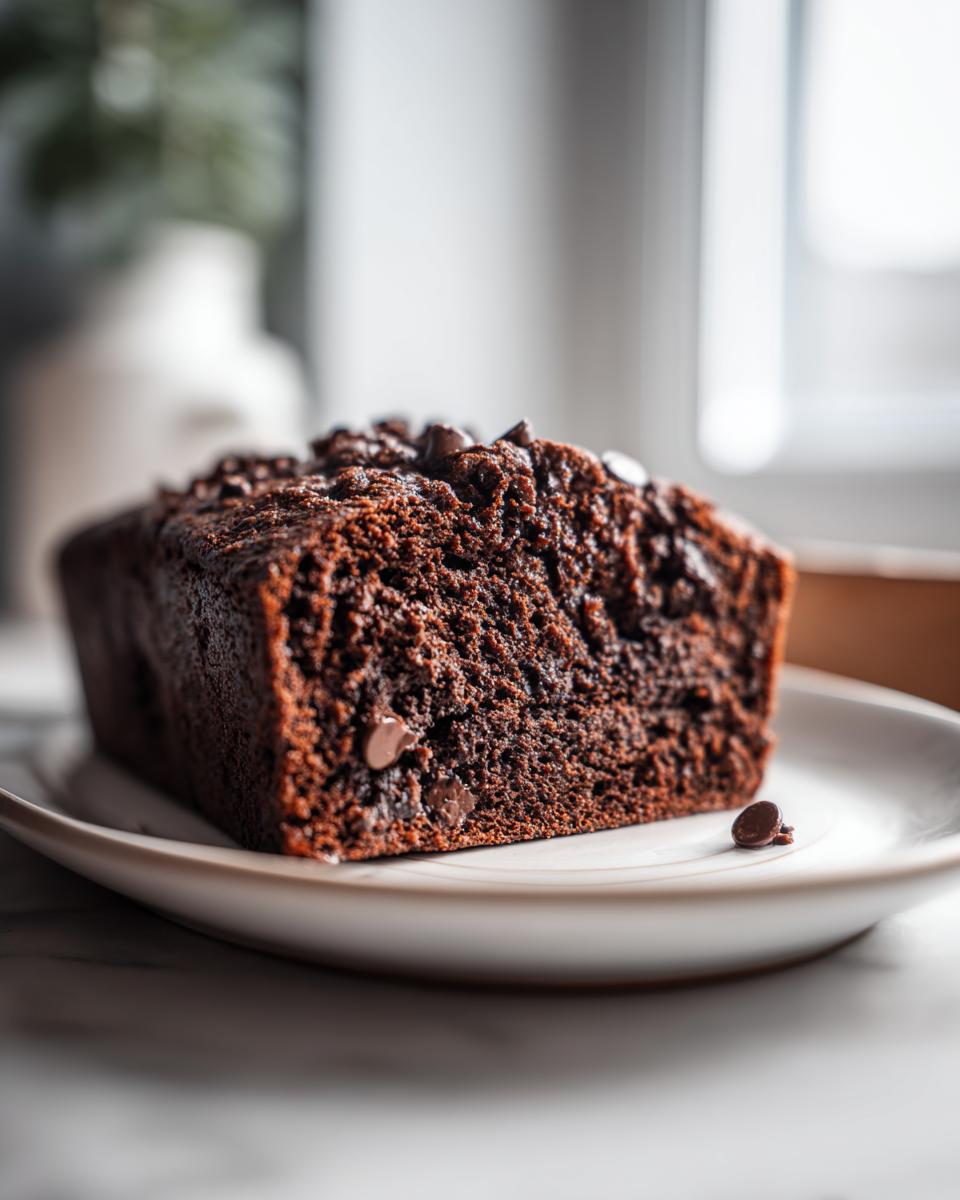
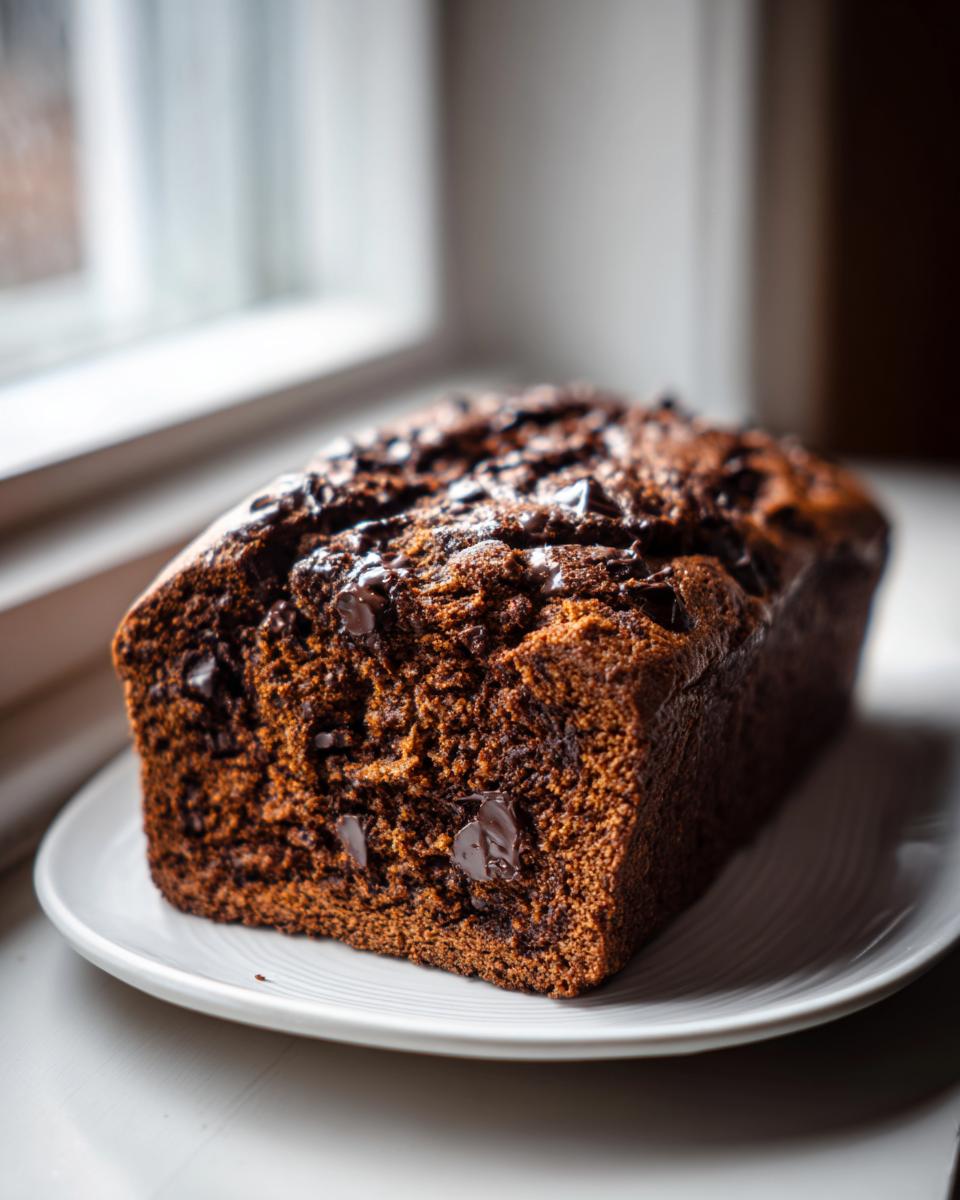
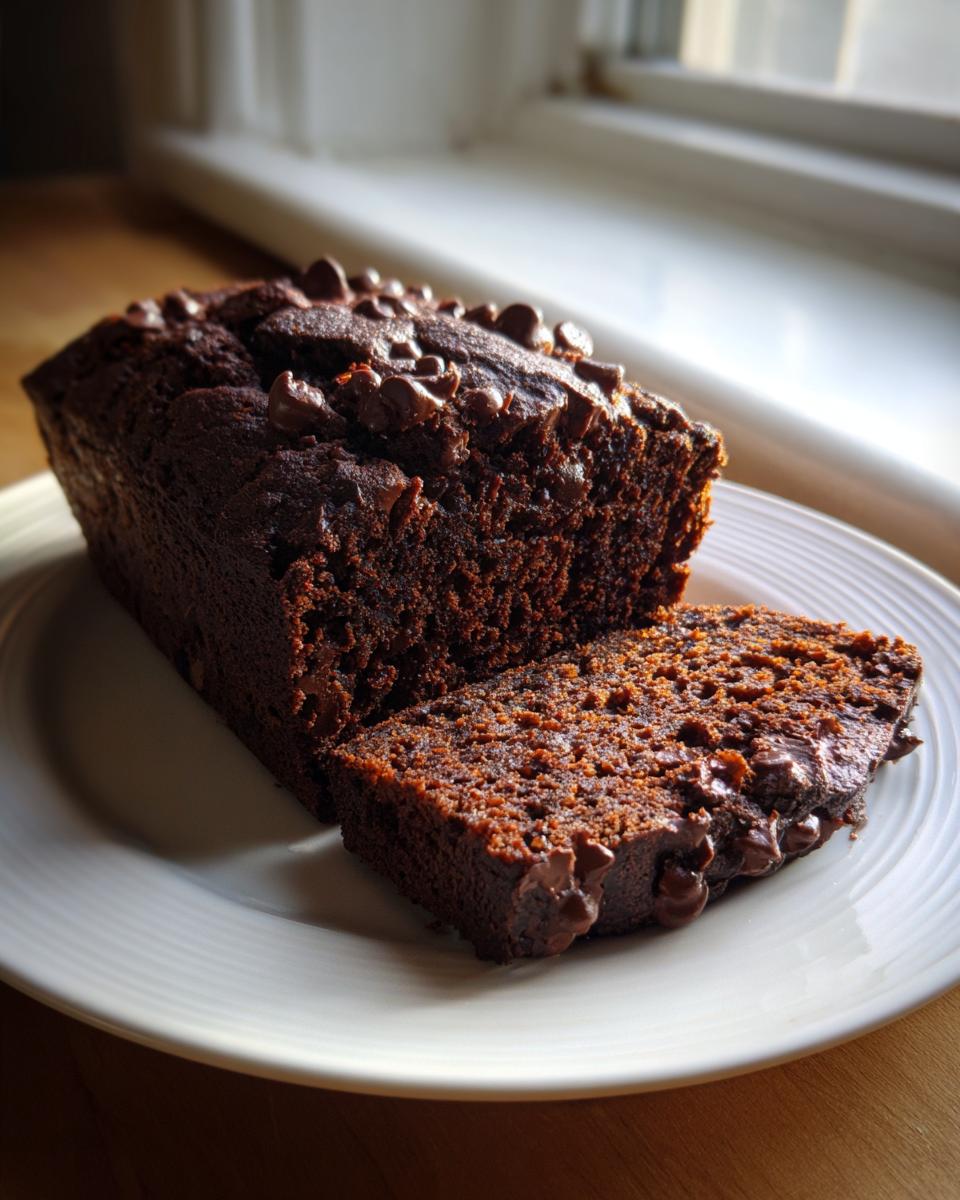
Once the batter is smooth after adding the hot coffee or water—yes, it will look thin, don’t freak out!—pour it into the pan and get it into that preheated oven. It usually bakes for about 55 to 65 minutes in my oven. How do you know it’s done? Forget dry toothpicks! We are looking for ‘moist crumbs attached’ when you insert a wooden skewer into the center, not wet, gooey batter. Once it passes that test, pull it out immediately. If you leave it in too long trying to get a clean toothpick, you’ll lose that ultra-moist texture we worked so hard for. Let the chocolate bread cool in the pan for about 15 minutes before you carefully turn it out onto a wire rack to finish cooling completely. Patience in those first few minutes out of the oven keeps it from collapsing!
Tips for the Best Homemade Chocolate Bread
You’ve made the batter, you’ve baked the loaf, and now you want to ensure every single slice of this chocolate bread is as incredible as the first. Getting that rich, dark flavor and moist crumb to stick around isn’t luck; it’s about a few careful steps after it comes out of the oven. I always want everyone who tries my recipes to have the Best Homemade Chocolate Bread experience possible, so here are a few things I always do when I pull mine out.
First, let’s talk about that coffee trick again. I know some people are nervous about putting coffee in baking, but I promise you, the coffee doesn’t make it taste like a mocha! Instead, it acts like a flavor amplifier for the cocoa. If you have quality, dark-roast coffee beans, use them when you brew that hot cup you’re planning to have with your slice later, and use that liquid in the batter. It truly deepens the chocolate flavor in a way plain water just can’t mimic.
Second, and this is crucial for texture maintenance: wrap it right! Once the bread has cooled on the rack for that crucial initial 30 minutes (don’t rush this or it might stick!), wrap the entire loaf tightly in plastic wrap. This traps the steam that’s still trying to escape, keeping that interior extra tender. Store it at room temperature like this; don’t put it straight into the fridge, which can actually dry out baked goods faster.
If you’re adding chocolate chips, the quality really matters here, just like with good chocolate chip cookies! I like to use a mix of semi-sweet and just a few dark chocolate chunks. If you want to level up, try spiking those chocolate chips with a tiny splash of vanilla extract right before folding them in—it just enhances that dessert quality. If you want to see another recipe where I obsess over chocolate quality, my chocolate chip cookie recipe is legendary!
Finally, never skip the cooling time before slicing. I know it’s hard! You see that gorgeous, dark loaf and you want to cut a warm piece immediately. But if you slice it too soon, that thin, moist structure collapses slightly as the steam rushes out. Wait until it’s completely cooled, or at least cooled significantly, and you’ll get those clean, fudgy slices you’re hoping for.
Variations on This Rich Chocolate Loaf
Even though this recipe is a perfect, self-contained Rich Chocolate Loaf, I absolutely love seeing what you all dream up in your own kitchens! This batter is so forgiving and sturdy, making it the perfect base for extra flair. If you’re looking to turn this into a true chocolate celebration, don’t be afraid to mix things up a bit. Remember, baking is supposed to be fun, not restrictive!
If you love the idea of something slightly fruitier or maybe taking inspiration from other great loaves out there, I have a few ideas that work perfectly with this exact formula. If you are interested in a fruit swap, you absolutely have to look at my recipe for moist banana bread; the technique for that is similar, but adding banana puree to this chocolate base would turn it into something spectacular.
For those of you chasing that intense, cookie-like experience—that fudgy brownie texture we talked about—here are a couple of easy ways to customize it:
The Fudge Swirl: This is my go-to for making it feel like true dessert bread. Right after you pour the thin batter into your loaf pan, take about half a cup of chocolate frosting (store-bought works great if you’re in a rush!) or softened Nutella, and dollop it randomly over the top of the batter. Then, take a butter knife and gently run it through the batter in a figure-eight motion, just once or twice. Don’t over-swirl, or you’ll just mix the color right in! This creates those stunning ribbons, just like in some of the gorgeous chocolate swirls I’ve seen pinned online.
The Nutty Crunch: For texture contrast, fold in half a cup of toasted pecans or walnuts along with your chocolate chips. Toasting them beforehand, even for just five minutes in a dry pan, wakes up their oils and gives them a much better flavor pop against the richness of the cocoa.
Hello, Zucchini! If moisture is your ultimate goal, you can replace the chocolate chips entirely with one cup of finely grated, unpeeled zucchini (squeeze the excess water out first!). This addition makes the loaf even more tender, almost like my classic zucchini bread, but with that intense chocolate kick. Remember, baking with vegetables you can’t even taste is my favorite kitchen magic trick!
Storage and Reheating Instructions for Chocolate Bread
So, you have this perfect, glorious loaf of ultra-moist chocolate bread, and now you have to make it last, right? Or, maybe you’ve hidden a slice away for a midnight snack—I won’t tell! The great thing about recipes relying on oil and buttermilk is that they naturally hold onto moisture better than butter-based cakes. However, we still need to treat it right to keep that velvety texture intact.
If you manage to keep any left over—and honestly, that’s the hardest part—you should always store it at room temperature. Never put this loaf in the refrigerator if you can help it! Cold air kills the tender crumb we worked so hard to create. Wrap the entire loaf tightly in plastic wrap, or place it in an airtight container. Stored this way, it should stay wonderfully fresh for about three to four days. I know some people try to freeze slices, which works fine, but for enjoying it fresh, room temperature is your best friend.
Now, let’s talk about reviving a slice! If your loaf has been sitting out for a couple of days and feels just a touch less supple than day one, reheating is the key. You have two great options here depending on how much patience you have. For a single slice, the microwave is surprisingly effective. Just wrap that piece in a slightly damp paper towel—I mean *slightly* damp, we aren’t making soup here—and zap it for about 10 to 15 seconds. That little bit of steam does wonders! It softens the crumb right back up, making it taste almost freshly baked.
If you have the time, the oven method yields a slightly better texture if you’re heating up half a loaf or more. Wrap the slices loosely in foil and place them in a preheated oven at a low temperature, maybe 300°F (150°C), for about ten minutes. This gentle heat re-melts any sugars and keeps that fudgy quality locked in without drying it out. Honestly, when this chocolate dessert bread is served warm, it feels like a pure indulgence!
Serving Suggestions for Your Chocolate Bread
This super moist chocolate bread is honestly versatile enough to stand completely on its own, but why stop at perfect when you can go totally over the top? Since this recipe works beautifully as a rich snack, a satisfying breakfast, or a decadent final course, the toppings depend entirely on what kind of mood you’re in. If you’re serving this up as a true Chocolate Dessert Bread, you need to elevate it just a bit! Don’t forget to check out my recipe for the lightest vanilla buttercream frosting—a thin layer of that on a cooled loaf is pure heaven.
For a weekend brunch situation, I love keeping things lighter. A simple dusting of powdered sugar is elegant, but if you have fresh berries on hand, try piling on some lightly sweetened whipped cream and fresh raspberries. The tartness cuts through that rich cocoa beautifully, making it feel lighter than it actually is!
If you are eating this for breakfast, which I absolutely encourage—no judgment here!—the best pairing is a simple, strong cup of coffee or an iced latte. The slight bitterness of the coffee plays perfectly against the sugar in the loaf. A thin smear of good salted butter while the slice is still slightly warm is also something I can never resist. It just melts right into all those moist crumbs.
And if you want to go full dessert mode, try serving a thick slice warmed up slightly with a scoop of vanilla bean ice cream on top. Or, if you happen to have some rich ganache leftover from another project, a drizzle right over the top makes it instantly shareable; it screams “special occasion,” even if the occasion is just Tuesday afternoon!
Frequently Asked Questions About Making Chocolate Bread
I totally get it; sometimes the basic recipe guide leaves you with a few nagging questions, especially when you’re trying to achieve that perfect texture! I’ve compiled some of the things folks ask me most often about this chocolate bread. Don’t worry, these tweaks won’t complicate things—they just help you customize this Easy Chocolate Loaf Cake to your exact cravings. If you need something fast for a weeknight, remember my whole philosophy is built around making things simple, which you can read more about on my weeknight recipes page!
Can I make this chocolate bread recipe without buttermilk?
Yes, absolutely! I know buttermilk isn’t always the first thing people have on hand. If you don’t have any, don’t stress about it for a second. Just use regular milk—any kind works, 2% or whole milk is usually best. Take one cup of that milk and stir in one tablespoon of white vinegar or lemon juice. Let it sit on your counter for about five to ten minutes until it starts to look slightly curdled or thickened. That’s your homemade substitute, and it works perfectly to activate the baking soda and keep things tender in your Moist Chocolate Bread Recipe!
How can I get a fudgier texture like Fudgy Brownie Bread?
To push this recipe firmly into that decadent, brownie-like zone, you need to maximize the richness! The first trick is that hot liquid—don’t use water, use that hot brewed coffee. It brings out unbelievable depth. Second, if you want that extra gooey factor, skip the standard chocolate chips and fold in about half a cup of chopped dark chocolate along with your chips right at the very end. Don’t mix it much, just enough to incorporate. That little bit of extra fat and intense chocolate powder will give you that wonderfully dense, almost fudgy goodness we associate with the Fudgy Brownie Bread everyone seems to crave!
Is this considered an Easy Chocolate Loaf Cake or bread?
That is such a fair question! Honestly, it’s both, and that’s the brilliance of it! Because we bake it in a loaf pan, we call it chocolate bread, and it’s perfectly acceptable for breakfast alongside your morning coffee. But structurally, since it relies on chemical leaveners (baking soda/powder) rather than yeast, it behaves exactly like a quick bread, which is essentially a loaf cake. So yes, you can absolutely call it an Easy Chocolate Loaf Cake when you serve it up for dessert later! It’s versatile, which is why it’s such a must-have Simple Chocolate Bread recipe.
Rate This Ultra-Moist Chocolate Bread Recipe
I have shared all my secrets for achieving that unbelievably moist, rich flavor in this chocolate bread, and now I really need your help! Baking these recipes for you is the joy of my day, but knowing if the recipe really stacks up in *your* kitchen is the final, crucial step. I truly want you to feel that instant confidence I feel every time I pull this loaf out of the oven.
If you just made this chocolate loaf cake, please take a moment to leave a rating below! Did it deliver on the ultra-moist promise? Did your family devour it? Don’t be shy; high ratings help other home cooks who are standing where you were just an hour ago, nervous about messing up a chocolate recipe. If you ran into any snags or had an amazing variation, drop a comment using the contact form here so we can all learn together.
And please, if you snap a picture of this glorious, fudgy creation, share it on social media! Tag me so I can see your amazing results. Knowing that this recipe has traveled from my kitchen to yours, adding a little bit of comfort and joy to your table, is why I work so hard on these guides. Happy baking, friends—I hope you loved making this as much as I loved sharing it with you. If you are looking for another incredibly popular chocolate loaf, don’t forget to give this one a peek: moist chocolate bread!
PrintUltra-Moist, One-Bowl Chocolate Bread
You can make this ultra-moist chocolate bread in one bowl for simple preparation. This recipe delivers a rich, velvety texture perfect for breakfast, a snack, or dessert.
- Prep Time: 15 min
- Cook Time: 60 min
- Total Time: 75 min
- Yield: 1 loaf (about 10 servings) 1x
- Category: Dessert
- Method: Baking
- Cuisine: American
- Diet: Vegetarian
Ingredients
- 1 3/4 cups all-purpose flour
- 3/4 cup unsweetened cocoa powder
- 1 1/2 teaspoons baking soda
- 1 teaspoon baking powder
- 1 teaspoon salt
- 1 3/4 cups granulated sugar
- 2 large eggs
- 1 cup buttermilk
- 1/2 cup vegetable oil
- 1 teaspoon vanilla extract
- 1 cup hot water or hot brewed coffee
- 1/2 cup semi-sweet chocolate chips (optional)
Instructions
- Preheat your oven to 350°F (175°C). Grease and flour a 9×5 inch loaf pan.
- In a large bowl, whisk together the flour, cocoa powder, baking soda, baking powder, and salt.
- Add the sugar to the dry ingredients and whisk to combine well.
- Add the eggs, buttermilk, vegetable oil, and vanilla extract to the dry mixture. Mix with a whisk or electric mixer on low speed until just combined. Do not overmix.
- Carefully pour the hot water or hot coffee into the batter. Mix on low speed until the batter is smooth. The batter will be thin.
- If using, gently fold in the chocolate chips.
- Pour the batter into your prepared loaf pan.
- Bake for 55 to 65 minutes, or until a wooden skewer inserted into the center comes out with moist crumbs attached, not wet batter.
- Let the bread cool in the pan for 15 minutes before carefully turning it out onto a wire rack to cool completely.
Notes
- Using hot coffee instead of hot water deepens the chocolate flavor without making the bread taste like coffee.
- For an extra fudgy texture, you can fold in 1/2 cup of chopped dark chocolate along with the chips.
- This recipe is very forgiving, but avoid overbaking to keep the texture ultra-moist.
Nutrition
- Serving Size: 1 slice
- Calories: 310
- Sugar: 35
- Sodium: 300
- Fat: 15
- Saturated Fat: 3
- Unsaturated Fat: 12
- Trans Fat: 0
- Carbohydrates: 42
- Fiber: 2
- Protein: 4
- Cholesterol: 35