
There are appetizers, and then there are those appetizers—the ones that disappear the moment you set them down, the ones everyone secretly hopes you brought to the party. You know exactly what I’m talking about: the humble, yet majestic, classic deviled eggs! I know you’ve probably made them before and maybe ended up with something a little watery or, worse, those dreadful grayish-green rings around the yolk. Ugh! But I promise you, that stops today. My tried-and-true method ensures you get that rich, perfectly seasoned, wonderfully creamy filling every single time. Get ready to feel totally confident making the best deviled eggs for your next gathering!
- Why This Is the Best Classic Deviled Eggs Recipe (E-E-A-T Focus)
- Ingredients You Need for Perfect Classic Deviled Eggs
- How to Make Classic Deviled Eggs: Step-by-Step Instructions
- Tips for Success Making Classic Deviled Eggs Ahead of Time
- Serving Suggestions for Your Classic Deviled Eggs
- Storage and Reheating Instructions for Classic Deviled Eggs
- Frequently Asked Questions About Classic Deviled Eggs
- Nutritional Estimates for Classic Deviled Eggs
- Share Your Perfect Classic Deviled Eggs Experience
Why This Is the Best Classic Deviled Eggs Recipe (E-E-A-T Focus)
I want you to feel proud when you serve these, which is why I focus on getting the basics absolutely rock solid. People call this the best deviled egg recipe because it skips the fancy, fussy ingredients and nails the technique. Forget those recipes that just tell you to boil eggs—that’s how you get dry yolks or, heaven forbid, those unattractive green rings! My method is rooted in reliability. We focus on getting that perfect texture first, which results in truly creamy deviled eggs everyone devours.
When you nail the timing for cooking, everything else just falls into place. I learned this the hard way trying to rush appetizers for holiday parties. Now? I follow this sequence religiously because it works, whether I’m making a dozen or fifty! If you want to read more about mastering the creamy texture, check out some great advice here for guaranteed crowd-pleasers.
The Secret to Perfectly Cooked Eggs for Classic Deviled Eggs
The key to avoiding that unappetizing sulfuric film around the yolk is temperature control. Don’t just put cold eggs in boiling water! Bring the water to a full, rolling boil first. Then, kill the heat immediately, cover the pot, and let them sit for exactly 12 minutes. This gentle residual cooking is just enough. Immediately plunge them into an ice bath—I mean, ice water—for at least 15 minutes. This stops the cooking instantly and helps the membrane separate from the white, making peeling a dream!
Ingredients You Need for Perfect Classic Deviled Eggs
Okay, let’s talk ingredients! For the absolute best deviled egg recipe, we are sticking to the classics here. No weird additions, just pure, reliable flavor builders. You’ll need 12 large eggs, of course—the star of the show! Then we grab the essentials: mayonnaise, Dijon mustard, white vinegar, salt, and pepper. Simple, right?
My biggest tip here revolves around the mayo. Since the filling is mostly yolk and mayo, use a brand you genuinely love the taste of. A really good, rich, full-fat mayonnaise makes all the difference in achieving that decadent, creamy deviled eggs texture we’re aiming for. Don’t skimp here; it’s worth the little bit extra!
Ingredient Notes and Substitution Options
While we respect tradition, I know sometimes you need to make things work with what you’ve got! For the mustard, I insist on Dijon over bright yellow mustard. Dijon adds a sophisticated sharpness that cuts through the richness of the yolk beautifully, keeping that filling from tasting flat. It really elevates this from a snack to a true party favorite.
If you prefer a little more zing to create that sought-after tangy deviled egg filling, swap out the white vinegar for sweet pickle juice. Just a teaspoon! Honestly, it’s magic. If you use pickle juice, you might want to cut back slightly on the added salt in the recipe, as the juice brings its own brine. You decide the vibe!
How to Make Classic Deviled Eggs: Step-by-Step Instructions
Alright, this is the fun part where we transform those perfectly boiled eggs into what I fondly call classic party snacks! Remember those perfect whites chilling on the platter? Let’s get those yolks ready. Once you’ve carefully scooped out every bit of yolk into your mixing bowl—and that means all of it, don’t leave any behind!—it’s time to start smashing.
Learning how to make deviled eggs that impress is all about texture consistency here. Don’t just stir the yolks; mash them with a fork until they are as fine as sand. Seriously, you want zero grit. Once they are powdery smooth, then you add the mayonnaise, mustard, vinegar, salt, and pepper. Mix well until it’s one unified, luscious yellow cloud. This base is everything! For more great tips on nailing the flavor profile, I often reference advice like that found here.
Achieving the Ultimate Creamy Deviled Eggs Filling
When I say mash until perfectly smooth, I really mean it. If you have lumps left over, your filling won’t hold its shape nicely, and it just won’t feel luxurious when you eat it. Now, here’s my absolute best trick for the smoothest filling imaginable: if you have a fine-mesh sieve handy, push the mashed yolks through it before you add any liquid ingredients. It takes an extra minute, but wow, the texture is unbelievable!
Once you blend in the mayonnaise and seasonings, you want to mix until the filling is homogenous. Don’t over-mix it once the mayo is in, but make sure the mustard is nowhere to be seen in streaks. Aim for a thick, scoopable paste. Trust me, this step is what separates the good deviled eggs from the truly amazing ones.
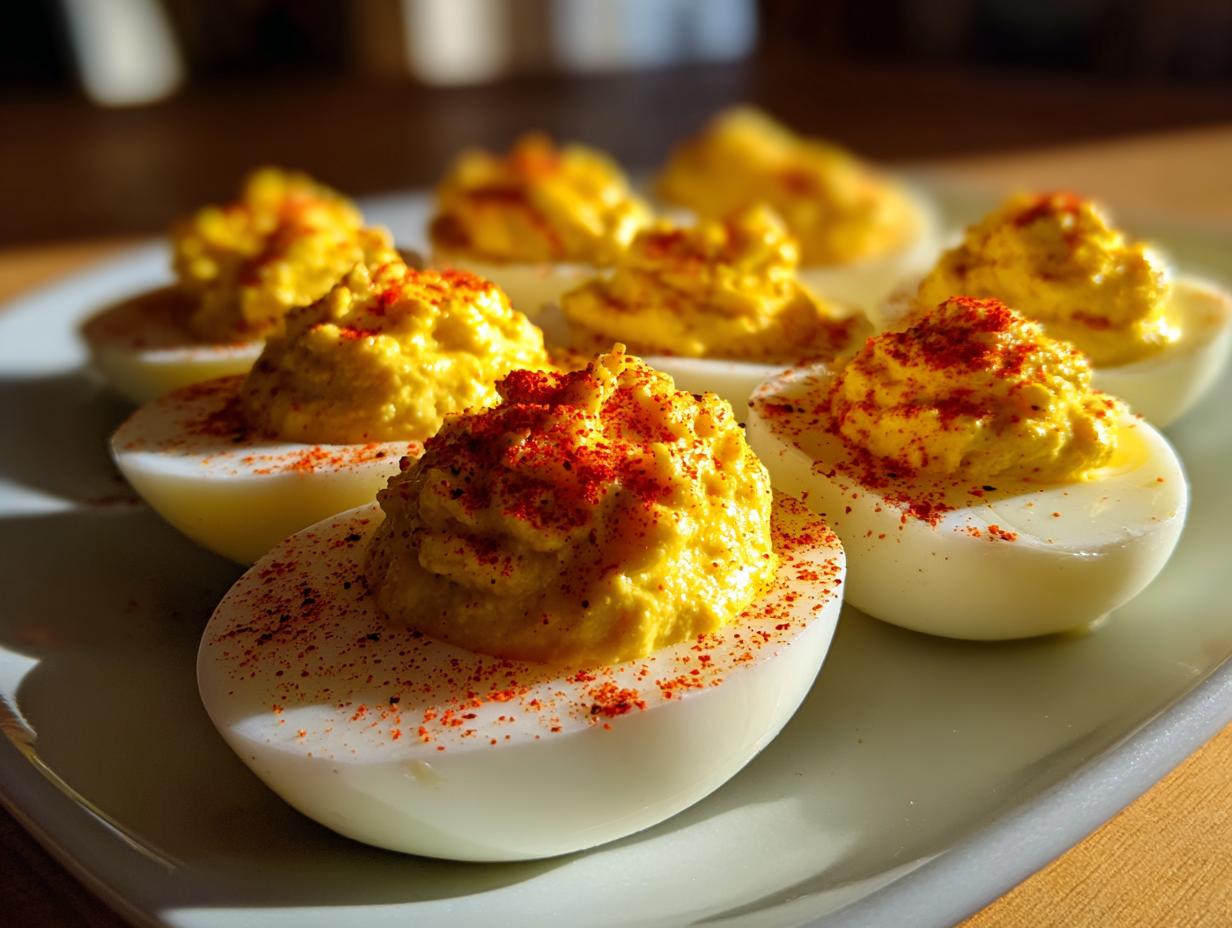
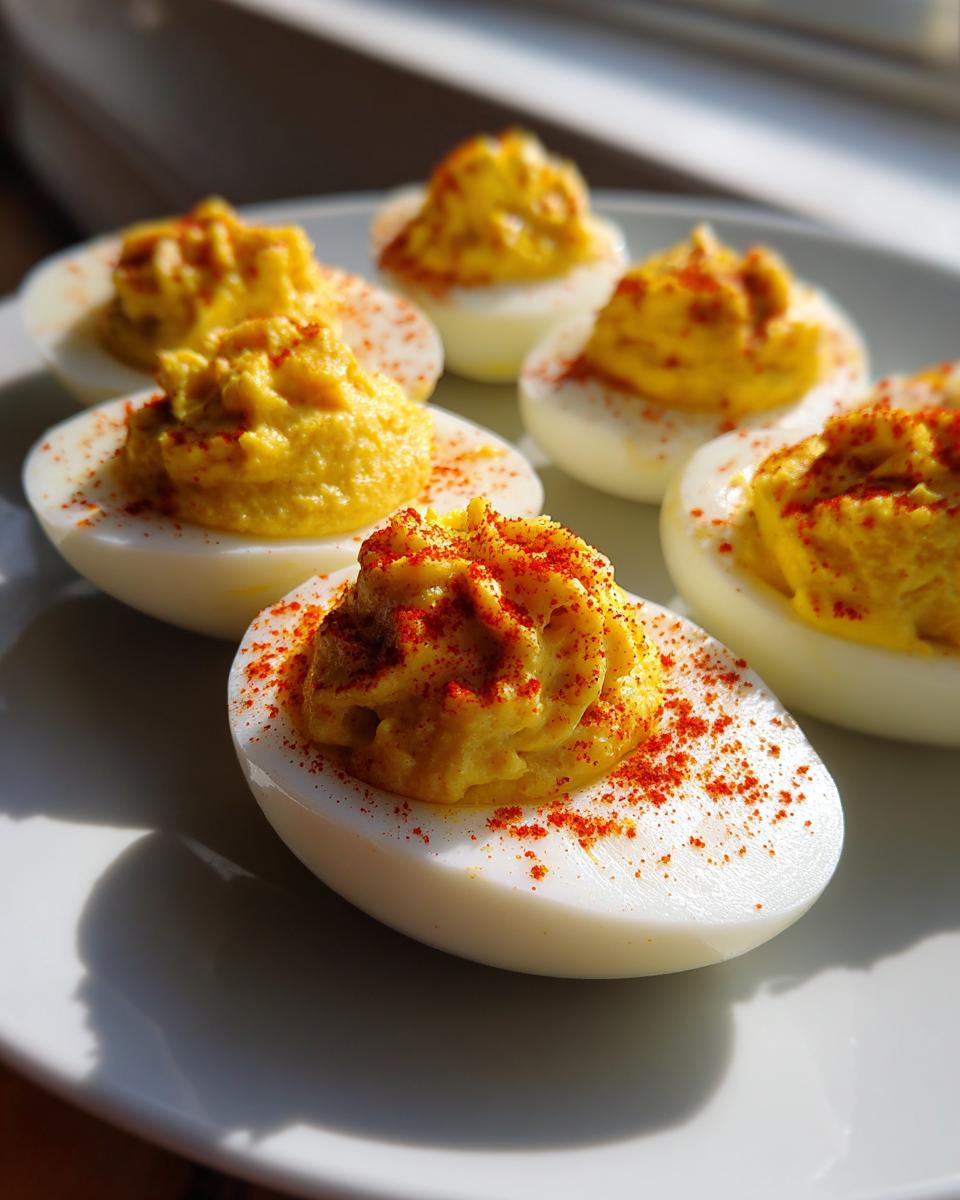
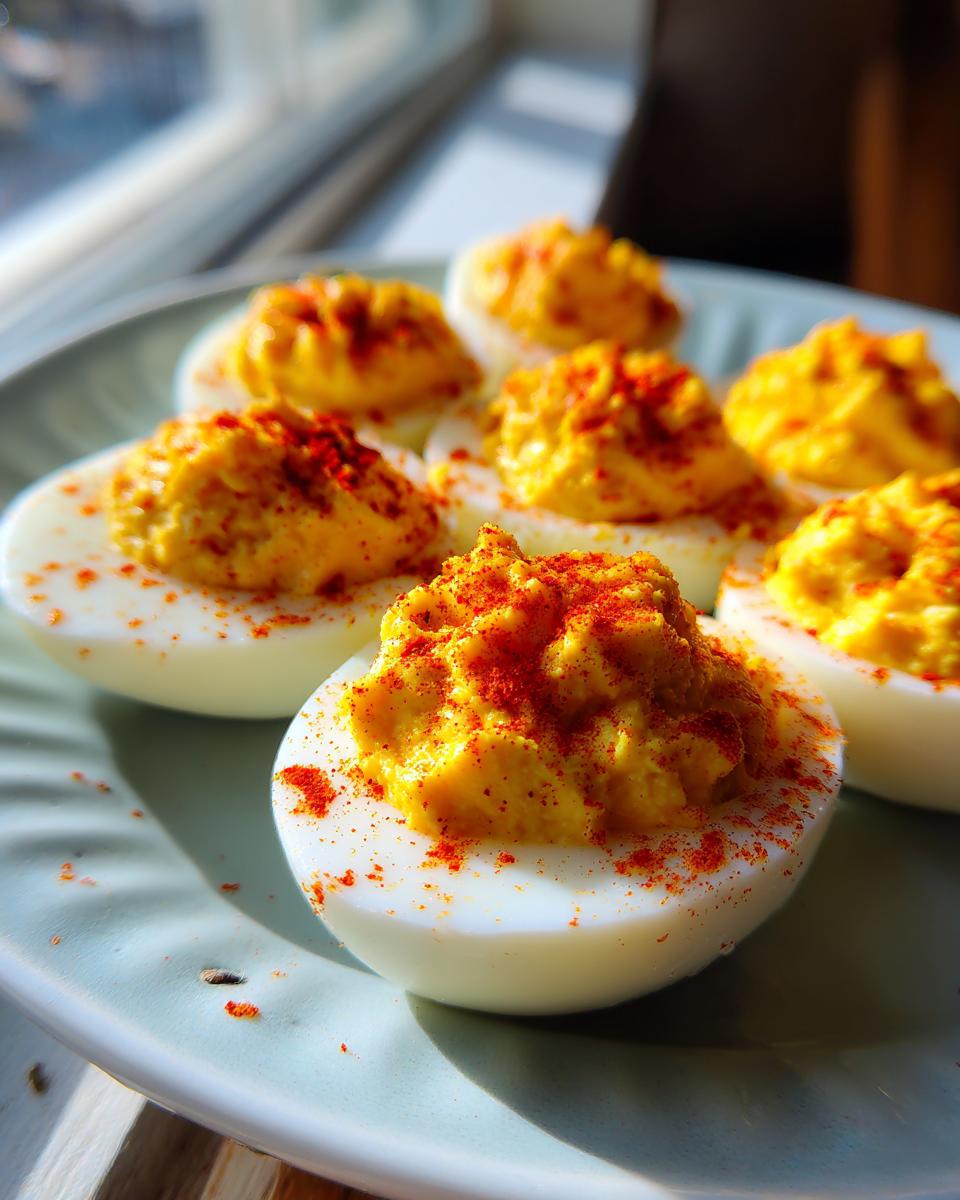
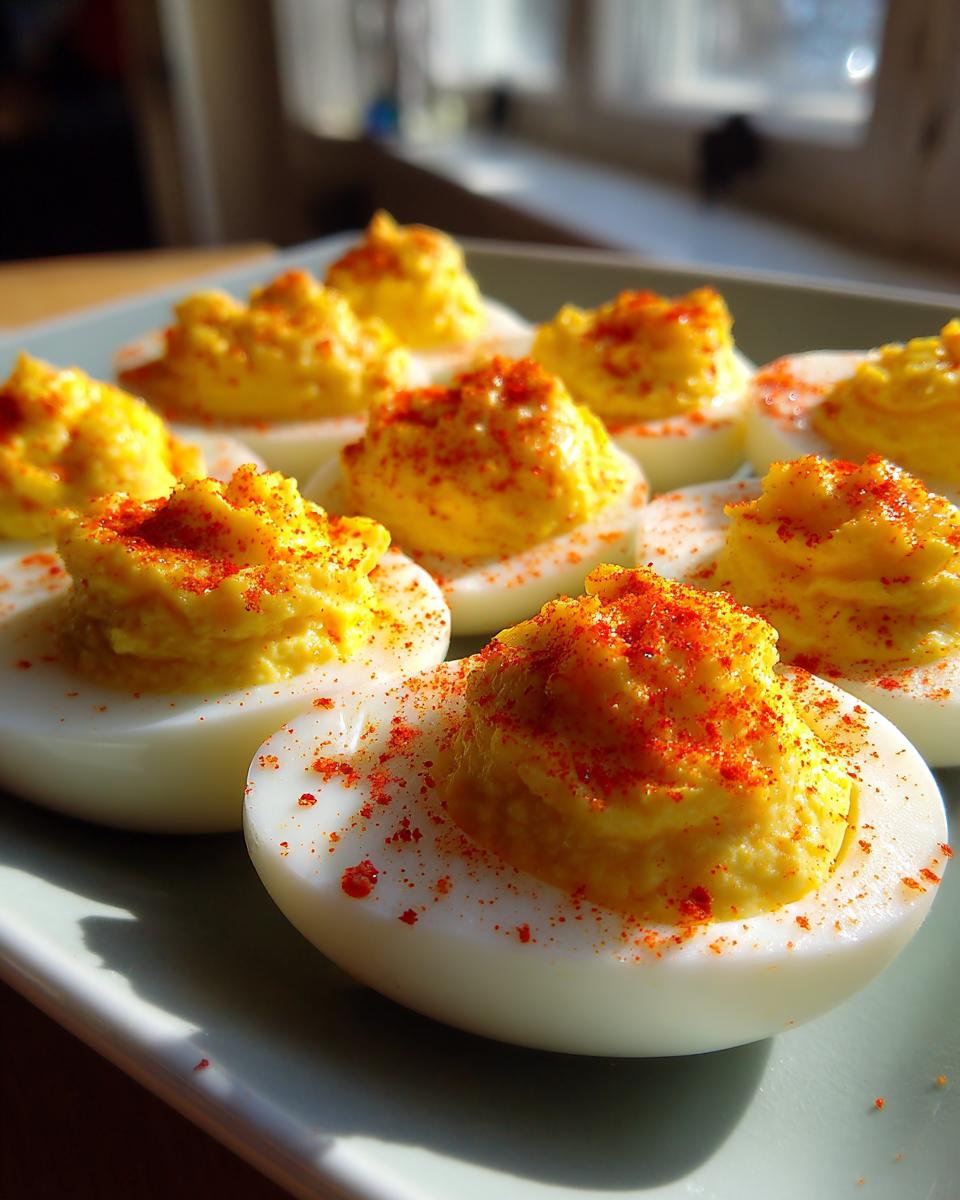
Presentation: Piping and Garnishing Your Classic Deviled Eggs
Now we fill them up! While you can certainly spoon the filling back in, if you want that beautiful, professional swirl that screams “this is the best appetizer board,” grab a piping bag and a star tip. Pipe the creamy mixture high into the egg white halves. They look so much more exciting that way!
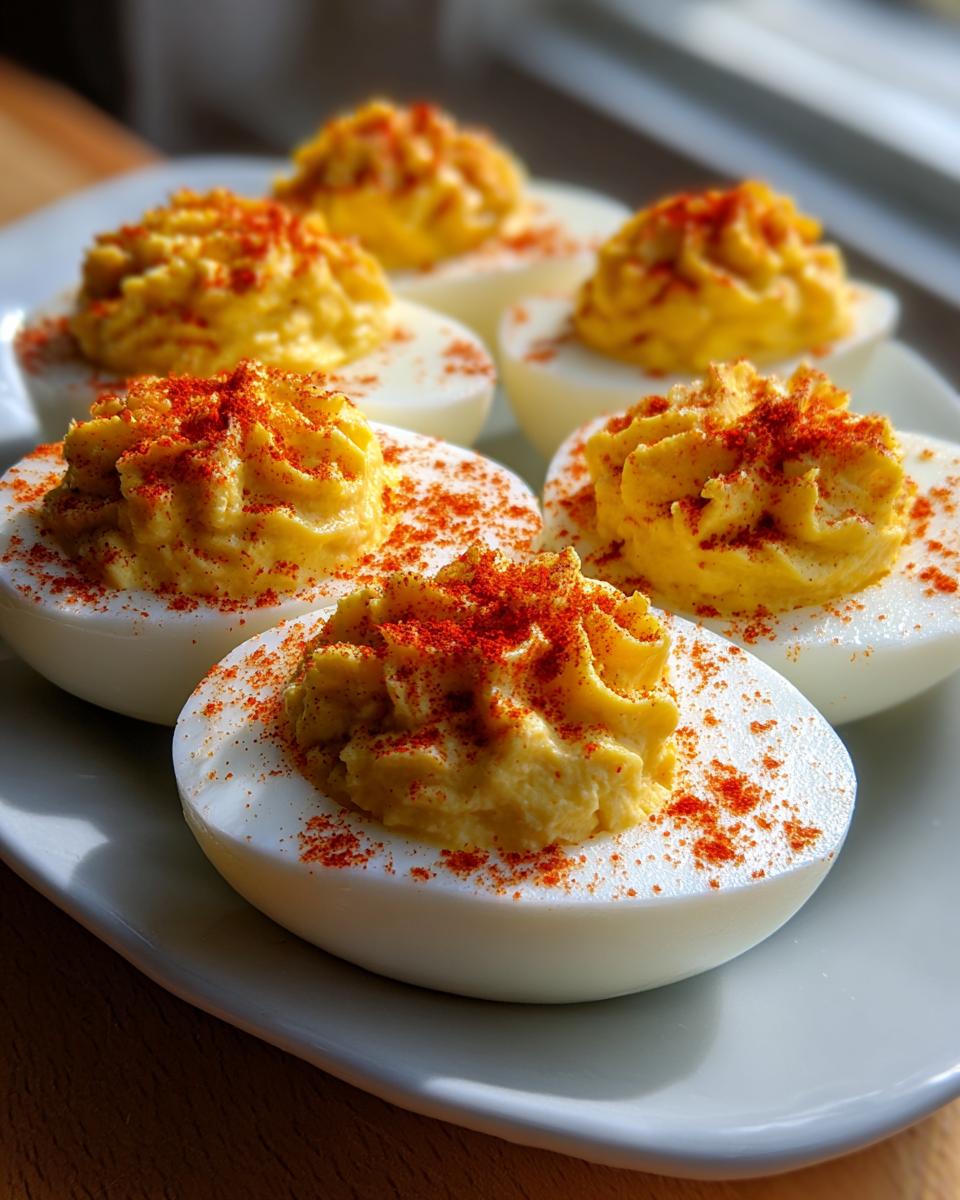
After piping, they need a little nap in the fridge—at least 30 minutes. This helps the filling firm up so it doesn’t squish out as soon as someone picks it up. Right before you serve them, don’t forget the signature touch: a generous dusting of bright red paprika right over the top. That color contrast is non-negotiable for a classic deviled eggs presentation!
Tips for Success Making Classic Deviled Eggs Ahead of Time
I know that the holidays and big parties mean you’re juggling a million things at once, so naturally, you might wonder if these are good make ahead appetizers. The answer is yes, but we need a strategy! You absolutely should bake the initial boil, peel, and yolk-mashing ahead of time. That part is safe to do a full day in advance.
Here is my rule: Never put the filling back into the whites until you are ready to serve, or at least within a few hours. The acid in the vinegar and mustard can start to make the egg whites look watery if they sit for too long! So, peel your eggs and store the hollowed-out whites and the finished yolk filling mixture separately in airtight containers in the fridge. They keep beautifully this way.
When you’re ready to plate, just whip your filling for a second if it chilled too hard, pipe it back into the whites, garnish with paprika, and you’re done! It saves so much time on the day of the event, and they taste totally fresh. Check out some great tips on timing and storage over at this page for another perspective!
Serving Suggestions for Your Classic Deviled Eggs
These classic deviled eggs are truly the MVP of any spread, no matter the event. They are essential classic party snacks because they are handheld, universally loved, and can be made ahead! I always make sure to have a platter ready when I take them to a big gathering—they are the first thing to go at any potluck party food table.
They look amazing nestled beside a tray of fresh veggies or some smoky meatballs. If you’re doing a holiday spread, they pair wonderfully with roasted ham or turkey. For a full appetizer lineup, try putting them next to something hearty like these stuffed mushrooms I make. They provide that perfect creamy, tangy contrast to richer holiday fare!
Storage and Reheating Instructions for Classic Deviled Eggs
When it comes to storing these beauties, remember what I mentioned before: assembly is best done last minute! If you must store them assembled, cover the platter tightly with plastic wrap—make sure the plastic isn’t touching the paprika, or it’ll get messy! In the fridge, they are best eaten within 24 hours. I wouldn’t push it past two days, honestly.
Now, about reheating? Please, don’t even try it! Because of the mayonnaise in the filling, heating them up ruins the texture completely, turning them into sad, greasy puddles. Serve these chilled or at cool room temperature for the best, creamiest experience possible!
Frequently Asked Questions About Classic Deviled Eggs
I totally get it; when you’re making a classic, you want to make sure you avoid any little hiccups! Here are the questions I get asked most often about achieving those perfectly creamy yolks and keeping them fresh. Having the answers makes serving up a platter of traditional deviled eggs so much less stressful.
For a deeper dive into troubleshooting, I recommend checking out this great resource here, which has fantastic input on Southern-style variations!
How do I stop my deviled egg filling from tasting too much like mayonnaise?
That happens when the richness overwhelms the palate! You need something to cut through it. For a truly classic deviled eggs balance, I recommend adding just a tiny dash of your favorite vinegary hot sauce (like Tabasco) along with the vinegar. It adds complexity without tasting ‘spicy.’ That little kick brightens the whole filling right up!
Can I use sweet pickle relish instead of vinegar for tangy deviled egg filling?
Yes, absolutely you can! A lot of people love that slight sweetness with the tang. If you swap my required teaspoon of white vinegar for sweet pickle relish, remember that relish is wetter and already salty. I’d use about one heaping teaspoon of relish, and then you must taste it before adding any extra salt to the yolk mixture. You want that tangy deviled egg filling, not a salty one!
Is the ice bath really necessary after boiling the eggs?
Oh, yes, it’s essential! I see people skip this step sometimes if they are in a hurry, which is a rookie mistake. The ice bath stops the residual heat immediately. If you skip it, the eggs continue to cook slowly, and that’s exactly what causes that unsightly—and less tasty—grayish-green ring around the yolk. Trust me, a few minutes in ice water saves you a lot of heartache!
What is the best way to peel hard-boiled eggs cleanly for easy deviled eggs?
Peeling is my least favorite part, but the ice bath helps immensely! Once they are totally chilled, gently tap the egg all over on a hard counter to crack the shell in many little spots. Then, start peeling under cool, running water. The water gets underneath the membrane and helps it separate from the white much easier, giving you nice, smooth halves.
Nutritional Estimates for Classic Deviled Eggs
Now, because I love you guys and cooking should always be an informed activity, I want to give you a little peek at what’s in these amazing treats. Keep in mind, these numbers are just estimates! If you use a Greek yogurt-based mayo or a low-sodium mustard, your sodium or fat content will shift, so treat this as a general guideline, not a strict diet chart.
These numbers reflect two halves (one whole egg), so it’s quite reasonable for an appetizer! Here’s what we’re looking at for serving sizes based on the recipe details:
- Serving Size: 2 halves
- Calories: 90
- Fat: 8g
- Saturated Fat: 2g
- Cholesterol: 100mg
- Sodium: 120mg
- Carbohydrates: 0.5g
- Protein: 3g
The cholesterol is naturally high because, well, we are using real egg yolks! But honestly, with only half a gram of carbs, these fit right into nearly any low-carb lifestyle. They are just pure, wonderful, traditional flavor! Don’t let the numbers scare you away from making this crowd-pleaser.
Share Your Perfect Classic Deviled Eggs Experience
Now that you have all my secrets, you’re ready to rock your next party with these truly perfect classic deviled eggs! I feel like we’ve spent quality time together in the kitchen, and I truly hope you feel more confident making this timeless appetizer now. I want to know how they turned out for you!
Did you make any tweaks to achieve that ideal tangy deviled egg filling? Did you pipe them beautifully? Please jump down to the comments section and let me know! Leaving a rating helps other cooks know that this recipe is reliable and truly the best deviled egg recipe out there.
I love seeing your creations! If you share a photo online, tag me so I can cheer you on. Remember, the whole point of Kings Cook is turning those kitchen hesitations into proud moments, and nothing makes me happier than knowing you successfully made a batch of irresistible, creamy deviled eggs that everyone asked for seconds of. Happy cooking, friends!
For more classic ideas that are perfect for sharing, you should definitely browse the treasures waiting over at The Wooden Skillet!
PrintThe Ultimate Creamy Classic Deviled Eggs: Perfect for Any Gathering

Master the timeless appetizer with this recipe for the best classic deviled eggs. You get a rich, creamy, tangy filling every time, making them a guaranteed crowd-pleaser for holidays, potlucks, and parties.
- Prep Time: 20 min
- Cook Time: 15 min
- Total Time: 35 min
- Yield: 24 halves (12 servings) 1x
- Category: Appetizer
- Method: Boiling and Mixing
- Cuisine: American
- Diet: Vegetarian
Ingredients
- 12 large eggs
- 1/2 cup mayonnaise
- 2 teaspoons Dijon mustard
- 1 teaspoon white vinegar
- 1/2 teaspoon salt
- 1/4 teaspoon black pepper
- Paprika, for garnish
- 1 tablespoon fresh chives, chopped (optional, for garnish)
Instructions
- Place the eggs in a saucepan and cover them completely with cold water. Bring the water to a rolling boil over high heat.
- Once boiling, immediately remove the pan from the heat, cover it, and let the eggs stand for exactly 12 minutes. This timing helps prevent green rings.
- Drain the hot water and immediately cover the eggs with ice water to stop the cooking process. Let them cool completely, about 15 minutes.
- Peel the cooled eggs. Slice each egg in half lengthwise. Gently scoop the yolks into a medium bowl. Place the egg white halves on a serving platter.
- Mash the egg yolks thoroughly with a fork until they are completely smooth. You want no lumps remaining.
- Add the mayonnaise, Dijon mustard, white vinegar, salt, and pepper to the mashed yolks. Mix well until the filling is creamy and uniform. Taste and adjust seasoning if needed.
- Spoon or pipe the yolk mixture back into the hollowed-out egg white halves. For a professional look, use a piping bag fitted with a star tip.
- Chill the deviled eggs for at least 30 minutes before serving. This allows the flavors to set.
- Just before serving, sprinkle the tops evenly with paprika and optional chopped chives.
Notes
- For the smoothest filling, press the mashed yolks through a fine-mesh sieve before mixing in the other ingredients.
- You can make the hard-boiled eggs and yolks one day ahead. Store the peeled whites and the filling separately in the refrigerator. Assemble just before serving.
- If you want a tangier flavor, substitute 1 teaspoon of sweet pickle juice for the white vinegar.
Nutrition
- Serving Size: 2 halves
- Calories: 90
- Sugar: 0.5
- Sodium: 120
- Fat: 8
- Saturated Fat: 2
- Unsaturated Fat: 6
- Trans Fat: 0
- Carbohydrates: 0.5
- Fiber: 0
- Protein: 3
- Cholesterol: 100