
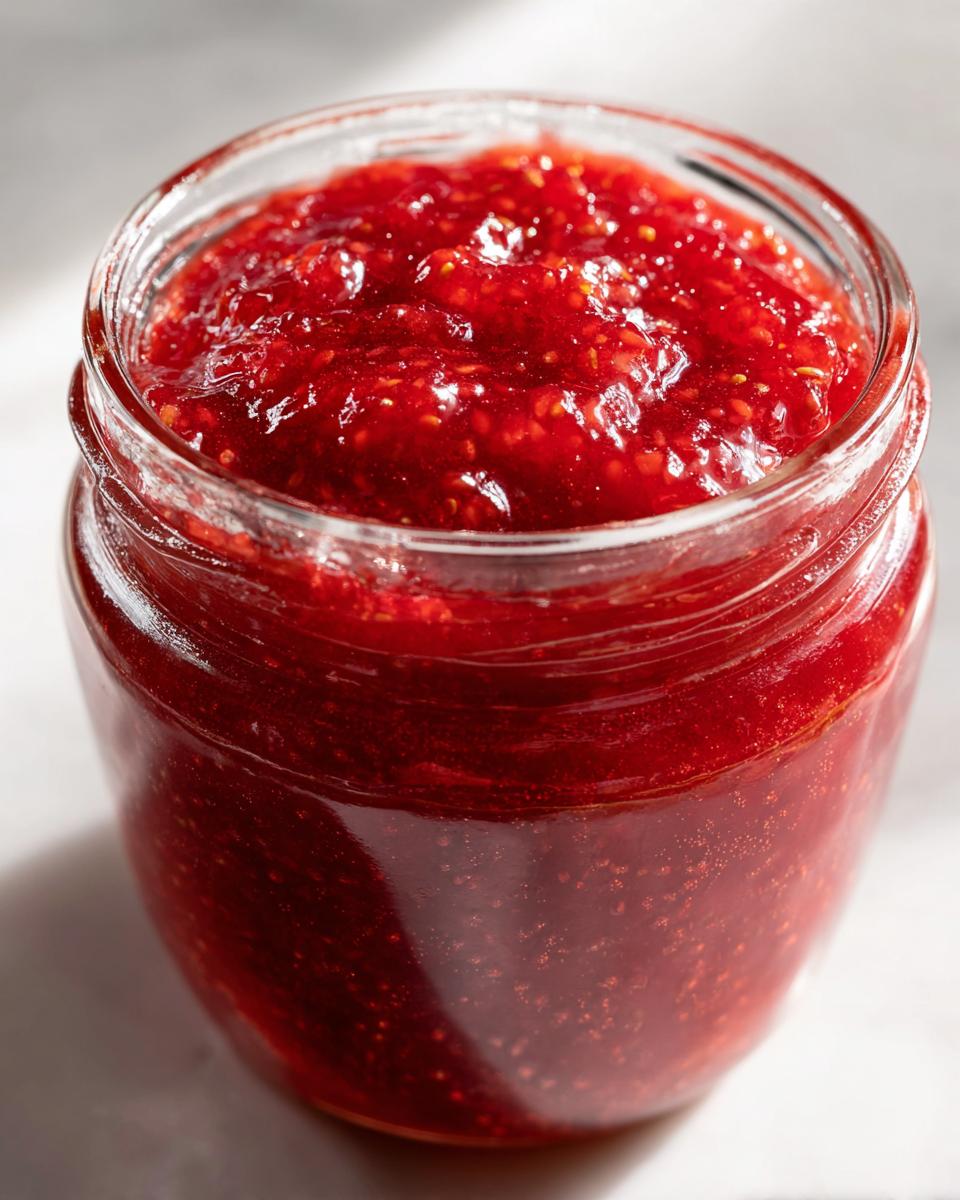
Oh, the taste of summer! There’s nothing quite like biting into a perfectly ripe strawberry, and my biggest frustration used to be that flavor seemed to disappear the second I tried to preserve it. Well, not anymore! I’ve cracked the code on an absolutely fantastic strawberry freezer jam that captures that fresh-picked sweetness perfectly.
This isn’t your grandma’s canning project—unless she was super speedy! My goal here at Kings Cook is simple: reliable results without the stress. This recipe is ultra-quick, completely no-cook, and best of all, requires absolutely no traditional canning. You get pure flavor in about 30 minutes total. Trust me, I’ve tested this batch after batch to make sure it works perfectly for every home cook!
- Why This Strawberry Freezer Jam Recipe Works So Well
- Gathering Ingredients for Your Strawberry Freezer Jam
- Essential Equipment for Easy Homemade Jam
- Step-by-Step Instructions for Perfect Strawberry Freezer Jam
- Preparing Containers for Your Strawberry Freezer Jam
- Tips for Success Making Strawberry Freezer Jam
- How to Store and Use Your Strawberry Freezer Jam
- Frequently Asked Questions About Strawberry Freezer Jam
- Estimated Nutritional Information for Strawberry Freezer Jam
- Share Your Homemade Strawberry Freezer Jam Creations
Why This Strawberry Freezer Jam Recipe Works So Well
If you’ve been searching for a foolproof way to capture that peak-season strawberry magic, this is the one. We skip the hot water bath entirely, which makes a huge difference in the final product. It’s honestly shocking how easy it is to get such professional results!
- Achieving That Fresh Strawberry Flavor
Traditional canning requires boiling the fruit for a long time, and when you boil fruit, you boil away some of that bright, fresh-from-the-garden taste. Since this is a true no-cook method, we are locking in that vibrant, natural flavor! It tastes like you just crushed the berries five minutes ago.
- The Speed of Making Strawberry Freezer Jam
Who has hours to spend simmering jam on the stove? Not us! We are aiming for incredibly fast results. You can have this batch of strawberry freezer jam made, jarred, and ready for the freezer in under 30 minutes. It’s the perfect Quick Strawberry Preserve for when berry season hits hard and fast.
Gathering Ingredients for Your Strawberry Freezer Jam
Okay, getting started is the easiest part because we are keeping the ingredient list super tight. Remember, the goal here is authentic, fresh flavor, so quality berries are key! I’ve listed exactly what you need below. Don’t sweat the measurements; this recipe is very forgiving once you get the hang of the pectin step.
Here’s what you need for about five small jars of deliciousness:
- 4 cups fresh strawberries, hulled and crushed (don’t measure them before crushing!)
- 1 package (1.75 oz) powdered fruit pectin (like SURE-JELL, that bright yellow box)
- 7 cups granulated sugar
- 1/2 cup water
Ingredient Notes and Substitution Options
Now, let’s talk about that pectin. If you are using standard powdered pectin (the kind that needs boiling), stick to the measurements exactly as written above. That’s how we ensure this amazing set for our strawberry freezer jam.
But what if you want less sugar? I get it! If you use a “No Sugar Needed” pectin product, you *must* follow its package directions precisely, because the liquid ratios change completely. Omitting pectin altogether is possible for a very soft, almost sauce-like spread, but if you want that nice, spreadable texture, stick to the recipe with powdered pectin or a specialty low-sugar version.
Essential Equipment for Easy Homemade Jam
One of the best parts about trying this **easy homemade jam** is that you don’t need a fancy canning setup. Seriously, ditch the big water bath canner! For this quick method, we just need a few everyday helpers you probably already have lurking in your cupboards. When I first started making preserves, I thought I needed all those specialized tools, but nope. This is totally beginner-friendly.
Here is the short list of what you absolutely need to have ready before you start crushing those strawberries:
- A very large mixing bowl: Remember, we are combining four cups of berries with seven cups of sugar! You need room to stir vigorously without sending sugar flying everywhere. Trust me on this one; a small bowl makes a huge mess.
- A small saucepan: This is just for briefly boiling the pectin and water mixture. It doesn’t need to be heavy-bottomed for this quick job.
- A sturdy whisk or wooden spoon: You need something that can handle stirring thick sugar around!
- Freezer-safe containers: This is crucial since we are skipping the canning. I usually use small half-pint mason jars because they look lovely for gifting, but any freezer-safe container works great. Just make sure they have tight-fitting lids!
That’s it! No special funnel needed, no headspace tool required—just simple kitchen basics to get your **beginner jam making** journey off to a smooth start.
Step-by-Step Instructions for Perfect Strawberry Freezer Jam
Alright, let’s get down to the good stuff! This is where the magic happens, and trust me, it moves fast. Since we aren’t using heat to set the jam, we have to rely on the pectin doing its job correctly, which means quick action is essential. Don’t worry, I’ll walk you through every second of the process for your strawberry freezer jam.
Combining Strawberries and Sugar
First things first, get those crushed strawberries into your very large bowl. Now, slowly add all 7 cups of granulated sugar right over the top. You need to stir this well, making sure everything is coated, and then you just wait. Seriously, step away for about 10 minutes. This slight resting time helps the sugar start pulling that beautiful, natural moisture out of the berries before we add anything else. It’s a tiny step that matters for the final texture!
Preparing the Pectin Solution
While those berries are chilling out, grab a small saucepan. Pour in your measured water and toss in the powdered pectin. Set this over medium-high heat. You need to stir continuously until it hits a rolling boil—that means it’s boiling hard and you can’t stir it down. Once it’s boiling hard, set a timer and let it go for exactly 1 minute. Not 45 seconds, and definitely not 90 seconds. Precisely 60 seconds! Immediately pull that saucepan off the heat. This precise timing is the key technical step in setting your strawberry freezer jam.
Mixing and Skimming the Strawberry Freezer Jam
Now, pour that hot pectin solution immediately into your sugar-berry mix. This needs serious attention! You have to stir this mixture vigorously, non-stop, for a solid 3 minutes. I mean it—you need to incorporate that pectin thoroughly into the sugary fruit. It will start to look a bit cloudy and thicker. After those three minutes, you might see some foamy bubbles on top, which is totally normal. Take a spoon and just gently skim that foam off the surface to keep your finished product looking professional. This careful attention ensures you end up with an **Easy Homemade Jam** that looks professionally done!
Preparing Containers for Your Strawberry Freezer Jam
This step is super important because, remember, we are skipping the traditional water bath bath where jars seal themselves under pressure. Since we aren’t canning, the seal relies completely on your lid being tight and your jar rims being spotless! It sounds minor, but trust me, a sticky rim means your beautiful jam might leak when it thaws later.
First, make sure your freezer-safe containers—whatever you chose, jars or plastic tubs—are totally clean and dry. You are going to fill these quite full, but you can’t go right to the top! You have to leave about 1/2 inch of space between the jam and the lid. We call this ‘headspace.’ Berries expand a little when they freeze, and if you don’t leave that space, the container might crack or pop the lid right off in the freezer.
Once you’ve ladled your lovely jam into the container, take a paper towel dipped in clean water (or maybe some white vinegar if you’re worried about stickiness) and wipe the entire rim area where the lid will touch. Get every last bit of sugar off that edge. Seal them up tight! I like to check them by giving the lid a good twist. You want to know they are secure before they head into the cold. This attention to detail is what makes a great Freezer Storage Jam Guide result in professional-looking jars!
Tips for Success Making Strawberry Freezer Jam
You have the recipe, you have the method, but now I want to share a few little tricks I’ve picked up over the years to make your strawberry freezer jam truly exceptional. The secret to loving homemade jam is loving the fruit you start with, so my number one tip is this: only make this when the strawberries are absolutely singing!
When berries are in season, they are sweeter, juicier, and bursting with that unmistakable Fresh Strawberry Flavor. Using pale, out-of-season berries means you’ll have to compensate with more sugar, and honestly, why bother when summer is so short? Use the best you can find—it’s worth the slight wait!
Achieving the Right Consistency
The instructions say to crush the berries, but that leaves the texture quite chunky. If you prefer something a little smoother, don’t hesitate to use your food processor! I usually pulse mine just three or four times. You want it slightly textured, not perfectly smooth like jelly, but pulse it until the chunks are smaller than you’d get from hand-crushing. This gives you wonderful control over the final look of your strawberry freezer jam.
Presentation for Gifting
I adore making little batches of this jam just to give away! Since it’s so fast, you can whip up a quick batch specifically for friends who love homemade items. If you’re gifting, skip the big containers and use those cute, small half-pint or even 4-ounce jars. Tie a piece of gingham ribbon around the lid with a little tag explaining that it’s freezer jam, not canned. It makes this Make Ahead Strawberry treat feel incredibly special and thoughtful!
How to Store and Use Your Strawberry Freezer Jam
Okay, the mixing is done, the jars are sealed tight, but we aren’t quite finished! Because this is a No Canning Jam Recipe, the storage method is entirely different from the jam you see on grocery store shelves. We aren’t relying on a vacuum seal; we are relying on ice-cold temperatures!
The key here is patience right after sealing. Don’t just shove those warm, sealed jars directly into the freezer. Remember, we want to avoid any temperature shock that could affect the texture or potentially crack the glass if you’re using jars. Let your containers sit out on the counter at room temperature for about 30 minutes after you wipe the rims clean. This lets them cool down just a tiny bit before hitting the deep freeze.
After that 30-minute rest, they are ready to freeze! Place them gently into your freezer. It usually takes about 24 hours for the jam to fully set into that gorgeous, spreadable texture we’re looking for. How long does it last? The beauty of strawberry freezer jam is its longevity! It keeps perfectly well for up to a full year in the freezer. That means you can capture that June harvest and still have phenomenal jam on your pancakes next February!
Now, when you pull a jar out to use it, just pop it in the refrigerator the night before you plan to enjoy it. Once thawed, treat it like fresh jam—it should be eaten within 3 to 4 weeks for the very best flavor.
Frequently Asked Questions About Strawberry Freezer Jam
When you’re trying something new like strawberry freezer jam, questions always pop up! I’ve gathered the ones I hear most often from readers who are just starting out. Don’t worry if you’re not sure about ingredients; we can troubleshoot together!
Can I make this strawberry freezer jam without pectin?
This is a great question, especially if you’re looking for a super simple version. While this recipe uses regular pectin for that perfect sliceable spread, you absolutely *can* make it without. Just know that if you skip the pectin completely, you’ll end up with a much softer set—think of it more like a chunky sauce than a traditional jam. If you want low sugar but still need help setting, use a ‘No Sugar Needed’ pectin product, but you have to follow its specific liquid conversion ratio, not the one I listed here!
Can I use frozen strawberries instead of fresh for this recipe?
Yes, you certainly can! This is fantastic for making **best freezer jam recipe** when fresh strawberries aren’t available. My only tip is that frozen berries release a lot more water when they thaw. If you use frozen, thaw them completely first, and gently drain off any excess liquid before you crush them and add them to the sugar. This stops your jam from getting too runny.
How long does this jam last in the refrigerator once thawed?
Once you pull a jar out of the freezer and let it thaw overnight in the fridge, it’s ready to eat! Because we didn’t use heat processing, we treat it just like fresh fruit preserves. Keep the thawed jar sealed in the refrigerator, and try to use it up within 3 to 4 weeks for the absolute best flavor and brightest color.
Estimated Nutritional Information for Strawberry Freezer Jam
As I always say here on Kings Cook, when we talk about homemade food, exact numbers can change depending on the sweetness of your berries or exactly how much sugar clung to the side of the bowl! These figures are based on making the full batch and dividing it into the standard yield of about 5 half-pint jars.
If you are tracking this for dietary planning, here is a general look at what you can expect per serving (which is about two tablespoons) of this sweet spread:
- Calories: About 90
- Total Fat: 0g
- Sodium: Around 5mg
- Carbohydrates: 23g
- Sugar: 23g (Yes, it’s high in natural fruit sugars and added sugar, it is jam after all!)
- Protein: 0g
Please remember that these are estimates! If you decide to try a low-sugar pectin route, those sugar and calorie counts will drop significantly. But for this classic, guaranteed-to-set strawberry freezer jam, this is a very close approximation. I always encourage my readers to focus more on the joy it brings to breakfast rather than stressing over these precise numbers!
Share Your Homemade Strawberry Freezer Jam Creations
Now that you’ve whipped up your first batch of this incredible strawberry freezer jam, I genuinely want to hear all about it! Seeing what you create in your own kitchen is truly the best part of running Kings Cook. Did it set perfectly? Are you already spreading it on scones?
Please, don’t be shy! If you loved this quick preserve, please pop down to the comments section below and leave me a rating. It helps me know which recipes are really hitting the mark for you all. Telling me how easy it was compared to traditional canning methods is always something I love to read!
And if you snapped a gorgeous picture of those vibrant jars—maybe sitting on your counter waiting for the freezer, or looking beautiful next to some fresh toast—I would be thrilled if you shared it! Tag me over on social media. Connecting and sharing tips is what this community is all about. I can’t wait to cheer you on as you master your kitchen, one easy jam batch at a time!
PrintUltra Quick Strawberry Freezer Jam (No Canning Required)
Capture the fresh taste of summer with this easy, no-cook strawberry freezer jam recipe. You can make this delicious spread in under 30 minutes without traditional canning methods.
- Prep Time: 15 min
- Cook Time: 5 min
- Total Time: 20 min
- Yield: About 5 half-pint jars 1x
- Category: Preserves
- Method: No Cook/Freezing
- Cuisine: American
- Diet: Vegetarian
Ingredients
- 4 cups fresh strawberries, hulled and crushed
- 1 package (1.75 oz) powdered fruit pectin (like SURE-JELL)
- 7 cups granulated sugar
- 1/2 cup water
Instructions
- Prepare your freezer containers. You will need about 5 half-pint jars or freezer-safe containers. Make sure they are clean and ready.
- In a large bowl, combine the crushed strawberries and the sugar. Stir well until the sugar begins to dissolve. Let this mixture sit for 10 minutes.
- In a small saucepan, combine the pectin and water. Bring this mixture to a rolling boil over medium-high heat, stirring constantly. Boil hard for exactly 1 minute, then remove from the heat.
- Immediately pour the hot pectin mixture into the strawberry-sugar mixture. Stir vigorously for 3 minutes to fully combine all ingredients.
- Quickly skim off any foam that forms on the surface of the jam.
- Ladle the jam into your prepared freezer containers, leaving about 1/2 inch of headspace at the top of each jar.
- Wipe the rims clean, seal the containers, and let them cool to room temperature on the counter for about 30 minutes.
- Place the containers in the freezer. The jam will be ready to eat once frozen solid, usually within 24 hours. This jam keeps well in the freezer for up to one year.
Notes
- For a lower sugar option, substitute the granulated sugar with a no-sugar-needed pectin product, following that product’s specific instructions for liquid amounts.
- If you prefer a smoother jam, you can use a food processor to pulse the strawberries until they reach your desired consistency instead of crushing them by hand.
- This recipe is excellent for gifting; use attractive, small mason jars for presentation.
Nutrition
- Serving Size: 2 tablespoons
- Calories: 90
- Sugar: 23g
- Sodium: 5mg
- Fat: 0g
- Saturated Fat: 0g
- Unsaturated Fat: 0g
- Trans Fat: 0g
- Carbohydrates: 23g
- Fiber: 1g
- Protein: 0g
- Cholesterol: 0mg