
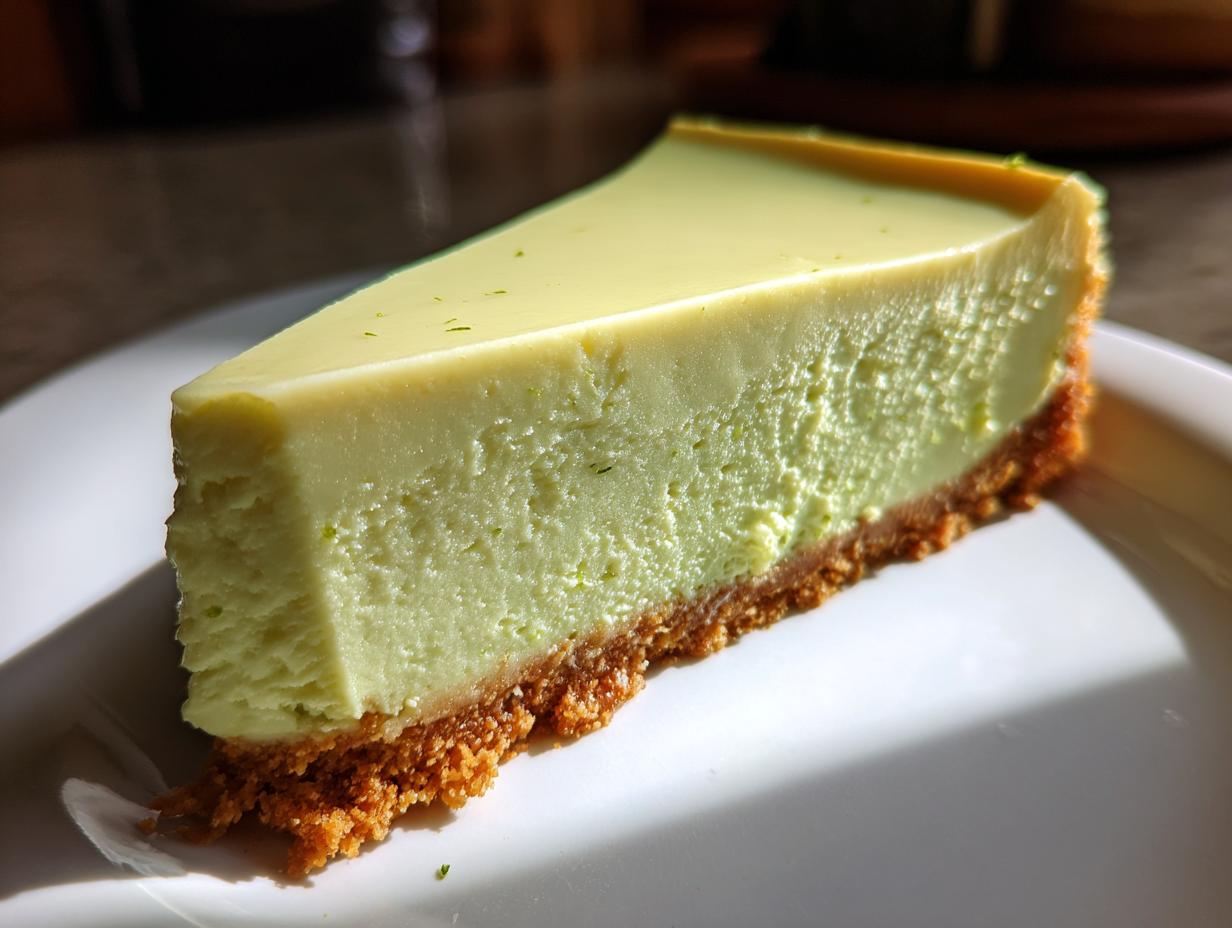
Are you tired of citrus desserts that fall flat or cheesecakes that turn out watery instead of rich? I totally get that feeling! That’s why I spent so much time perfecting this recipe. I promise you, this Ultimate Creamy Key Lime Cheesecake is the one that finally delivers. We are aiming for that amazing, thick and creamy texture with the perfect balance of sweet and wonderfully tangy lime flavor. I rigorously test every recipe here at Kings Cook so you can trust the results.
- Why This Creamy Key Lime Cheesecake is Your New Favorite Summer Cheesecake Recipe
- Ingredients for the Best Key Lime Cheesecake Recipe
- Step-by-Step Instructions for Your Homemade Key Lime Cheesecake
- Tips for Achieving a Perfect, Crack-Free Key Lime Cheesecake
- Make Ahead Cheesecake: Preparing Your Key Lime Cheesecake in Advance
- Variations: No Bake Key Lime Cheesecake and Mini Key Lime Cheesecakes
- Serving Suggestions for Your Refreshing Citrus Cheesecake
- Frequently Asked Questions About Key Lime Cheesecake
- Storage and Reheating Instructions for Key Lime Cheesecake
Why This Creamy Key Lime Cheesecake is Your New Favorite Summer Cheesecake Recipe
Listen, I’ve made my share of disappointing desserts, especially when it comes to citrus. Too often, you get a runny filling or a crust that just crumbles apart. Not with this recipe, my friend! This isn’t just another lime dessert; it’s exactly what you want when you’re looking for a truly Refreshing Citrus Cheesecake.
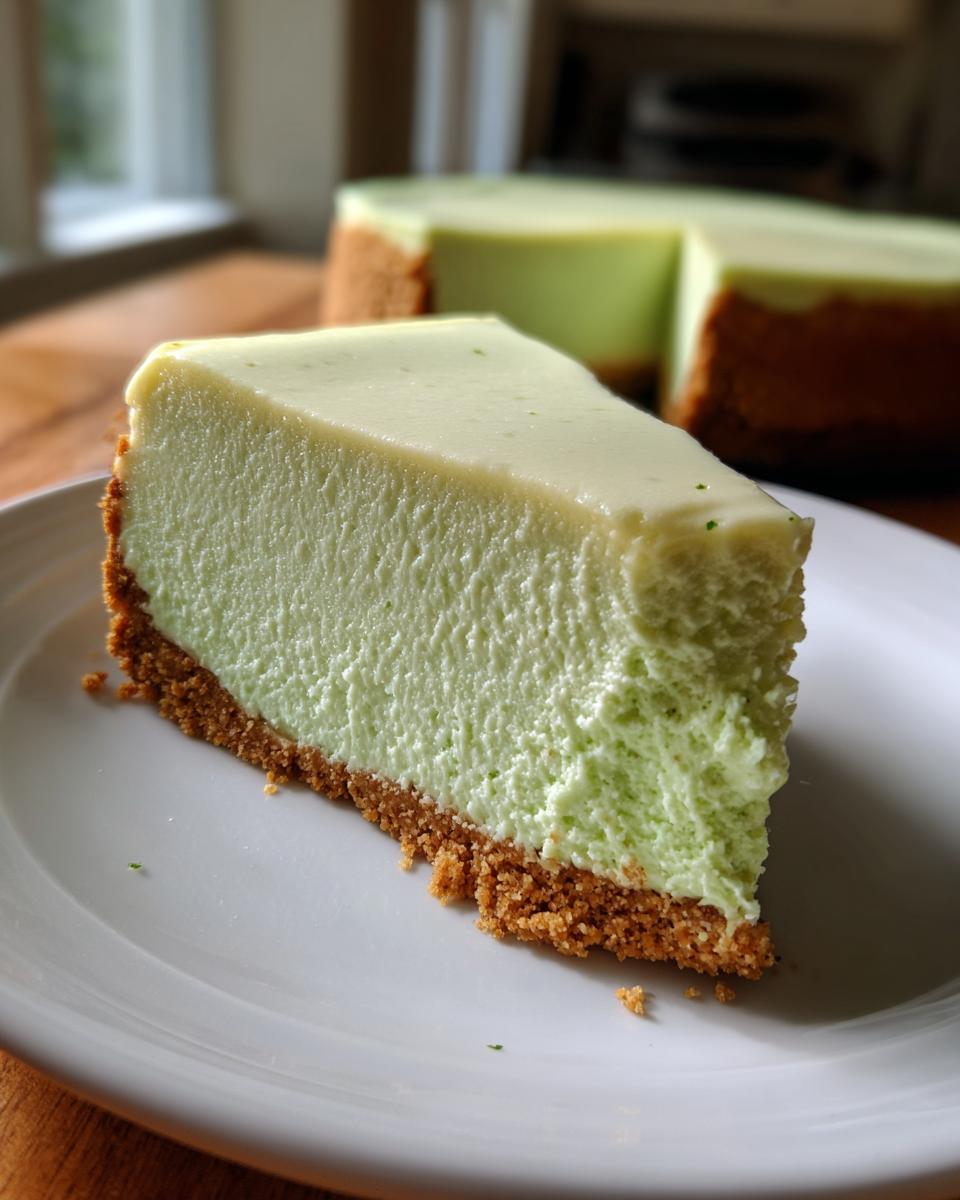
We are laser-focused on achieving that signature rich texture. Forget thin pies—this is a Thick and Creamy Dessert that holds its shape beautifully. If you’re looking for something bright for a barbecue or just a simple, impressive treat, this is it. The way I balance the sugar and the fresh juice is pure magic.
Here’s why this one knocks the socks off the others:
- The unmistakable, zesty pop of authentic key lime flavor.
- A dense, velvety filling that resists cracking beautifully once you follow my cooling steps.
- A buttery, perfectly crisp graham cracker crust that complements, not overpowers, the filling.
Hop over to my best dessert recipes roundup if you need more ideas after you finish this one!
Ingredients for the Best Key Lime Cheesecake Recipe
Okay, getting the absolute best key lime cheesecake means reading the labels on your ingredients, trust me on this! When you gather these components, make sure you’re paying attention to the details—like room temperature cream cheese and fully melted butter. These little things make the difference between a good cheesecake and a truly spectacular one that’s thick and creamy. I’ve broken down exactly what you need below so you don’t miss a thing. Being precise here sets us up for success!
For the Graham Cracker Crust Cheesecake Base
- 1 1/2 cups graham cracker crumbs
- 1/4 cup granulated sugar (for crust)
- 6 tablespoons unsalted butter, melted
For the Velvety Lime Filling
This is where the magic happens! Remember, fresh juice is non-negotiable for true tang.
- 3 (8 ounce) packages cream cheese, softened
- 1 1/2 cups granulated sugar (for filling)
- 1/4 cup all-purpose flour
- 1 teaspoon vanilla extract
- 1/2 teaspoon lime zest
- 1/2 cup fresh key lime juice (about 10-12 limes)
- 3 large eggs
- 1/2 cup sour cream
- Optional topping: Whipped cream and extra lime zest
Step-by-Step Instructions for Your Homemade Key Lime Cheesecake
Now we get to the fun part—bringing this incredible key lime cheesecake to life! I’ve laid out the steps simply so you can focus on the technique, but don’t rush the waiting game at the end. That cooling time is honestly half the secret to getting that dense, velvety texture we talked about.
Preparing the Graham Cracker Crust Cheesecake
First things first, let’s get the oven ready to 325 degrees Fahrenheit. Remember wrapping your 9-inch springform pan? Make sure you use heavy-duty foil and wrap the bottom tightly—this keeps water out of our crust! For the crust itself, just mix those crumbs, the tablespoon of sugar, and the melted butter until it looks like wet sand. Press it down firmly into the bottom of that prepared pan. Pop it into the oven for 10 quick minutes just to set it up before you move on.

Mixing the Tangy Lime Cheesecake Filling
This part requires a little patience, but don’t whip it like you’re making meringue! You need that smooth base. Beat your softened cream cheese first until it’s totally smooth—no lumps allowed! Then, gently beat in the sugar and the flour. Next come the flavor boosters: vanilla and lime zest. Once those are combined, drizzle in the fresh key lime juice slowly while mixing on low. Finally, add those three eggs in one at a time, mixing just until you see them disappear. I always finish by stirring the sour cream in by hand so I don’t accidentally incorporate too much air!
Baking the Key Lime Cheesecake with a Water Bath
This is the best trick I learned from my mentor, which really helps achieve any creamy key lime cheesecake without disaster. Place your foil-wrapped pan inside a larger roasting pan. Pour hot water into the outer pan until it comes about halfway up the sides of your springform pan. This water bath insulates the cheesecake and stops those nasty cracks. Bake it for about 55 to 65 minutes. You want the edges set, but the very center should still have a tiny wobble. Then, turn off the oven, crack the door open slightly, and let it sit in there for a full hour. This slow transition prevents shocking the structure. You can find more tips about baking reliability on my About Page, by the way!
Tips for Achieving a Perfect, Crack-Free Key Lime Cheesecake
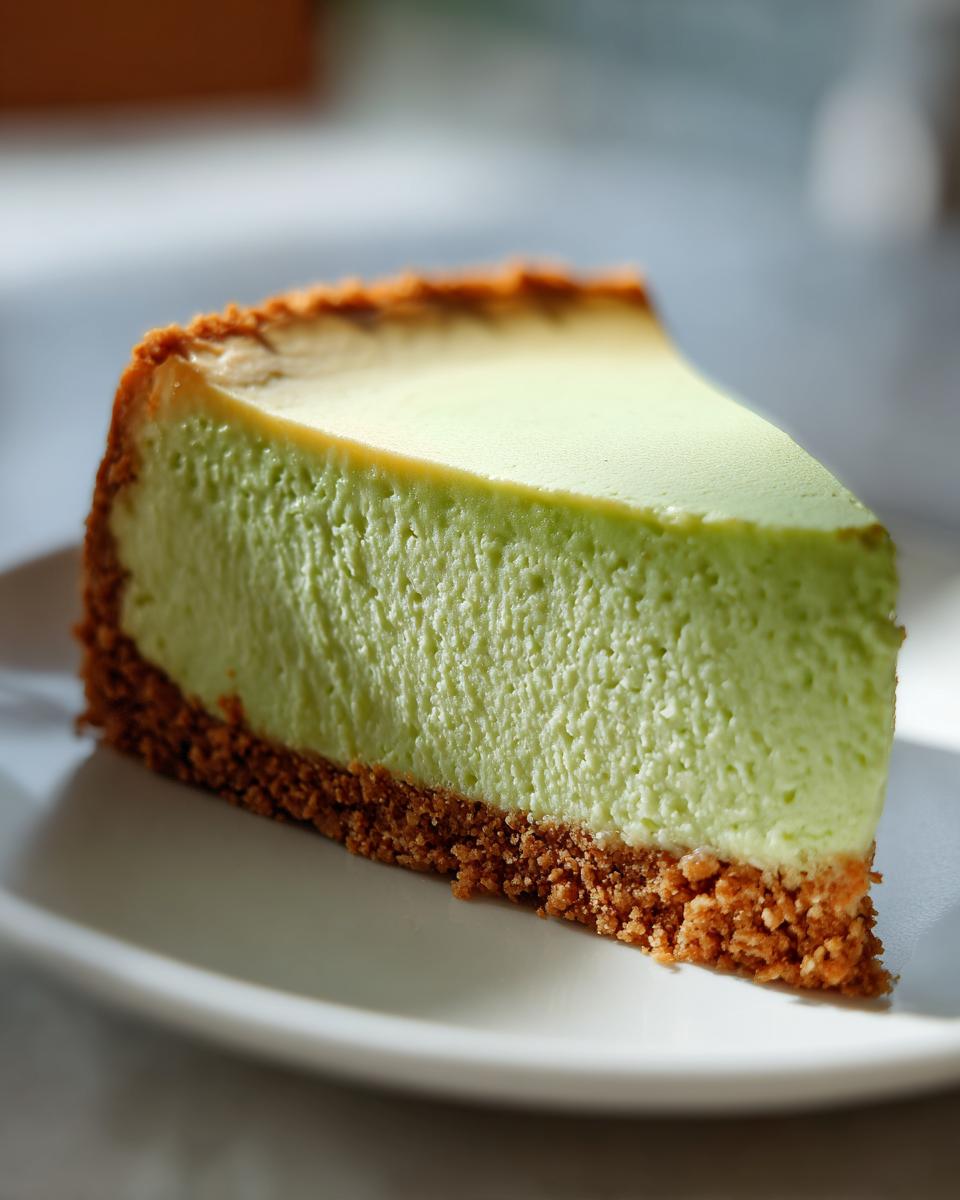
We don’t just want a good cheesecake; we want that flawless, super Thick and Creamy Desserts look that you see in fancy bakeries! Getting that professional finish on your key lime cheesecake really comes down to paying attention to the temperature and how you handle the mixing process. Don’t let a little crack stop you from enjoying what is probably the best citrus treat you’ve ever made!
Ingredient Temperature and Mixing for Creamy Key Lime Cheesecake
If your cream cheese is cold when you start, you are guaranteed lumps, and we just can’t have that curdled texture. Make sure your cream cheese is soft enough to really smoosh easily—I leave mine out for hours sometimes. The eggs need to be room temperature too! When you add them into that gorgeous lime mixture, you absolutely have to mix gently. Seriously, switch to low speed or even fold them in by hand after the first egg goes in. Over-beating adds air, and air expands, then collapses, leading to cracks later on.
The Essential Cooling Process for Your Key Lime Cheesecake
If you are going to ignore everything else I tell you, please don’t ignore the cooling! Thermal shock is cheesecake’s worst enemy. After that hour inside the warm, turned-off oven, let the cheesecake sit on the counter until it totally loses that warm feeling. Then, it needs quality time in the fridge. I cover mine loosely with plastic wrap only after it’s cool, and I give it a minimum of six hours, but overnight is truly the sweet spot. That long chill is what sets that beautiful, dense texture we are looking for!
Make Ahead Cheesecake: Preparing Your Key Lime Cheesecake in Advance
One of the best things about this particular key lime cheesecake recipe is that it actually gets *better* overnight! I honestly think the tanginess of the lime deepens beautifully after a full night in the fridge, making it the perfect make ahead dessert for parties. You never have to stress about making it the day of your gathering.
Once that cheesecake is completely cool—and I mean totally cold after its long rest—you need to handle the storage right. Don’t wrap it tightly with plastic wrap when it’s warm, or you risk sweating and ruining the top. After it’s chilled, just cover that springform pan loosely, or carefully transfer the whole thing onto a serving plate and cover it with a cake dome if wrapping seems weird.

You can rely on this beauty being fantastic for up to four days in the refrigerator. If you want to see some other great strategies for preparing for big meals, check out some of my top tips over on my About Page. And if you’re aiming for that ultimate texture, I know this spot has some great ideas on timing, too!
Variations: No Bake Key Lime Cheesecake and Mini Key Lime Cheesecakes
I know sometimes you need that amazing citrus flavor but you just can’t turn your oven on, especially when it’s scorching outside. That’s great news because we can definitely pivot this recipe into an easy No Bake Key Lime Cheesecake! Generally, for the no-bake version, you skip the eggs entirely and use a stabilizer, which is usually either gelatin or you up the amount of whipped topping you fold in right at the end. You still bake that buttery graham cracker crust for about 8 minutes, let it cool completely, and then your filling sets up perfectly in the fridge.
If you want to serve something adorable for a party, making Mini Key Lime Cheesecakes is super simple too! You just line a standard muffin tin with cupcake liners—or skip the liners and grease the tin really well. Pour the batter in, only filling them about three-quarters of the way up, and drastically reduce the baking time, usually down to about 20 minutes, then follow the same slow cooling method afterward.
You can find some fantastic no-bake ideas, and I share a few other simple treats over on my best dessert recipes page! And for a totally different take on the no-bake version, check out what my friends are doing over at The Recipe Rebel.
Serving Suggestions for Your Refreshing Citrus Cheesecake
You worked hard to get that incredibly smooth, tangy filling, so let’s make sure the presentation shines! This lovely dessert is perfect on its own, of course, but a little something extra on top really takes it over the edge. When I serve mine, I always keep it slightly chilled.
A dollop of fresh, unsweetened whipped cream cuts through the tartness perfectly. If you want something a little more decadent, try a drizzle of high-quality white chocolate ganache—the sweetness is fantastic with bright lime. And if you’re looking for something to sip alongside it, check out my favorite cocktail recipes that pair well with these zesty treats!
Frequently Asked Questions About Key Lime Cheesecake
I know you might have a few lingering questions still buzzing around after diving into this amazing recipe. Since the goal here is total kitchen confidence, let’s tackle the most common things I hear about getting that signature flavor and texture just right for your key lime cheesecake. For all my baking philosophy and background details, feel free to peek over at my About Page!
Can I substitute regular lime juice for key lime juice?
This is a big one! You absolutely *can* substitute regular lime juice, but you’re going to get a different result. Key limes are smaller, tarter, and have a slightly more floral, aromatic flavor. If you use regular lime juice, you will need to increase the amount of zest and maybe even add a little extra sugar to balance that sharper, less complex taste. For the best key lime cheesecake experience, I always push for the real deal!
How do I get that Cheesecake Factory Copycat texture?
Ah, aiming for that famously thick, almost decadent texture! That creamy result comes down to two things: surface area and mixing. Make sure your cream cheese is truly soft and that you aren’t incorporating too much air during mixing, especially after the eggs go in. Also, chilling time is vital for that dense structure. If you want to see how they nail that texture in their famous version, you can check out some analysis over at Recipe Horizon.
What is the difference between key lime and regular lime?
Regular limes (Persian limes) are bigger and have a more straightforward sourness. Key limes are smaller, more acidic, and have a unique, slightly floral aromatic quality to their juice that just sings in a dessert like this. It’s a subtle difference, but for a dedicated tangy lime cheesecake, it really makes a difference!
Can this be stored or is it best served immediately?
This is a fantastic make ahead dessert! Honestly, this homemade key lime cheesecake tastes even better on day two once those tangy flavors have fully married in the fridge. Make sure you check out my storage notes to keep it perfect until you’re ready to serve it up! If you’re curious about my general cooking philosophy, you can learn more about me on my About Page.
Storage and Reheating Instructions for Key Lime Cheesecake
Good news! This key lime cheesecake is designed to be made ahead, which means less stress on party day. Once it’s completely chilled—and I mean rock solid cold after that minimum six-hour chill—cover it loosely with plastic wrap or foil. Keeping it covered prevents it from soaking up any weird fridge smells.
You can keep this beauty fresh in the refrigerator for up to four days. I generally don’t recommend reheating cheesecake; it messes up that perfect creamy texture we worked so hard for! Just pull it out of the fridge about 15 minutes before slicing to let it soften just slightly. Enjoy that bright, zesty flavor!
PrintThe Ultimate Creamy Key Lime Cheesecake with Graham Cracker Crust

You can make this thick and creamy key lime cheesecake that balances sweet and tangy citrus flavors perfectly. This recipe uses a buttery graham cracker crust and delivers a refreshing dessert ideal for summer gatherings or any time you want a bright treat.
- Prep Time: 25 min
- Cook Time: 65 min
- Total Time: 7 hours 55 min
- Yield: 12 servings 1x
- Category: Dessert
- Method: Baking
- Cuisine: American
- Diet: Vegetarian
Ingredients
- 1 1/2 cups graham cracker crumbs
- 1/4 cup granulated sugar (for crust)
- 6 tablespoons unsalted butter, melted
- 3 (8 ounce) packages cream cheese, softened
- 1 1/2 cups granulated sugar (for filling)
- 1/4 cup all-purpose flour
- 1 teaspoon vanilla extract
- 1/2 teaspoon lime zest
- 1/2 cup fresh key lime juice (about 10–12 limes)
- 3 large eggs
- 1/2 cup sour cream
- Optional topping: Whipped cream and extra lime zest
Instructions
- Preheat your oven to 325 degrees Fahrenheit. Wrap the outside bottom of a 9-inch springform pan tightly with heavy-duty aluminum foil.
- Prepare the crust: Mix graham cracker crumbs, 1/4 cup sugar, and melted butter until evenly moistened. Press the mixture firmly into the bottom of the prepared springform pan. Bake for 10 minutes. Let the crust cool while you prepare the filling.
- Prepare the filling: In a large bowl, beat the softened cream cheese with an electric mixer until smooth. Gradually beat in 1 1/2 cups sugar and flour until combined. Mix in vanilla extract and lime zest.
- Add the key lime juice and beat on low speed until just incorporated. Do not overmix.
- Beat in the eggs one at a time, mixing only until each egg is blended into the batter. Stir in the sour cream by hand until smooth.
- Pour the filling over the cooled crust. Place the foil-wrapped springform pan into a larger roasting pan. Carefully pour hot water into the roasting pan until the water reaches halfway up the sides of the springform pan (this creates a water bath).
- Bake for 55 to 65 minutes, or until the edges are set but the center still has a slight wobble.
- Turn off the oven, crack the oven door open slightly, and allow the cheesecake to cool inside the oven for 1 hour. This prevents cracking.
- Remove the cheesecake from the water bath and foil. Let it cool completely on a wire rack. Once cool, cover and refrigerate for at least 6 hours, or preferably overnight, before serving.
- Before serving, remove the sides of the springform pan. Top with whipped cream and extra lime zest if desired.
Notes
- For the best tangy flavor, use fresh key lime juice. Bottled juice changes the taste profile.
- If you skip the water bath, check the cheesecake earlier, as it may cook faster and risk cracking.
- This cheesecake makes an excellent make ahead dessert; it keeps well covered in the refrigerator for up to four days.
Nutrition
- Serving Size: 1 slice
- Calories: 450
- Sugar: 35g
- Sodium: 310mg
- Fat: 30g
- Saturated Fat: 18g
- Unsaturated Fat: 12g
- Trans Fat: 0.5g
- Carbohydrates: 40g
- Fiber: 1g
- Protein: 7g
- Cholesterol: 110mg