
Oh, friends, do I have a perfect, crunchy snack for you! If you’ve ever stared longingly at the pickle jar in the store thinking, “Why can’t I ever get them *that* crisp?” or felt totally intimidated by the whole canning process, you are absolutely in the right place.
I promise you, making incredible, snappy refrigerator pickles at home is shockingly simple. We are skipping the water bath canner entirely! These Ultra-Crispy Garlic Dill Refrigerator Pickles deliver that perfect dill punch and amazing crunch, and they are ready to eat in just 24 hours. When I started teaching my college friends how to cook, recipes like this were my secret weapon—simple steps that deliver amazing, confident results. Get ready to toss those supermarket jars!
- Why This Ultra-Crispy Recipe Makes the Best Refrigerator Pickles
- Essential Ingredients for Perfect Garlic Dill Refrigerator Pickles
- Step-by-Step Instructions: How To Make Refrigerator Pickles
- Tips for Success with Your No Canning Pickles
- Troubleshooting Common Issues in Refrigerator Pickles
- Serving Suggestions for Your Fresh Cucumber Pickles Storage
- Frequently Asked Questions About Refrigerator Pickles
- Estimated Nutritional Data for Garlic Dill Refrigerator Pickles
- Share Your Best Homemade Refrigerator Pickles Experience
Why This Ultra-Crispy Recipe Makes the Best Refrigerator Pickles
Honestly, the biggest reason people skip making pickles at home is they assume it means endless hours of sterilizing jars. Not here! This recipe is all about maximum flavor payoff with minimal effort. These are truly the Best Homemade Refrigerator Pickles because they focus on texture first.
- Guaranteed Crisp Texture in Refrigerator Pickles: We stop the mush before it even starts! I have a couple of tricks up my sleeve to keep these cucumbers snappy.
- Speed: Quick Refrigerator Pickles Ready in 24 Hours: You read that right. This isn’t a multi-day affair. If you make these tonight, tomorrow you get homemade goodness. It’s the perfect 24 Hour Pickles Recipe for busy weeks.
Guaranteed Crisp Texture in Refrigerator Pickles
The crunch is everything, right? Nobody wants a limp pickle! To make sure these stay perfectly firm, we do two key things. First, we always aggressively trim off the blossom end of the cucumber—that little nub at the end holds enzymes that just want to make your pickle soft. Trust me on this one!
Second, if you have an extra 30 minutes, toss your sliced Kirby cucumbers into a huge bowl of ice water while you make your brine. That shock treatment firms them right up. This step makes all the difference between a good pickle and a great one, and it’s crucial for Crispy Refrigerator Dill Pickles.
Speed: Quick Refrigerator Pickles Ready in 24 Hours
Traditional canning requires processing jars, letting them cool, and sometimes waiting weeks for the flavors to fully deepen. We don’t have time for that drama! With these Easy Homemade Pickles, the brine is hot when it goes in, which kickstarts the marinating process immediately. By the time you have your dinner planned for the next evening, those lovely spears are ready to go.
This method cuts out all the fuss of water baths and pressure cookers. It’s all about that super-fast infusion process you only get with quick vinegar pickles.
Essential Ingredients for Perfect Garlic Dill Refrigerator Pickles
When I make recipes for Kings Cook, I always stick to ingredients you can just grab at your normal grocery store—no specialty hunting allowed! For the absolute **best homemade refrigerator pickles**, you need to focus on freshness, especially the cucumbers. We are keeping this list short and sweet, focusing only on what gives us that maximum flavor and snap.
Here is what you’ll need hiding in your pantry or fridge right now:
- 2 lbs pickling cucumbers—Kirby or Persian work best!
- 4 cloves garlic, smashed up good
- 2 heads fresh dill (or 4 tsp dried dill seed)
- 1/4 cup pickling salt (or just use kosher salt)
- 1 tablespoon whole black peppercorns
- 1 teaspoon mustard seeds
- 2 cups white vinegar (make sure it’s 5% acidity!)
- 2 cups water
- 1 teaspoon sugar (just a touch, it balances everything out!)
Cucumber Selection and Preparation Notes
You definitely want pickling cucumbers, like a Kirby or Persian, because they have thinner skins and feel much firmer than the big slicing ones you usually see. Remember the secret weapon for crispness? You must trim off that little blossom end on every single cucumber. Seriously, don’t skip it! That part releases enzymes that want to turn your beautiful pickle soft and sad. Trim it off, slice them up thick, and you are halfway to crunchy glory.
Crafting the Flavorful Brine for Refrigerator Pickles
The brine is totally simple: vinegar, water, salt, and just a little sugar to keep things rounded out. I always boil this mixture just until everything dissolves, which takes about five minutes. That hot brine goes right over the spices and cucumbers to get the party started. If you’re making these to go alongside a light summer meal, make sure you check out my recipe for a beautiful Greek Salad—perfect pickle partners!
Step-by-Step Instructions: How To Make Refrigerator Pickles
Okay, here is where the magic happens! I know reading instructions can sometimes feel stiff, but I broke this down so anyone, even if you’ve never made refrigerator pickles before, feels totally comfortable. We are going step-by-step to ensure every jar is packed perfectly for that amazing crunch.
Preparing Cucumbers and Jars for Simple Refrigerator Pickling
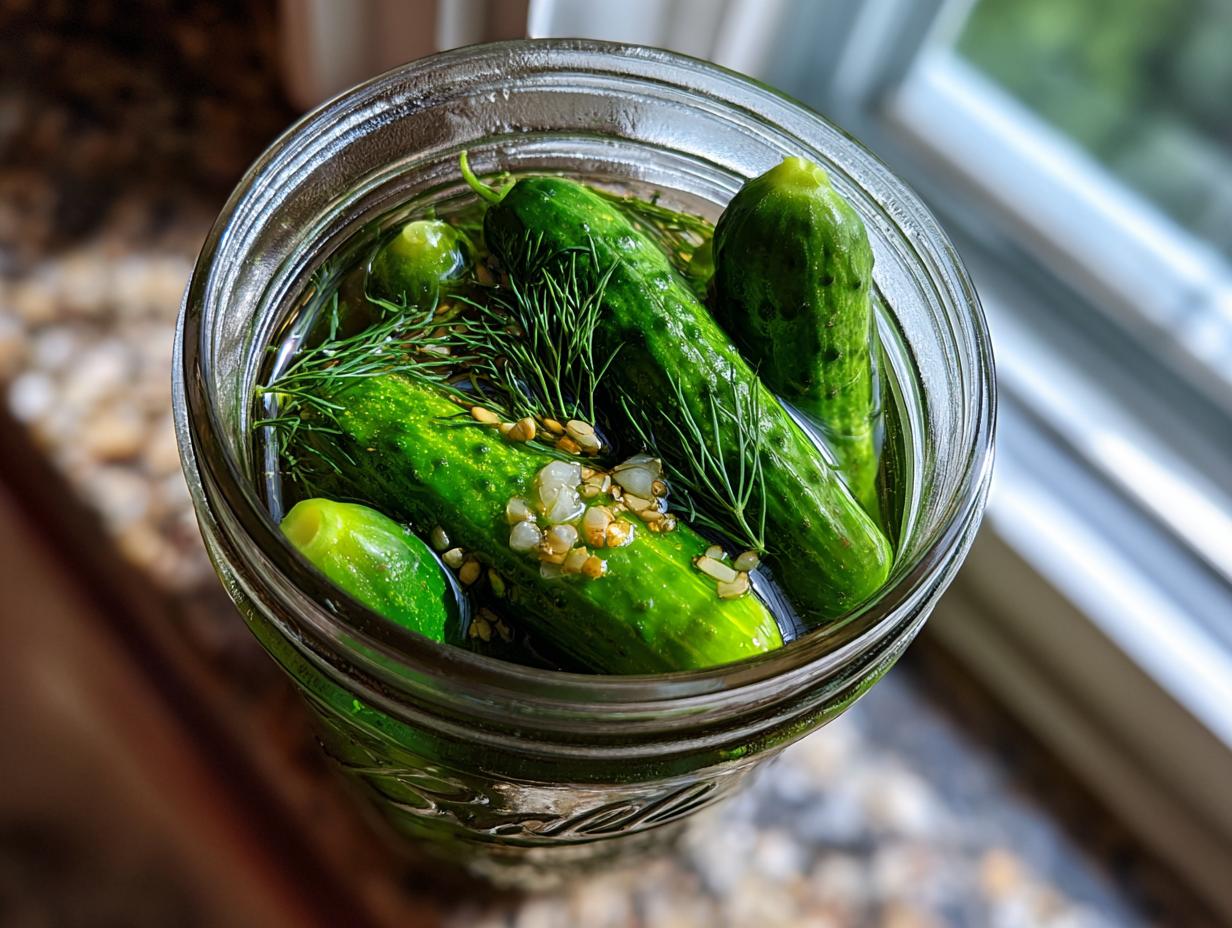
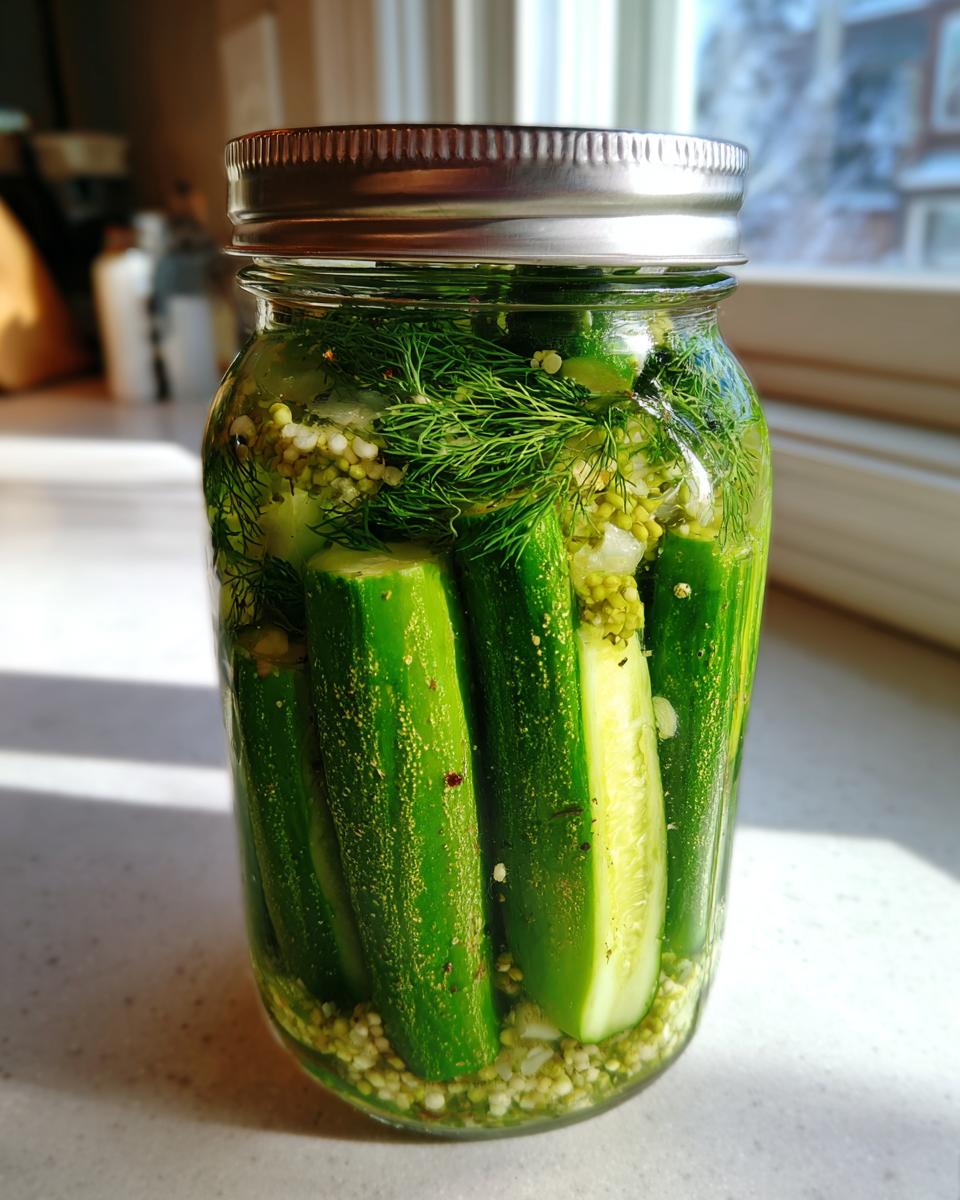
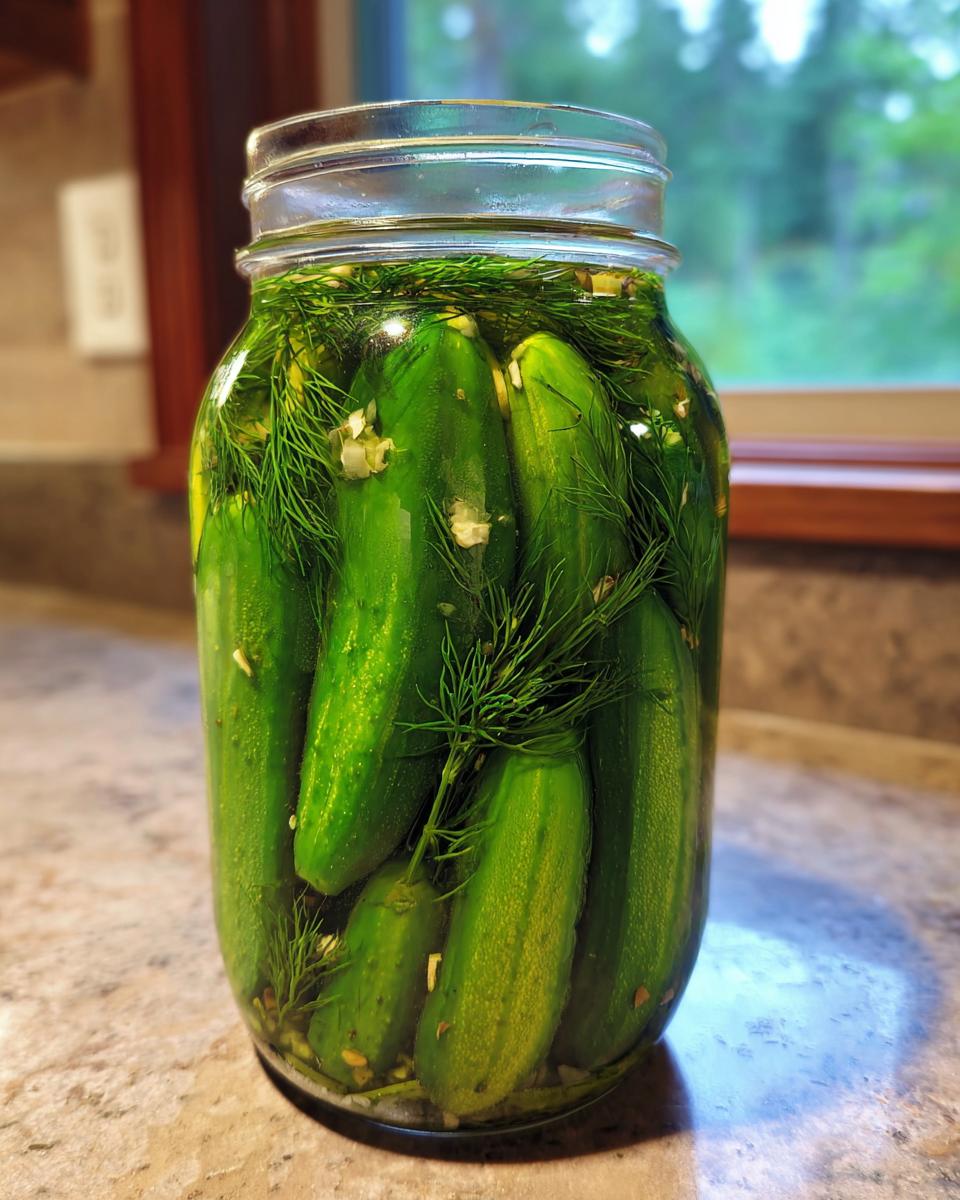
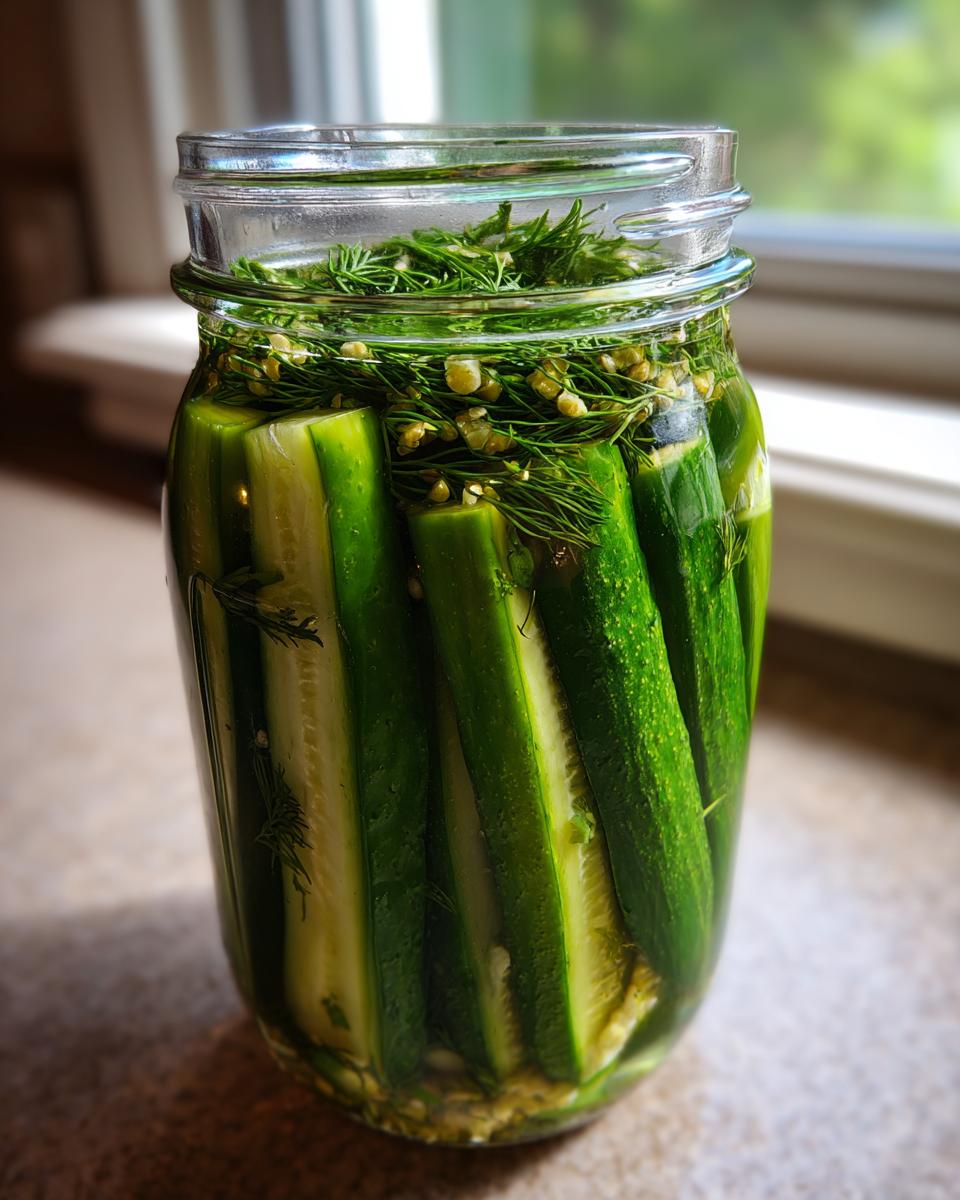
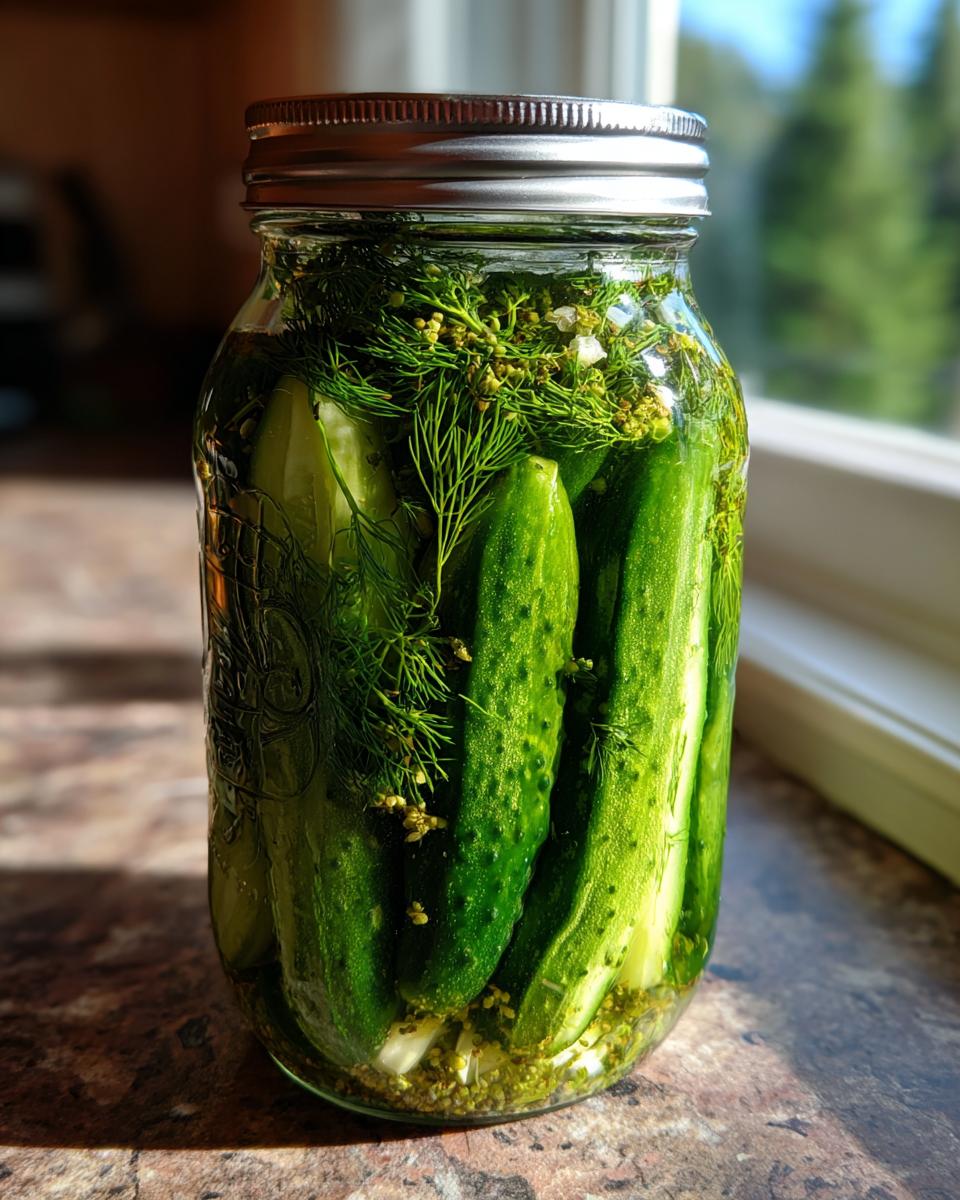
First things first: make sure your jars are clean—I like to give mine a quick wash in hot, soapy water just to be sure. Now, take those cucumbers you prepped and packed them into the jars. Don’t just toss them in loosely! You really want to pack them in tight, but leave about an inch of space at the top, what we call headspace. This gives the brine room to work its magic.
Before the cucumbers go in, don’t forget the flavor bombs! Divide your smashed garlic, fresh dill sprigs, peppercorns, and mustard seeds evenly between both jars. If you like strong garlic flavor like I do, make sure those cloves get right down to the bottom!
Boiling the Brine and Packing the Refrigerator Pickles
Time for the brine. Grab a saucepan and combine your vinegar, water, salt, and that tiny bit of sugar. You just need to bring this mixture up to a full boil over medium-high heat. Keep stirring until you can’t see any salt crystals floating around anymore. That’s how you know your brine is ready to go! Carefully pour that hot liquid over the cucumbers in the jars. Fill it up so the cucumbers are completely submerged—that’s critical!
Once filled, grab the jar and just tap it lightly on the counter a couple of times. This helps any trapped little air bubbles float up and out. Wipe the rim spotless and seal the lids on tight.
Curing Time for Crunchy Pickles Recipe
You can’t eat them right away, but don’t panic! Let those sealed jars sit on the counter for about an hour to cool down a bit. They’ll be warm to the touch, but not hot. Once they’ve cooled, pop them straight into the fridge. While they technically start pickling right away, you absolutely need to respect the clock here for that perfect texture.
For the best flavor and guaranteed snap—the hallmark of a great Crunchy Pickles Recipe—give them a full 24 hours in that cold darkness. Seriously, waiting overnight makes all the difference in achieving maximum crunch!
Tips for Success with Your No Canning Pickles
Now that you know exactly how to put these together, let’s talk about keeping them perfect! Since we aren’t preserving these babies with a hot canner, our success totally relies on keeping them cold and following a few quick rules. These simple steps are what make these No Canning Pickles such a reliable treat every single time.
Don’t worry about storage much—just make sure they stay covered in the fridge. The one thing you might want to play with is the sweetness level, which is super easy to adjust!
Making Sweet Refrigerator Pickles Variations
If you prefer things a little sweeter than our standard dill recipe, you are in luck because it’s such an easy modification! Remember that little bit of sugar we put in the brine? If you want to make fantastic Sweet Refrigerator Pickles, just bump that sugar up to about 1/4 cup total. That little bit of extra molasses flavor pairs surprisingly well with the garlic!
If you make that change, I recommend you cut the salt down just slightly—maybe down to 3 tablespoons instead of 4—to keep the flavor profile balanced. It’s a tiny tweak, but it makes a huge difference if you’re craving something less tart.
Troubleshooting Common Issues in Refrigerator Pickles
Okay, even with the most reliable recipe, sometimes things look a little… off. That’s totally normal when you start making things in your own kitchen! Since these are Easy Homemade Pickles and not shelf-stable, troubleshooting is usually just about temperature or preparation mistakes, not sterilization problems. Let’s make sure you get that crunch every time!
The number one issue everyone worries about is softness. If your pickles are getting soft, it almost always comes down to one two things: either you didn’t trim that blossom end off (remember, the enzyme factory!) or your cucumbers weren’t chilled down properly before they hit the hot brine. If you skip the ice bath trick, you are gambling with your crunch, trust me!
What about the brine getting cloudy? Don’t freak out! That usually happens a few days in, especially if you used garlic or dill, because those fresh ingredients are just releasing more goodness. As long as the jar hasn’t been sitting out at room temperature and everything still smells bright and vinegary, cloudy brine is just a sign that you packed them full of great aromatics. This is perfectly normal for Simple Refrigerator Pickling.
If you happen to see visible, fuzzy mold forming after a week or so, something went wrong with the seal or storage. Pull those jars out immediately and toss the contents—safety first, always!
Serving Suggestions for Your Fresh Cucumber Pickles Storage
After all that hard work—and waiting a whole 24 hours!—it’s time to enjoy your beautiful Fresh Cucumber Pickles. Since these are meant for immediate enjoyment and flavor development, they don’t need long-term storage, but you definitely need to keep them cold. Rule number one: always store these in the refrigerator. They should stay happily crunchy and delicious for about three weeks if you keep them submerged in brine and chilled the entire time.
So, what do you do with a jar full of the best Quick Snack Pickles you’ve ever made? Well, honestly, I eat them plain right over the sink sometimes! But they really shine when they accompany something savory and rich. They cut right through the fat and spice beautifully.
You simply must try them piled high on a juicy burger—I’m talking about my favorite veggie burger recipe! They are also phenomenal chopped up and mixed into potato salad for that extra zing of acidity. If you are making something heavy like fried chicken or my famous Chicken Fried Steak, nothing balances that delicious richness like a spear of cold, garlicky dill pickle.
Don’t let them sit waiting! These are best when they are super fresh, so integrate them into your meals immediately!
Frequently Asked Questions About Refrigerator Pickles
I know you might still have some questions buzzing around, especially since this is so different from traditional canning. That’s totally fine! When I first started teaching people how to cook, the Q&A was always my favorite part. Here are some things I hear often about these refrigerator pickles—I hope this helps you feel super confident!
Can I use regular cucumbers instead of pickling cucumbers for my refrigerator pickles?
That’s a great question! Look, if you are heading to the store and all you see are the big, waxy slicing cucumbers, it *can* work in a pinch for these Easy Homemade Pickles, but it really won’t be the same. Pickling cucumbers, like Kirby or Persian, are bred specifically to stay firm, and they have fewer seeds and naturally less water. If you use the big ones, trust me, you’re going to end up with a much softer pickle, even if you use the ice bath trick. Stick to the pickling varieties if you can for that signature crunch!
How long do these Easy Homemade Pickles last in the fridge?
Because we aren’t sterilizing these for shelf stability and relying only on the vinegar brine and the cold, they are definitely at their peak freshness when they are young. My rule of thumb is to use them up within three weeks. After that, they are still perfectly safe to eat, but you might notice they start to lose a tiny bit of that amazing, sharp flavor and texture. The secret is keeping them constantly cold and ensuring the brine always covers the cucumbers!
What is the difference between these and canned pickles?
This is the big one! Canned pickles have gone through a high-heat processing step (canning) that kills off surface bacteria, making them shelf-stable—meaning you can store them in your pantry for a year or more. Our recipe skips that drastic heat treatment entirely, labeling them as Quick Vinegar Pickles. Since they haven’t been sterilized for shelf storage, they must live in the refrigerator from the moment they cool down. It’s faster, easier, and gives you that brighter, fresher cucumber flavor!
Estimated Nutritional Data for Garlic Dill Refrigerator Pickles
Now, I know you are making these for flavor and that amazing crunch, not for tracking macros, but I always like to give you a ballpark idea of what’s in your jar. Since these are quick vinegar pickles, they are naturally very low in fat and sugar, which is a win-win!
Keep in mind that all nutritional information is just an estimate based on the ingredients listed in the recipe above. If you use a different brand of vinegar or double up on the optional sugar, that might change things just a touch. These numbers assume a standard serving size of about three pickle slices.
- Serving Size: 3 slices (about 55g)
- Calories: 10
- Fat: 0.1g
- Saturated Fat: 0g
- Cholesterol: 0mg
- Sodium: 290mg (Remember, salt is key for pickling, so this will be the highest number!)
- Carbohydrates: 2g
- Fiber: 0.2g
- Sugar: 0.5g (This is only if you add the optional teaspoon)
- Protein: 0.3g
See? Pretty negligible for a snack that brings so much joy to a sandwich! The sodium might look high, but remember, a standard dill pickle serving often clocks in way higher than this, and you’re getting so much fresh flavor without any weird preservatives. Enjoy!
Share Your Best Homemade Refrigerator Pickles Experience
I truly hope you run to the kitchen and get these refrigerator pickles started right now! Seriously, making food that tastes this good with this little effort just feels like cheating, doesn’t it? Once you’ve waited that magical 24 hours and had your first crunchy bite, I desperately want to hear all about it.
Did they turn out perfectly crisp? How much garlic did you sneak in there? Did they hold up well next to that leftover BBQ? Please, please leave a comment right below this section! I read every single one, and knowing that you felt confident enough to try making your own Easy Homemade Pickles is what makes all the testing and writing worth it.
If you snapped a photo of your beautiful spears nestled on a burger or sitting proudly in your fridge next to your other Quick Vinegar Pickles, tag me on social media! Seeing your kitchen successes truly makes me feel like we are mastering the cooking game together, one crunchy jar at a time. Happy pickling, friends—I can’t wait to see your results!
PrintUltra-Crispy Garlic Dill Refrigerator Pickles: Ready in 24 Hours (No Canning Needed)
Make crunchy, flavorful homemade dill pickles quickly without using a canner. These refrigerator pickles are ready in 24 hours and are perfect for sandwiches, burgers, or snacks.
- Prep Time: 15 min
- Cook Time: 5 min
- Total Time: 1 hour 20 min (plus 24 hours chilling)
- Yield: About 2 quarts 1x
- Category: Side Dish
- Method: Quick Pickling
- Cuisine: American
- Diet: Vegetarian
Ingredients
- 2 lbs pickling cucumbers (Kirby or Persian), sliced into spears or rounds
- 4 cloves garlic, smashed
- 2 heads fresh dill (or 4 tsp dried dill seed)
- 1/4 cup pickling salt (or kosher salt)
- 1 tablespoon whole black peppercorns
- 1 teaspoon mustard seeds
- 2 cups white vinegar (5% acidity)
- 2 cups water
- 1 teaspoon sugar (optional, for balance)
Instructions
- Wash cucumbers thoroughly. Trim off the blossom end of each cucumber; this end contains enzymes that can soften the pickles. Slice cucumbers to your desired thickness.
- In two clean, quart-sized glass jars, divide the garlic cloves, fresh dill (or dill seed), peppercorns, and mustard seeds evenly between them.
- Pack the cucumber slices tightly into the jars, leaving about 1 inch of headspace at the top.
- In a medium saucepan, combine the vinegar, water, salt, and sugar (if using). Bring the mixture to a boil over medium-high heat, stirring until the salt and sugar dissolve completely.
- Carefully pour the hot brine over the cucumbers in the jars, ensuring all cucumbers are submerged. Tap the jars gently to release any trapped air bubbles.
- Wipe the rims clean, seal the jars with lids, and allow them to cool on the counter for about 1 hour.
- Transfer the sealed jars to the refrigerator. Allow the pickles to chill and cure for a minimum of 24 hours before eating for best flavor and crunch. They are best eaten within 3 weeks.
Notes
- For the crispiest pickles, soak the cucumbers in ice water for 30 minutes before slicing and packing.
- If you prefer a sweeter pickle, increase the sugar in the brine to 1/4 cup and reduce the salt slightly.
- These are quick vinegar pickles and must remain stored in the refrigerator. Do not store at room temperature.
Nutrition
- Serving Size: 3 slices
- Calories: 10
- Sugar: 0.5
- Sodium: 290
- Fat: 0.1
- Saturated Fat: 0
- Unsaturated Fat: 0
- Trans Fat: 0
- Carbohydrates: 2
- Fiber: 0.2
- Protein: 0.3
- Cholesterol: 0