
Oh, honey, I know the heartbreak! You scrubbed all that grease out of the fryer because you wanted a healthier, simpler batch of wings, and what do you get? Sad, floppy, slightly damp disappointment. Been there, done that, and trust me, I was *not* pleased!
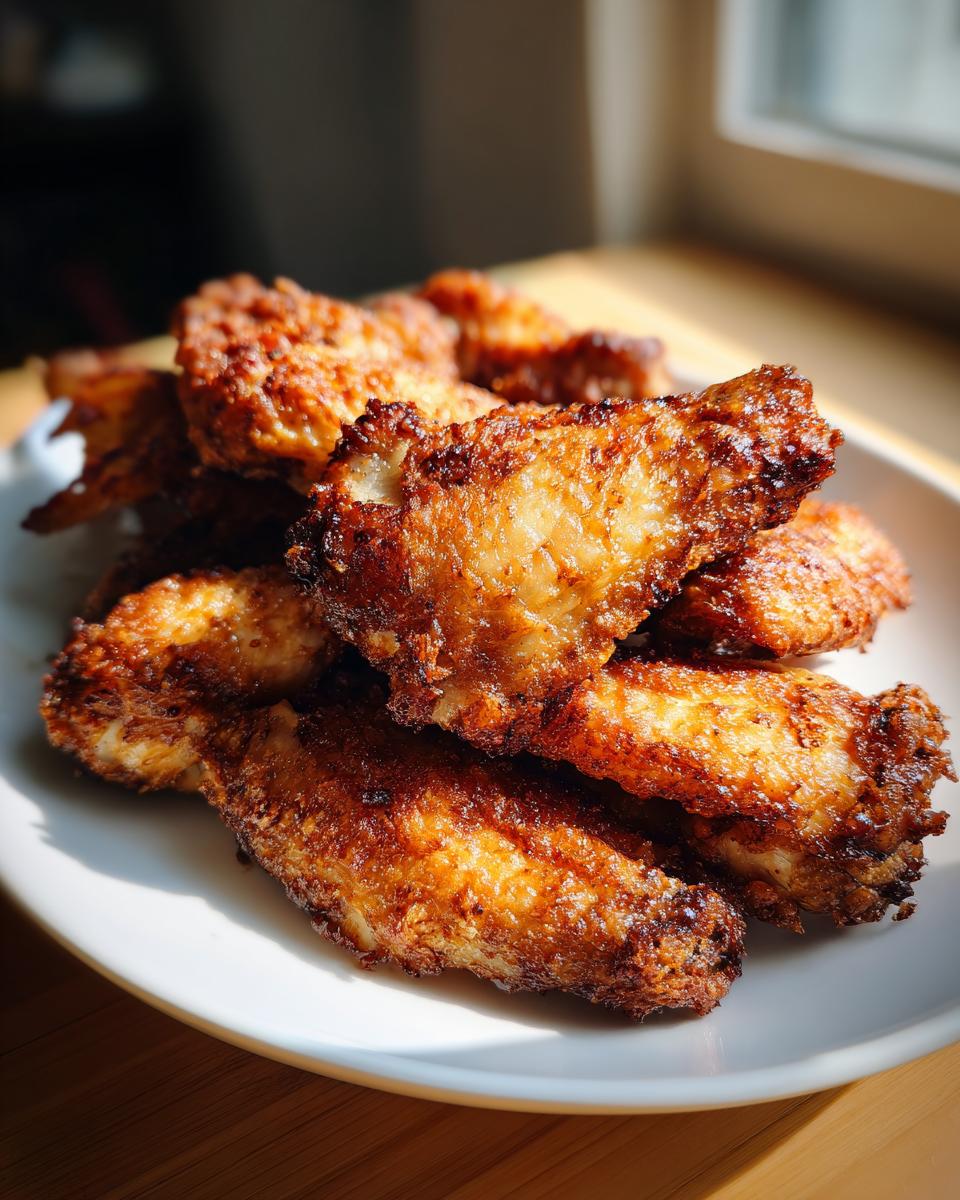
That frustration is exactly why I spent weeks testing ovens and spice ratios until I cracked the code. Forget deep frying for good! I’m here today to share my foolproof, utterly reliable method that guarantees you shatteringly crispy baked chicken wings every single time, using nothing but your regular oven. This is my promise to you: no more soggy bottoms.
Here at Kings Cook, I believe simple food made correctly is royalty-worthy food. This oven baked chicken wings recipe cuts out the mess but keeps all the crunch, offering that perfect, reliable crunch you deserve for game day or a quick weeknight dinner. Let’s get cooking!
- The Secret to Ultimate Crispy Baked Chicken Wings: Why This Oven Baked Chicken Wings Recipe Works
- Ingredients for Perfectly Crispy Baked Chicken Wings
- Step-by-Step Instructions: How to Make Crispy Baked Wings
- Expert Tips for the Best Crispy Baked Chicken Wings Texture
- Serving Suggestions for Your Crispy Baked Chicken Wings
- Storage and Reheating Crispy Baked Chicken Wings
- Frequently Asked Questions About Crispy Baked Chicken Wings
- Nutritional Snapshot for Healthy Chicken Wings Recipe
- Share Your Crispy Baked Chicken Wings Success
The Secret to Ultimate Crispy Baked Chicken Wings: Why This Oven Baked Chicken Wings Recipe Works
Okay, listen up, because this is genuinely the single most important part of making crispy baked chicken wings that aren’t just *okay*—they’re incredible. The science behind turning limp chicken skin into something that snaps when you bite it seems complicated, but it’s really just two crucial steps. Ignore these, and you’ll end up with steamed wings, guaranteed.
First and foremost: dryness. You have to conquer surface moisture. Moisture is the absolute enemy of crispiness! I spend a good five minutes just patting my wing sections down with paper towels until they feel almost rough. This simple effort locks in the flavor and allows the heat to work its magic on the skin instead of boiling off water. Learning how to get that perfect golden skin is key, and many folks find the steps detailed over at this great resource really helpful for visualizing the process.
Second, we use my favorite chemical trick: baking powder. Yes, baking powder! This is the famous baking powder trick wings secret. It slightly raises the pH level on the skin, which helps the proteins break down and allows the fat underneath to render out faster. This combination of ultra-dry skin hitting high heat, aided by the powder, is the best baked wings technique there is for oven cooking.
Why We Skip the Fryer for Crispy Baked Chicken Wings
Deep frying is fun for about five minutes, and then you’re left with a greasy mess, a smoke detector screaming, and skin that’s basically saturated oil. If you’re looking for a guilt free chicken wings option or just don’t want to deal with a giant pot of hot oil, this is your answer. This healthy chicken wings recipe gives you that satisfying crunch while keeping the process clean and manageable. We get the crunch without the commitment!
Ingredients for Perfectly Crispy Baked Chicken Wings
I love that this recipe uses easy ingredients you likely already have, but pay close attention to the star players here. We are using 2 lbs of chicken wing sections—I always use a mix of flats and drumettes because variety is the spice of life, right? We keep the seasoning blend simple so the texture stays the focus, but we need exactly 1 tablespoon of good baking powder. Trust me, this stuff is magic for texture!
You’ll also need salt, garlic powder, onion powder, black pepper, and paprika for a lovely, warm, simple seasoning oven wings blend. Oh, and please grab some paper towels because we are going to dry these wings like our life depends on it!
Ingredient Notes and Substitution Guidance
Let’s talk baking powder again. You absolutely must use regular baking powder, and I always recommend the aluminum-free version if you can find it—it keeps any potential metallic aftertaste away. Do NOT swap this for baking soda; it’s way too strong and will taste awful! The olive oil is optional; I only drizzle a tiny bit on *after* they come out of the oven just before saucing, but frankly, they are amazing dry too.
As for sauce, keep whatever you use handy! This coating is sturdy enough for whatever you throw at it later. If you’re going classic Buffalo, make sure your sauce is ready to go. Once these wings are perfectly cooked, you don’t want them sitting around waiting for sauce, or they’ll lose that hard-earned crispness!
Step-by-Step Instructions: How to Make Crispy Baked Wings
Okay, now for the fun part! This is where we take those dry, seasoned wings and transform them using the no soggy wings method. If you follow these steps exactly, you’ll have the best easy oven wings recipe result you’ve ever made at home. I promise, it’s simple, but timing matters! Knowing how to arrange your pans properly reminds me of setting up for a big meal, kind of like when I am getting ready to tackle a huge recipe like my famous chicken fried steak.
Preparing the Wings: Drying and Coating for Maximum Crunch on Crispy Baked Chicken Wings
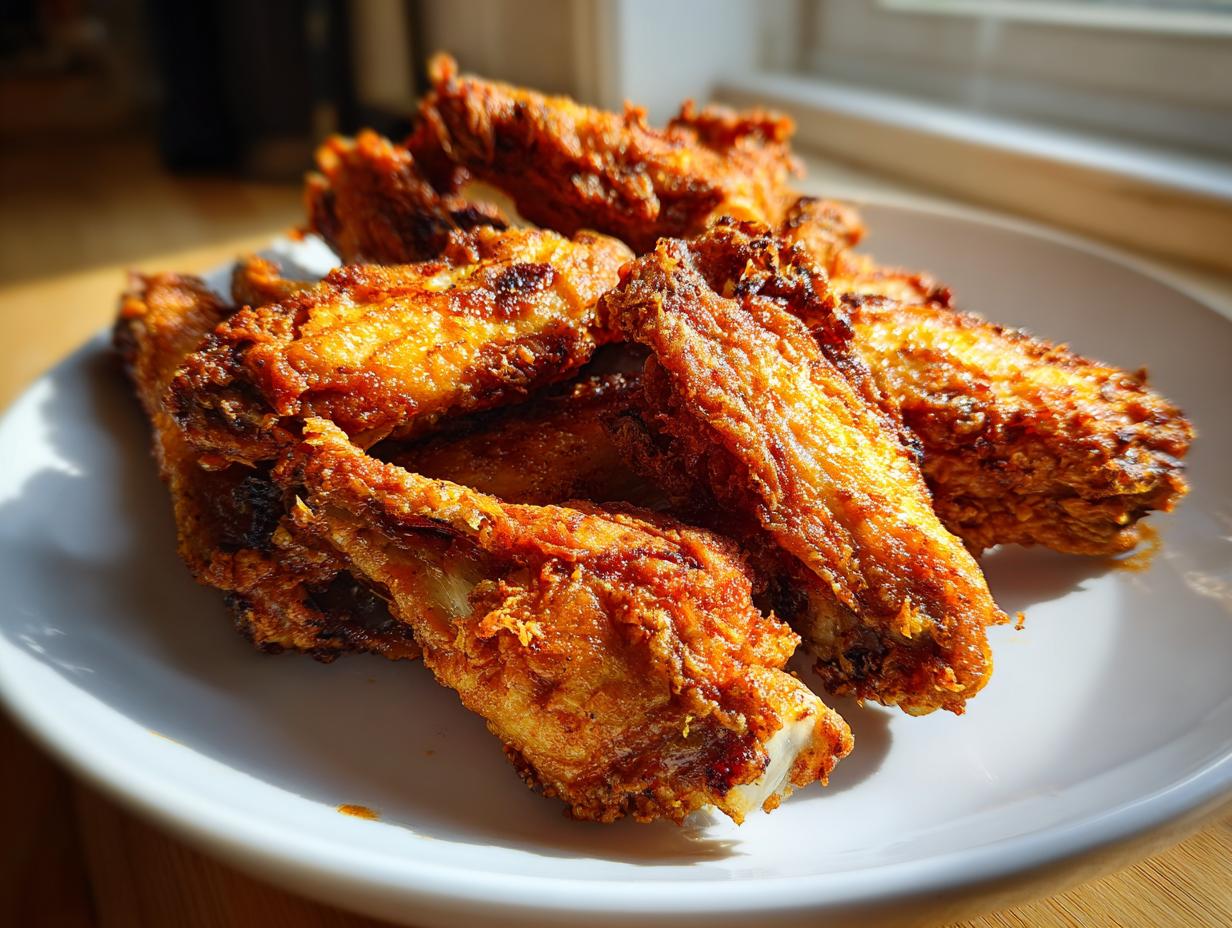
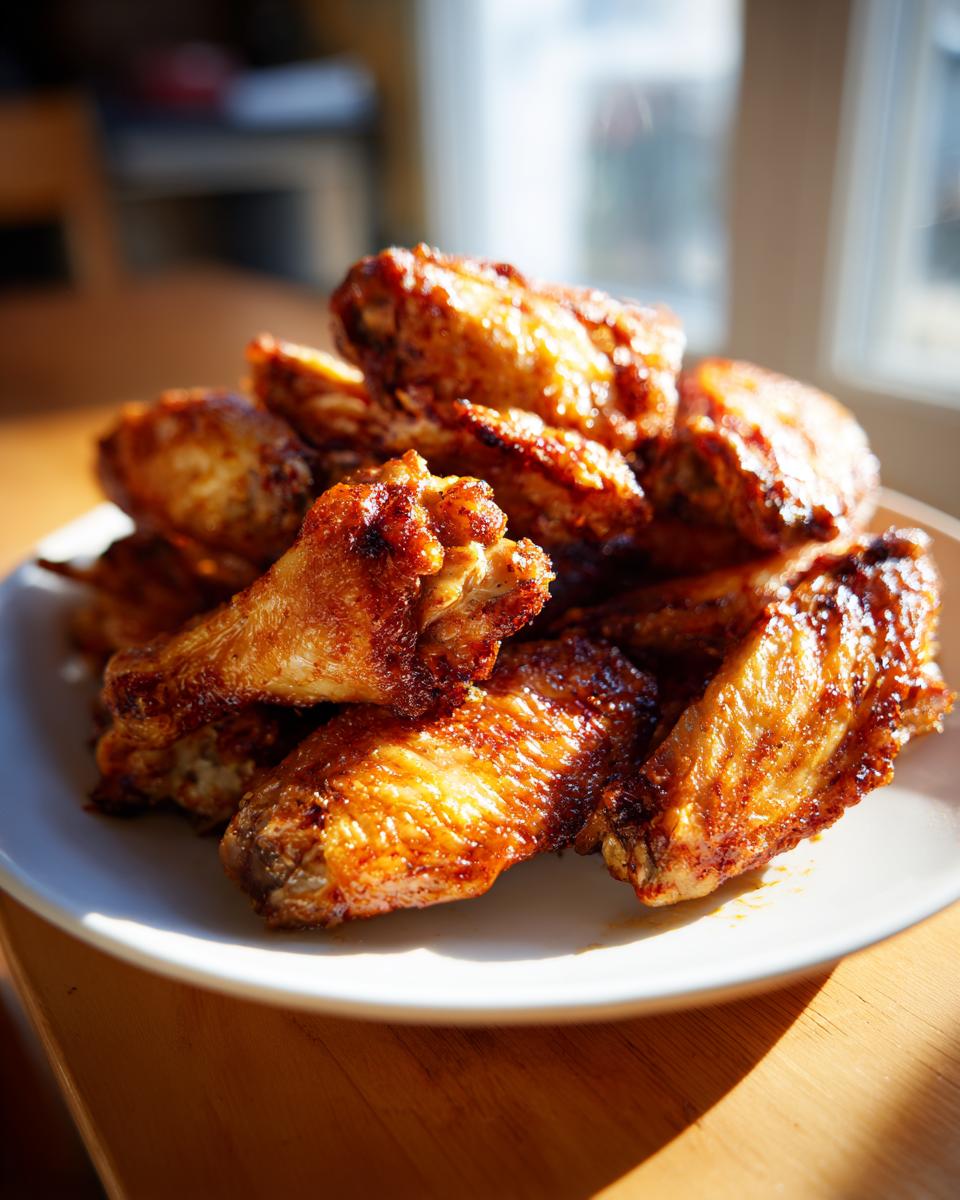
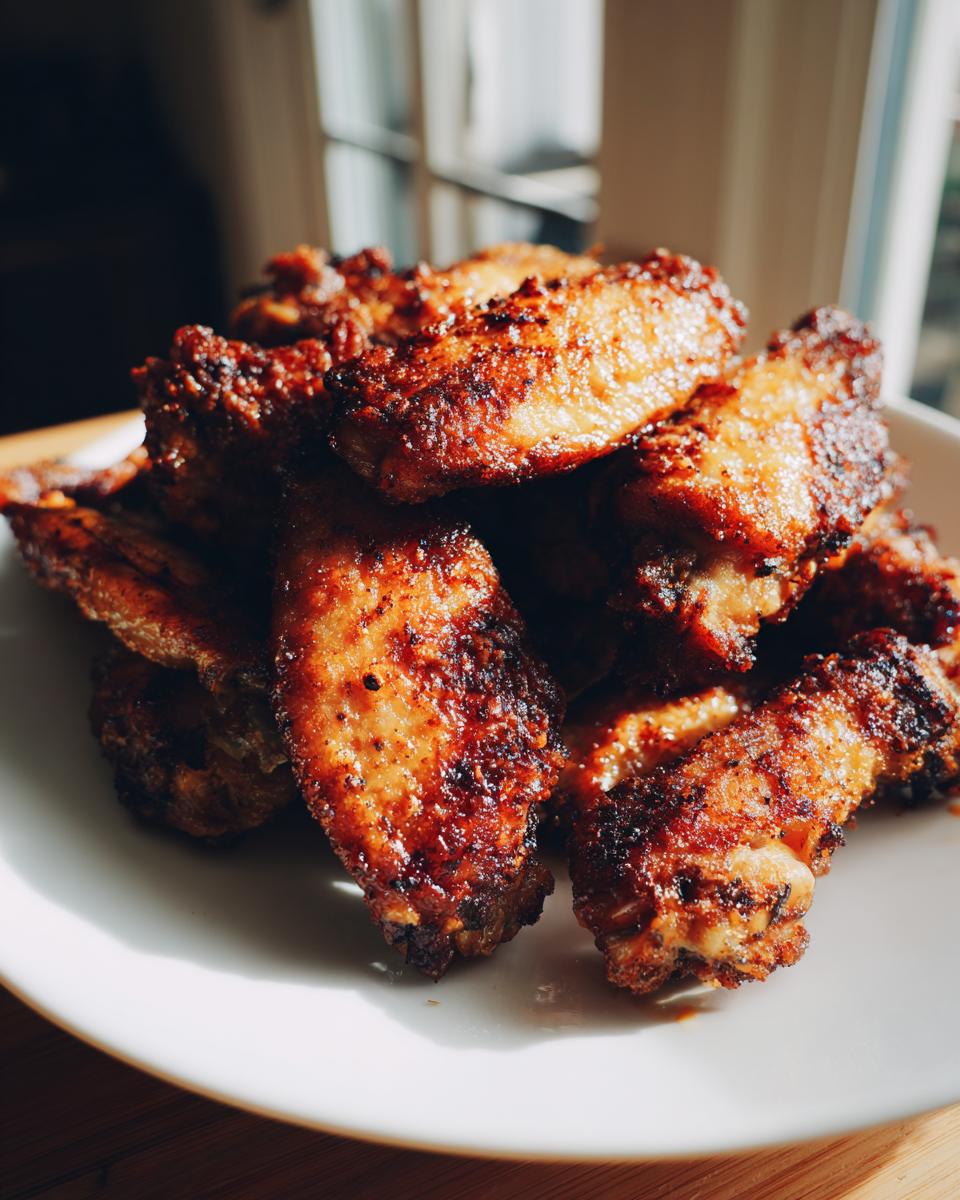
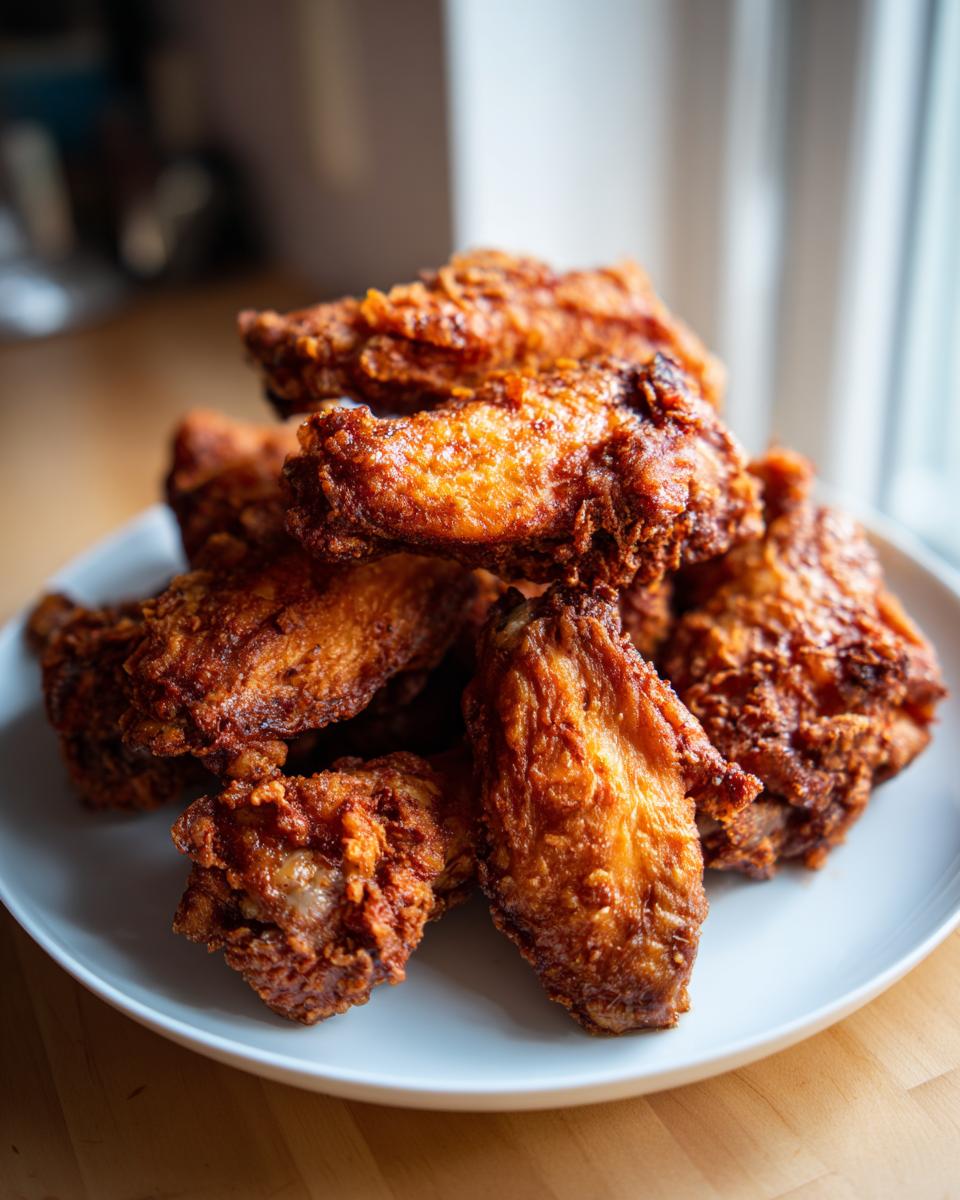
First things first: the oven needs to be scorching hot! Preheat it to 425°F (220°C). While that heats up, line a baking sheet with foil—this is a lifesaver for cleanup, trust me. Then you need to set up your system: put a wire cooling rack right on top of that foil-lined sheet. This rack is vital because it lets the hot air circulate underneath the wings, meaning the bottoms don’t steam in their own juices!
Take those completely dry wing sections and toss them into your spice bowl that already has the baking powder mixed in. Make sure every single nook and cranny is coated evenly. Once they’re coated, arrange them on that wire rack in a single layer. Do not overlap them! We need space between every wing for true crisp development.
Baking Times and Achieving That Juicy Inside Crispy Outside Wings Finish
Pop that tray into the hot oven and let them bake for a solid 25 minutes. Don’t peek too much! After that first blast, take the pan out and flip every single wing over. This ensures both sides get that golden color we are after. Back in they go for another 20 to 25 minutes. They are done when they look richly golden and feel satisfyingly firm.
For the ultimate texture—that shatteringly crisp finish—you can switch your oven to broil for just one or two minutes, really watching them closely! You want crunchy, not charcoal. Once they hit 165°F internally, pull them out. If you’re wondering about making a delicious, spicy sauce to go with these, check out the tips on making a classic buffalo dip right here, which pairs perfectly when tossed on these finished wings!
Expert Tips for the Best Crispy Baked Chicken Wings Texture
Even though the steps look simple, a few extra kitchen habits really push these wings over the top. Remember how I mentioned the baking powder raises the pH? That’s science working for us! It helps the skin dehydrate quickly, which is why we can skip the deep fryer entirely and still get that satisfying crunch. It’s honestly my favorite kitchen hack that turns a simple weeknight meal into something special.
One absolute non-negotiable rule for the juiciest interior is that you cannot, I repeat, *cannot* sauce the wings until they are completely done baking. Sauce adds moisture back in, and if you apply it too early, you are just steaming the crust you worked so hard to build! If you are using a simple seasoning oven wings style, serve the sauce on the side for dipping—that’s the safest bet for crunch security.
Also, if you are making Buffalo wings, here is a little secret Kate learned from watching too many cooking shows: toss the cooked wings in your sauce *right* when they come out of the oven, and because they are so hot, they hold the sauce without getting immediately soggy. If you need that sauce to really stick, throw them back under the broiler for just two minutes after tossing. It sets the glaze beautifully. If you love fried food but want to stick to baking, I have a few other tips for getting incredible results when making healthier versions of classics!
Serving Suggestions for Your Crispy Baked Chicken Wings
Now that you have created the world’s best, crackling-crispy, non-greasy wings—the real question is what do you serve them with? These beauties are the ultimate game day chicken wings, but honestly, they show up for any party! You’ve got to keep that crunch intact, which means handling the sauce application carefully right at the very end.
If you serve them dry, which is how I often eat half my batch straight off the cooling rack (don’t judge!), you have to have some cool, creamy dips ready. Ranch and blue cheese are classics for a reason! I also love setting out some crisp celery sticks and maybe some carrot sticks on the side. They offer that nice, cooling crunch to balance the heat, much like a good side dish balances out my creamy deviled eggs.
Sauce Variations: Beyond Basic Buffalo for Your Crispy Baked Chicken Wings
Buffalo sauce is amazing, but we love flavor variety around here! Since the skin is so stable thanks to the baking powder, these wings can handle a good toss in almost anything. If you don’t want the heat, try a light coating of honey mixed with soy sauce and a little fresh grated ginger. Toss it on right as they come out of the oven, and you get a fantastic savory-sweet flavor that sticks perfectly.
Another winner for me is a dry rub alternative. Instead of tossing them in liquid sauce, try mixing up a simple Lemon Pepper blend—just dried lemon zest, lots of black pepper, a little garlic powder, and salt. Toss the hot wings in that mix instead of Buffalo sauce. Wow! The heat helps those oils bloom and the aroma is just incredible. You get all the flavor without adding any extra moisture, keeping that crispness locked in!
Storage and Reheating Crispy Baked Chicken Wings
So, you made a massive batch because, honestly, who can stop at just a few? Good for you! Leftovers are the absolute best for a quick lunch the next day. If you do have any of these beauties left, you need to handle them correctly so we don’t lose the crunch we worked so hard for.
Here’s the deal: get them into an airtight container and into the fridge as soon as they cool down slightly—maybe 30 minutes maximum. Moisture loves sitting around, and we’ve proven moisture is the enemy, so don’t leave sauce-covered wings sitting on the counter!
When you’re ready to eat them again, please, for the love of crispy skin, skip the microwave! A microwave turns everything into rubbery sadness. Your best bet is tossing them back onto that wire rack and into a 350°F oven for about 8 to 10 minutes. If you have an air fryer, even better—just a few minutes at 375°F will bring back nearly all that original, glorious crunch. They’ll taste like they just came out of the oven!
Frequently Asked Questions About Crispy Baked Chicken Wings
I know sometimes you just need a quick answer before you commit to making the whole batch. It’s exciting trying out a new technique, but you want to make sure you don’t hit any snags! I tried to cover most of the confusing bits in the steps, but here are a few more things I hear people ask about all the time when they are trying to achieve that perfect crunch.
Can I use frozen wings for this oven baked chicken wings recipe?
Oh, absolutely not! Please don’t even try it. If you put wings straight from the freezer onto the rack, they will release a massive amount of water as they thaw and cook. You’ll essentially be steaming them for the first half hour. Moisture is the absolute enemy of crispiness, remember? You need to make sure your wings are completely thawed, and then you dedicate a solid five minutes just to patting every single surface dry before anything else happens. It seems excessive, but it’s the key to success!
What is the best temperature to bake crispy baked chicken wings?
We have to go hot and fast here to render that fat before the meat overcooks. I’ve tested low and slow, and it just yields sad, chewy skin. The temperature we rely on in this guide is 425°F (220°C) as the required ballpark for that initial bake. Why so hot? Because high heat is what causes the skin to rapidly dehydrate, and combined with that baking powder, it locks in the texture you’ve been dreaming of. We keep it high and steady for the best results, only dropping down if you have to use a broiler at the end!
If you want to see my other favorite quick snacks and appetizers—because who doesn’t love easy finger food?—you can browse my whole collection of reliable recipes right here on my Appetizers & Snacks page. Happy crunching!
Nutritional Snapshot for Healthy Chicken Wings Recipe
I know a lot of you are watching what you eat, and after all that talk about crunch and flavor, you might be wondering how these crispy baked chicken wings stack up health-wise. I’m not a nutritionist, but I want to be completely transparent with you about what’s in this recipe so you know exactly what you’re preparing!
Based on using 4 wings per serving, here is the estimated breakdown. Remember, this relies on the assumption that you aren’t drowning them in butter-based sauces or adding extra oil during the final toss. Think of this as the baseline for our wonderfully baked wings!
- Serving Size: 4 Wings
- Calories: About 250 (That’s great for something this satisfying!)
- Protein: A whopping 26 grams! You’re staying full, for sure.
- Fat: Around 15 grams total, but remember, much of that fat renders off during the baking process because we aren’t deep frying them.
- Carbohydrates and Sugar: Almost zero! This recipe leans heavily on spices, keeping it super low carb.
Because this cooking method skips the deep fryer entirely, it automatically makes these wings a much lighter option than what that fast food place offers. This is how we enjoy our favorites guilt-free! The addition of the baking powder really is a game changer because it lets us skip heavy batter coatings too. If you load them up with super sugary BBQ sauce later, those numbers will shift, of course, so keep that in mind when you are tracking!
Share Your Crispy Baked Chicken Wings Success
Honestly, seeing your success in the kitchen is what makes all those batches of test wings worth it! I put my heart into making sure every recipe that leaves Kings Cook is rock solid, and when you send me a note saying these crispy baked chicken wings finally gave you that crackle you thought only a deep fryer could produce? Well, that just makes my day!
I truly want to hear about your results. Did the baking powder trick work the magic you hoped for? Did you stick to the simple seasoning, or did you mix up a wild sauce combination? Please drop a rating—I always hope for five stars!—and leave a comment below telling me how they turned out. Your feedback keeps my recipes honest and reliable for everyone else trying to make game day chicken wings.
Sauce Variations: Beyond Basic Buffalo for Your Crispy Baked Chicken Wings
This is where you can really get creative now that the texture foundation is perfect! I mentioned a few great options above, but I am always looking for new flavor ideas people come up with. If you tried roasting them dry and then tossing them in something totally unexpected—like a homemade peanut sauce or a spicy Korean glaze—please spill the beans in the comments!
I love seeing how you adapt these simple, reliable recipes to fit your family’s taste. Knowing that you customized this easy oven wings recipe just makes the whole thing feel like a true family tradition, just like the ones I grew up with. Don’t be shy about sharing your sauce secrets!
If you’re looking for more reliable meals that are guaranteed to work every time, why not take a peek at my About page? I explain exactly why I test everything so thoroughly here at the blog. I can’t wait to see what you cook up next!
PrintUltimate Crispy Baked Chicken Wings: Secrets to Non-Soggy Oven Crunch (No Fry!)

Learn the simple technique using baking powder to achieve shatteringly crispy skin on chicken wings when baked in the oven. This recipe delivers juicy meat and a crunchy exterior without deep frying, perfect for game day or a quick dinner.
- Prep Time: 10 min
- Cook Time: 45 min
- Total Time: 55 min
- Yield: 4 servings 1x
- Category: Appetizer
- Method: Baking
- Cuisine: American
- Diet: Low Fat
Ingredients
- 2 lbs chicken wing sections (flats and drumettes)
- 1 tablespoon baking powder (aluminum-free recommended)
- 1 teaspoon kosher salt
- 1 teaspoon garlic powder
- 1 teaspoon onion powder
- 1/2 teaspoon black pepper
- 1/2 teaspoon paprika
- 1 tablespoon olive oil (optional, for tossing after baking)
- Your favorite sauce (e.g., Buffalo sauce) for tossing
Instructions
- Preheat your oven to 425°F (220°C). Line a large baking sheet with aluminum foil for easier cleanup. Place a wire cooling rack on top of the prepared baking sheet.
- Pat the chicken wings completely dry using paper towels. This step is crucial for crispiness.
- In a large bowl, combine the baking powder, salt, garlic powder, onion powder, black pepper, and paprika. Mix the dry ingredients well.
- Add the dried chicken wings to the bowl. Toss thoroughly until every wing is evenly coated with the seasoning and baking powder mixture.
- Arrange the coated wings in a single layer on the wire rack, ensuring there is space between each wing for air circulation. Do not overcrowd the rack.
- Bake for 25 minutes.
- Flip each wing over. Return the pan to the oven and bake for another 20 to 25 minutes, or until the skin is deeply golden brown and very crisp. The internal temperature should reach 165°F (74°C).
- Remove the wings from the oven. If you want extra crispiness, switch the oven to broil for 1-2 minutes, watching constantly to prevent burning.
- Transfer the hot, crispy wings to a clean bowl. If desired, drizzle lightly with olive oil and toss with your favorite sauce or serve dry with a side of sauce for dipping.
Notes
- Using a wire rack allows air to circulate underneath the wings, which prevents the bottom from steaming and becoming soggy.
- Baking powder raises the pH level of the chicken skin, helping it to brown and crisp faster. Do not substitute with baking soda.
- For the juiciest inside, do not sauce the wings until they are fully cooked and removed from the oven.
- If you are making Buffalo wings, toss the cooked wings in the sauce, then return them to the oven (or broiler) for 2-3 minutes to set the sauce.
Nutrition
- Serving Size: 4 wings
- Calories: 250
- Sugar: 0
- Sodium: 350
- Fat: 15
- Saturated Fat: 4
- Unsaturated Fat: 11
- Trans Fat: 0
- Carbohydrates: 1
- Fiber: 0
- Protein: 26
- Cholesterol: 90