
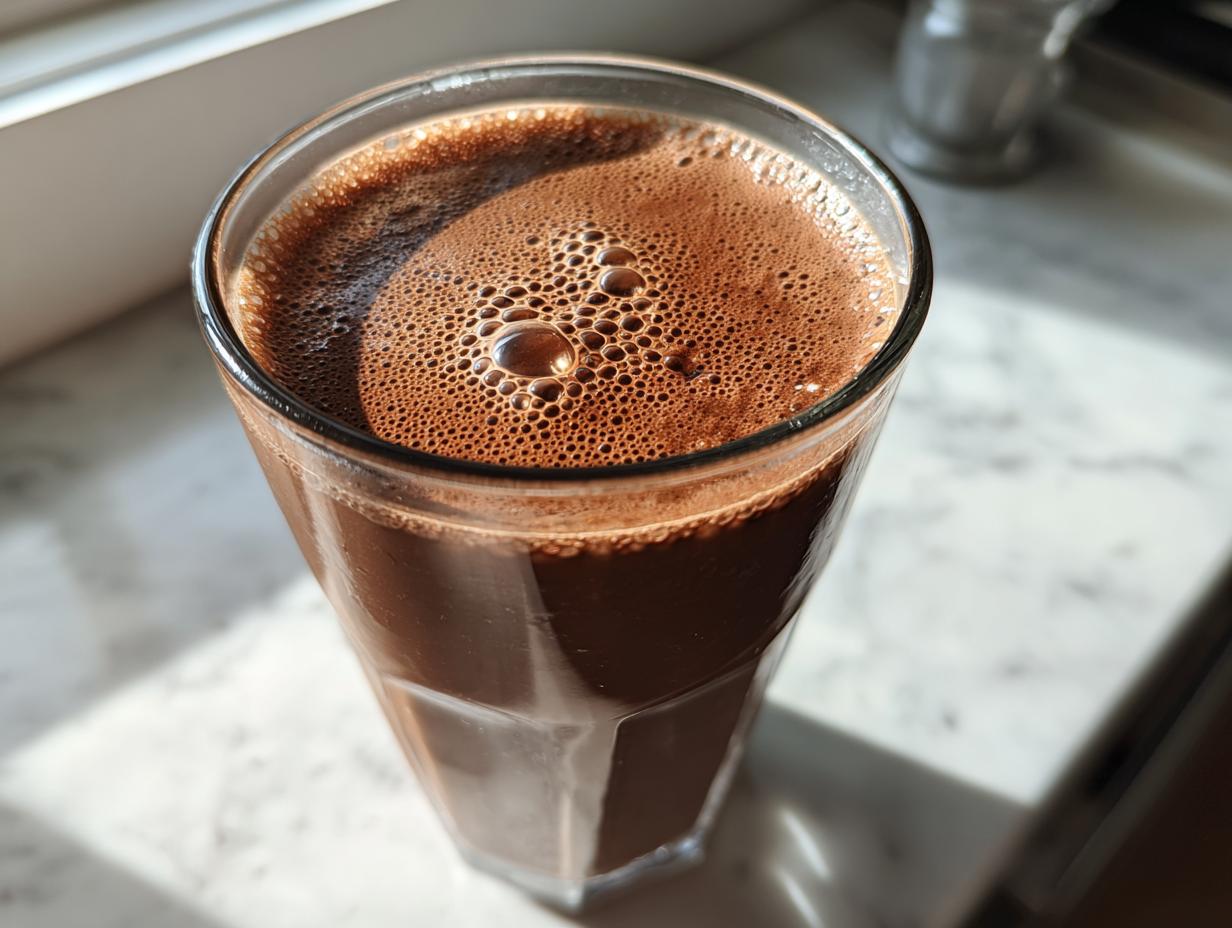
Oh, I know that craving! There’s nothing quite like that first ice-cold, creamy sip of truly delicious chocolate milk—it instantly takes me back to being a kid waiting for my dad to get home from work. But honestly, store-bought versions are usually either too watery or loaded with junk I don’t want. That’s why I developed this ultimate guide for you!
Here at Kings Cook, my goal, coming from my background in nutrition science, is making sure you feel totally confident in what you’re serving. So, I put both major techniques to the test repeatedly until I nailed them. Forget disappointing results; this comprehensive guide gives you two definitive ways to make homemade chocolate milk that will blow the carton stuff out of the water: Method One is the slow-simmered, deep-flavored syrup for the *best* result, and Method Two is the lightning-fast cocoa powder fix for when you need it *now*.
- Why This Homemade Chocolate Milk Recipe Works (EEAT Focus)
- Ingredients for the Best Chocolate Milk Recipe
- Method 1: Crafting Rich Chocolate Syrup for Gourmet Chocolate Milk
- Method 2: Instant Chocolate Milk Using Cocoa Powder Mix
- Assembling Your Perfect Chocolate Milk Drink
- Tips for Success with Creamy Chocolate Beverage
- Frequently Asked Questions About Chocolate Milk
- Storage and Making Chocolate Milk for One
- Serving Suggestions for This Comfort Drink Recipes
- Estimated Nutritional Data for Homemade Chocolate Milk
- Share Your Perfect Glass of Chocolate Milk
Why This Homemade Chocolate Milk Recipe Works (EEAT Focus)
When I set out to create the *best* recipe for homemade chocolate milk, I obsessed over reliability. You see, I’ve tested hundreds of recipes for this site—and if you check out my story over at my about page, you’ll know how much time I invest in making sure things work for you! Having that background in nutrition science helps me focus on what matters: quality ingredients and repeatable steps.
These two methods guarantee you skip the weird stabilizers and excessive sugar found elsewhere. You get a genuinely creamy chocolate beverage, exactly how you want it. Here’s why this approach is superior:
- Total Reliability: Both methods have been tested until they are foolproof, whether you’re in a rush or taking your time.
- Flavor Layers: You get the deep, molasses notes from the syrup method, or pure, bright cocoa flavor from the quick mix.
- Ingredient Transparency: You know exactly what is going into your glass.
The Control You Get with Homemade Chocolate Milk
This is my favorite part! When you make your own drink, you control what goes in. Are you using whole milk for absolute richness, or maybe some wonderful raw milk? You decide the sugar. If you’re leaning toward a healthy chocolate milk experience, you can easily cut the sugar down or use maple syrup instead. It’s your kitchen, your rules!
Ingredients for the Best Chocolate Milk Recipe
Okay, let’s get our bowls ready! Having all your items lined up is half the battle, especially when you decide at 9 PM you absolutely *must* have this amazing chocolate milk. Since we are using two systems here—one stovetop and one no-cook—I like to keep my ingredients separated so I don’t accidentally put sugar in the quick-mix bowl. It sounds silly, but oops, it happens!
Remember, the quality of your milk really shines through here, so use whatever milk you love best—whether it’s standard whole milk for that classic creaminess or a lovely non-dairy option.
For the Rich Chocolate Syrup Recipe
This is for the deep, decadent batch that you’ll want to keep tucked away in the fridge. If you want that true rich chocolate syrup recipe experience, grab these five things:
- 1/4 cup of water—just plain stuff!
- 1/4 cup of granulated sugar.
- One tablespoon of unsweetened cocoa powder. Don’t grab the Dutch process unless you know what you’re doing; standard is best here.
- A splash of vanilla extract for depth.
- And just a tiny, tiny pinch of salt to make the chocolate pop!
For the Quick Chocolate Milk with Cocoa Powder
If you are looking for that instant fix—that easy chocolate milk drink—you only need three things, plus your milk, of course. It’s pure speed and simplicity!
- About two tablespoons of unsweetened cocoa powder.
- A pinch of salt again, essential for flavor balance.
- Optional: Your preferred sweetener, like maple syrup or honey, if you aren’t using the syrup base.
Method 1: Crafting Rich Chocolate Syrup for Gourmet Chocolate Milk
This is where the deep flavor magic truly happens! If you want that unbelievably rich, almost fudge-like taste in your chocolate milk, you have to make the base syrup first. Trust me, it’s worth the extra five minutes on the stovetop. This is the foundation for what I call from scratch drinks! If you want to see another beautiful approach to the process, check out this great article on making chocolate milk.

Grab a very small saucepan—you aren’t making a giant batch here, just enough for a few drinks. Combine your water, sugar, and that initial tablespoon of cocoa powder. Put that on medium heat. Now, you’re going to stir almost constantly. We don’t want scorching, but we need that sugar to completely disappear into the cocoa and water. Once it starts to bubble happily, let it simmer gently for exactly one minute. That minute is important for texture!
As soon as that minute is up, yank it off the heat. Stir in your vanilla extract. Now, this is crucial: you absolutely must let that syrup cool down completely before adding it to your cold milk. Warm syrup hitting cold milk equals a weird texture, not smooth chocolate milk!
Expert Tip for Smooth Syrup Texture
To prevent that gritty, sandy texture some homemade syrups get, I always sift the cocoa powder directly into the liquid *before* I even turn the heat on. A quick whisk while cold will create a nice slurry, and you’ll avoid those hard-to-dissolve cocoa clumps later on. Smooth as silk!
Method 2: Instant Chocolate Milk Using Cocoa Powder Mix
Now, for the real time-saver! If you need that perfect glass of chocolate milk five minutes ago, this is your go-to. We are skipping the stove completely and relying on a little kitchen trick to prevent dreaded lumps. Seriously, no one has time for chalky spots in their comfy drink, right?
This directly answers the need for Chocolate Milk with Cocoa Powder in a flash. Grab your glass—yes, you can mix right in the glass!—and put in your cocoa powder and that tiny pinch of salt. Now, here’s the secret: add just a small splash of your cold milk first. Whisk that mixture aggressively until it totally smooths out into a thick, dark paste. It looks messy, but trust me, it’s the essential step for guaranteeing that beautifully mixed Instant Chocolate Milk.
Once you have that smooth base, pour in the rest of your cold milk and stir gently until everything is perfectly combined. If you’re looking for cleaner ingredients, check out how fresh is done over at this great recipe!
Assembling Your Perfect Chocolate Milk Drink
Alright, this is the moment of truth! Whether you spent five luxurious minutes making the rich syrup or you whipped up that amazing cocoa paste in sixty seconds flat, it’s time to enjoy your perfect glass of chocolate milk. The assembly is simple, but the taste is anything but!
If you used the syrup (Method 1), take your cooled syrup and add about one to two tablespoons into your glass of cold milk. I usually start with one big spoonful and stir well. If you go straight to two, you might end up with milk too thick to drink easily! For the quick cocoa mix (Method 2), you just pour the rest of your cold milk right over that smooth paste we made and stir until it’s uniform.
No matter which way you went, always taste it before you take the first big gulp. Milk can vary in natural sweetness, so you might need a little something extra. This ensures your final chocolate milk is exactly right for you.
Making Low Sugar Chocolate Milk Variations
This is where we cater to our health goals while keeping that comforting flavor! If the original syrup tasted a bit sweet for you, or if you skipped it entirely to go for the low sugar chocolate milk approach, you have great options. Instead of refined sugar, feel free to use maple syrup or even a dash of honey. Start small, with just half a teaspoon, and whisk it in thoroughly. It dissolves way easier than granulated sugar, which is a huge win, especially if you’re making chocolate milk for one!
Tips for Success with Creamy Chocolate Beverage
Now that you’ve mastered the two main ways to make incredible chocolate milk, let me give you some little secrets that ensure every single glass is perfect. I’m big on not wasting effort, so these tips are designed to keep your drink flawless every time, whether it’s your first attempt or your hundredth.
First, temperature is key for that truly creamy chocolate beverage experience. Always, always start with milk that is refrigerator cold! Pouring warm syrup into room-temperature milk just never blends right. Chill everything down. If you made the syrup, store it in an airtight jar—it lasts beautifully in the fridge for up to two weeks, so you’re set for quick drinks later!
Also, don’t rush the stirring process. If you use the syrup and it seems a little thick, try adding your milk slowly while stirring constantly. You can always add more milk, but trying to fix chocolate milk that’s too thin is impossible! For more amazing tips on achieving the best flavor, take a look at what they do over at this recipe.
Frequently Asked Questions About Chocolate Milk
I always get tons of questions about this simple drink—it turns out everyone has a very specific idea of what makes the best chocolate milk recipe! I’ve pulled a few of the most common ones right here to make things easy. It’s funny how one glass of milk can spark so much curiosity!
For instance, people often ask about switching up the base liquid. Yes! You absolutely can use oat milk, almond milk, or soy milk for this recipe. The only real difference you’ll notice is that the syrup method might require a tiny bit more stirring to fully incorporate, but the flavor is still fantastic. That rich, comforting taste really comes through no matter what you choose.
Can I use this recipe to make DIY Chocolate Milk Mix?
You totally can, and it saves so much time in the morning! If you want a DIY Chocolate Milk Mix, just prepare the syrup base (Method 1) but keep the water out. Mix together your dry ingredients: the sugar, the cocoa powder, and that pinch of salt. Store this mix sealed tight. When ready to use, just whisk about 3 tablespoons of the dry mix into a single cup of cold milk!
If you want to learn more about creating that shelf-stable mix, check out the methods suggested over at this site. That’s a great resource if you want to make a huge jar for the pantry!
Which milk creates the creamiest drink?
If richness is your priority for your creamy chocolate beverage, whole milk is honestly unbeatable. The higher fat content gives it that wonderful mouthfeel that reminds us of classic diner chocolate milk. If you use a non-dairy option, make sure it’s a “barista blend” or “full-fat” version if you can find one; those tend to have stabilizers that help keep things smoothly combined.
Can I turn this into a Chocolate Banana Milk smoothie?
Oh, that sounds like a fun twist for a post-workout treat! Yes, you can easily bulk up this recipe for a Chocolate Banana Milk experience. Just take your finished glass of chocolate milk, toss it into a blender with one frozen banana and a few ice cubes, and you’re ready to go. It transforms that simple comfort drink into something seriously substantial!
Storage and Making Chocolate Milk for One
One of the biggest perks of preparing your own flavoring bases is not having to repeat the same steps every time you want a glass of that delicious chocolate milk. If you made the rich syrup (Method 1), you’ve basically prepped yourself for the next two weeks of sweet cravings!
Seriously, just pour that cooled, lovely syrup into an airtight jar, like a mason jar, and tuck it into the back of your fridge. It stays flavorful and perfectly useable for up to two weeks. That way, when that famous craving hits, you just grab your cold milk, stir in a spoonful or two of your pre-made magic, and you’re done in seconds. No cooling time, just pure satisfaction!
And hey, what if you’re reading this recipe and you’re just cooking for yourself? That is perfectly fine! I totally get the need for a single serving sometimes—no one wants leftovers of flavored milk sitting around.
The simplest way to handle this for a Chocolate Milk for One moment is to use the quick cocoa powder method (Method 2) because it’s naturally portioned! But even if you only made the syrup, you can easily eyeball it. Start by pouring 1 cup of cold milk into your favorite glass. Then, add about one teaspoon of that homemade syrup. Taste it. If it needs to be richer, add another half teaspoon. It’s so easy to measure out just what you need that way!
I actually found a wonderful, dedicated guide on how to perfect that single-serving approach over at Chocolate Milk for One, which is super helpful if you find yourself always wanting just one perfect glass!
Serving Suggestions for This Comfort Drink Recipes
Honestly, this chocolate milk is fantastic all by itself, especially when it’s ice cold. It’s my go-to when I need a little afternoon lift that isn’t coffee. But since you’ve gone to the trouble of making it from scratch, why not make the whole experience special? I love enjoying my homemade version alongside a stack of my fluffy homemade pancakes—the richness of the milk plays so well against the warm, buttery pancakes. You can find my favorite recipe for those right here: fluffy pancakes!
If you’re having it post-workout, it’s an amazing little protein boost. And you know what else? A really good quality glass of this rich cacao beverage is actually divine when paired with a slightly salty, chewy chocolate chip cookie. It just elevates that simple comfort factor, doesn’t it?
Estimated Nutritional Data for Homemade Chocolate Milk
Okay, talking numbers! Since I studied nutrition science, I know folks are curious about what they’re consuming, even when it’s a comfort drink like this wonderful chocolate milk. I plugged the base recipe—using standard whole milk and the syrup method—into my tracker to give you a baseline estimate. Remember, this is just a ballpark figure, but it gives you a great idea!
If you use skim milk or substitute the sugar for maple syrup, these numbers will definitely change, so keep that in mind. But for a rich, classic glass, here’s what we’re looking at. Feel free to use this as a guide when planning your meals!
- Serving Size: 1 cup
- Calories: 250 (Wow, not bad for such flavor!)
- Sugar: 30g (This is where you can cut back substantially with adjustments!)
- Sodium: 100mg
- Fat: 10g
- Saturated Fat: 6g
- Unsaturated Fat: 4g
- Trans Fat: 0g
- Carbohydrates: 35g
- Fiber: 3g
- Protein: 9g
- Cholesterol: 30mg
This data reflects a standard preparation. If you switch to non-dairy milk or use a sugar substitute like stevia, your sugar count will drop significantly, moving you toward that healthy chocolate milk territory we talked about earlier. It’s so easy to adjust this recipe to fit whatever dietary needs you have!
Share Your Perfect Glass of Chocolate Milk
And that’s it! You have gone from having a simple craving to mastering two incredible, foolproof ways to make truly spectacular chocolate milk right in your own kitchen. Didn’t I tell you it was possible to feel totally confident about this? My whole mission here at Kings Cook is helping you turn those “I can’t” kitchen moments into proud, delicious “I did!” moments, and making that creamy beverage from scratch is a perfect way to start!
I genuinely want to see how your version turned out. Did you stick with the unbelievably deep syrup? Did you use that amazing raw milk? Or did you opt for the quick cocoa powder mix when you needed that instant fix? Don’t be shy! If you have any burning questions, feel free to reach out to me via the contact page. Better yet, leave a rating and review right below this section!
Please, please, please leave this recipe five stars if it brought you that comforting hug in a glass. Sharing your experience helps other busy folks out there realize making their favorite things is easy! Happy cooking, my friend—I can’t wait to hear what you think!
PrintThe Ultimate Homemade Chocolate Milk: Rich Syrup VS. Quick Cocoa Powder Method
Make the best chocolate milk at home using two methods: a rich, slow-simmered syrup for deep flavor, or a fast cocoa powder mix for instant gratification. Choose your preferred sweetness level.
- Prep Time: 5 min
- Cook Time: 5 min
- Total Time: 10 min
- Yield: 1 serving 1x
- Category: Beverage
- Method: Stovetop (for syrup) and Mixing
- Cuisine: American
- Diet: Vegetarian
Ingredients
- 1 cup Milk (Dairy or non-dairy, such as whole milk or raw milk)
- 2 tablespoons Unsweetened Cocoa Powder (for quick method)
- 1/4 cup Water (for syrup method)
- 1/4 cup Granulated Sugar (for syrup method)
- 1 tablespoon Unsweetened Cocoa Powder (for syrup method)
- 1/4 teaspoon Vanilla Extract
- Pinch of Salt
- Optional: Maple syrup or honey for low-sugar option
Instructions
- Prepare the Rich Chocolate Syrup (Optional, for best flavor): Combine 1/4 cup water, 1/4 cup sugar, and 1 tablespoon cocoa powder in a small saucepan. Heat over medium heat, stirring constantly until the sugar dissolves and the mixture simmers gently for 1 minute. Remove from heat and stir in vanilla extract. Let the syrup cool completely.
- Prepare the Quick Cocoa Powder Mix (For instant milk): In a small bowl or directly in your glass, whisk together 2 tablespoons of cocoa powder, a small splash of milk, and a pinch of salt until a smooth paste forms. This prevents lumps.
- Assemble the Milk (Syrup Method): Pour 1 cup of cold milk into a glass. Stir in 1 to 2 tablespoons of the cooled chocolate syrup, depending on how rich you like it.
- Assemble the Milk (Quick Method): Pour 1 cup of cold milk over the cocoa paste. Stir well until fully combined.
- Adjust Sweetness: Taste the milk. If you prefer it sweeter or want a healthier option, stir in maple syrup or honey to your liking.
- Serve: Serve immediately over ice if desired.
Notes
- For a low-sugar version, use the quick cocoa powder method and sweeten only with a small amount of maple syrup or stevia substitute.
- If using the syrup method, you can make a large batch of syrup and store it in an airtight container in the refrigerator for up to two weeks.
- Use cold milk for the best texture and flavor. Whole milk provides the creamiest result.
Nutrition
- Serving Size: 1 cup
- Calories: 250
- Sugar: 30
- Sodium: 100
- Fat: 10
- Saturated Fat: 6
- Unsaturated Fat: 4
- Trans Fat: 0
- Carbohydrates: 35
- Fiber: 3
- Protein: 9
- Cholesterol: 30