
You know those moments, right? When only deep, dark, messy chocolate will do? You’re craving something rich, something gooey, something that feels like the ultimate reward after a long week. Well, stop dreaming about it, because I have the solution that ends all chocolate anxiety! If you love deep chocolate flavor, you have to check out my fudge brownies recipe too, but right now, we are focusing on my ultimate recipe for the hot fudge pie!
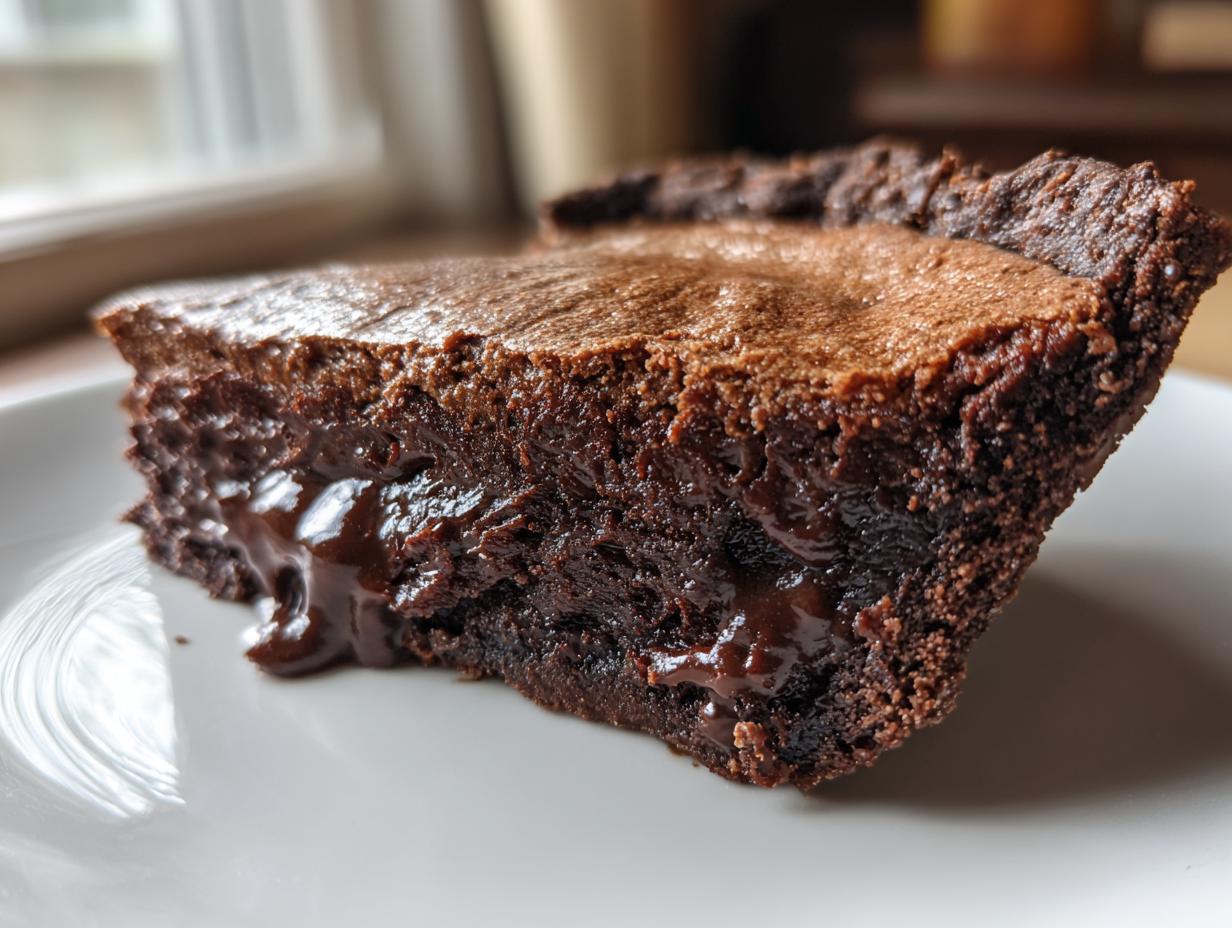
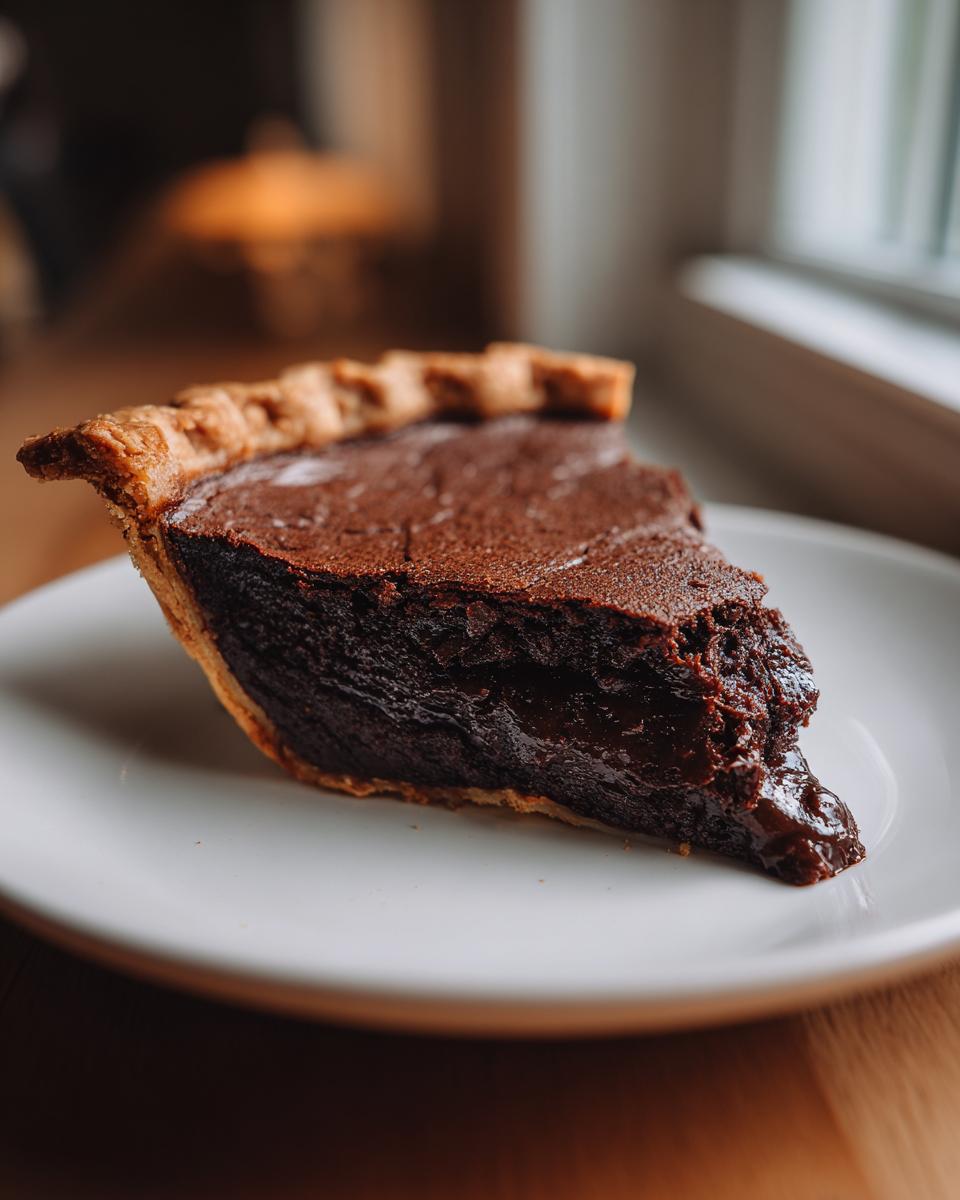
This isn’t just some regular pie; this is pure, unadulterated fudgy dessert heaven. Seriously, it’s right between a dense, fudgy brownie and a perfectly molten lava cake, all baked up snug into a buttery crust. When I create recipes here at Kings Cook, my whole goal is to make sure you, the home cook, can nail it on the first try. This pie is reliable, straightforward, but packs a massive flavor punch. Forget standing over the stove making complicated fudge when you can have this spectacular treat ready in under an hour. Trust me, you are going to want to warm up a slice of this and maybe hide it from the rest of the family!
- Why This Hot Fudge Pie is Your New Favorite Decadent Fudge Dessert
- Gathering Ingredients for Your Homemade Fudge Pie
- Step-by-Step Instructions for the Best Chocolate Pie Recipe
- Tips for Success When Making a Hot Fudge Pie
- Serving Suggestions for Your Warm Chocolate Pie
- Storage and Reheating for Your Gooey Chocolate Pie
- Frequently Asked Questions About the Classic Chocolate Fudge Pie
- Nutritional Estimates for This Rich Chocolate Indulgence
- Share Your Comfort Food Dessert Experience
Why This Hot Fudge Pie is Your New Favorite Decadent Fudge Dessert
I’ll tell you right now, if you need a rich chocolate indulgence that tastes like pure decadence, stop scrolling. This hot fudge pie checks every single box. I spent ages tinkering with the batter proportions because I absolutely refused to serve anything less than fudgy dessert heaven. My goal was that perfect texture—you know, where the edges are firm like a good brownie, but the center is just shy of liquid when you cut into it. If you’re looking for more reliable crowd-pleasers, don’t forget to check out my general best dessert recipes roundup!
This isn’t fussy baking; this is easy comfort food dessert that delivers a wow factor every time. It’s easily one of the best chocolate pie recipes I have, and I’m so proud that I finally landed on the exact mix of cocoa and chocolate chips that keeps it gooey even after it cools down a bit.
Quick Facts: Details for Your Perfect Hot Fudge Pie
Making a five-star dessert shouldn’t take all day, right? I developed this recipe to be quick and reliable. Here’s what you can expect:
- Prep Time: Roughly 15 minutes—it’s seriously fast!
- Cook Time: Just about 40 minutes.
- Yield: It serves 8, which means you get two slices, no judgment here.
- Category: Dessert, obviously, but I sometimes sneak a slice for breakfast.
Gathering Ingredients for Your Homemade Fudge Pie
Before we get to the baking magic, we need to gather our supplies. For this hot fudge pie to turn out perfect—rich, fudgy, and absolutely dreamy—the ingredients matter. Don’t skip the good stuff! I always insist on using good quality, unsweetened cocoa powder. That’s where that amazing deep chocolate flavor comes from, which makes it such a satisfying, rich chocolate indulgence.
You’ll need a 9-inch pie plate ready, and you’ll want your crust waiting patiently. Remember, we are aiming for that delicious, home-baked texture, so gather everything listed below:
- 1 (9 inch) unbaked pie crust (store-bought or homemade—your call!)
- 1 cup granulated sugar
- 1/2 cup all-purpose flour
- 1/4 cup unsweetened cocoa powder (The good stuff matters here!)
- 1/2 teaspoon salt
- 1/2 cup (1 stick) unsalted butter, melted
- 2 large eggs
- 1 teaspoon vanilla extract
- 1/2 cup milk
- 1 cup semi-sweet chocolate chips
- Vanilla ice cream or whipped cream, for serving (This part is not optional, frankly!)
Ingredient Notes and Simple Fudge Recipe Substitutions
Because I want everyone to feel confident making this, let’s talk substitutions quickly. If you really want to push that richness factor, go ahead and swap out half of those semi-sweet chocolate chips for dark chocolate chips. It gives the pie an amazing, deep complexity. I’ve done it dozens of times when I need that extra jolt of chocolate bliss!
Now, about that crust: I list an unbaked crust because it works best with the liquid batter to create that signature brownie-like set. If you absolutely have to use a pre-baked crust to save time, that’s fine! Just keep an eye on the baking time. You might need to pull it out 5 minutes earlier than the recipe states, since the crust won’t be simultaneously baking with the filling. You’re looking for that center to still wobble just a bit when you gently shake the pan!
Step-by-Step Instructions for the Best Chocolate Pie Recipe
Okay, now for the fun part! This is where we take those ingredients and turn them into pure, warm chocolate pie magic. Don’t let the word ‘pie’ intimidate you; this is really just a super-rich, fudgy batter poured into a shell. I’ve broken this down so it’s impossible to goof up. We start with the heat, move to the mixing, and finish with the critical cooling stage. Seriously, don’t try to rush that last bit!
- First things first: Preheat your oven to 350°F (175°C). Get that heat going while you prep. Place your unbaked 9-inch pie crust right into the pie plate.
- In a regular medium bowl—nothing fancy required—whisk together the sugar, flour, cocoa powder, and salt until everything looks perfectly blended and uniform.
- Now for the wet stuff! Add your melted butter, eggs, vanilla extract, and milk right into that dry mix. Grab your whisk and mix until the batter is totally smooth. I mean it—smooth, no lumps of flour hiding anywhere.
- Once it looks nice, gently stir in those semi-sweet chocolate chips. Make sure they are spread evenly throughout the batter. Remember, we want a chip surprise in every bite!
- Carefully pour all that thick batter into the prepared pie crust. It will be really thick, just like mixing up a batch of brownie batter. That’s exactly what we want for a great hot fudge pie!
- Bake this beauty for 35 to 40 minutes. This is the tricky part, so pay attention! The edges should look set and firm, almost like they’re pulling slightly away from the crust, but the dead center will still look very soft and fudgy.
- Pull that pie out of the oven when it looks like that, and place it on a wire rack. Now, this step is non-negotiable: let it cool for at least 20 minutes. I know you want to dive in, but trust me, that slight cooling time is what lets that gooey center firm up just enough so it holds its shape when you cut it.
- When it’s ready, serve it warm—and I mean *warm*—with a huge scoop of vanilla ice cream or a cloud of whipped cream. This is how you achieve that chocolate lovers dream dessert experience! If you loved making this, my best dessert recipes page has lots more easy crowd-pleasers!
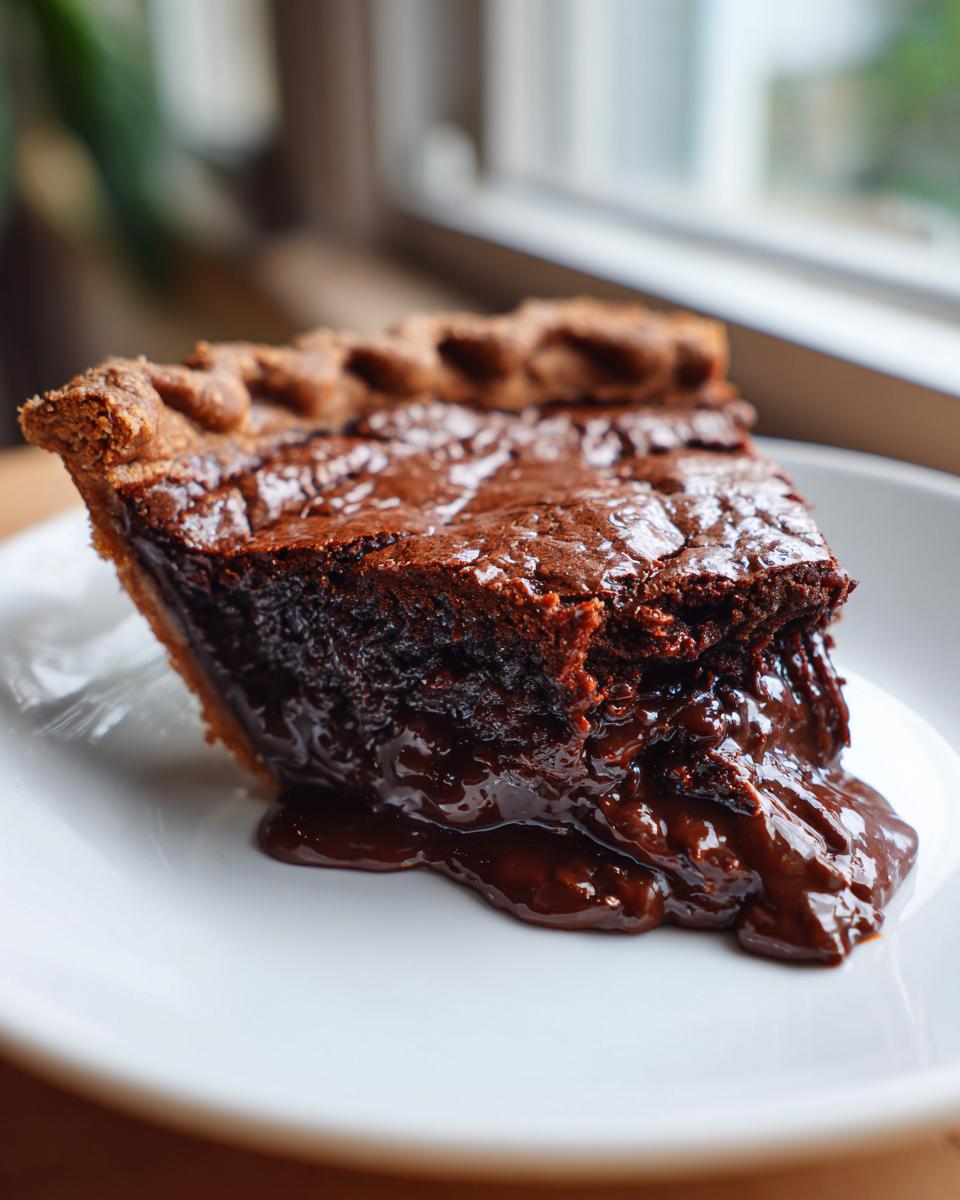
Achieving the Molten Chocolate Pie Center
The secret to that incredible molten chocolate pie texture? It’s all about knowing when to stop baking! If you bake this pie until the center is totally firm, you end up with a dense chocolate tart, not the gooey masterpiece we are after. We bake it at 350°F, which is gentle enough to cook the eggs and crust without instantly solidifying that gooey fudge interior.
See that soft center? That’s liquid gold settling in! It firms up beautifully during that mandatory 20-minute rest period on the counter. A crucial tip here: when you mix the wet and dry ingredients, whisk just until combined. If you overmix, you develop the gluten in the flour too much, and you end up with a tougher texture instead of that soft, melt-in-your-mouth slice. We want smooth, not tough!
Tips for Success When Making a Hot Fudge Pie
Listen, I’ve made this pie enough times to know where things can go wrong—and more importantly, how to make sure they don’t! My goal is that your hot fudge pie comes out perfect and tastes exactly like that incredible, decadent fudge dessert you’re dreaming about. Transparency is key in my kitchen, so here are the three absolute must-know tips for guaranteed success, especially when dealing with a liquidy filling and a delicate crust.
First up: preventing that dreaded soggy bottom. This is the downfall of many a great pie dreams! Since our batter is so moist—remember it’s supposed to be like a fudgy dessert heaven, not a firm cake—we need to protect that crust. If your crust is homemade or perhaps a bit thin, try one of two things: lightly brush the bottom of the unbaked crust with a thin layer of your melted butter *before* adding the dry ingredients, or, better yet, bake the empty crust for about 8 minutes on its own before pouring in the filling. Pop it out, pour in the batter, and finish baking. That little head start makes a huge difference!
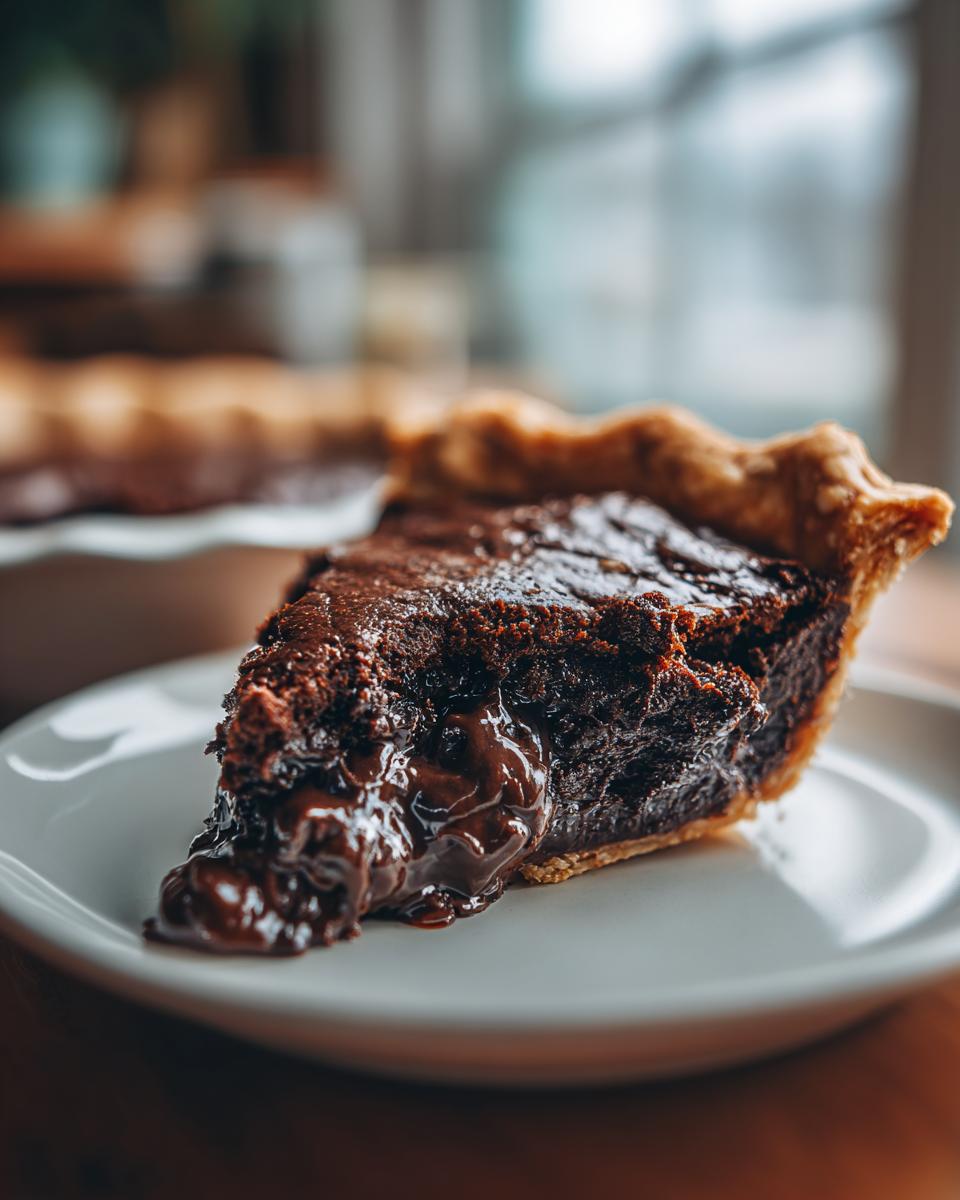
Next, watch your oven time like a hawk. This is where we aim for that ‘molten chocolate pie’ stage. The visual cue is more important than the clock! If you bake it until a temperature probe reads ‘done,’ you’ve gone too far! You want those edges to look set up—like they’ve formed a protective wall for the middle—but when you give the pan a *tiny* wiggle, that center should still slosh just a little bit. That wobble is your signal! Pulling it out when it’s slightly underdone is the entire secret to ensuring it slices like that rich, warm brownie-meets-lava-cake hybrid we are aiming for.
Finally, let it rest. I cannot stress this enough for any warm chocolate pie recipe. You MUST let it sit on the counter for 20 minutes after it comes out. If you try to slice it hot, the filling will run out onto the plate looking soupy. Those 20 minutes allow the proteins and fats to stabilize enough so that when you serve it, you get that lovely, thick, gooey layer that clings beautifully to the crust. It will still be perfectly warm, I promise, just structurally sound enough to handle a scoop of vanilla ice cream!
Serving Suggestions for Your Warm Chocolate Pie
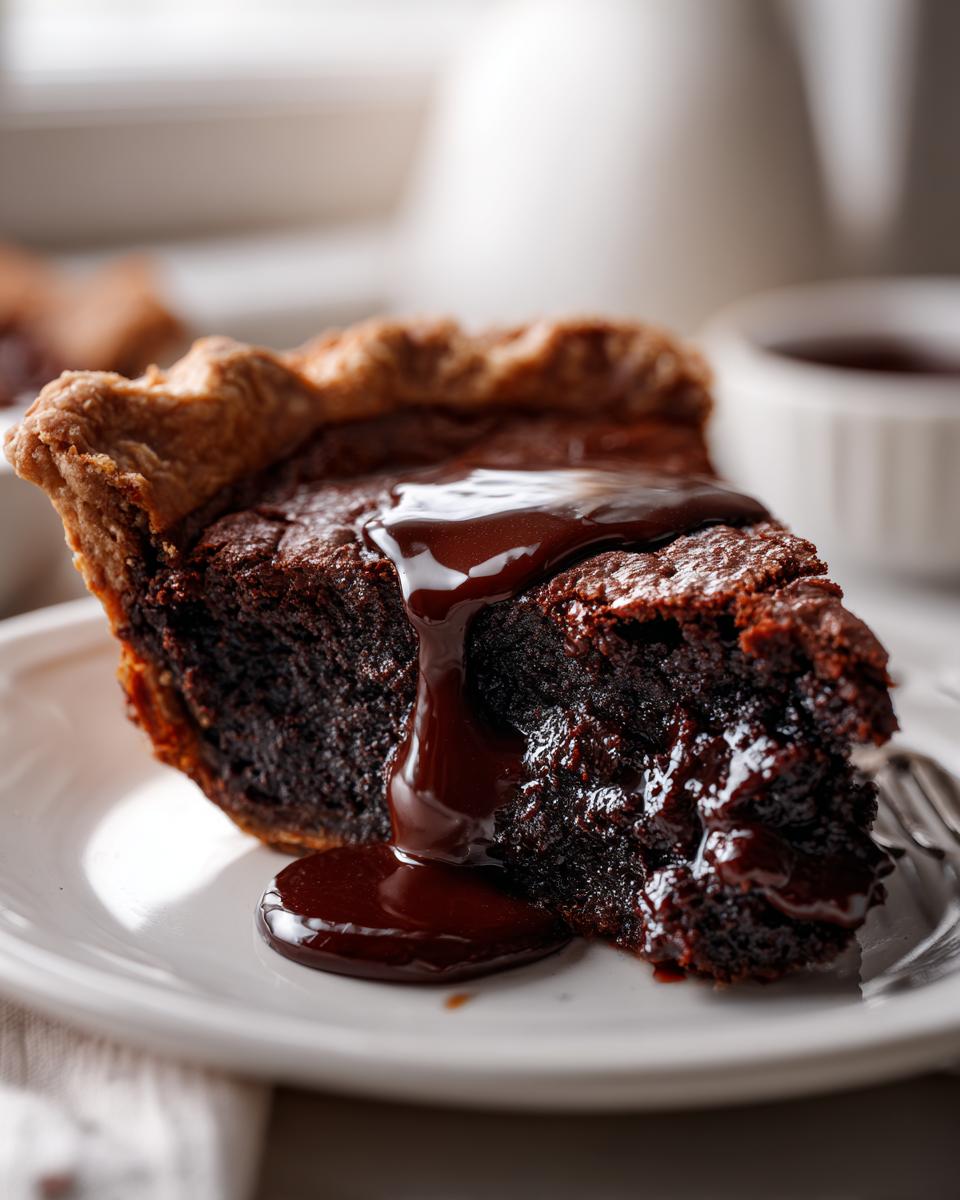
Okay, you’ve nailed the baking, and now the best part of any hot fudge pie comes: the garnish! This is not just a pie; it’s a vehicle for pure indulgence, and how you top it really matters. For me, this dessert transcends simple weeknight treat status and becomes a holiday showstopper with the right accompaniment.
If you take one thing away from me today, please make it this: You absolutely must serve this warm chocolate pie with vanilla ice cream. Not just any vanilla, but a really high-quality, rich, creamy French vanilla. The contrast between the warm, decadent fudge and the cold, sweet ice cream is what creates that iconic, melt-in-your-mouth experience. That pairing—that perfect pie with ice cream topping—is what elevates this from great to legendary.
If ice cream just isn’t an option, whipped cream works beautifully too! I usually whip my heavy cream with just a tiny touch of powdered sugar and, if I’m feeling fancy, a splash of bourbon or vanilla extract—but keep it light. You want the topping to complement the thick chocolate, not totally bury it. Honestly, sometimes when I’m hiding in the kitchen after the kids go to bed, I eat a slice plain while it’s still warm, but that’s our little secret, okay? For your guests (or your family), definitely go for the cold topping. If you are looking for more ideas for finishing off delicious bakes, I always keep a list of favorites over on my best dessert recipes page!
Storage and Reheating for Your Gooey Chocolate Pie
Now, I know you won’t have leftovers, because everyone will eat this entire hot fudge pie in one sitting, but just in case you manage to save a slice or two (or maybe you’re planning for tomorrow!), we need to talk storage. Since this pie uses eggs and milk like a lovely, rich custard, it definitely needs to live in the fridge. Don’t just leave it covered on the counter—trust me on this one!
Wrap those leftover slices really well with plastic wrap or put them in an airtight container. It will last about three to four days in the refrigerator. The good news is that even cold, it’s still pretty tasty if you have a major chocolate craving, but it won’t have that signature warm, molten texture we worked so hard for.
So, how do we bring that glorious gooeyness back? Reheating is simple, but you have to be gentle! You can’t just blast the whole pie; you’ll destroy that delicate texture. Take out just the slice you want to eat. I find the microwave is the quickest way to get that decadent fudge dessert warm again.
Put the slice on a microwave-safe plate. Start with 15 seconds on medium power. Give it a little poke—does the edge still feel firm but the center is softening? Perfect! If it needs more heat to get that perfect, slightly molten texture, add 10 more seconds on medium power, no higher. High power will bake the slice right there in the microwave and you’ll lose that soft, fudgy quality. Again, the goal is just warm enough that the chocolate melts again slightly, turning it back into that brownie-meets-lava-cake dream. You want it warm, not hot enough to burn your tongue off!
Frequently Asked Questions About the Classic Chocolate Fudge Pie
I know you have questions! When baking something this decadent, you want reassurance that you’re getting that rich, gooey magic just right. I’ve pulled together the questions I get most often about achieving the perfect texture and keeping this dessert easy enough for a weeknight but special enough for a holiday. If you’re looking for other easy versions, I highly recommend checking out some good guides like the one I found over on fudgy dessert heaven for more inspiration!
Can I use a pre-baked crust for this hot fudge pie?
You absolutely can, but I have to give you my honest opinion first. This recipe is truly designed around starting with an unbaked crust. Why? Because the liquid batter soaks into the raw crust just enough to set it perfectly underneath while baking, giving you that classic brownie-meets-pie texture. If you must use a pre-baked crust for your simple fudge pie, I suggest you bake that empty shell alone for about 5 to 8 minutes first to give the bottom a head start. Just watch it closely so it doesn’t brown too much!
What makes this different from a regular brownie pie recipe?
That is such a smart question! Most people think a brownie pie is basically the same thing, but the goal is different. A standard brownie pie is meant to set up firmly, like a thick brownie sheet baked in a pie dish. With our classic chocolate fudge pie, we are aiming for a much gooier interior; we want that molten, lava-flow center. The higher liquid content from the milk and the way the batter is mixed—just until smooth, not stiff—ensures that even after resting, the center remains softer and richer than any standard brownie pie would be.
How long will the gooey texture last after baking?
This is the downside to true fudge dessert heaven—it’s best enjoyed almost immediately! The peak gooeyness happens when the pie has cooled for that mandatory 20 minutes post-oven time. If you simply refrigerate the entire thing, the cold temperature will solidify the fats and eggs, making it much firmer, more like a dense fudge block. If you want gooey leftovers, you need to reheat slices individually using the microwave trick I mentioned earlier. Eat it the same day for that ultimate warm chocolate pie experience!
Is this recipe freezer-friendly?
I wouldn’t recommend freezing this pie, especially if you are hoping to keep that signature gooey texture. Freezing and thawing tends to break down the structure of baked goods with high moisture and fat content, and you might end up with a weirdly grainy texture when you try to reheat it. For the best results for this rich chocolate indulgence, if you know you won’t eat it within a few days, it’s better to wrap individual slices tightly and freeze them right away; reheating from frozen might work slightly better than thawing it fully first, but honestly, this hot fudge pie is designed to be devoured fresh!
Nutritional Estimates for This Rich Chocolate Indulgence
Now, even though this hot fudge pie is pure dessert heaven, I know some of you are like me and want the full picture. We are talking about deep, rich chocolate indulgence here, so we know this isn’t a salad, but transparency is what Kings Cook is all about!
I’ve put together the estimated nutritional breakdown below based on the standard recipe ingredients I listed. Please remember, because I use real butter and good quality cocoa, these numbers are just a guide. Different brands of chocolate chips or even the size of your eggs can swing these figures a bit. Think of this section as providing context, not a strict diet plan—this is comfort food, after all!
- Serving Size: 1 slice (Yields 8 servings)
- Calories: Approximately 450
- Sugar: About 45g (That butter and cocoa need their friends!)
- Fat: Around 25g
- Saturated Fat: Roughly 14g
- Carbohydrates: About 55g
- Protein: Around 6g
If you’re making swaps, like using dark chocolate or cutting back on sugar, you’ll obviously need to recalculate, but this gives you a solid baseline for enjoying your slice of this incredible, gooey chocolate pie. Just make sure to balance it out with a nice, fresh homemade meal later in the week!
Share Your Comfort Food Dessert Experience
So, there you have it! My absolute favorite way to conquer any chocolate craving: The Ultimate Rich and Gooey Hot Fudge Pie. This recipe isn’t just about mixing ingredients; it’s about creating that perfect moment of comfort when that warm, fudgy slice hits your tongue, especially when paired with cold vanilla ice cream. It’s truly a dessert that makes you feel like royalty at your own table, which is exactly what I want for everyone who visits Kings Cook!
Now that you’ve made your own hot fudge pie, I would genuinely love to hear all about it! Did it turn out perfectly gooey? Did your family fight over the last slice? Did you end up using my dark chocolate chip suggestion? Please don’t be shy! Drop a rating down in the comments below so other home cooks know how reliable this recipe is. And if you snapped a picture of that amazing moment when you cut into the molten center, share it on Instagram and tag me—I love seeing your culinary wins!
Thank you so much for trusting me with your baking time today. I hope this decadent fudge dessert makes its way into your regular rotation for holidays, celebrations, or just because it’s Tuesday! If you’re looking for more ways to boost your kitchen confidence, you can always read a little more about my mission over on my about page. Happy baking, and I’ll see you at the next recipe!
PrintThe Ultimate Rich and Gooey Hot Fudge Pie: Best Served Warm with Vanilla Ice Cream
Make this rich, gooey hot fudge pie that tastes like a cross between a brownie and a molten lava cake. This simple recipe delivers decadent chocolate indulgence perfect for any occasion.
- Prep Time: 15 min
- Cook Time: 40 min
- Total Time: 55 min
- Yield: 8 servings 1x
- Category: Dessert
- Method: Baking
- Cuisine: American
- Diet: Vegetarian
Ingredients
- 1 (9 inch) unbaked pie crust (store-bought or homemade)
- 1 cup granulated sugar
- 1/2 cup all-purpose flour
- 1/4 cup unsweetened cocoa powder
- 1/2 teaspoon salt
- 1/2 cup (1 stick) unsalted butter, melted
- 2 large eggs
- 1 teaspoon vanilla extract
- 1/2 cup milk
- 1 cup semi-sweet chocolate chips
- Vanilla ice cream or whipped cream, for serving
Instructions
- Preheat your oven to 350°F (175°C). Place the unbaked pie crust in a 9-inch pie plate.
- In a medium bowl, whisk together the sugar, flour, cocoa powder, and salt until combined.
- Add the melted butter, eggs, vanilla extract, and milk to the dry ingredients. Mix with a whisk until the batter is smooth. Do not overmix.
- Stir in the chocolate chips until they are evenly distributed throughout the batter.
- Pour the batter into the prepared pie crust. The batter will be thick.
- Bake for 35 to 40 minutes. The edges should look set, but the center will still be soft and fudgy, similar to a brownie.
- Remove the pie from the oven and let it cool on a wire rack for at least 20 minutes before serving. The center will firm up slightly as it cools.
- Serve the pie warm with a generous scoop of vanilla ice cream or a dollop of whipped cream.
Notes
- For an extra rich flavor, substitute 1/4 cup of the semi-sweet chocolate chips with dark chocolate chips.
- If you prefer a slightly firmer texture, bake for an additional 5 minutes, but watch carefully to keep the center gooey.
- This pie is best eaten the day it is made for the optimal warm, molten texture.
Nutrition
- Serving Size: 1 slice
- Calories: 450
- Sugar: 45g
- Sodium: 180mg
- Fat: 25g
- Saturated Fat: 14g
- Unsaturated Fat: 11g
- Trans Fat: 0.5g
- Carbohydrates: 55g
- Fiber: 3g
- Protein: 6g
- Cholesterol: 85mg