
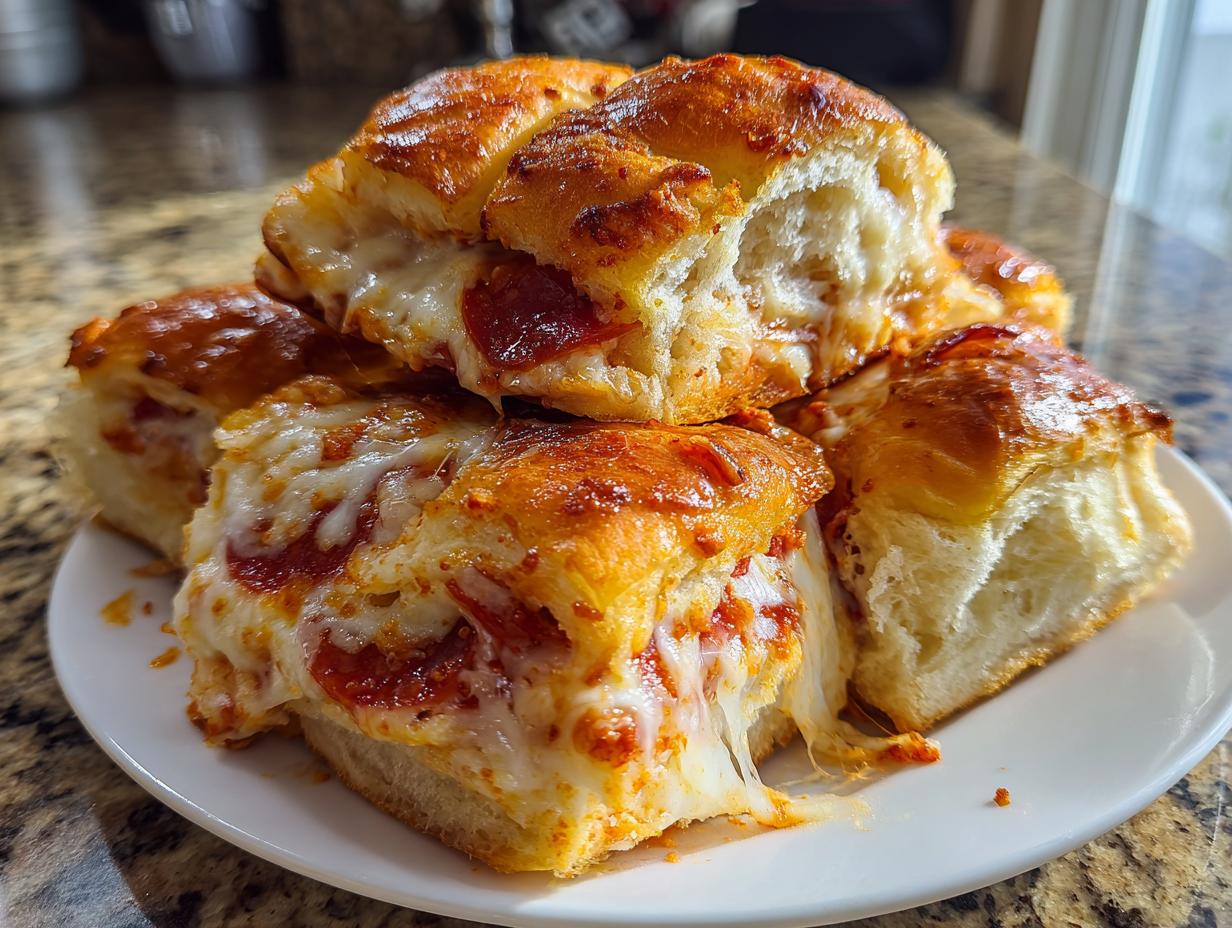
If you’re anything like me, you’ve probably stared down the barrel of a big game or a last-minute party and panicked because you have zero impressive food ready. Stop right there! You don’t need a three-day preparation schedule to win over a crowd, and that’s exactly why I’m obsessed with these incredible pizza sliders. They take everything you love about delivery pizza—the gooey mozzarella, the spicy pepperoni, the satisfying sauce—and shrink it down into the easiest, most crowd-pleasing format possible. As someone who grew up learning that food is our primary language of love in the Midwest, I promise you one thing: I test every recipe until it’s absolutely reliable. These sliders are the definition of a delicious, easy-to-follow win for your table!
- Why These Are the Best Pizza Sliders (Quick Party Finger Food)
- Gathering Ingredients for Your Pizza Sliders Recipe
- Mastering the Assembly of Cheesy Mini Pizza Sandwiches
- Creating the Signature Garlic Butter Topping for Pizza Sliders
- Baking Instructions for Perfect Pull Apart Pizza Bites
- Tips for Success with Your Pepperoni Pizza Sliders Easy Recipe
- Make Ahead Appetizer and Storage for Pizza Sliders
- Frequently Asked Questions About These Simple Weeknight Dinner Sliders
- Estimated Nutritional Overview for Your Pizza Sliders
Why These Are the Best Pizza Sliders (Quick Party Finger Food)
Honestly, if you need a dish that disappears the second you set it out, this is it. Forget fiddling with individual mini pizzas—that takes forever! The sheer genius of these pizza sliders is that they bake as one giant sheet and you just pull them apart. It’s magic, I tell you!
- Pull-Apart Simplicity: Serve instantly without needing plates or tongs!
- Kid-Friendly Factor: Everyone loves pizza in a tiny, manageable handheld shape.
- Minimal Cleanup: Everything stays in one single baking dish!
Perfect for Game Day Appetizer Idea
Have you ever hosted for the Super Bowl or just a big viewing party? You need something that stays hot and doesn’t require you to babysit a slow cooker. These sliders are practically custom-made for that chaos. You can throw them in the oven right as the pre-game finishes, and they’ll be piping hot and perfectly melty for kick-off. Plus, because they’re baked together, they stay warm longer than individual appetizers.
Gathering Ingredients for Your Pizza Sliders Recipe
Okay, now for the fun part: getting everything ready! The beauty of these pizza sliders is that there are so few moving parts. You’re using almost all pantry staples or things you can grab in one quick trip. The ingredient list is short, but every single item matters for that perfect cheesy, savory result. You’ll want the full list right here before you even preheat the oven!
- We need one 12-count package of those sweet slider buns—you know the ones!
- A generous cup of your favorite pizza sauce or marinara.
- One cup of shredded mozzarella—make sure it’s the low-moisture kind so it melts perfectly.
- One cup of sliced pepperoni.
- For the glaze, we’ll use melted butter, garlic powder, and Italian seasoning.
- And finally, some grated Parmesan to finish the top!
Tips for Selecting the Best Hawaiian Roll Sliders Buns
When it comes to this recipe, the bun choice is pretty crucial, trust me! You must use the soft, slightly sweet slider rolls. They are often called King’s Hawaiian, and that slight sweetness is what really elevates these from just a kid’s snack to a genuinely great party food. They are sturdy enough when sliced horizontally to hold their shape, but they bake up so soft inside.
Don’t try to substitute with regular, hearty Kaiser rolls or stiff sandwich buns! When you bake these, you want them to steam together slightly and still be pillowy soft when you pull them apart. If your store sells them in the 12-pack, grab those first. They are specifically designed for this kind of pull-apart magic!
Mastering the Assembly of Cheesy Mini Pizza Sandwiches
Alright, we have our ingredients ready, so let’s build these amazing pizza sliders! This is the stage where organization really pays off, and it only takes about ten minutes, tops. First, grab your 9×13 baking dish, and lightly grease it. Don’t skip the grease, even if the rolls are slightly sweet—we want these to slide out easily later!
The absolute trickiest part—and where most people mess up—is slicing the buns. You need to slice the entire package right across the middle, horizontally, but you *cannot* let the top half separate from the bottom half. Think of it like you’re giving the whole block of rolls a haircut across its equator! Place the whole bottom piece gently into your prepared dish.
Now, let’s build those layers! Spread the pizza sauce evenly over the bottom buns. Here’s my little Kate secret: make sure you get sauce all the way to the edges of every single roll square, but don’t let it glob too much onto the sides of the pan. We want that flavor in every bite! Next up is the pepperoni, followed by that beautiful pile of mozzarella cheese sprinkled right over the top. Gently set the top half of the buns over the cheese layer. They nestle right in, ready for their buttery treatment!
Creating the Signature Garlic Butter Topping for Pizza Sliders
Listen, if you just throw these pizza sliders in the oven plain, they’ll be fine—they’ll be like little cheesy bread bites. But we aren’t aiming for “fine,” are we? We are aiming for *award-winning* Game Day grub! This garlic butter topping is the absolute non-negotiable step that takes these from a simple assembly job to fully realized, incredible pepperoni pizza sliders.
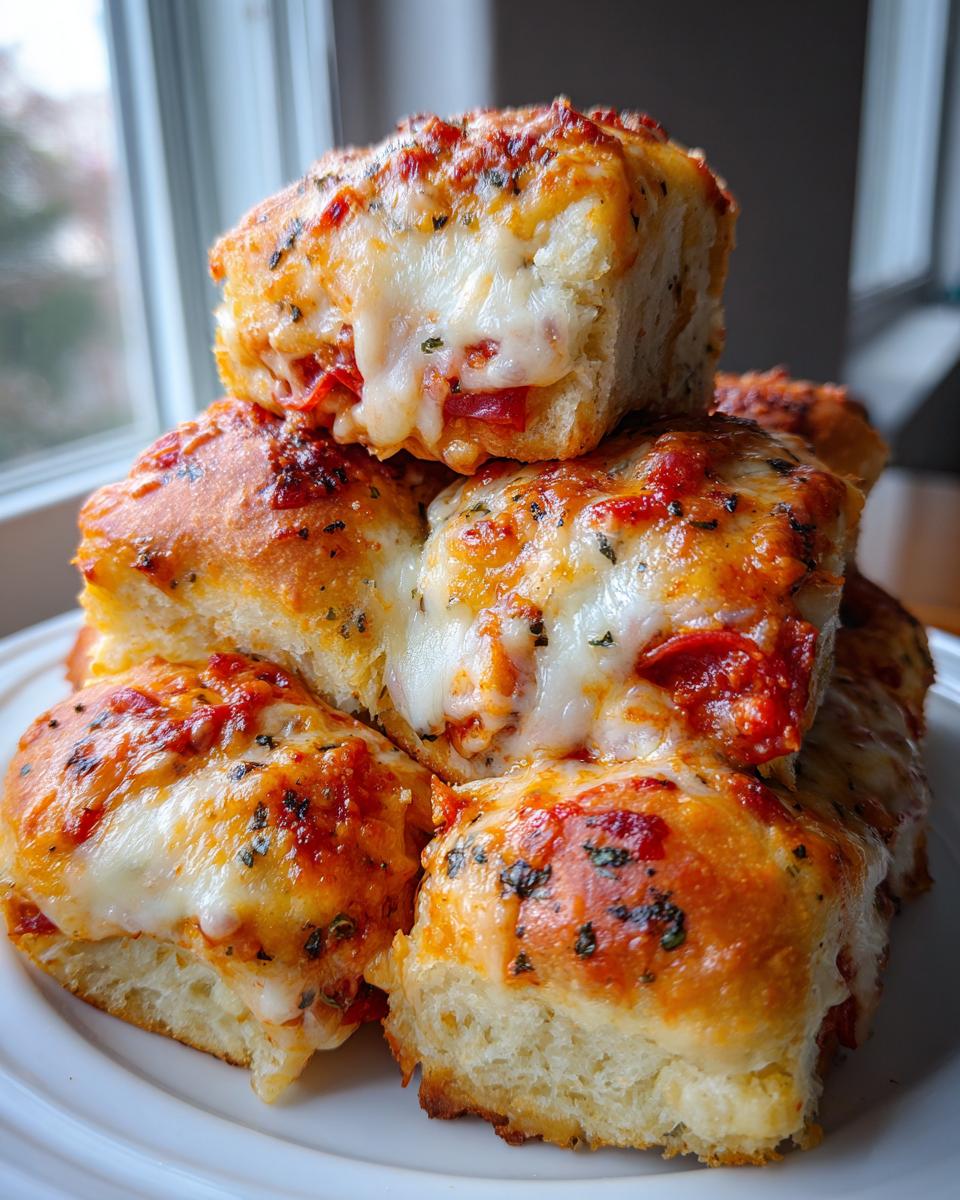
It’s so easy, it almost feels like cheating. You just need a tiny little bowl. Melt up that butter—use the real stuff, it matters—and toss in your garlic powder and your dried Italian seasoning. Whisk it quickly! You want that seasoning to bloom a little bit in the warm fat so you get that full aroma when it hits the heat.
Once you’ve got that mixture looking happy and uniform, grab a pastry brush—or honestly, even the back of a spoon works if you’re desperate!—and brush that beautiful mixture *generously* all over the top surface of those rolls. Make sure every single square edge gets hit with that garlic butter. This coating is what makes the tops golden brown and slightly crispy while the inside stays wonderfully soft and gooey. This simple brush of flavor is exactly what separates our great recipe from just a boring bake sandwich!
Baking Instructions for Perfect Pull Apart Pizza Bites
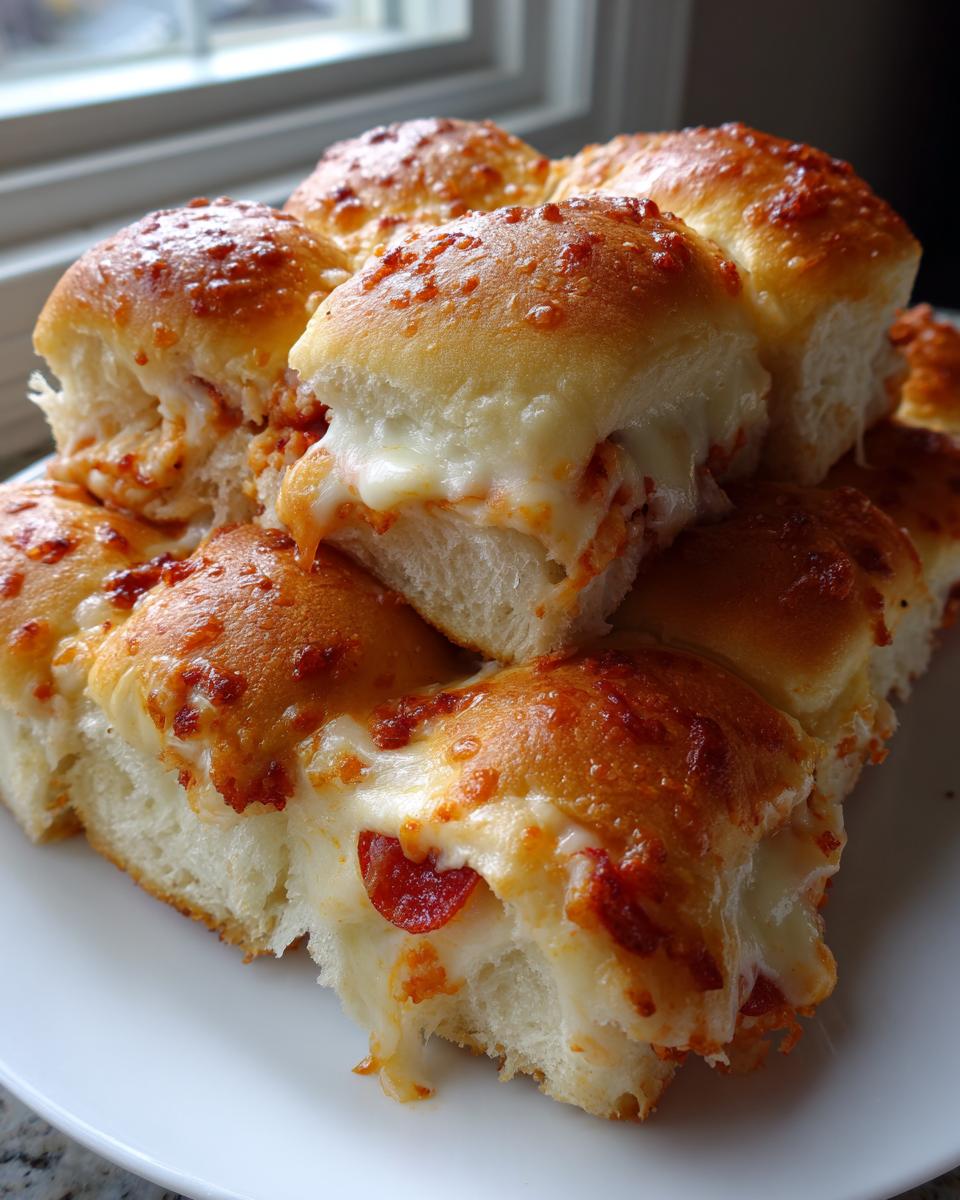
Now that we’ve got the assembly down and that glorious garlic butter coating on top, it’s time for the oven! Baking these pizza sliders is a two-part process, and following these steps ensures you get that perfect melt without burning the buns. Remember, we’re aiming for gooey cheese inside and a beautiful, crisp-tender top!
First things first, preheat your oven to 350°F. Once it’s ready, place the whole assembled dish into the oven, but you *must* cover it tightly with aluminum foil first. This first phase, about 15 minutes covered, is crucial! It traps the heat and steam needed to thoroughly melt all that mozzarella we layered in there. You want the cheese to be fully liquid before we even think about browning the tops.
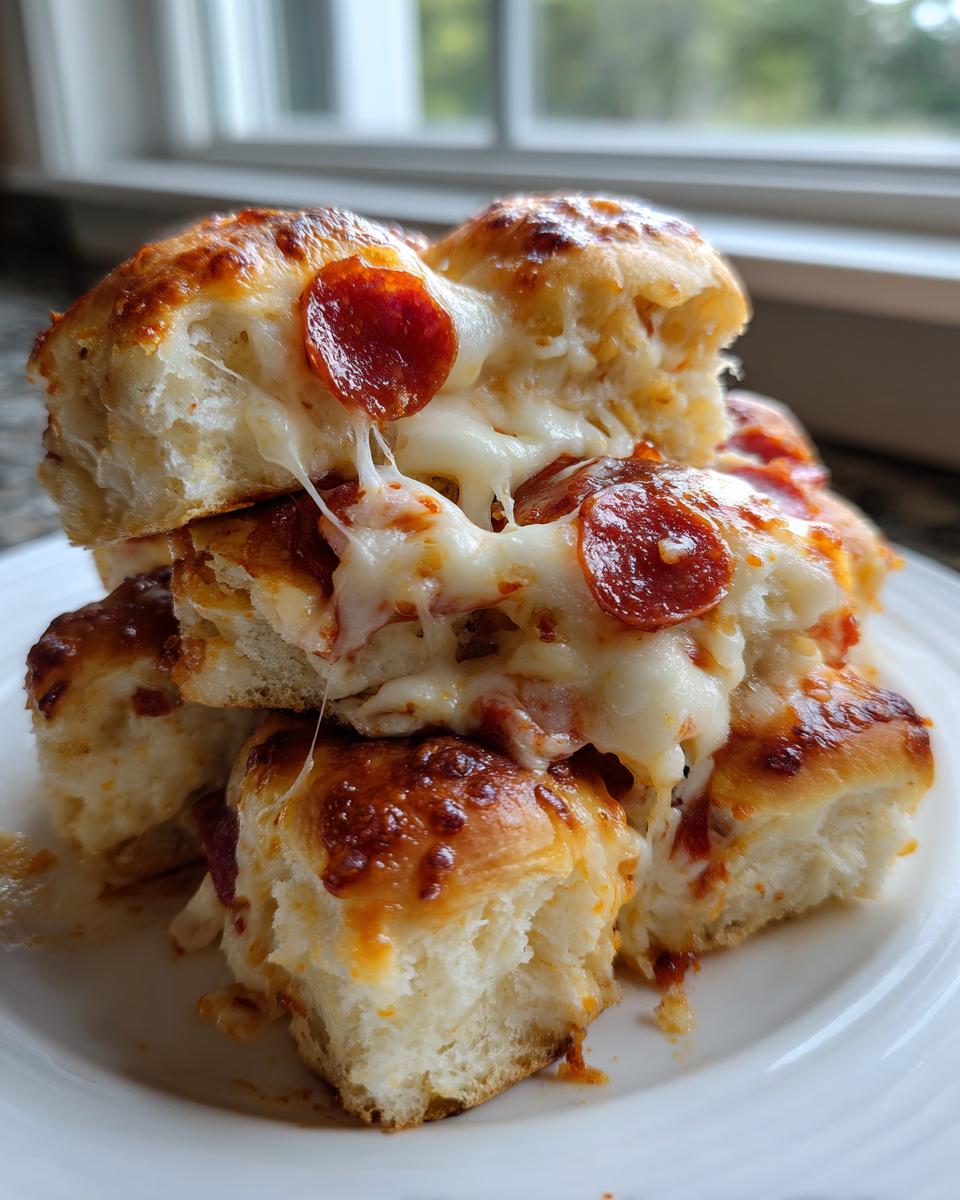
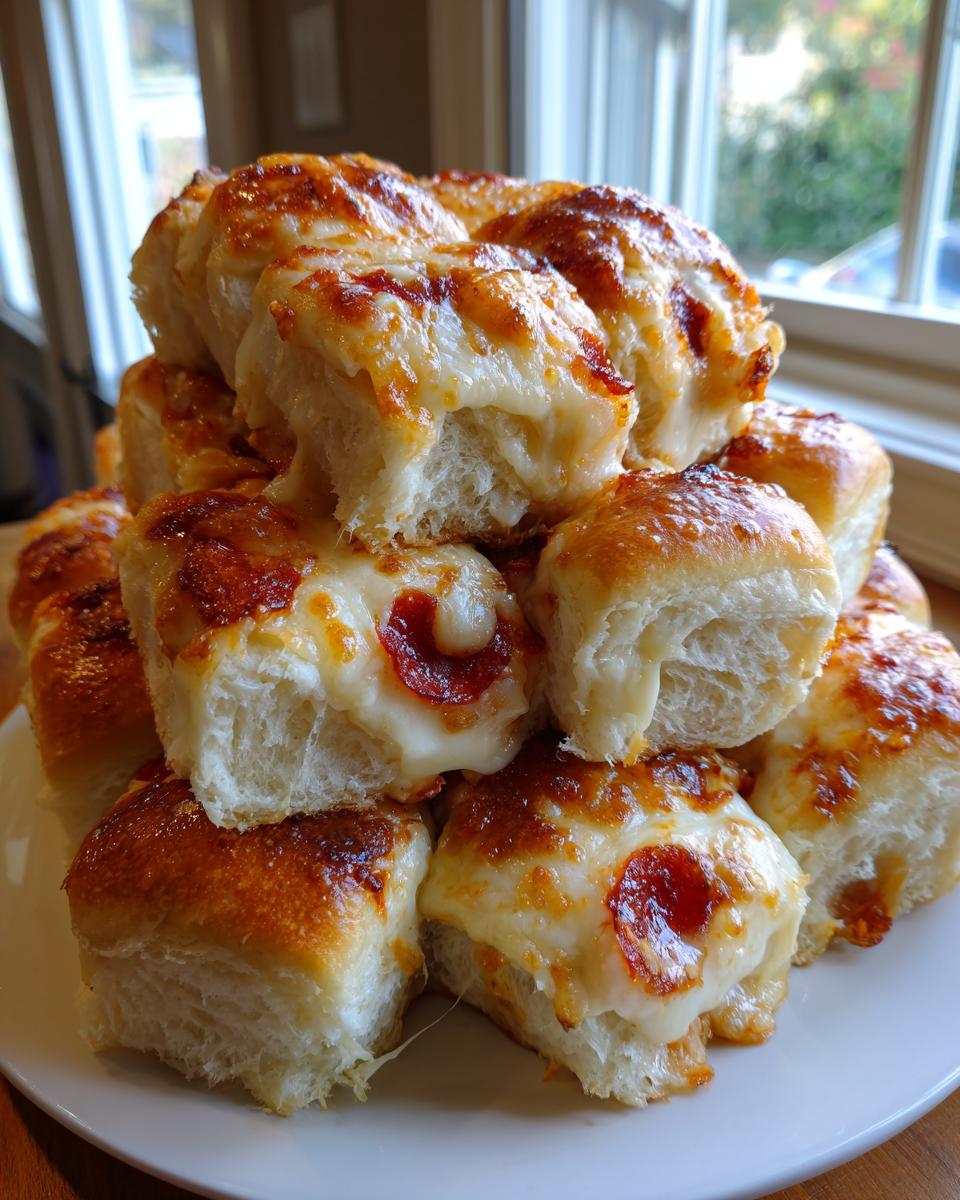
After that 15 minutes is up, carefully remove the foil. You’ll see the steam puff out—watch your hands! Now, let them bake uncovered for another 5 to 10 minutes. This is when the magic happens: the butter sizzles into the Parmesan, the tops of the rolls get golden brown, and the edges get just a little bit crisp. Once they look perfectly brown and bubbly, pull them out. Don’t cut them right away, though! Let the whole pan rest for 5 minutes. This simple step lets the cheese set up just enough so your final pull-apart action doesn’t result in a giant cheese pull disaster!
Tips for Success with Your Pepperoni Pizza Sliders Easy Recipe
I’ve made this batch of Easy Pizza Sliders Recipe more times than I can count for potlucks and busy Tuesday nights, so I know exactly where things can go wrong if you rush! My biggest tip, which I mentioned briefly earlier, is letting them rest for those crucial five minutes after they come out of the oven. If you try to pull them apart right away, you’re going to end up with hot cheese strings everywhere, and frankly, it looks messy! They need just a minute to settle down.
Now, let’s talk about wetness. If you are worried about the bottom buns soaking up too much moisture from the sauce—it happens, especially if you use a really thin sauce—try this little trick I learned from my dad. After you place the bottom buns in the greased pan, give them a very light, quick toast under the broiler for about two minutes *before* you add any sauce. Just until they look slightly dry to the touch. This creates a little protection barrier! Then, you can proceed with the saucing, topping, and baking as usual.
Best Pizza Slider Toppings and Variations
While the classic pepperoni is definitely my favorite for speed and flavor—it’s such a great Simple Weeknight Dinner Sliders solution—these really shine when you customize them a tiny bit. Don’t feel locked into just sauce and pepperoni!
For a little extra crunch and brightness, try adding super thinly sliced rings of sweet onion or crisp diced bell peppers right on top of the pepperoni before the mozzarella goes on. Thin veggies won’t release too much water during the bake, but they add great flavor complexity. If you’re feeling a little more dramatic, you absolutely have to try adding a tiny pinch of dried oregano right into that garlic butter mixture before you brush it on. It just smells incredibly Italian and takes these Baked Pizza Rolls Recipe up a notch instantly!
Make Ahead Appetizer and Storage for Pizza Sliders
One of the best things about these pizza sliders is figuring out how to sneak ahead of the party chaos! I totally get how overwhelming prepping everything at the last minute can be. Good news: You can absolutely assemble them ahead of time, which makes them a fantastic Make Ahead Appetizer.
If you do all the layering—sauce, pepperoni, cheese—just like we planned, cover the whole dish tightly with plastic wrap, and pop it into the refrigerator, it will hold perfectly for up to 4 hours. Seriously, you can do this in the morning and forget about it until guests start arriving! Just remember one tiny thing: if you are baking them straight from the cold fridge, you need to add about 5 to 10 extra minutes to that initial covered baking time to ensure that cheese gets fully gooey in the center.
Now, what about the leftovers? Because these are so rich and cheesy, honestly, they taste fantastic the next day, too. For storage, you have to treat them right so they don’t get soggy. Don’t just wrap the whole thing back up in foil. You need to slice them apart first, and then store the individual Quick Party Finger Food pieces in a truly airtight container. If you stack them, put a little piece of parchment paper between the layers so the buttery, cheesy tops don’t stick together. Gross!
When it’s time to reheat, please, for the love of all things cheesy, skip the microwave! The microwave speeds up the process but turns those beautiful golden tops instantly soggy. Instead, I recommend the oven—the same 350°F we used for baking works perfectly. Pop the pieces you want to eat onto a baking sheet, uncovered, and warm them for about 8 to 10 minutes. This brings back that slight crispness to the bun top and melts the cheese just right. They’ll be like they were freshly made!
Frequently Asked Questions About These Simple Weeknight Dinner Sliders
I know you might have a few nagging questions when trying a new recipe, especially when working with those sweet little slider buns! That’s totally normal, and I want to make sure everyone feels 100% confident before they start assembling these Simple Weeknight Dinner Sliders. I’ve bundled up the most common things people ask me about these Cheesy Mini Pizza Sandwiches right here for you.
Can I use regular dinner rolls instead of Hawaiian Roll Sliders buns?
You certainly *can*, but I have to give you a fair warning! The whole point of that rich topping interacting with the sweet roll is what makes these specifically so irresistible. If you use standard white dinner rolls or potato rolls, they won’t have that signature slight sweetness. They’ll still be good, trust me, because we have plenty of sauce and cheese in there, but they won’t be *these* sliders.
If you are stuck, go for high-quality potato rolls. If you use plain rolls, you might want to slightly increase the amount of brown sugar you might be putting in a dough in another recipe, or just accept that the flavor profile will lean more savory than sweet-and-savory. Stick with the sweet rolls if you can, especially if you’re looking for that top-tier Game Day Appetizer Idea!
How do I make these pizza sliders spicy?
Oh, I love this question! Sometimes you need that little kick, right? It’s so easy to adjust the heat level on these Pepperoni Pizza Sliders Easy versions. My go-to move is actually adding crushed red pepper flakes right into that melted butter mixture we brush on top. If you add about half a teaspoon of flakes to the butter, garlic powder, and Italian seasoning, it toasts beautifully in the oven and disperses the heat really nicely across all the tops!
If you want a deeper, meatier heat, switch out your pepperoni for a spicy Italian version, or even mix in some finely chopped Calabrese salami if your store carries it. Either way, it’s a simple adjustment that instantly transforms the whole experience without messing up the baking process!
What is the best way to serve these Gooey Cheese Sliders?
The best way is straight out of the oven, piping hot, while the cheese is still stringy, of course! Since these are already a full meal packed into a tiny package, they don’t technically *need* anything else. However, people go wild for dipping sauces if you’re serving these up as a proper Kid Friendly Pizza Meal!
I always set out little ramekins or small dipping bowls on the side. You can never go wrong with an extra bowl holding slightly warmed marinara sauce—it just doubles down on that pizza flavor. But honestly, my family prefers something cool and tangy to cut through all that richness. A simple homemade ranch dressing or even a mild garlic aioli gets rinsed clean super fast when it’s sitting next to a plate of these Gooey Cheese Sliders!
Estimated Nutritional Overview for Your Pizza Sliders
I always like to give a general snapshot of what you’re throwing into your body when enjoying these easy pizza sliders, even though they are mostly just fun party food! Please remember, these numbers are just a guideline based on the ingredients list I provided—your actual counts might change depending on if you use leaner pepperoni or a different brand of sweet rolls.
- Calories: About 280 per slider
- Fat: Roughly 14 grams
- Protein: A solid 14 grams! Great for an appetizer!
- Carbohydrates: Around 25 grams
- Sugar: About 7 grams
So, there you have it! Everything you need for a crowd-pleasing snack that comes together faster than ordering takeout. Happy cooking, friends!
PrintEasy Pull-Apart Pepperoni Pizza Sliders
Make these simple, cheesy pizza sliders using slider buns for a fast appetizer or kid-friendly weeknight meal. They bake up gooey and are topped with a savory garlic butter glaze.
- Prep Time: 10 min
- Cook Time: 25 min
- Total Time: 35 min
- Yield: 12 sliders 1x
- Category: Appetizer
- Method: Baking
- Cuisine: American
- Diet: Vegetarian
Ingredients
- 1 (12 count) package sweet slider buns (like King’s Hawaiian)
- 1 cup pizza sauce or marinara sauce
- 1 cup shredded mozzarella cheese
- 1 cup sliced pepperoni
- 1/4 cup melted butter
- 1 teaspoon garlic powder
- 1/2 teaspoon dried Italian seasoning
- 1/4 cup grated Parmesan cheese
Instructions
- Preheat your oven to 350°F (175°C). Lightly grease a 9×13 inch baking dish.
- Slice the entire package of slider buns horizontally, keeping the bottom and top halves connected in one piece. Place the bottom halves of the buns in the prepared baking dish.
- Spread the pizza sauce evenly over the bottom layer of buns.
- Layer the pepperoni slices over the sauce.
- Sprinkle the mozzarella cheese over the pepperoni layer.
- Place the top halves of the buns over the cheese layer.
- In a small bowl, whisk together the melted butter, garlic powder, and Italian seasoning.
- Brush the butter mixture evenly over the top of the assembled sliders.
- Sprinkle the grated Parmesan cheese over the buttered tops.
- Cover the baking dish tightly with aluminum foil.
- Bake for 15 minutes covered.
- Remove the foil and bake for an additional 5 to 10 minutes, or until the cheese is fully melted and the tops are lightly golden brown.
- Let the sliders rest for 5 minutes before slicing them apart and serving warm.
Notes
- For extra flavor, add thin slices of cooked sausage or bell peppers with the pepperoni.
- You can prepare the sliders completely, cover them, and refrigerate them for up to 4 hours before baking. Add 5-10 minutes to the covered baking time if baking straight from the refrigerator.
- Use good quality marinara sauce; the sauce flavor makes a big difference in this simple recipe.
Nutrition
- Serving Size: 1 slider
- Calories: 280
- Sugar: 7
- Sodium: 650
- Fat: 14
- Saturated Fat: 6
- Unsaturated Fat: 8
- Trans Fat: 0.2
- Carbohydrates: 25
- Fiber: 1
- Protein: 14
- Cholesterol: 35