
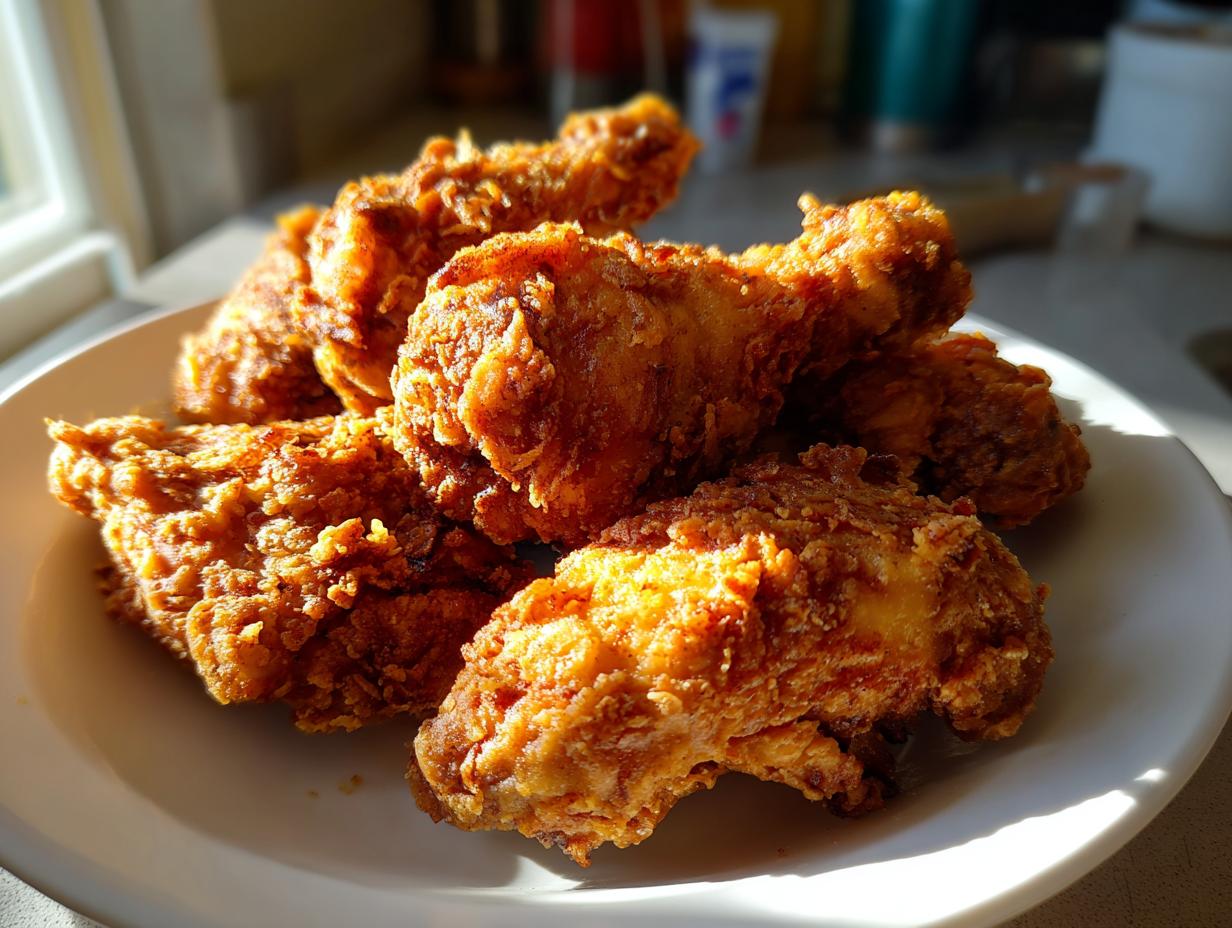
Oh, is there anything better than that first bite of perfectly crispy, golden fried chicken? It’s the ultimate comfort food, right? That satisfying crunch followed by incredibly juicy, tender meat inside—it’s pure magic! Making amazing fried chicken at home can feel a little daunting, like a real test in the kitchen, but trust me, it’s totally doable. Here at Kings Cook, my goal, even going back to my Midwest roots and nutrition science days, is to make those classic dishes, like this incredible fried chicken, feel super accessible and totally achievable for you. Forget those intimidated feelings; we’re going to get that perfect golden crust and that melt-in-your-mouth center, making your kitchen feel like the happiest place on earth.
- Why You'll Love This Classic Fried Chicken Recipe
- Ingredients for Perfect Fried Chicken
- Essential Equipment for Making Fried Chicken
- Step-by-Step Guide to Crispy Buttermilk Chicken
- Tips for the Best Southern Fried Chicken
- Ingredient Notes and Substitutions for Fried Chicken
- Serving Suggestions for Classic Comfort Food
- Storage and Reheating Your Fried Chicken
- Frequently Asked Questions About Fried Chicken
- Nutritional Estimate for Fried Chicken
- Share Your Fried Chicken Creations!
Why You’ll Love This Classic Fried Chicken Recipe
Seriously, why is this fried chicken recipe a winner? Let me count the ways!
- It’s Surprisingly Easy: Don’t let the thought of frying scare you! This recipe breaks down the steps so beautifully, you’ll be amazed at how simple it is to get those restaurant-quality results.
- Incredible Flavor & Texture: Get ready for that perfect crunch you’ve been dreaming of, with super juicy, tender chicken underneath. It’s the best of both worlds!
- Ultimate Comfort Food: Whether it’s Sunday dinner, a picnic, or just a craving that needs satisfying, this classic Southern fried chicken hits the spot every single time. Pure cozy deliciousness!
- Reliable Results: Just like all my recipes here at Kings Cook, this one has been tested again and again. You can trust it to turn out perfectly, making you feel like a kitchen superstar!
Ingredients for Perfect Fried Chicken
Alright, gathering your ingredients is the first fun step! For this amazing fried chicken, you’ll want:
- 2 cups all-purpose flour
- 1 generous tablespoon salt (don’t skimp here!)
- 1 teaspoon black pepper, freshly ground if you can
- 1 teaspoon paprika for that lovely color
- 1/2 teaspoon cayenne pepper – this gives it a little kick!
- 1/4 teaspoon garlic powder
- 1/4 teaspoon onion powder
- About 2 1/2 pounds of chicken pieces – thighs, drumsticks, and even breasts work beautifully. Just make sure they’re a good size!
- 2 cups of plain buttermilk (this is key for tender chicken!)
- 2 large eggs
- And of course, plenty of vegetable oil for frying – enough to get about an inch deep in your pan.
Essential Equipment for Making Fried Chicken
Having the right gear makes all the difference when you’re diving into making fried chicken. You’ll want a sturdy cast-iron skillet – it holds heat so well! A good kitchen thermometer is a lifesaver to make sure your oil is just right (not too hot, not too cool). And definitely grab yourself a metal wire rack set over a baking sheet; it’s perfect for letting that crispy chicken drain without getting soggy.
Step-by-Step Guide to Crispy Buttermilk Chicken
Okay, deep breaths, everyone! It’s time to turn those beautiful chicken pieces into the most amazing fried chicken you’ve ever tasted. Follow these steps, and you’ll be a fried chicken pro in no time. Remember, the goal is that gorgeous golden crust and super juicy meat inside! You can imagine serving this with some delicious jalapeño cheddar cornbread or a hearty helping of German potato salad!
Preparing the Buttermilk Soak
First things first, let’s get that chicken all cozy. In one of your shallow dishes, whisk together the trusty buttermilk and those two large eggs. Now, take each piece of chicken and give it a good dip, making sure it’s totally covered in that creamy mixture. This buttermilk bath is like a spa treatment for the chicken – it helps tenderize the meat and gives the flour something amazing to stick to!
Seasoning and Dredging for Maximum Crisp
Now for the magic coating! In your *other* shallow dish, whisk together all those yummy dry ingredients: the flour, salt, pepper, paprika, cayenne, garlic powder, and onion powder. Once your chicken has had its buttermilk bath, lift it out, let any excess drip off for just a second, and then plunge it into that seasoned flour. Really press that flour onto the chicken – you want every nook and cranny coated! It’s like giving your chicken a delicious, crunchy hug. Once they’re all floured up, lay them on that wire rack and let them sit for about 10-15 minutes. This little rest period is super important; it lets the coating set up and really stick, which is key for that extra crispy texture.
Frying Your Fried Chicken to Golden Perfection
Here comes the exciting part! Pour enough vegetable oil into your cast-iron skillet or Dutch oven so it’s about an inch deep. Heat that oil over medium-high heat until it gets to around 350°F (175°C). I always keep my thermometer handy – it’s the best way to know it’s ready! Carefully lower a few pieces of chicken into the hot oil. Try not to crowd the pan; give them some space so they fry evenly. Cook them for about 6 to 8 minutes on each side. You’re looking for that beautiful deep golden-brown color. It’s like watching edible art happen! My grandma always said to listen for the sizzle; a good, happy sizzle means it’s working!
Draining and Resting for Optimal Texture
Once your chicken pieces are perfectly golden and cooked through (an instant-read thermometer should read 165°F or 74°C), it’s time to get them out. Carefully lift them from the oil and place them back onto that clean wire rack set over a baking sheet. This lets all that yummy excess oil drain away, keeping your chicken wonderfully crisp and not greasy. Trust me, this step is non-negotiable for the best texture!
Tips for the Best Southern Fried Chicken
Okay, let’s really kick your fried chicken game up a notch! Making truly awesome Southern fried chicken isn’t just about following the recipe; it’s about those little tricks that make a huge difference. First off, oil temperature is EVERYTHING. If it’s not hot enough, you’ll get greasy chicken, and nobody wants that. Too hot, and the outside burns before the inside cooks. So, really nail that 350°F (175°C) mark! If you’re craving an extra-crispy crust, try double-coating: dip in the buttermilk, then flour, back into the buttermilk, and a final dredge in flour before frying. Trust me, it creates this amazing, crunchy texture! And don’t be afraid to play with the spices – want a little more heat? Add a pinch more cayenne. Prefer it milder? Cut back a bit. It’s your chicken, make it perfect for you! It pairs wonderfully with crispy air fryer fried pickles or some fluffy jalapeño cheddar cornbread.
Ingredient Notes and Substitutions for Fried Chicken
Now, let’s chat about a few ingredient specifics because they really do matter for that perfect fried chicken! While I absolutely adore using buttermilk for its tenderizing magic, if you’re in a pinch, you can quickly make a substitute by adding a tablespoon of lemon juice or white vinegar to regular milk and letting it sit for about 5 minutes. For the chicken pieces, thighs and drumsticks are fantastic because they stay super juicy, but breasts work too – just be extra careful not to overcook them! And for the oil, while vegetable oil is my go-to because it’s neutral and has a good smoke point, you could also use canola or even peanut oil for a slightly different flavor profile.
Serving Suggestions for Classic Comfort Food
Okay, so you’ve got this incredible fried chicken – now what do you serve it with? This dish is pure classic comfort food, so it deserves sides that are just as heartwarming! My absolute favorites? You can’t go wrong with some fluffy jalapeño cheddar cornbread – perfect for soaking up any extra juices. A dollop of creamy German potato salad is another winner that just screams cozy. And for something green? A rich broccoli cheese casserole always rounds out the meal perfectly. Yum!
Storage and Reheating Your Fried Chicken
Got some delicious fried chicken leftovers? Lucky you! To keep it tasting almost as good as fresh, let it cool down completely before storing. Pop it into an airtight container or wrap it well in plastic wrap and then foil. It’ll still be yummy in the fridge for about 2-3 days. Reheating is key here, though! For the best crisp, a quick trip in the air fryer or a hot oven (around 375°F or 190°C on a baking sheet) for about 10-15 minutes usually does the trick to bring back that crunch.
Frequently Asked Questions About Fried Chicken
Got questions about making the best fried chicken? I’ve got you covered! It’s totally normal to have a few queries when you’re aiming for that perfect crunch and juiciness.
How to Achieve Extra Crispy Fried Chicken?
Oh, for that ultimate crunch! Make sure your oil is at the perfect 350°F (175°C) – that’s step one. Also, letting that floured chicken sit for 10-15 minutes before frying? It’s not just a suggestion, it’s crucial for setting up that amazing crust! And if you’re feeling extra ambitious, a double coating – flour, buttermilk, flour again – creates a super thick, wonderfully crispy shell.
What is the Best Oil for Frying Chicken?
For classic fried chicken, you really can’t go wrong with a neutral oil that has a higher smoke point, like vegetable oil or canola oil. They let the chicken’s flavor shine through and handle the heat like champs. Peanut oil is also a fantastic option if you like a subtle nutty flavor!
Can I Make This Fried Chicken Healthier?
I get it, sometimes we want that fried chicken flavor but maybe a little lighter! While true frying gives that unbeatable crisp, you can get pretty close with other methods. Try baking it on a rack in a hot oven (around 400°F or 200°C) until it’s golden and cooked through. Or, for something crispy without all the oil, check out my recipe for Crispy Baked Chicken Parmesan – it uses panko breadcrumbs for amazing texture!
Nutritional Estimate for Fried Chicken
Now, a little note on nutrition – because we all want to know, right? This classic fried chicken is a delicious treat! A typical serving (which is usually one piece) is estimated to have around 450 calories, about 28g of fat, and a good punch of protein at about 25g. Obviously, these numbers are just estimates and can change depending on the exact size of your chicken pieces and how much oil they soak up. Enjoy it as the wonderful comfort food it is!
Share Your Fried Chicken Creations!
Alright, home cooks! Now that you’ve mastered this amazing fried chicken recipe, I’d absolutely LOVE to hear all about it! Did you have a super crispy crust? Was the inside oh-so-juicy? Please, please leave a comment below and tell me everything. If you snapped some pics, tag me on social media – I’m always so excited to see your culinary triumphs! It’s these moments that remind us why we love cooking. And if you have any quick questions, feel free to drop those in the contact form!
PrintClassic Southern Fried Chicken

Achieve perfectly crispy, golden-brown fried chicken with juicy, flavorful meat using this classic Southern-style recipe. Master the art of home-cooked fried chicken that rivals your favorite restaurants.
- Prep Time: 20 min
- Cook Time: 30 min
- Total Time: 50 min
- Yield: 4-6 servings 1x
- Category: Main Course
- Method: Frying
- Cuisine: American
- Diet: Vegetarian
Ingredients
- 2 cups all-purpose flour
- 1 tablespoon salt
- 1 teaspoon black pepper
- 1 teaspoon paprika
- 1/2 teaspoon cayenne pepper
- 1/4 teaspoon garlic powder
- 1/4 teaspoon onion powder
- 2 1/2 pounds chicken pieces (such as thighs, drumsticks, and breasts)
- 2 cups buttermilk
- 2 large eggs
- Vegetable oil, for frying
Instructions
- In a shallow dish, whisk together the flour, salt, black pepper, paprika, cayenne pepper, garlic powder, and onion powder.
- In another shallow dish, whisk together the buttermilk and eggs.
- Dip each piece of chicken into the buttermilk mixture, ensuring it is fully coated.
- Dredge each buttermilk-coated chicken piece in the seasoned flour mixture, pressing gently to ensure the flour adheres well. Place the floured chicken on a wire rack and let it sit for 10-15 minutes to allow the coating to set.
- Pour enough vegetable oil into a large cast-iron skillet or Dutch oven to reach a depth of about 1 inch. Heat the oil over medium-high heat until it reaches 350°F (175°C).
- Carefully place a few pieces of chicken into the hot oil, being careful not to overcrowd the skillet. Fry the chicken for about 6-8 minutes per side, or until golden brown and cooked through. The internal temperature should reach 165°F (74°C).
- Remove the fried chicken from the skillet and place it on a clean wire rack set over a baking sheet to drain any excess oil.
- Repeat with the remaining chicken pieces.
- Serve hot.
Notes
- For extra crispy skin, you can double-coat the chicken: dip in buttermilk, then flour, then back into buttermilk, and finally into flour again.
- Ensure your oil is at the correct temperature before frying. Too low and the chicken will be greasy; too high and it will burn before cooking through.
- You can adjust the cayenne pepper to control the level of spice.
Nutrition
- Serving Size: 1 piece
- Calories: 450
- Sugar: 2g
- Sodium: 800mg
- Fat: 28g
- Saturated Fat: 8g
- Unsaturated Fat: 20g
- Trans Fat: 0g
- Carbohydrates: 25g
- Fiber: 2g
- Protein: 25g
- Cholesterol: 150mg