
Do you ever get that intense craving for Chinese takeout, that savory, slightly salty hit of classic fried rice, but then the guilt kicks in because you promised yourself you’d stick to your low-carb goals? I totally get it! That’s why I spent ages testing and re-testing this cauliflower fried rice method.
My goal wasn’t just to make a vegetable swap; my mission, as always here at Kings Cook, was to nail the texture. You deserve a healthy alternative that beats the soggy microwave versions any day. After rigorously testing this recipe for flavor and texture synchronization, I can promise you, this technique delivers that fluffy, slightly chewy bite you crave in a better than takeout fried rice experience. This is truly a recipe built on reliability!
- Why This Cauliflower Fried Rice Recipe Is Your New Weeknight Hero (E-E-A-T Focus)
- Essential Ingredients for Authentic Flavor Cauliflower Fried Rice
- Step-by-Step Instructions for Perfect Cauliflower Fried Rice
- Making Your Cauliflower Fried Rice Better Than Takeout
- Serving Suggestions for Your Easy Weeknight Dinner
- Storage and Reheating Instructions for Low Carb Meal Prep Ideas
- Troubleshooting Common Cauliflower Fried Rice Issues
- Frequently Asked Questions About Cauliflower Fried Rice
- Your Kitchen Confidence Starts Now
Why This Cauliflower Fried Rice Recipe Is Your New Weeknight Hero (E-E-A-T Focus)
I know you’re busy, so let me tell you exactly why this particular Cauliflower Fried Rice Recipe deserves prime placement on your dinner rotation. It’s fast, incredibly flavorful, and it solves that major issue everyone has with vegetable substitutes.
- It’s genuinely a 30 Minute Fried Rice meal, perfect for when you need dinner on the table ASAP.
- It’s the ultimate Healthy Fried Rice Alternative that doesn’t taste like you’re missing anything!
- Every ingredient is accessible; no special grocery store trips needed, trust me on this one.
Achieving the Best Cauliflower Rice Texture
Here’s our biggest secret for that unbelievably satisfying bite: we treat the cauliflower rice like it’s real rice first. That initial dry-sauté step I talk about in the instructions is non-negotiable. It evaporates the water content before we add any sauces or salty liquids. This simple technique is the difference between mush and achieving that genuine, slightly crisp Better Than Takeout Fried Rice texture.
Dietary Flexibility: Keto Fried Rice and Gluten Free Fried Rice Ready
This recipe was built for everyone! Because we rely on tamari instead of flour-based sauces, this is completely Gluten Free Fried Rice friendly right out of the gate. Even better? It naturally fits right into any strict low-carb lifestyle, making it an amazing Keto Fried Rice option. And yes, just swap the tamari, and you’re good to go for Whole30 Fried Rice too. Easy, right?
Essential Ingredients for Authentic Flavor Cauliflower Fried Rice
Okay, you’ve got the technique down; now let’s talk ingredients! For this Cauliflower Fried Rice Recipe to truly sing—to taste like that take-out you crave—you need quality components. We’re keeping it simple, but every item plays a part. Don’t skip the fresh garlic and ginger; they are non-negotiable for that authentic Asian flavor profile!
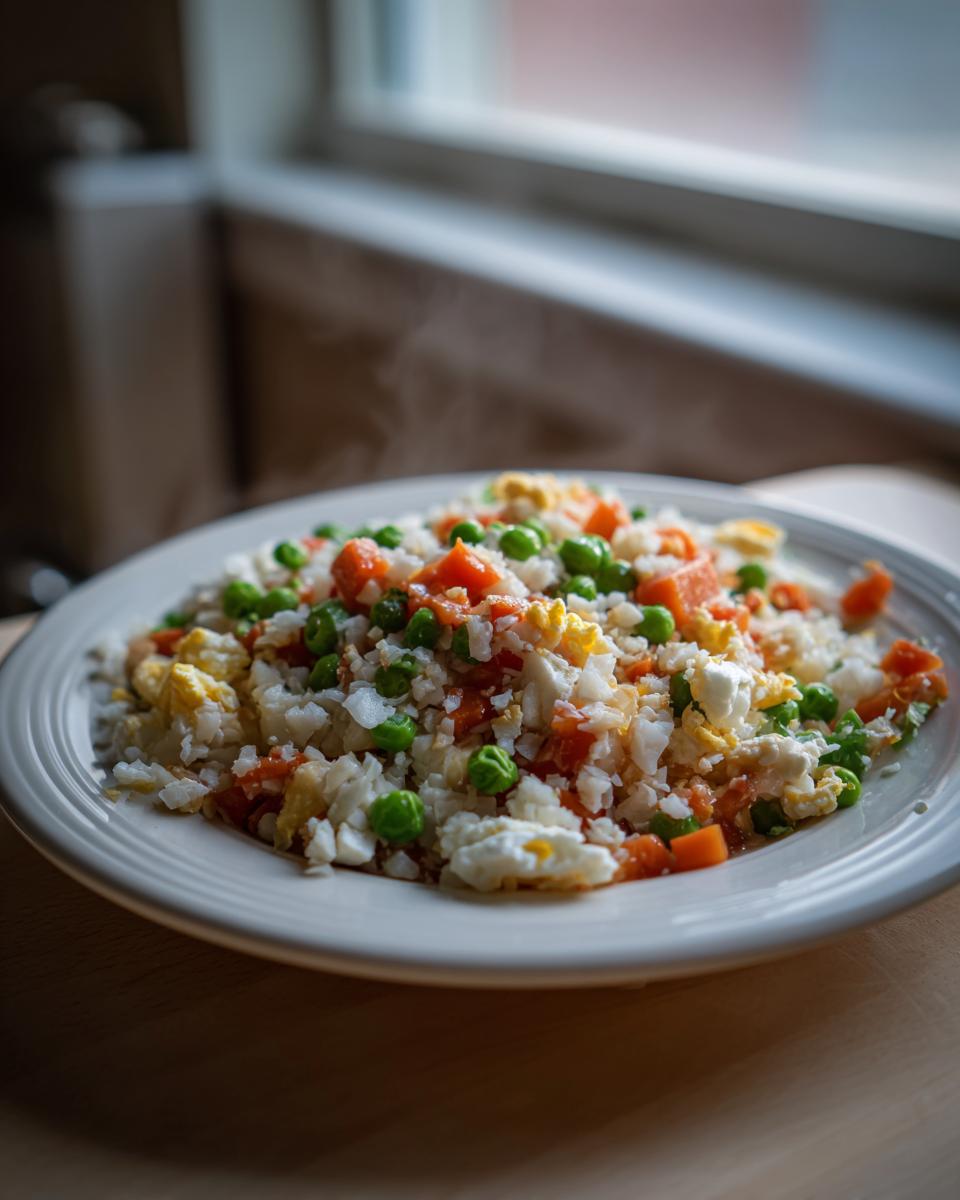
You’ll need about 1 lb of riced cauliflower. If you’re using fresh, pulse it until it looks like grains, but if you use frozen, just know you need to be extra diligent during that initial drying step. We’ll also need our protein, which you can customize—4 ounces of diced chicken, shrimp, or pork works perfectly. Don’t forget the two eggs for that classic look!
Ingredient Notes and Substitutions for Your Low Carb Fried Rice
Listen, I know everyone’s pantry looks different, so here are my little notes to keep this dish diet-friendly. For the savory sauce base, we use tamari, which keeps it Gluten Free Fried Rice friendly. But if you are strictly following Whole30 Fried Rice, you MUST swap that tamari out for coconut aminos—it gives a slightly sweeter profile, but it works beautifully.
Also, make sure you use toasted sesame oil at the very end. It’s an aromatic addition, not a cooking oil! It’s what seals the deal on that rich, savory finish we are aiming for in this Low Carb Fried Rice!
Step-by-Step Instructions for Perfect Cauliflower Fried Rice
Alright, let’s get cooking! This is where the magic happens, and remember, making this a successful Quick Cauliflower Rice Meal depends entirely on timing. We aren’t just dumping things in a wok; we are layering flavor and, most importantly, draining that dreaded moisture!
First things first, you need to have your cauliflower prepped. If you’re starting with whole heads, pulse them in your food processor until they look like rice grains. If you grabbed a bag of frozen stuff—no worries, just move straight to the next step, but be ready to cook it a little longer!
The Crucial Drying Technique for Fluffy Cauliflower Fried Rice
This is the moment you’ve been waiting for! Take that riced cauliflower, fresh or frozen, and dump it into a large skillet over medium-high heat—dry! Yes, dry! Don’t you dare add oil yet. You need to cook this, stirring constantly, for about five to seven minutes. I’m looking for the moment when you can see the edges start to turn faintly golden or toasted. That means the water content has cooked off. Once it looks happy and dry, scoop it right out and set it aside. Trust me, this move ensures you get that absolutely perfect, non-soggy texture that makes this Cauliflower Fried Rice a keeper.
Building the Savory Cauliflower Stir Fry Base
Now we bring in the flavor! Add about a teaspoon of your avocado oil to that nice, hot pan. Throw in your cooked protein—whether that’s diced chicken, shrimp, or pork—and cook it until it’s a nice brown color, then pull it out and put it with the cauliflower. Next up: the eggs. Beat those two beauties and quickly scramble them in the same pan until they’re just set. Chop ’em up and set them aside too! Don’t worry if the pan looks empty; we’ve just reserved space for the flavor builders. I’d head over and check out my trick for perfect Chicken Fried Steak while you wait for the oil to heat up, just kidding, but staying organized helps!
Now, add the rest of your oil, toss in your diced onion, and let it soften for about three minutes. In go the minced garlic and grated ginger—cook them until they smell amazing, just about 30 seconds. Then, toss in your frozen mixed veggies until they heat through, maybe three more minutes.
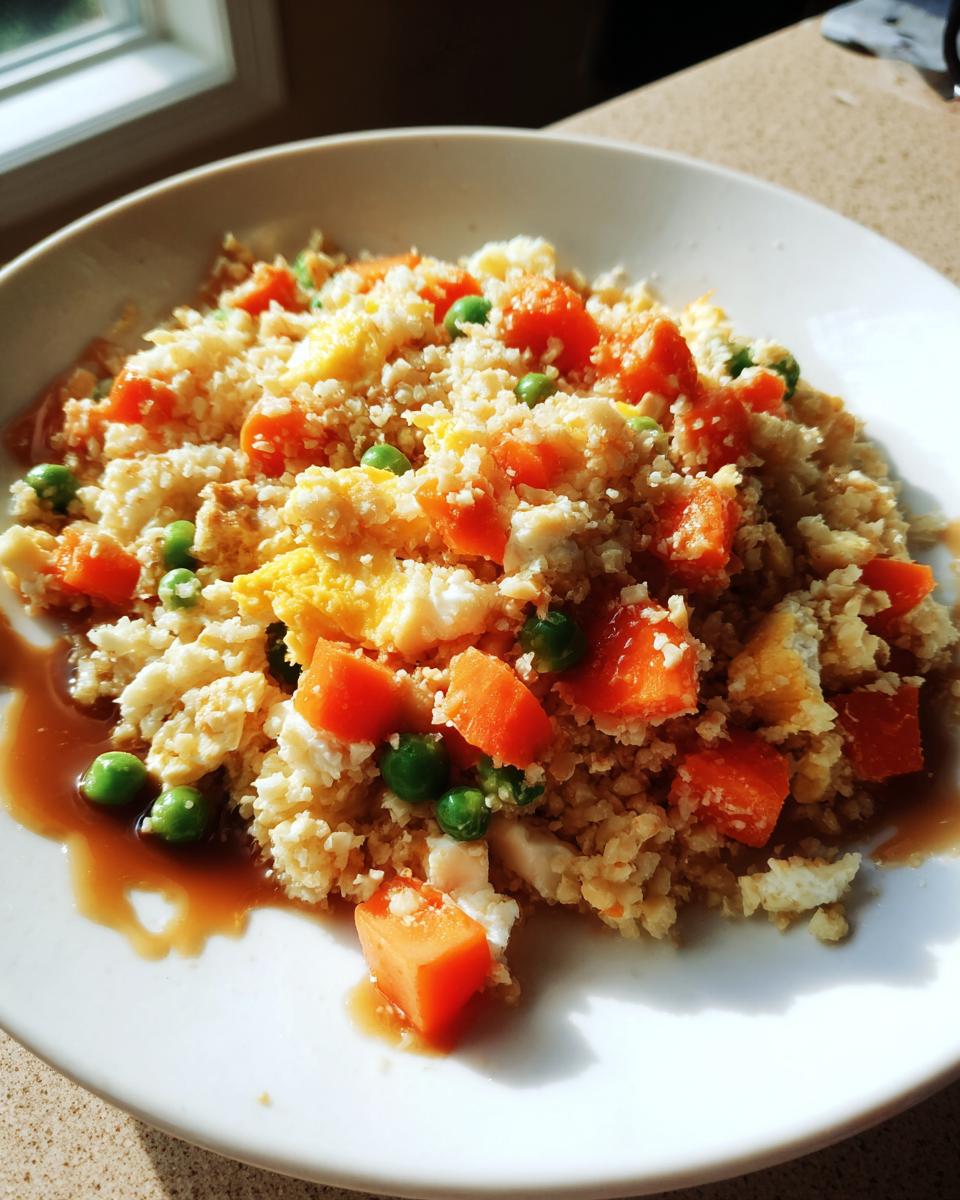
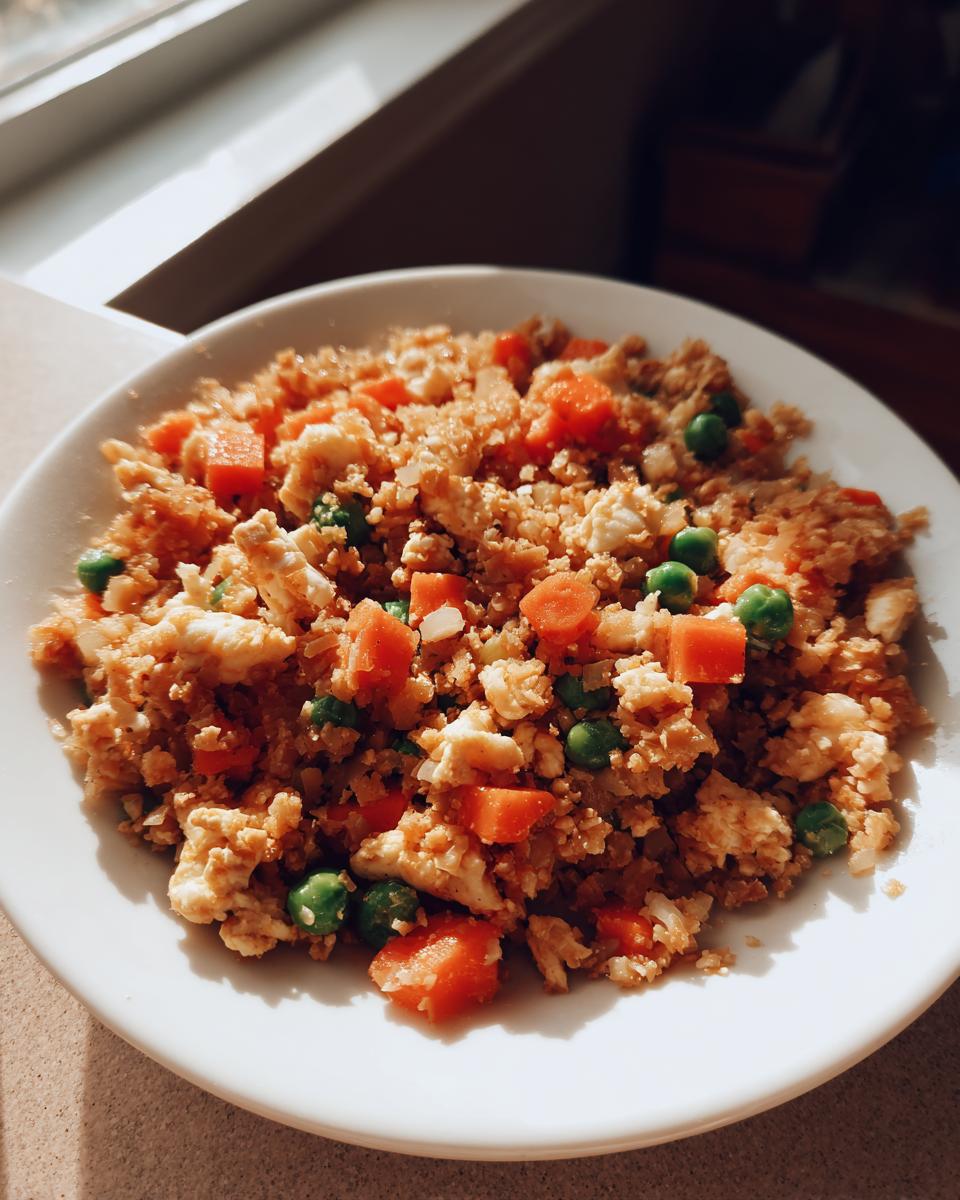
Finally, everything comes home! Add that dried cauliflower rice back in, along with your cooked protein, the tamari, sesame oil, and pepper. Stir everything hard over that medium-high heat for a good two or three minutes to really let those flavors marry. Right at the end, fold in your chopped eggs. Taste it for salt. If it needs a little boost, now’s the time to add it before topping it all with those green onions!
Making Your Cauliflower Fried Rice Better Than Takeout
I absolutely love the science behind making something healthy taste incredibly indulgent. When we talk about getting that authentic “takeout” flavor in this Cauliflower Fried Rice, it all comes down to the alchemy of the final seasoning mix. You’ve done the hard work drying the rice; now we reward ourselves with bold flavor!
The role of tamari (or soy sauce) is crucial here. It gives us that deep umami that white salt just can’t replicate. But the real game-changer, the component that screams “I ordered this from my favorite spot,” is the toasted sesame oil. You add it right at the end, off the heat if you can manage it, because that nutty perfume is volatile. You want to smell that gorgeous aroma the minute you lift the serving spoon!

Honestly, achieving this perfect savory punch took me ages. Early attempts were just bland vegetable stir-fry—nothing special. But once I started using a real grated ginger alongside the garlic, and then making sure the tamari hit the hot cauliflower rice just long enough to caramelize slightly, that’s when I knew I had cracked the code. It’s what makes this dish a true favorite, not just a compromise. If you want another look at essential flavor balancing, check out how some folks handle low-carb sauce layering here, but trust my formula for this one!
Serving Suggestions for Your Easy Weeknight Dinner
The beauty of this Cauliflower Fried Rice Recipe is how completely versatile it is. Since the rice itself cooks up so light and fluffy—thanks to that crucial drying step—it’s an amazing canvas for whatever protein you have in the fridge. It easily moves from being a satisfying side dish to a full, flavor-packed main event, making it the definition of an Easy Weeknight Dinner.
If you’re aiming for a complete meal, just load it up! We already covered adding chicken, shrimp, or pork, but don’t forget the power of the egg—it stretches the meal wonderfully. I always feel like scrambled eggs are the cheapest protein bump you can make, and they taste fantastic mixed right in. If you’ve kept the base simple (just veggies and eggs), consider serving it alongside something else rich, like maybe my easy Chicken Shawarma for an incredible flavor fusion!
Even though we cook everything in one pan, making it a true One Pan Cauliflower Rice Dinner, remember you can easily double the veggies and skip the meat if you need a lighter meal. Or, if you’re meal prepping, portion it into containers with pre-cooked beef or tofu stirred in on the day you cook. It reheats surprisingly well, and you’ll be set for lunch all week long!
Storage and Reheating Instructions for Low Carb Meal Prep Ideas
I absolutely adore that this cauliflower fried rice works so perfectly for meal prepping. It’s filling, light, and fits right into those low-carb plans we make on Sunday, but the reheating part trips people up every time! If you just toss this in the microwave for two minutes, you risk turning that beautifully dry cauliflower into a steamy, mushy mess. We worked too hard to avoid sogginess the first time around to let that happen now!
For storage, keep it simple: airtight containers are your best friend. If you made this as a complete meal with chicken or shrimp already mixed in, it should keep beautifully in the fridge for about three or four days. If you made a big batch of just the seasoned rice, it keeps even longer, maybe up to five days. Pack it tight!
Now for the reheating magic! If you’re eating just a small portion, the stovetop is still the champion. Put a tiny bit of oil (avocado or coconut oil works fine) in a skillet over medium heat. Dump in the portion you want to eat, maybe a tablespoon of water if it seems really dry, and stir it quickly. It should heat through in about three to five minutes and retain almost all of that great texture. Seriously, it’s worth the extra three minutes on the stovetop over nuking it!
If you *must* use the microwave—I get it, sometimes you’re running out the door—make sure you put a damp paper towel right over the top of the rice before you heat it. This traps the steam in a controlled way. Heat it in 30-second bursts, stirring in between, until it’s just warmed through. It won’t be quite as perfect as the skillet method, but it’s better than eating it cold! For more ideas on refreshing leftovers, check out my tips for making a great Quinoa Salad Recipe, which also needs careful reheating!
Troubleshooting Common Cauliflower Fried Rice Issues
Okay, let’s get real for a second. Even when you follow the best recipe in the world—and trust me, I’ve tested this one until my wok was smoking—sometimes things go a little sideways. The absolute enemy of good cauliflower fried rice is water. If you’ve ended up with a soupy mess, don’t panic! It happens to the best of us, and it’s almost always fixable.
The number one reason for wet, soggy cauliflower rice is skipping or rushing that initial drying stage. If you don’t cook the moisture out of the rice *before* introducing the soy sauce or veggies, that liquid has nowhere to go but right back into your cauliflower!
If your rice still feels damp after you’ve sautéed it alone, crank that heat up a notch! You want it to sizzle, not steam. Seriously, keep stirring it for a full 5 to 7 minutes. It needs those little toasted edges to create structure.
Now, let’s say you followed the drying step perfectly, but then you got excited and dumped in way too much tamari or some watery frozen veggies that you didn’t cook down enough? Oops! Here’s my expert tip for rescue: If you have any leftover, uncooked riced cauliflower floating around, toss a cup of that dry stuff into the skillet. It acts like a sponge and soaks up the excess liquid immediately! Stir it in quickly over high heat, and that extra raw cauliflower will absorb the moisture and cook right into the dish, thickening everything up beautifully. It’s like a secret ingredient stabilizer!
Another thing you might run into is sticking. If your pan is too crowded, the ingredients won’t dry out; they’ll just crowd each other and steam. If you look down and see more than three or four distinct layers of ingredients touching the pan at once, you need to cook in batches! It’s more effort, but cooking in batches ensures every piece gets direct, dry heat. That’s the real way to get that incredible, separated grain texture you see in restaurants.
Frequently Asked Questions About Cauliflower Fried Rice
I always get asked the same few things when people try this out for the first time—which is great because it means you all are paying attention to the important details! Since this is a major departure from traditional rice, it’s smart to have a few things clarified beforehand. Let’s knock out a few of these common questions so you can start cooking with total confidence.
Can I use pre-riced frozen cauliflower for this Cauliflower Fried Rice Recipe?
Yes, you absolutely can! I know life gets busy, and sometimes that bag of frozen riced cauliflower is a lifesaver. However, here’s the deal: frozen cauliflower holds way more water than fresh, even after it’s been pre-riced. Think of it like this: it starts with a handicap! So, if you use frozen, you need to be even MORE aggressive during that critical drying stage I covered in the instructions. Skip the gentle sauté. You need high heat and constant movement for a good 7 to 10 minutes until you see some real browning. If you rush it, you’re going to end up with the soggy dish we are trying so hard to avoid. It’s worth the extra stir, trust me!
How can I make this Keto Fried Rice even richer?
If you’re really leaning into the richness, we need to dial up the healthy fats! The recipe calls for avocado oil, which is great because it has a high smoke point, but if you want that deep, savory flavor often missing from a Vegetable Fried Rice Swap, try using ghee instead of the avocado oil for sautéing the aromatics. Ghee (clarified butter) adds an incredible milky depth that oil just can’t touch.
For protein richness, if you aren’t strictly avoiding pork, dicing up a couple of slices of bacon or using some rendered bacon fat instead of the initial oil gives the whole dish an amazing smoky, salty base. You can cook the bacon first, remove it, and then use that rendered fat to cook the aromatics and eggs later. That’s a total game-changer for a deeply flavorful Keto Fried Rice. If you want to see how I use eggs in other satisfying meals, you should take a peek at my classic deviled eggs recipe!
How is the flavor profile different from traditional fried rice?
That’s a fantastic question! With traditional fried rice, the rice grains absorb a lot of the sauce flavor over the cooking time. Since cauliflower rice doesn’t absorb liquids the same way, we have to crank up the impact of our seasoning agents! That’s why we lean heavily on fresh ginger and garlic, and that splash of toasted sesame oil right at the end is crucial—it’s non-negotiable for that signature nutty aroma. It’s less about the volume of sauce and more about the intensity of the ingredients you add, ensuring your Egg Fried Cauliflower Rice tastes bold!
Your Kitchen Confidence Starts Now
Seriously, you made it through! Now that you have the absolute best technique for getting non-soggy texture—and trust me, that’s 90% of the battle here—I really, really want you to try this out this week. This cauliflower fried rice is proof that you don’t have to compromise flavor to stick to your healthy eating goals.
Don’t be shy! Once you nail that initial dry-sauté, you’ll feel like a total pro. I want to hear how it went. Did you add chicken? Did you use shrimp? Tell me in the comments below! Hearing about your successes is honestly the best part of running Kings Cook. It’s how we prove that anyone, and I mean anyone, can feel that joy and confidence in their own kitchen.
If you’re looking for more reliable recipes designed just like this one—easy, accessible, and rigorously tested—you should definitely check out the About page to see my whole philosophy! Now go enjoy that guilt-free takeout!
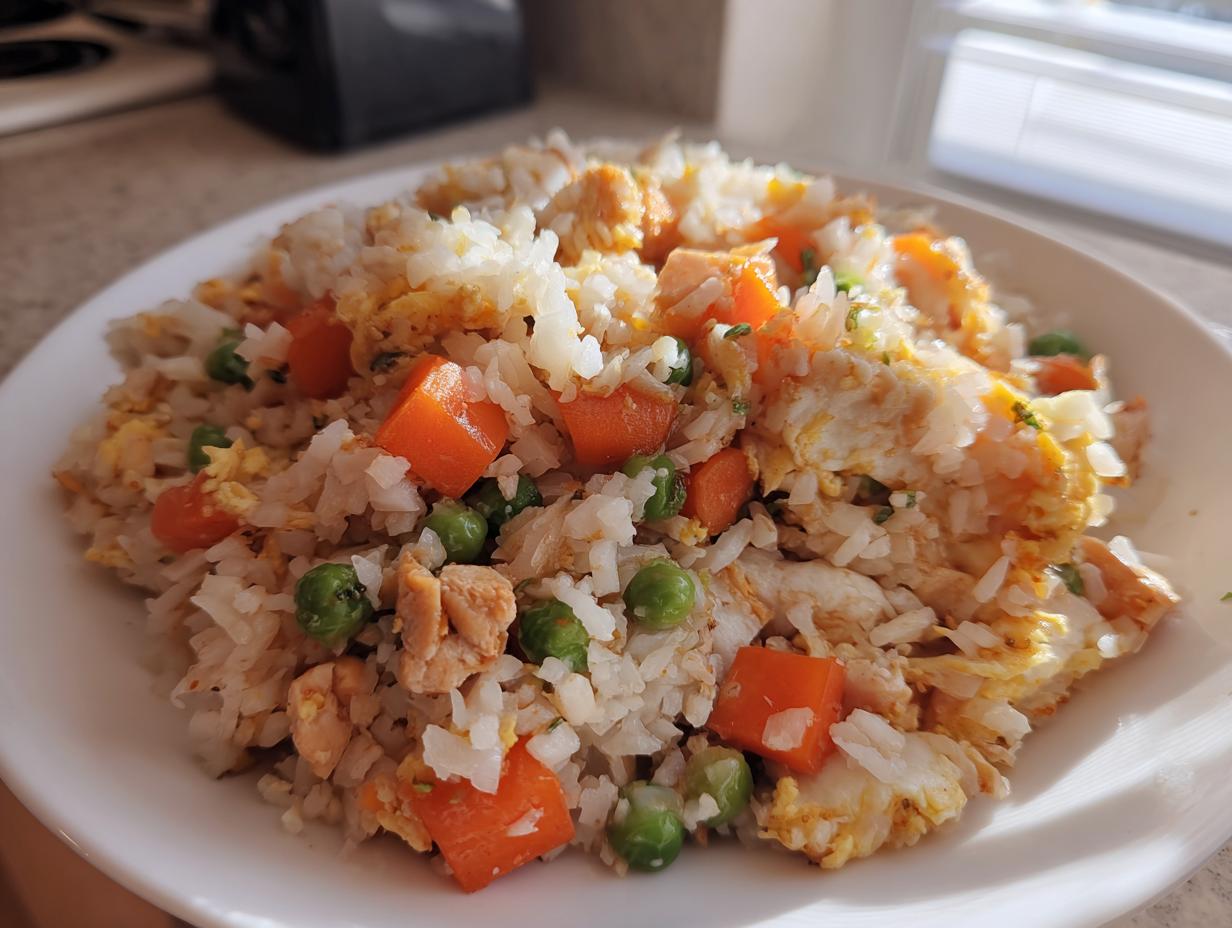
PrintThe Ultimate Low-Carb Cauliflower Fried Rice: Better Than Takeout Texture & Flavor (Keto/GF Ready)

You need a healthy alternative to traditional fried rice that tastes like takeout. This recipe focuses on techniques to keep your cauliflower rice fluffy, not soggy, making it a perfect Keto, Gluten-Free, and Whole30 weeknight dinner.
- Prep Time: 10 min
- Cook Time: 20 min
- Total Time: 30 min
- Yield: 4 servings 1x
- Category: Dinner
- Method: Stir-Frying
- Cuisine: Asian Inspired
- Diet: Keto
Ingredients
- 1 tablespoon avocado oil or coconut oil
- 1 pound riced cauliflower (fresh or frozen, see note for best texture)
- 1/2 cup diced onion
- 1 cup mixed frozen vegetables (peas, carrots, corn blend)
- 2 large eggs, lightly beaten
- 4 ounces cooked protein (chicken breast, shrimp, or pork), diced (optional)
- 2 cloves garlic, minced
- 1 teaspoon fresh ginger, grated
- 3 tablespoons tamari or low-sodium soy sauce
- 1 teaspoon toasted sesame oil
- 1/4 teaspoon white pepper
- 2 green onions, sliced, for garnish
Instructions
- Prepare the cauliflower rice: If using fresh, pulse cauliflower florets in a food processor until they resemble rice grains. If using frozen, skip this step.
- Dry the cauliflower rice: This step is crucial for non-soggy texture. Place the riced cauliflower in a large, dry skillet over medium-high heat. Cook, stirring frequently, for 5 to 7 minutes until most of the moisture has evaporated and the rice begins to look slightly toasted. Remove the cauliflower rice from the skillet and set aside.
- Cook the protein (if using): Add 1 teaspoon of the avocado oil to the same skillet. Add your diced chicken, shrimp, or pork. Cook until browned and cooked through. Remove the protein and set aside with the cauliflower rice.
- Scramble the eggs: Add the remaining oil to the skillet. Pour in the beaten eggs and cook, scrambling quickly until just set. Remove the eggs and chop them roughly. Set aside.
- Sauté aromatics and vegetables: Add the diced onion to the skillet and cook for 3 minutes until softened. Add the minced garlic and grated ginger; cook for 30 seconds until fragrant. Add the frozen mixed vegetables and cook until heated through, about 3 minutes.
- Combine and season: Return the dried cauliflower rice and cooked protein (if using) to the skillet. Pour in the tamari/soy sauce and toasted sesame oil. Add the white pepper. Stir everything together quickly over medium-high heat for 2 to 3 minutes to heat through and combine flavors. Do not overcook at this stage.
- Finish and serve: Stir in the scrambled eggs. Taste and adjust seasoning if needed. Serve immediately, garnished with sliced green onions.
Notes
- To prevent soggy cauliflower rice, ensure you cook the riced cauliflower alone first until it is dry and slightly browned before adding any other ingredients. This mimics the texture of cooked grains.
- For a Whole30 compliant version, substitute tamari with coconut aminos.
- This recipe works well with tofu or ground turkey as alternative protein sources.
- If you prefer a spicier flavor, add a dash of sriracha or red pepper flakes with the soy sauce.
Nutrition
- Serving Size: 1 serving (without added protein)
- Calories: 160
- Sugar: 5g
- Sodium: 550mg
- Fat: 9g
- Saturated Fat: 2g
- Unsaturated Fat: 7g
- Trans Fat: 0g
- Carbohydrates: 15g
- Fiber: 5g
- Protein: 5g
- Cholesterol: 75mg