
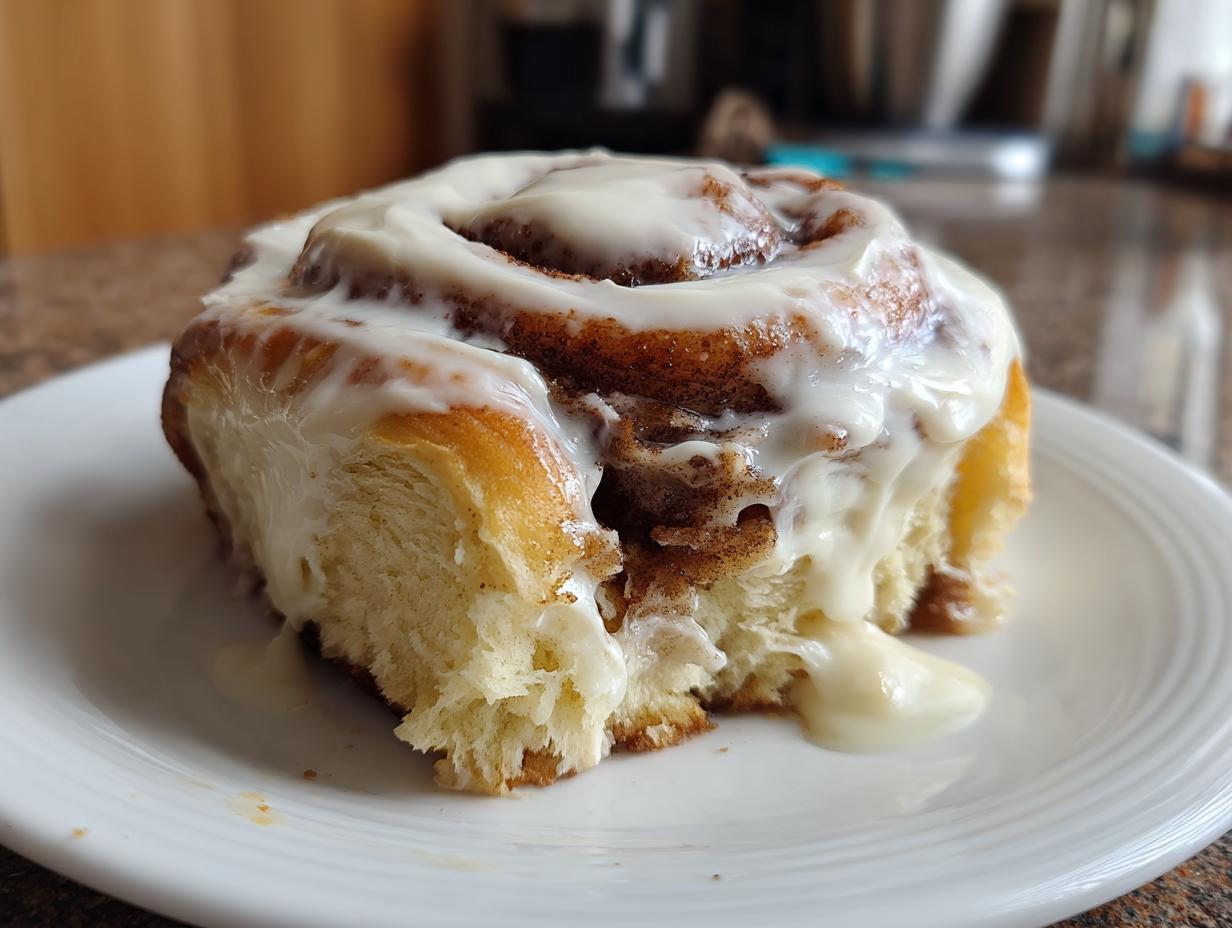
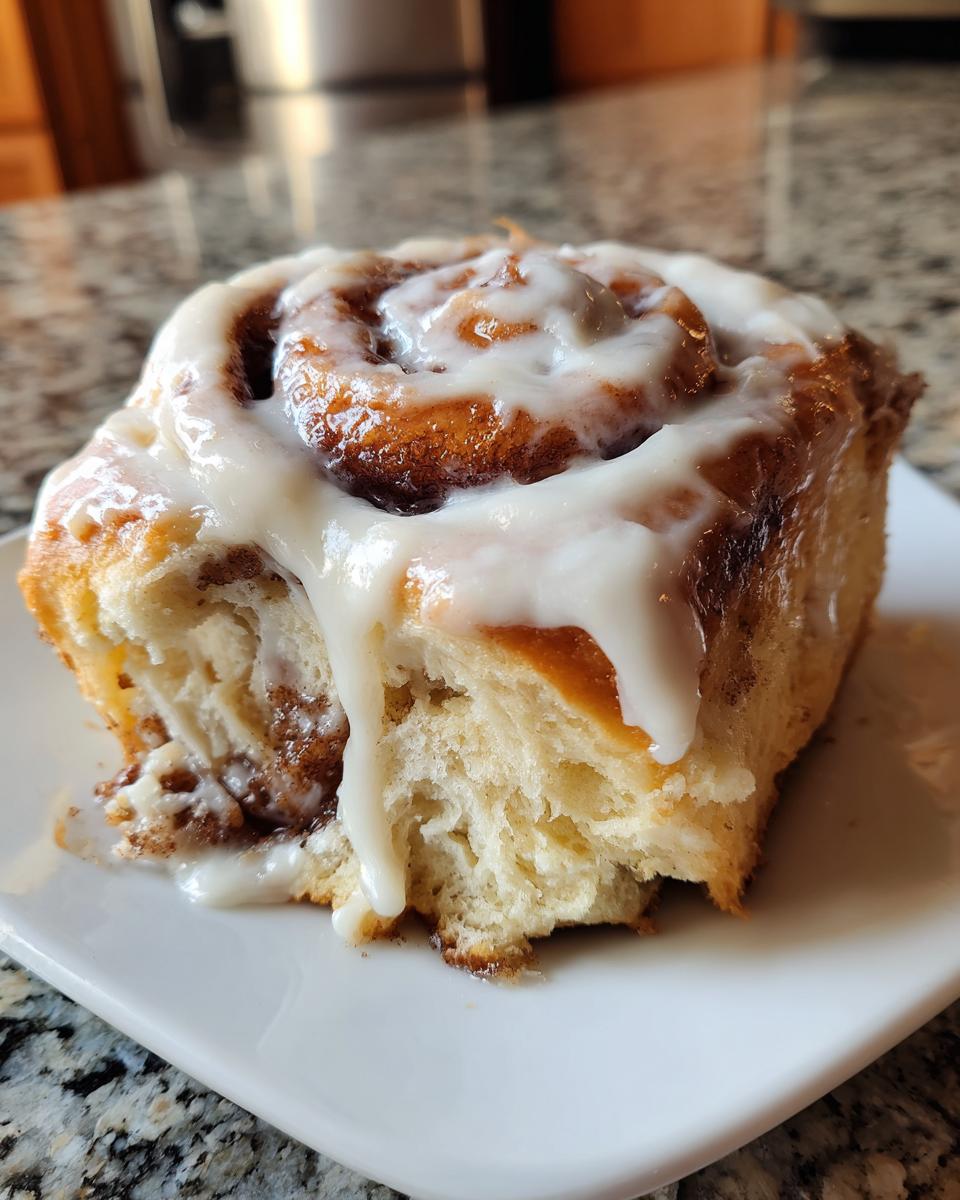
If you’ve ever walked into a bakery and inhaled that incredible scent of warm, gooey sweetness, you know the magic I’m talking about. Many of you probably think those homemade cinnamon rolls are impossible outside a professional kitchen, but trust me, they are not! I’m Katherine, and I promise you, this is the absolute best, fluffiest recipe for achieving those gorgeous, bakery-style buns right in your own home.
Baking these rolls always pulls me right back to my grandma’s kitchen. There’s just something so comforting about preparing the yeasted dough by hand, feeling it get smooth and elastic under your palms. Forget dry, dense disappointments; these are unbelievably soft, and that thick cream cheese frosting just seals the deal. Get ready to impress everyone this weekend!
- Why You Will Love These Fluffy Homemade Cinnamon Rolls
- The Ultimate Ingredient List for Homemade Cinnamon Rolls
- Step-by-Step Guide to Perfect Homemade Cinnamon Rolls
- Tips for No Fail Homemade Cinnamon Rolls Success
- Make Ahead Cinnamon Rolls: Weekend Breakfast Baking Made Easy
- Serving Suggestions for Your Homemade Cinnamon Rolls
- Frequently Asked Questions About Homemade Cinnamon Rolls
- Estimated Nutritional Data for Homemade Cinnamon Rolls
- Share Your Best Homemade Cinnamon Rolls Creations
Why You Will Love These Fluffy Homemade Cinnamon Rolls
I get asked all the time what sets these apart from the rolls that turn out flat or tough. Honestly, it comes down to the process, but these results are totally worth the effort! Here’s why I think this is your new go-to recipe:
- They are genuinely fluffy bakery style cinnamon rolls. We achieve maximum height and softness thanks to the room-temperature ingredients and proper rising times.
- This is a no fail cinnamon rolls approach! I’ve tested this dough countless times, and it yields perfectly pliable dough that is easy to roll out without tearing.
- You get that unbelievable, rich texture. They are tender throughout, never crumbly, thanks to the perfect balance of milk and butter in the dough.
- The filling is everything! We use a high ratio of brown sugar and cinnamon so you get that intense, gooey cinnamon roll filling that bubbles up beautifully.
- The technique is straightforward, even with yeast. I break down the mixing and kneading so you feel confident handling the dough, even if you’re new to yeasted sweets.
- They smell absolutely incredible while baking; it’s the best aroma for a Saturday morning, hands down!
The Ultimate Ingredient List for Homemade Cinnamon Rolls
Okay, let’s talk ingredients! For homemade cinnamon rolls this fluffy, we can’t skimp on quality or precision. I’ve listed everything you need below, broken down into the three sections: the dough itself, that glorious gooey filling, and the frosting that makes everyone swoon. Make sure you have everything measured out before we start mixing, especially those temperature-sensitive items!
For the Soft Dough
This yeast dough is the foundation of fluffiness, so temperature matters here. Those yeast granules need a warm bath to wake up, but they are sensitive! We are aiming for 110°F for the milk—not too hot, or you’ll kill the yeast, but warm enough to make it happy.
- 1 cup whole milk, warmed to about 110°F (this is important!)
- 2 1/4 teaspoons active dry yeast
- 1/2 cup granulated sugar
- 2 large eggs, make sure they are at room temperature
- 1/2 cup unsalted butter, melted and then cooled down just a little bit
- 4 1/2 cups all-purpose flour, plus extra for dusting the counter later
- 1 teaspoon salt
For the Gooey Cinnamon Roll Filling
This mix is where the magic happens—it’s what creates that incredible, sticky texture once baked. Don’t worry, this mixture is super simple to throw together while the dough is doing its first rise. It ensures a truly gooey cinnamon roll filling.
- 1 cup (that’s two full sticks!) unsalted butter, softened completely until spreadable
- 1 1/2 cups packed light brown sugar (packing it in gives you that moisture!)
- 3 tablespoons ground cinnamon
For the Classic Cream Cheese Frosting Recipe
We can’t forget the topping! This takes just minutes, but the flavor combination of tangy cream cheese and sweet vanilla gives you that perfect classic cream cheese frosting recipe contrast to the rich cinnamon.
- 8 ounces cream cheese, softened to room temperature
- 1/2 cup unsalted butter, softened
- 4 cups powdered sugar, make sure you sift this so there are no lumps!
- 1 teaspoon pure vanilla extract
- 2-4 tablespoons whole milk, you’ll add this slowly to get the right texture
Step-by-Step Guide to Perfect Homemade Cinnamon Rolls
Alright, this is where the magic happens and the fun begins! Making the best homemade cinnamon rolls is really just about respecting the yeast and being steady with your rolling. Don’t stress about perfection here; just follow these steps, and I promise you’ll end up with soft, beautiful buns. We are going to tackle the dough, the rise, the filling, and finally, the baking all one after another. If you’re hungry right now, you can always peek ahead at my full recipe for gooey homemade cinnamon buns recipe, but stick around, the details here make all the difference!
Making and Kneading the Cinnamon Rolls Dough
We always start by getting that yeast happy. Pour your warm milk into your mixing bowl—I love using my stand mixer for this part, but you can absolutely do this gently by hand! Sprinkle in the dry yeast and wait five minutes until it gets foamy. That foam tells you the yeast is alive and ready to make your dough rise high!
Next, mix in the sugar, those room-temperature eggs, and the slightly cooled melted butter. Once those wet ingredients are one, we start adding the flour and salt slowly. This is the beginning of learning how to make cinnamon rolls dough that works every time.
Now for the kneading! If you’re using a stand mixer with the dough hook, let it run on medium-low speed for about 6 to 8 minutes. If you are kneading by hand on your lightly floured counter, you’ll need to put a little elbow grease in for about 10 minutes. You’re looking for a dough that feels smooth, springs back when you poke it softly, and is only slightly sticky—not like molasses!
The Rising Process for Fluffy Homemade Cinnamon Rolls
The rising stages are non-negotiable if you want those fluffy homemade cinnamon rolls! We need that yeast to build structure.
First Rise: Pop your kneaded dough into a lightly oiled bowl—just turn it over once to coat it. Cover that bowl tight with plastic wrap. Find the warmest, draft-free spot in your kitchen, maybe near the oven (but not on top of it!). Let it sit and double in size, which usually takes about an hour to an hour and a half. Don’t rush this! If your kitchen is cold, it might take longer.
Second Rise: Once you’ve rolled and shaped those beauties, they need a second nap. Place them in their baking dish, cover them loosely so they don’t dry out, and let them sit again until they look wonderfully puffy—usually 30 to 45 minutes. They should almost be touching each other before they go into the oven; that keeps them soft!
Rolling, Filling, and Shaping Your Homemade Cinnamon Rolls
Time to roll things out! Punch that first risen dough down gently—that’s satisfying! On a lightly floured surface, use a rolling pin to stretch the dough out into a perfect rectangle, aim for 12 inches by 18 inches. A little extra length on one side helps with sealing later.
Take your softened butter, brown sugar, and cinnamon filling—I hope it smells amazing right now!—and spread it evenly across the surface. Make sure you leave about a half-inch border clear along one of the long edges. This “clean border” is our secret to getting a tight seal!
Starting on the opposite side, roll that dough up tightly, creating one long log. Roll consistently so your swirls are even. Once you have the whole log rolled, pinch that clean edge you left behind right onto the main log to seal it shut. Oops, make sure that seam is fully closed so the filling doesn’t leak out while they bake!
Now, slice it up! Use a sharp knife or some unflavored dental floss (my trick for clean cuts!) to divide that log into 12 equal pieces, about an inch and a half thick each. Place them cut-side up into your prepared baking dish.
Baking and Creating the Classic Cream Cheese Frosting
Preheat your oven to 375°F (190°C). The rolls go in for about 20 to 25 minutes. Keep an eye on them! You want tops that are golden brown, but remember, slightly soft centers mean they’ll be gooey later. If you bake them until they are rock hard in the middle, they will be dry!
While they cool slightly—and I mean slightly, you want them warm for glazing—we make that frosting. Whip the softened cream cheese and butter together until they are lump-free. Gradually mix in the sifted powdered sugar and vanilla. Here’s where you decide the consistency: add milk just one tablespoon at a time until it’s thick enough to hold its shape but still easily spreadable. If you want a runnier drizzle, add a tiny bit more milk. Speaking of flavor boosters, if you ever want an extra cinnamon kick on the side, you should check out this quick cinnamon butter whipped recipe!
When the rolls are still warm, slather that frosting all over them. That warmth melts the frosting just enough so it sinks into all those beautiful cinnamon swirls. Enjoy them warm!
Tips for No Fail Homemade Cinnamon Rolls Success
We want your kitchen to produce the absolute best homemade cinnamon rolls on the block, not a baking disaster! Troubleshooting is part of the fun, really. My biggest piece of advice, which I learned the hard way, is using room temperature ingredients for the dough—eggs and butter really need to be soft so they incorporate smoothly. If your dough isn’t rising well, it’s usually because your kitchen is too chilly, so find a warmer spot for that second rise.
If you find yourself with runny frosting, don’t panic! Just slowly beat in more sifted powdered sugar, maybe a half-cup more at a time, until it thickens up to a nice, spreadable texture for that classic topping. And remember, if you want an even faster treat sometimes, I have a recipe for quick gooey cinnamon roll bites that skip the yeast entirely! Patience during the initial rising is what guarantees that fluffy texture we are aiming for.
Make Ahead Cinnamon Rolls: Weekend Breakfast Baking Made Easy
If you’re planning a big brunch, you absolutely need to know this trick for making homemade cinnamon rolls ahead of time! This is honestly my secret weapon for stress-free weekend breakfast baking. After you’ve shaped your rolls and placed them snugly into that 9×13 dish, cover the dish tightly with plastic wrap—be generous with the wrap to keep them from drying out in the fridge.
Tuck them into the refrigerator overnight. They can chill out there for up to 18 hours! When morning comes, pull them out about an hour before you plan to bake. They still need that second rise time, but it will be a bit slower in the cooler kitchen air. I usually add an extra 10 to 15 minutes to that final proofing time just to make sure they are puffy enough before they hit the 375°F oven. Check out my detailed guide on make ahead cinnamon rolls recipe for the full breakdown!
Serving Suggestions for Your Homemade Cinnamon Rolls
Honestly, when do you *not* serve the world’s best cinnamon rolls? They are perfect for those lazy weekend mornings when you can actually take the time to let the dough rise properly. They turn an ordinary Saturday into something special, which is why they are a huge hit for weekend breakfast baking gatherings or holiday brunches.
When serving these big, luscious rolls to your friends or family, I like to keep things classic. Because they are so rich and already loaded with that gooey filling, they don’t need much else on the plate. A simple side of fresh, bright fruit helps cut through the richness—think sliced strawberries or maybe some orange segments!
They pair absolutely wonderfully with hot coffee, naturally. But if you are hosting brunch, I always make sure I have a pitcher of strong black coffee ready, or maybe even a rich hot chocolate if the weather is chilly. If you need more ideas for the rest of your brunch spread, I’ve collected some of my favorite reliable recipes over at my main breakfast and brunch recipes page. Just remember to serve these rolls warm, because that frosting gets absolutely perfect when it’s slightly melted!
Frequently Asked Questions About Homemade Cinnamon Rolls
I know baking from scratch can bring up a few questions, especially when dealing with yeast! These are the common things I hear most often when people try this homemade cinnamon rolls recipe the first time. Don’t worry about these little bumps; they are easy to fix, I promise!
Can I use instant yeast instead of active dry yeast for these homemade cinnamon rolls?
Yes, you absolutely can! Instant yeast is fabulous because it doesn’t need that blooming step where you test the milk temperature. If you use instant yeast, you can just skip Step 1 entirely. Just mix the instant yeast right in with the flour and salt, and then add your liquid ingredients. Since you remove the blooming time, you might notice the total rising time shortens slightly, but it’s still a fantastic way to get your easy from scratch cinnamon rolls recipe going!
How do I get the rolls perfectly soft and fluffy bakery style cinnamon rolls?
The secret here is twofold: temperature and time. First, using room temperature eggs and slightly cooled melted butter ensures everything mixes evenly without killing the yeast or melting the structure we built. Second, don’t rush the rises! Those two rising periods are what develop the incredible airy texture. Also, make sure when you roll them up, you roll tightly enough to create definition, but don’t ever overbake them—that’s the fastest way to turn them hard! Stick to that 20-25 minute bake time for the best fluffy bakery style cinnamon rolls.
My icing is too thin. How can I fix the classic cream cheese frosting recipe?
Oh, that happens to everyone! If your cream cheese and butter were a touch too soft when you started, or if you added milk too fast, you might end up with something more like a glaze than a thick frosting. The fix is simple: just start beating in more sifted powdered sugar, a half-cup at a time, until it thickens up just right. You want it spoonable, but not runny enough to immediately drip off the sides. If you need more tips on perfecting that topping, I have more details on my gooey breakfast buns recipe page!
Estimated Nutritional Data for Homemade Cinnamon Rolls
Now, listen up! While these homemade cinnamon rolls are definitely a treat and not something we eat every single day, I always like to give everyone a realistic idea of what they’re working with. Please know that these numbers are just estimates, and they can totally change based on the exact brands of butter or the size of your eggs. I did the math based on the full yield of 12 glorious rolls.
If you are tracking macros or calories, keep in mind that this is the delicious, gooey, full-fat version—the one that makes weekend breakfast baking worthwhile! You can adjust by using less butter in the filling or going lighter on that heavenly frosting if you need to lighten things up, but honestly? I rarely do that. Enjoy the indulgence!
- Serving Size: 1 roll
- Calories: approximately 550
- Fat: about 30g (Be proud of that butter!)
- Saturated Fat: roughly 18g
- Carbohydrates: around 70g
- Sugar: approximately 55g (That’s the good stuff from the brown sugar and icing!)
- Protein: 8g
- Sodium: 350mg
Share Your Best Homemade Cinnamon Rolls Creations
Whew! We did it! You have officially made the most delicious, fluffy, restaurant-quality homemade cinnamon rolls that your kitchen has ever seen. I am so proud of you for tackling this recipe. Now, I really want to hear about your success!
Did they come out giant and bakery-style? Did the kids devour them in seconds? Let me know! Please take a moment to leave a rating right down below the recipe card. Five stars if you’re feeling generous, but honestly, any feedback helps me keep perfecting these kitchen adventures.
And please, please, please take a picture! You know I want to see those gorgeous swirls smothered in cream cheese frosting. Tag me on social media when you share your masterpiece. If you ran into any weird snags or had a brilliant idea of your own while baking, drop it in the comments so we can all learn from it! If you ever need a quick way to reach me with a compliment or a burning question, you can always find my contact form right here: Send me a message. Happy baking, friends!
PrintThe Best Ever Fluffy Homemade Cinnamon Rolls with Cream Cheese Frosting
Make soft, gooey, bakery-style cinnamon rolls from scratch. This reliable recipe guides you through making the perfect fluffy dough and rich filling for truly satisfying homemade cinnamon buns.
- Prep Time: 45 min
- Cook Time: 25 min
- Total Time: 175 min
- Yield: 12 servings 1x
- Category: Breakfast
- Method: Baking
- Cuisine: American
- Diet: Vegetarian
Ingredients
- For the Dough: 1 cup whole milk, warmed to 110°F
- 2 1/4 teaspoons active dry yeast
- 1/2 cup granulated sugar
- 2 large eggs, room temperature
- 1/2 cup unsalted butter, melted and cooled slightly
- 4 1/2 cups all-purpose flour, plus more for dusting
- 1 teaspoon salt
- For the Filling: 1 cup (2 sticks) unsalted butter, softened
- 1 1/2 cups packed light brown sugar
- 3 tablespoons ground cinnamon
- For the Cream Cheese Frosting: 8 ounces cream cheese, softened
- 1/2 cup unsalted butter, softened
- 4 cups powdered sugar, sifted
- 1 teaspoon vanilla extract
- 2–4 tablespoons whole milk
Instructions
- Activate the Yeast: In a large bowl or the bowl of a stand mixer, combine the warm milk and yeast. Let it sit for 5 minutes until foamy.
- Mix Dough Ingredients: Add the sugar, eggs, and melted butter to the yeast mixture. Mix briefly. Gradually add the flour and salt. Mix on low speed with a dough hook until a soft, slightly sticky dough forms.
- Knead: Knead the dough on medium-low speed for 6 to 8 minutes, or by hand on a floured surface for 10 minutes, until smooth and elastic.
- First Rise: Place the dough in a lightly oiled bowl, turning to coat. Cover with plastic wrap and let it rise in a warm place for 1 to 1.5 hours, or until doubled in size.
- Prepare Filling: While the dough rises, mix the softened butter, brown sugar, and cinnamon together in a medium bowl until well combined. Set aside.
- Roll Out Dough: Gently punch down the risen dough. On a lightly floured surface, roll the dough into a large rectangle, approximately 12 by 18 inches.
- Spread Filling: Spread the cinnamon-sugar filling evenly over the entire surface of the dough, leaving a small half-inch border on one long edge.
- Shape Rolls: Starting from the long edge opposite the clean border, tightly roll the dough into a log. Pinch the seam closed.
- Cut Rolls: Slice the log into 12 equal pieces, about 1 1/2 inches thick. Place the rolls cut-side up in a greased 9×13 inch baking dish.
- Second Rise: Cover the dish loosely and let the rolls rise again in a warm spot for 30 to 45 minutes, until puffy.
- Bake: Preheat your oven to 375°F (190°C). Bake for 20 to 25 minutes, or until the tops are golden brown.
- Make Frosting: While the rolls cool slightly, beat the softened cream cheese and butter together until smooth. Gradually add the powdered sugar and vanilla. Add milk one tablespoon at a time until you reach a spreadable consistency.
- Glaze and Serve: Spread the cream cheese frosting generously over the warm cinnamon rolls. Serve immediately.
Notes
- For the softest rolls, use room temperature ingredients for the dough.
- If you prefer make ahead cinnamon rolls, assemble them completely, cover tightly, and refrigerate overnight. Add 10-15 minutes to the second rise time before baking.
- To achieve gooey cinnamon roll filling, do not overbake; the centers should still be slightly soft when you remove them from the oven.
Nutrition
- Serving Size: 1 roll
- Calories: 550
- Sugar: 55
- Sodium: 350
- Fat: 30
- Saturated Fat: 18
- Unsaturated Fat: 12
- Trans Fat: 0.5
- Carbohydrates: 70
- Fiber: 2
- Protein: 8
- Cholesterol: 85